Kahua API Authentication
Overview
The Kahua API uses OAuth 2.0 for authorization. The basic steps to using OAuth 2.0 are:
-
Provision a client ID and client secret for use in retrieving an access token.
-
Utilize the client ID and secret in an initial API request to retrieve a bearer token.
-
Including the token in subsequent API requests for authentication.
Configuration
Before executing API requests, users must first be configured as a member of the API User group in Kahua. Only users that are part of the API User group at the domain level in Kahua will be permitted to execute API requests. To add a user to the API User group, a domain administrator must use the Groups app to add the necessary users to the group. This must be done at the domain (root) level:
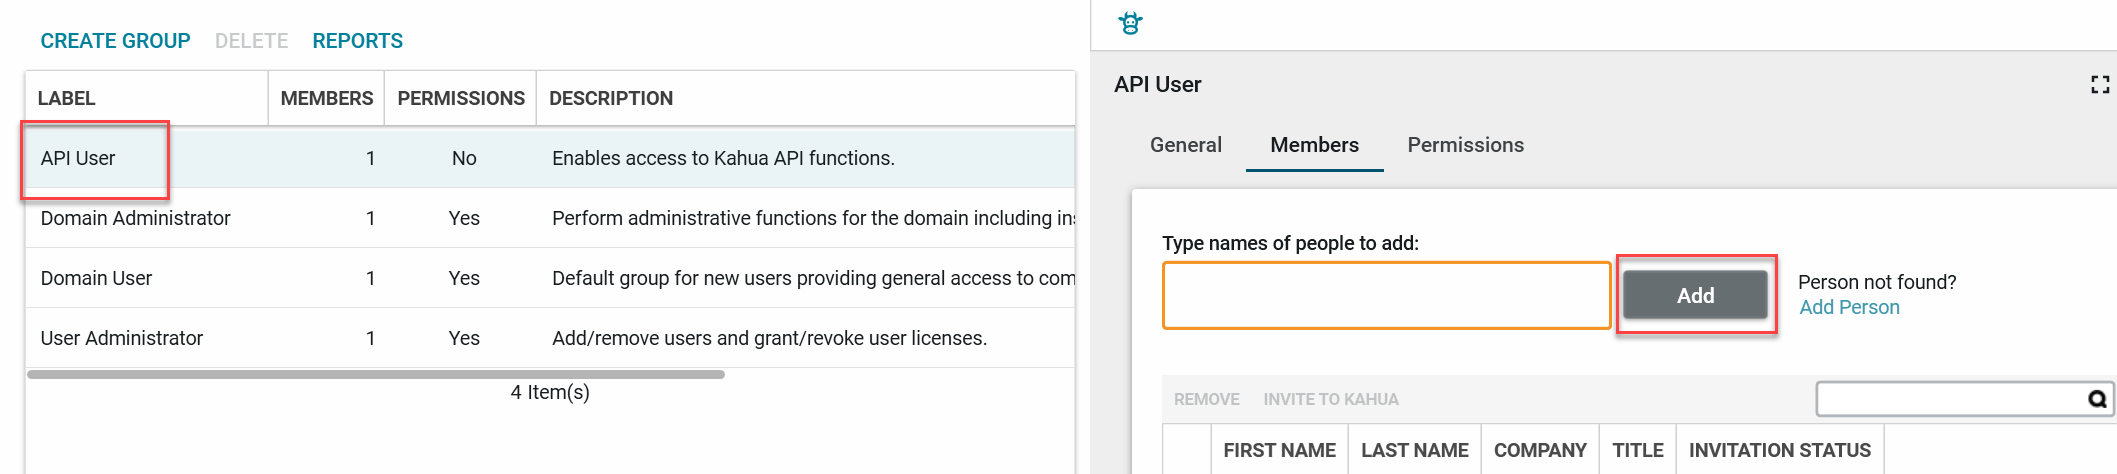
The presence of at least one person in the API User group is required in order for the Authorization tab to appear in the step below. You may need to log out and back in after adding your user to the group before proceeding to provision a client ID and client secret to ensure the Authorization tab shows up in configuration.
Provisioning a client ID and client secret
Once a user is enabled for API access, a client ID and client secret can be provisioned for that user.
-
In the Configuration app, select the Authorization tab.
-
On the Inbound section of the Authorizations, select the user for which OAuth 2.0 credentials will be generated.
-
Select the Override option, then select the "OAuth 2.0" checkbox. You will see a Client ID and Client Secret generated. Copy both of these values before saving. If an existing Client ID and Secret were already provisioned for this user, the Secret will be empty (It cannot be seen once the values are initially saved).
-
If you need a new Client Secret, select the Regenerate Client Secret link and a new secret will be created.
When you generate a new secret, any old secret becomes invalidated. Be sure to update any applications with the new secret as they will be unable to use the API until they are updated.
-
Be sure to click the Save button at the bottom of the page once you've copied the client ID and secret. The changes will not go into effect until you save. Once saved, the secret will no longer be visible.
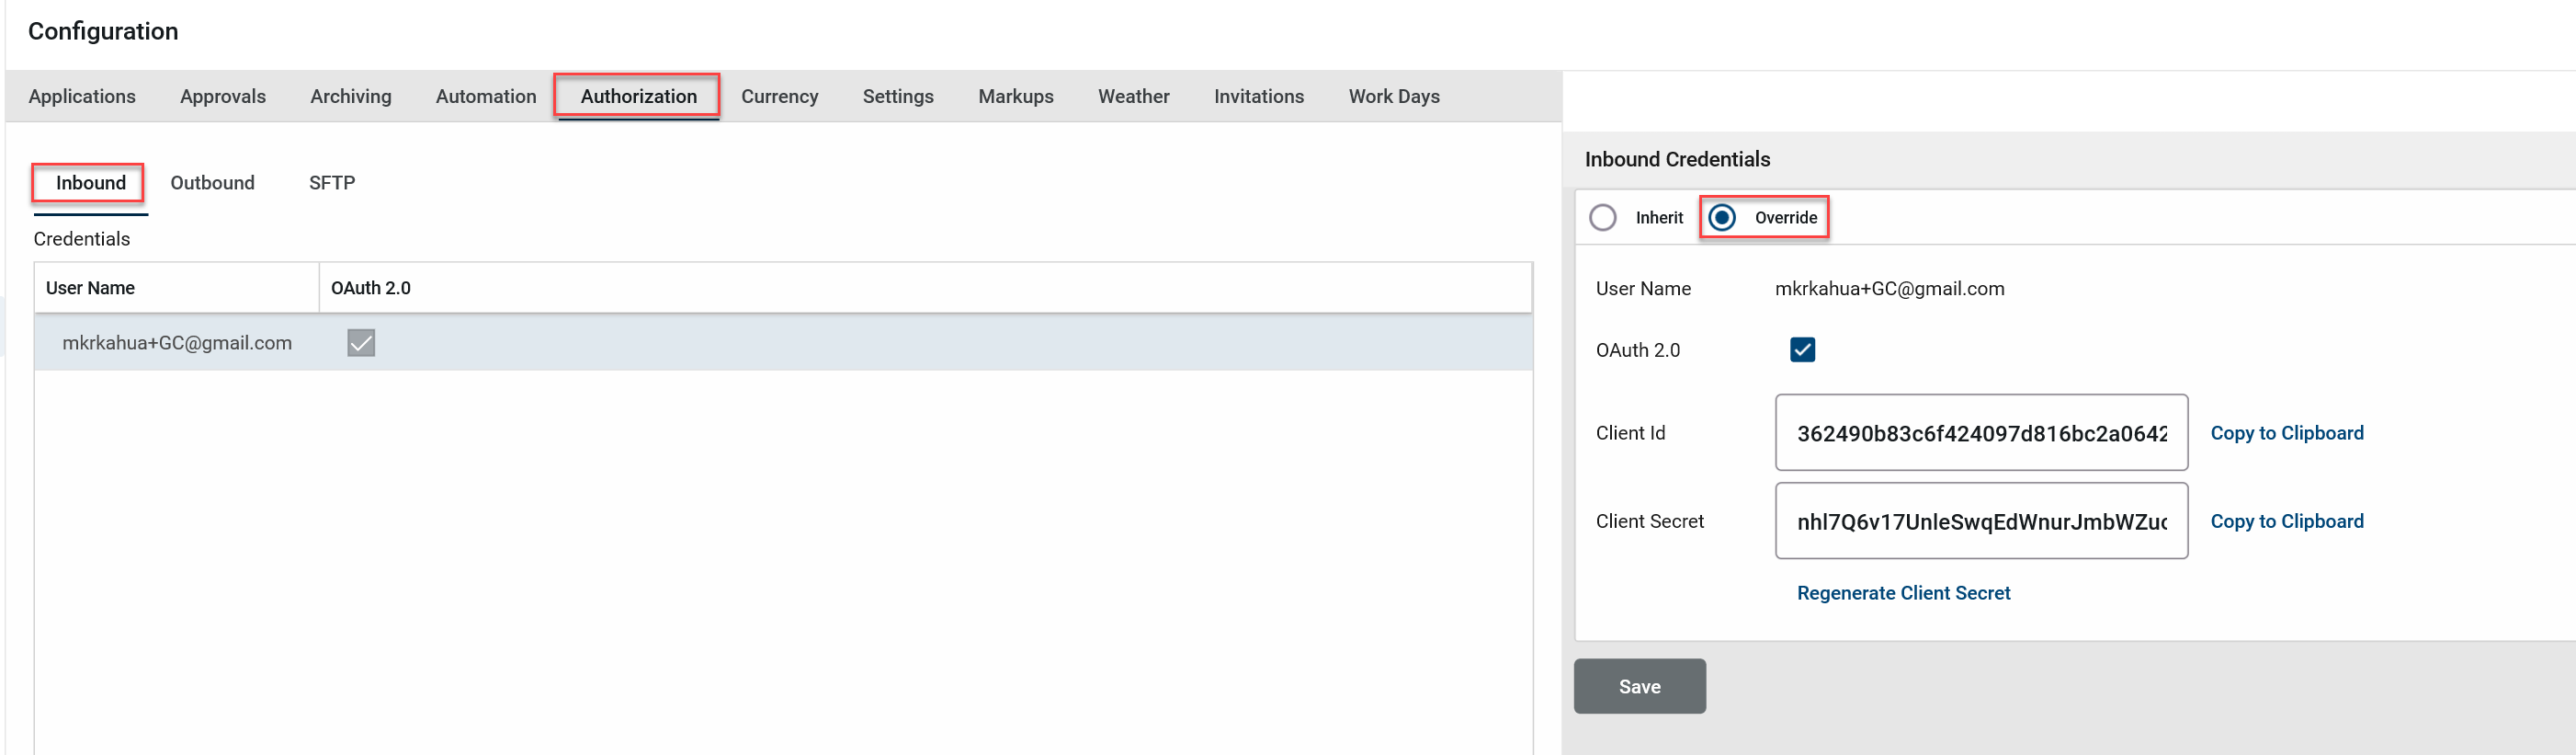
The Inbound tab contains the credentials for accessing the Kahua API. (Note: the Outbound tab is not covered in this document, but is used for entering credentials for external systems that Kahua calls out to). This configuration allows administrators to provision a unique set of Client ID and Client Secret credentials to be used in the OAuth 2.0 flow. The first step to adding new credentials is to select a Kahua user from the API User group. A Kahua user is always required to perform operations in the system.
Store the client ID and client secret in a safe place for future reference.
Requesting a token
Using the client ID and client secret, a token can be obtained by sending a POST request to an environment's token endpoint.
| Environment | Token Endpoint URL |
|---|---|
| Dev/Test | https://{envname}service.kahua.com/oauth2/token
(For example the devweekly environment would be https://devweeklyservice.kahua.com/oauth2/token) Other environments such as ProdIL2 and DevMonday follow this format: https://prodil2service.devx.kahua.com/oauth2/token https://mondayservice.devx.kahua.com/oauth2/token |
| Production (Kahua Commercial Network) | https://service.kahua.com/oauth2/token |
| Production (Kahua Government Network) | https://service.kahuafn.com/oauth2/token |
| Production (CA1/Canada) | https://ca1service.kahua.com/oauth2/token |
| Production (UK1/United Kingdom) | https://uk1service.kahua.com/oauth2/token |
Headers
ContentType: application/x-www-form-urlencoded;charset=UTF-8Body: grant_type=client_credentialsAuthorization: Basic <base64 encoded client ID and client secret>
Note that the client ID and secret are sent as a Basic Authentication header, which is a base64 encoding of the string clientid:clientsecret
A successful OAuth 2.0 token request will return the token value in the following format:
{
"access_token" : "EEE0CECC-2896-41AE-9612-6E8195D7DB1B",
"token_type" : "Bearer",
"expires_in" : 3600
}The "expires_in" value lists the number of seconds until the token expires. Only one token is active at a time for a given client ID and client secret. If a new token is requested, it will simply return the existing active token again. Requesting a new token will NOT extend the expiration time of the token.
Using Postman with OAuth 2.0
You can configure postman to perform OAuth 2.0 authorization automatically on the "Authorization" tab by selecting "OAuth 2.0" as the Auth Type, and filling in the "Configure New Token" information as shown below:
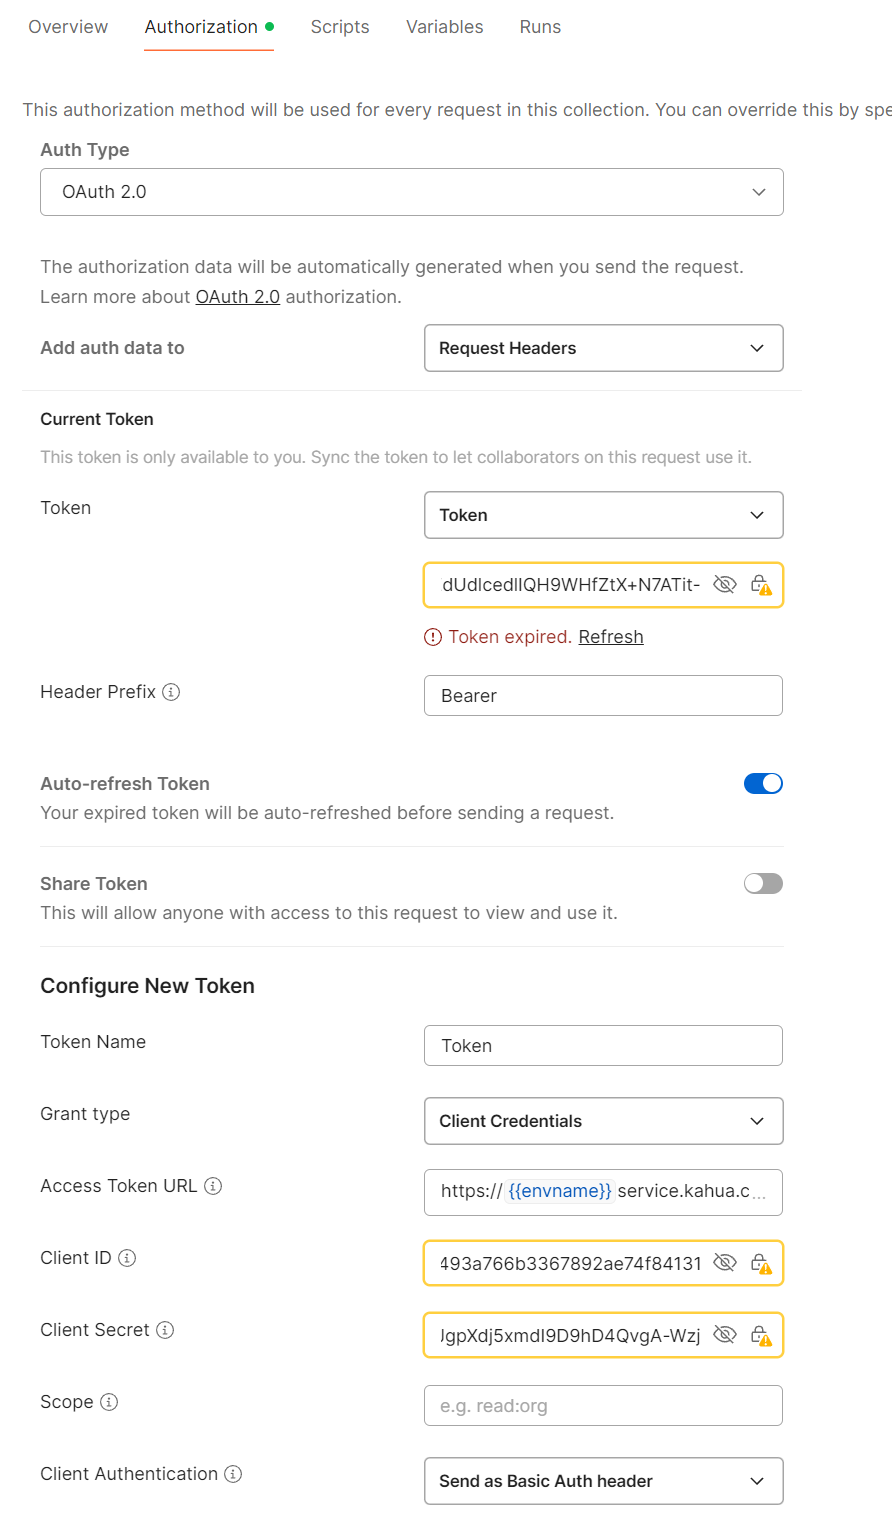
For more information on setting up authorization in postman, refer to https://learning.postman.com/docs/sending-requests/authorization/oauth-20/
Using the bearer token in API requests
Once a token has been received, that token must be included in subsequent API requests as a "Bearer" token. Bearer tokens are passed in as an Authorization header as such:
Authorization: Bearer <token>
Token expiration
When the token expires, a 401 result code will be returned with a response message of "Token expired". When a token expires, the calling application/script should detect an expired token, request a new token, and resubmit the failed request in order to continue processing.
All client ID and client secret values shown in the above screenshots represent test data and are not to be considered actual values.