Punch List Libraries
The Punch List Libraries app allows you to create and maintain a list of typical punch list items that can occur on a project. You can create templates with a subset of punch list items for different project types. You can then use those templates to create a project-specific library of possible punch list items, associated with the appropriate contractors.
Note For more information on the Punch Lists app, refer to Punch Lists.
The Punch List Libraries app consists of the following sub-apps:
-
Master Library - The Master Library is a list of common punch list item defects, grouped by type. By default, this list is pre-filled. You can add new items to the list, delete unwanted items, or modify existing ones. The Master Library is a domain level sub-app. Modifications made to the Master Library are available to all projects, regardless of what project is open when you make those modifications.
-
Templates - Templates are a way to select the appropriate punch list item types for different project types. Templates are available to all projects, regardless of the project you have open when they are created or modified.
Example For example, you could set up a template for office renovation projects that includes only interior finish punch list item types, and a different template for new construction that includes interior work and exterior work punch list item types.
-
Project Library - You can build a project-specific library of punch list item defects by entering defects individually or by selecting a template.
Each punch list item type can be associated with a contact from your project, and that contact is automatically assigned as the responsible party when a defect from that punch list item type is created in the Punch Lists app.
Example For example, the painting contractor can be assigned to the "Interior Paint" item type. When punch list items are created in the Punch Lists app from that item type, the painting contractor contact is automatically assigned as the Responsible Party.
How to . . .
By default, the Master Library contains a list of common punch list defect items, organized by Type. You can add, edit, or delete item types, and you can add, edit or delete individual defect items from the list within a type.
Note Changes made to the Master Library appear throughout your domain, regardless of the project or partition that you are in when making the changes.
To add or edit both Library Types and punch list Defect items in the Master Library, complete the following steps:
-
Navigate to the Punch List Libraries application (Apps > All Apps > Punch List Libraries).
-
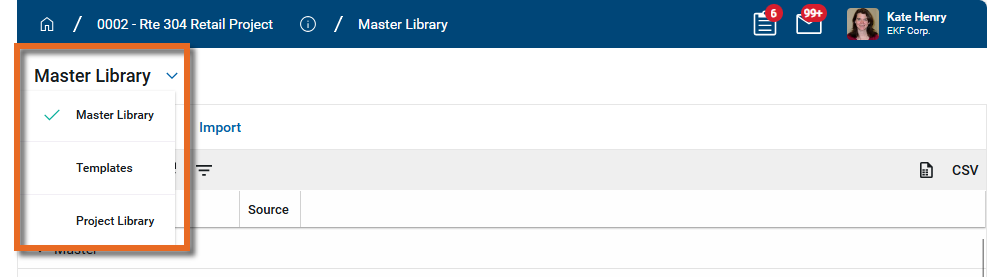
Select the Master Library sub-app. A list of Library Types appear. Each Library Type contains a list of defects associated with that type.
-
To create a new Library Type and build a list of defects, click New in the action bar.
To modify the defects associated with a Master Library Type, select a library type to open the detail page. Click Edit in the action bar.
-
Complete the following actions as needed:
Action Description Enter or edit a Type name Enter a new Type or modify the existing value. Add new defects Enter a number and select Insert to add that number of lines to the grid. Enter a Defect Description on each new line.
Note For more information on working with grids, refer to Item Grids.
Modify existing defects Edit the Defect Description. Delete existing defects Select the check box for all defects you want to delete. Select Delete in the grid header. -
Click Save when you are done.
Templates are a way to select the appropriate punch list item types for a different project types. All Templates are available to all projects, regardless of the project you have open when they are initially created.
Templates are used when building a Project Library. You can only select one template when creating a project library, so your template should include all the item types from the Master Library that are likely to be used. Item types that will not be used on a particular project can be not included or deleted.
Example You can build an "Interior Office Renovation" template and include all the flooring types available from the master library (e.g., carpet, vinyl, tile) in the template. When applying that template to an actual project, you can delete any flooring types not used on that particular project.
Note Changes made to Templates appear throughout your domain, regardless of the project or partition that you are in when making the changes.
To create or edit templates to use in a project library, complete the following steps:
-
Navigate to the Punch List Libraries application (Apps > All Apps > Punch List Libraries).
-
Select the Templates sub-app.
-
To create a new Template, click New in the action bar.
To modify the libraries associated with an existing template, select a template to open the detail page. Click Edit in the action bar.
-
Complete the following actions as needed:
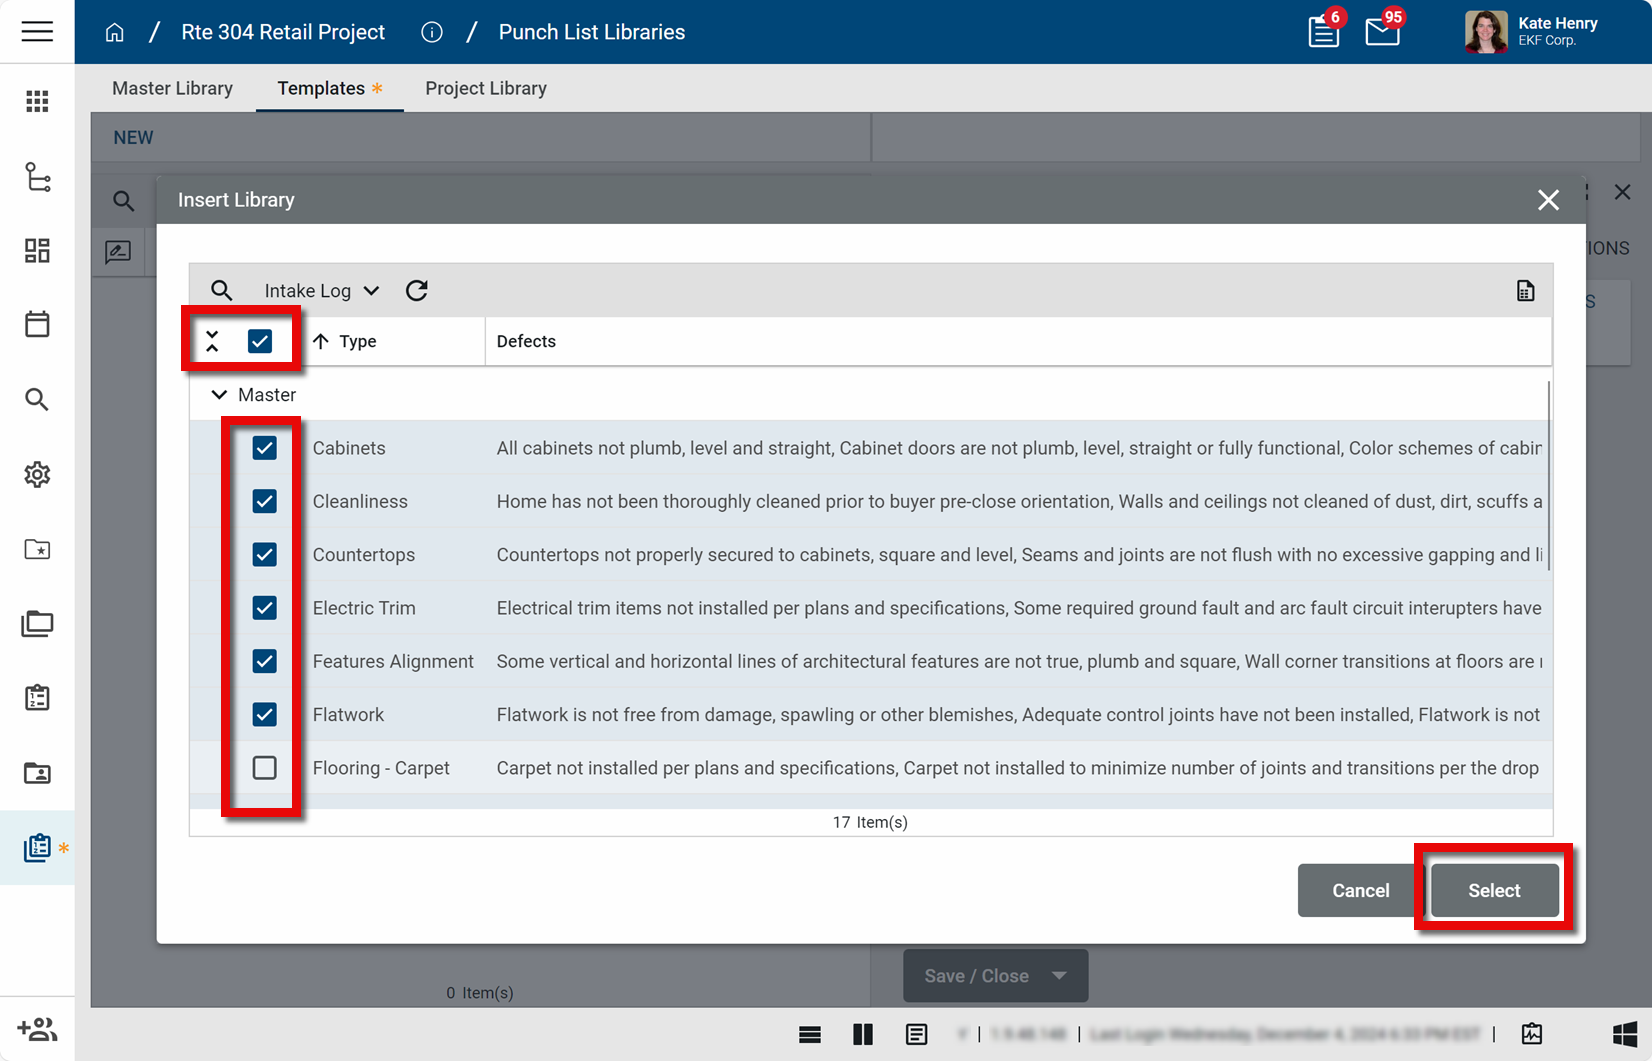
Action Description Enter or edit a template name Enter a new Name or modify the existing value. Add libraries Select Insert Library. The Insert Library page opens.
Select the items from the Master Library that you want to include in this template. To select all items, select the check box in the grid header. Select or clear individual items from the list of libraries.
Click Select when you are done.
Note For more information on working with grids, refer to Item Grids.
Modify libraries Libraries are managed in the Master Library. To modify what defects are included in a library, refer to Create or edit items in the Master Library.
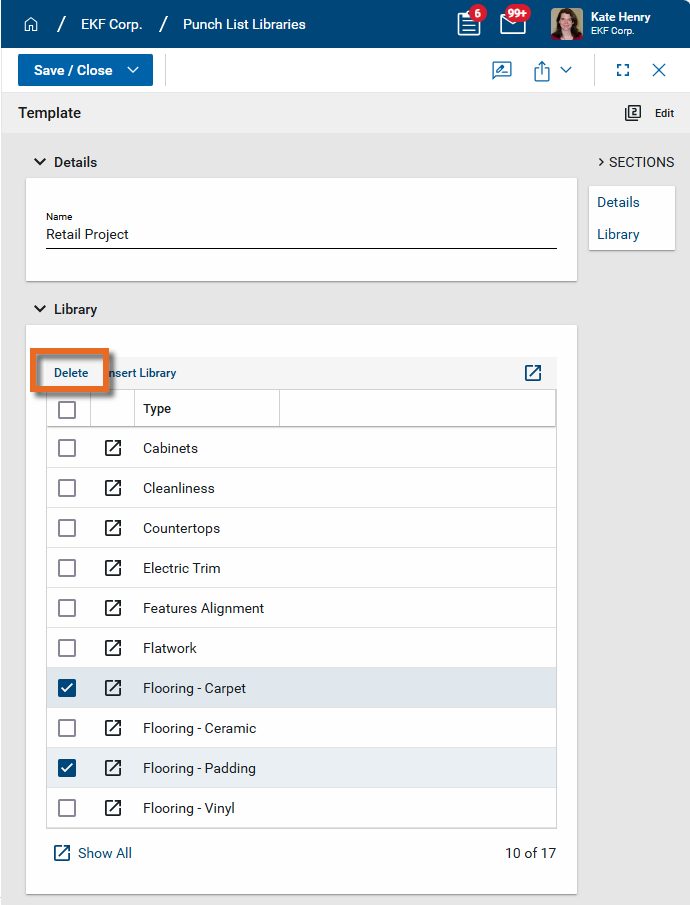
To review what defects are included in a library on a template, click the View Details icon
 for that library.
Remove libraries Select the check box for all the libraries you want to remove. Select Delete in the grid header.
-
Click Save when you are done.
A project library is a list of possible punch list defects for a project. In addition to providing a pre-filtered list of possible punch list defects, the project library can be used to associate defect types with a responsible party. The associated contact automatically populates the Responsible Party field on the punch list item.
If there are no defects listed in the Project Library, all defects from the Master Library will be available for selection when creating a punch list item for the project. If there are any defects listed in the Project Library, only those defects can be selected.
Note Punch list items do not have to be selected from the library defect list. Individual defects can be added to a punch list item manually.
To build a project library, complete the following steps:
-
Review the header to ensure that you are in the correct project or partition.
-
Navigate to the Punch List Libraries application (Apps > All Apps > Punch List Libraries).
-
Select the Project Library sub-app.
-
To use a template to build the project library, click Select Template in the action bar. The Choose Template page appears. Choose one of the available templates from the Templates sub-app and click Next.
-
All the defect types from the template are added to the log view. If you select a different template, only the defect types from the newly selected template will appear. Selecting a different template does not add to the list, it replaces the former list with values from the new template.
-
Item groups added from a template can be modified. Additionally, you can add one or more new groups of defects directly to the project library.
To modify an item group, select it to open the detail page and click Edit in the action bar. To add a new group, click New on the action bar. Complete the following actions as needed:
Action Description Include Select this option to have this group of defects available for selection in the punch list app for this project. Clear this option to have them not appear.
Note Clearing this option removes these defects from the selection list, but you can later include them by selecting it afterwards. This provides greater flexibility for managing the list of options than simply deleting the group.
Enter or edit a Type name Enter a new Type or modify the existing value. Select a Responsible Party Select the person responsible for these types of punch list items from your contact list. This person is typically the contractor, subcontractor, or vendor.
The contact selected here automatically populates the Responsible Party field when one of the defects from this item type is selected as a punch list item. The defaulted value can be changed.
Add new defects Enter a number and select Insert to add that number of lines to the grid. Enter a Defect Description on each new line.
Note For more information on working with grids, refer to Item Grids.
Modify existing defects Edit the Defect Description. Delete existing defects Select the check box for all defects you want to delete. Select Delete in the grid header. -
Click Save when you are done.