Using the Launch Bar
The launch bar is where you will go to access most of the applications in Kahua. From the launch bar you can open and close applications, pin them to make them more easily accessible, determine which application appears when you first open Kahua, and access any application-specific help videos or documentation your organization has made available to you. Additionally, you can expand or collapse the launch bar itself.
How to . . .
The launch bar will always be present on the left side of Kahua, but you can set it to the expanded or collapsed view. Click the collapse icon ![]() or the expand icon
or the expand icon ![]() to change your view.
to change your view.
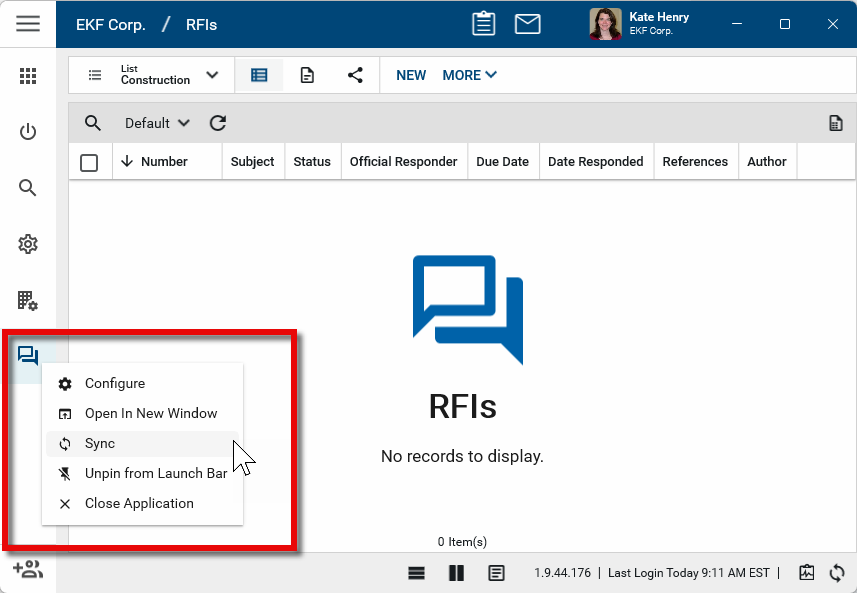
In both the expanded and collapsed state, you can right-click on an application's icon to access the launch bar menu.
The Apps application will always appear at the top of the list of applications. You can use this app to access all the other applications in your domain. It can be accessed from the launch bar.
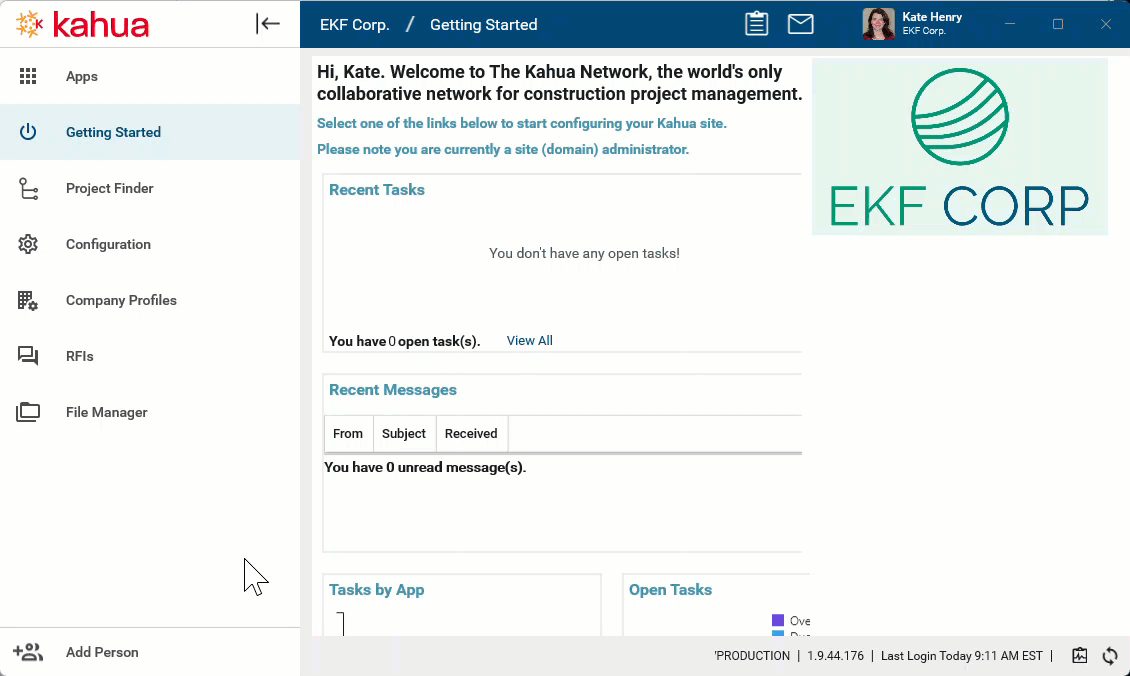
The remaining applications that appear in the launch bar are all your open applications and applications that have been pinned to the launch bar.
Applications can be moved up and down the list by clicking and dragging them to the desired position.
To determine if an app is pinned to the launch bar, hover over the application name with the launch bar in the expanded state. The pinned icon ![]() will appear for pinned applications.
will appear for pinned applications.
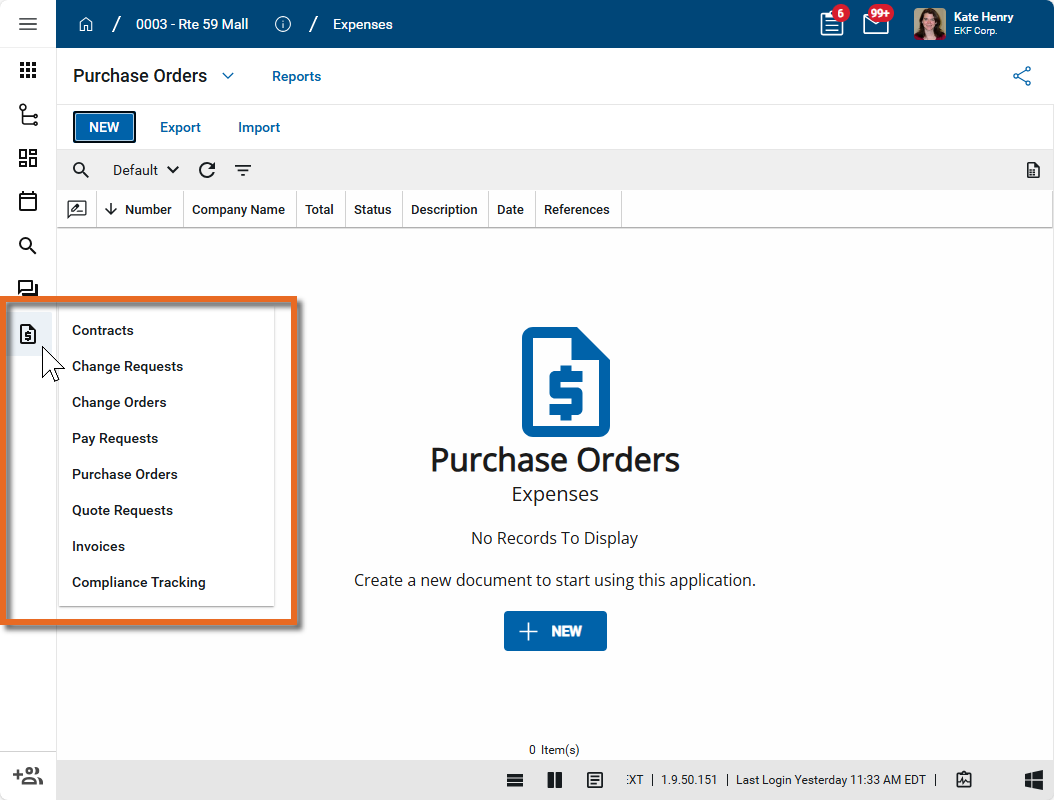
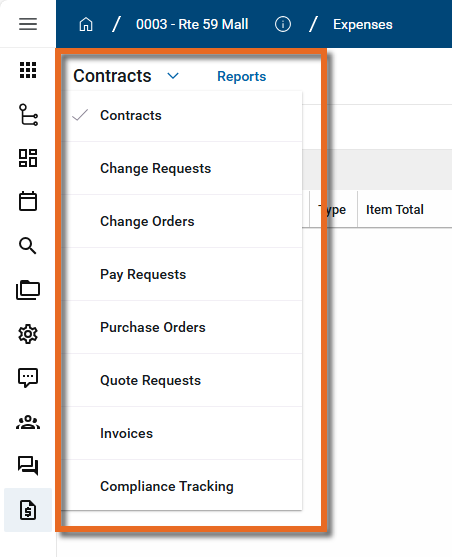
Some applications are grouped together in app groups. For example, the Expenses app group contains apps such as Contracts, Change Requests, Change Orders, Pay Requests, and so on.
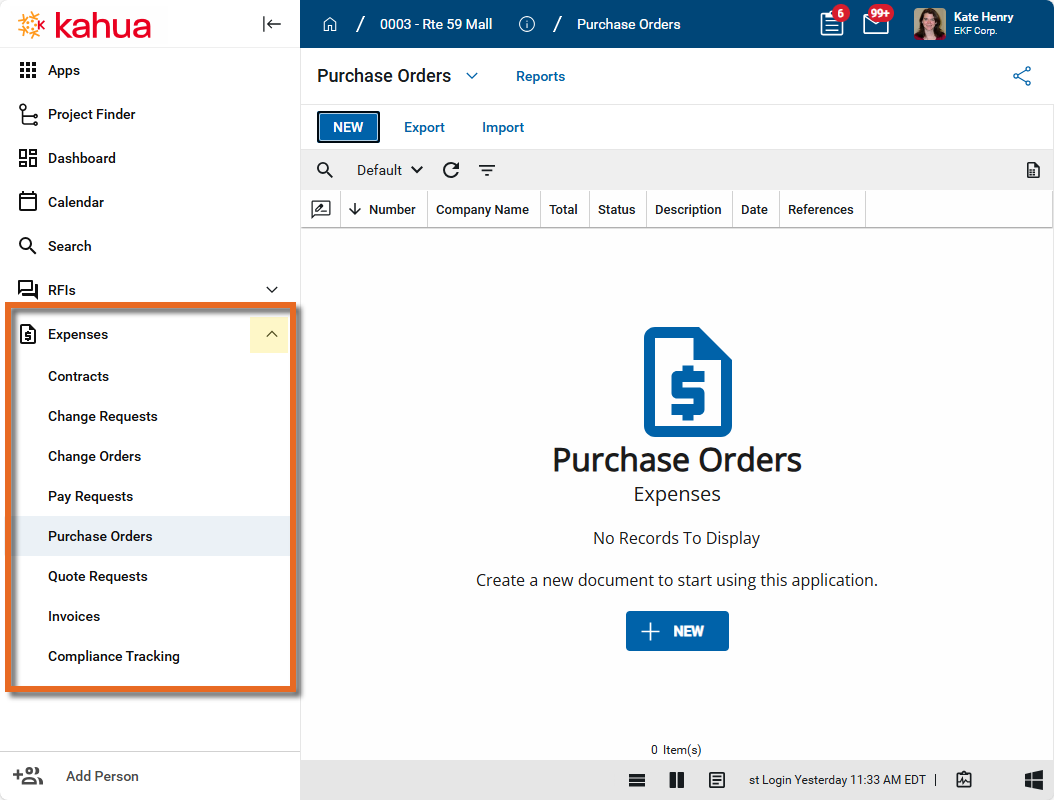
When the launch bar is expanded and an app group appears on the launch bar, the group can be expanded and collapsed by clicking the Expand ![]() or Collapse
or Collapse ![]() icons. To open an individual app from the expanded menu, click on the app name.
icons. To open an individual app from the expanded menu, click on the app name.
When the launch bar is collapsed, click on the app group icon to open the app group to the first app on the list. Continue to hover to open the list of individual applications. Click on the name of an individual app to open it.
Once an app is open, you can click on the app name from the application title bar to open the app list and select a different one.
To access the launch bar menu for an application, right-click on the application or, when the launch bar is in the expanded state, left-click on the ellipses icon.
The following options can appear in the launch bar menu for an application:
Note Not all options will appear for every application.
| Option | Description |
|---|---|
| Open App for Full Menu | This option appears when the application is closed. Click on the application name or icon to open the app. Once the app is open, all the launch bar menu options for the app are available for review. |
| Videos & Documentation | If your organization has set up any application-specific help videos or documentation, it will be available here. If you are an administrator and want to learn more about making videos and documentation available to your users, refer to Accessing and Configuring Videos & Documentation. |
| Configure | Select this option to open the Configuration app to configure this application. To learn more about using the Configuration application, refer to Application configuration. |
| Open in New Window | Select this option to open the application in a separate window. This can be helpful when you are working in multiple applications and need to compare the same information in multiple applications. |
| Permission Explorer |
This option is available to members of the Domain Admin group for the File Manager application. Select it to open the Permission Explorer tab in the Status Window. This page shows all the File Manager folders and individual users with access to them and their assigned role. Only direct users on the domain appear, that is, contacts that are domain users or users who access a folder via sharing. Results can be filtered by entering filter terms in the column headers. Up to 50,000 rows appear on the page. Select Export to export filtered results up to 1,000,000 rows. Click the Open icon to open the folder directly. Click the Refresh icon to update the results if changes are made in the folder. |
| Sync/Disable Sync | Select this option to enable or disable syncing for an application. This option is only available on certain applications. For more information, refer to Kahua Offline. |
| Pin/Unpin from Launch Bar | You can pin applications to the launch bar. Pinned applications are always available from the launch bar and you do not have to navigate to the Apps application to launch them. Drag and drop pinned applications to control the order in which they appear in the launch bar. |
| Get Link |
Select this option to generate a link which is saved to your clipboard for the combination of the currently open project and app. The link can then be shared as appropriate. Note On a Windows device, you can use Windows+V to open your clipboard history. |
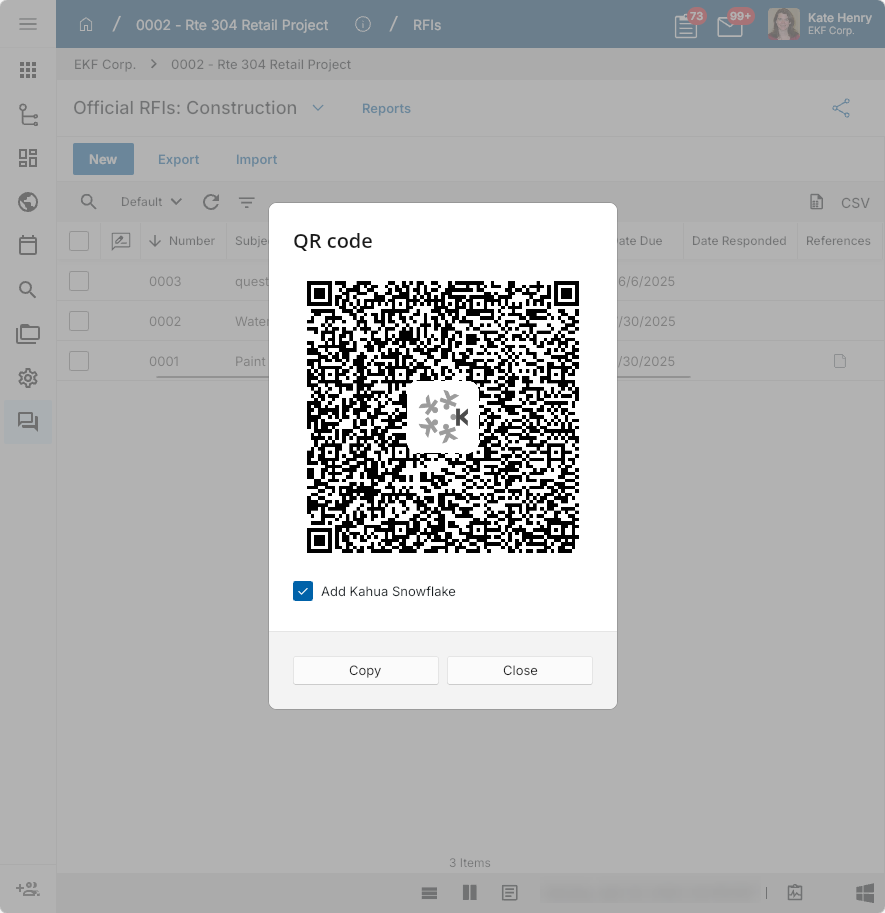
| Get QR Code |
Select this option to generate a QR code for the combination of the currently open project and app. The QR code can be shared directly from your screen, or copied to your clipboard to be shared as appropriate.
|
| Close Application | Select this option to close the application. Applications that are pinned remain visible on the launch bar. Applications that are not pinned disappear. To re-open an unpinned application, navigate to the Apps icon on the launch bar or click on the name of the currently open app in the header. |
When there is an un-saved record in an application, an orange dot ![]() appears next to the application icon on the launch bar. This is a visual indicator meant to remind you that there is a new or edited record in that app that has not yet been saved.
appears next to the application icon on the launch bar. This is a visual indicator meant to remind you that there is a new or edited record in that app that has not yet been saved.
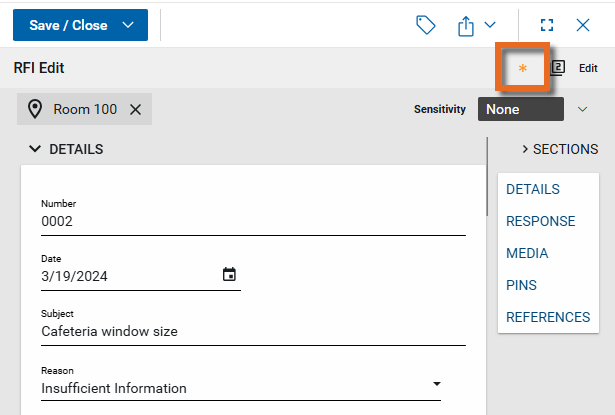
An orange star ![]() appears on the un-saved record.
appears on the un-saved record.
In addition to pinning applications to the launch bar, you can also pin folders from File Manager to the launch bar.
To pin or unpin File Manager folders on your launch bar, complete the following steps:
-
Review the header to ensure that you are in the correct project or partition.
-
Navigate to the File Manager application (Apps > Document Management > File Manager).
-
In File Manager, right-click on a folder.
-
Select Pin/Unpin. Pinned Folders will now appear on the launch bar.
-
Click on Pinned Folders to access all the pinned folders across all your projects.
-
To remove a folder from Pinned Folders, click the Unpin icon, or right-click on the folder in the File Manager application and select Pin/Unpin.