Creating ad hoc reports
The report wizard is used to create new ad hoc reports or edit ones you previously created. It can found in the Report Manager application or accessed from the report view for an application.
How to . . .
To use the report wizard to create a new ad hoc report, complete the following steps:
-
Ensure you are in the partition or project where you want to create the report.
-
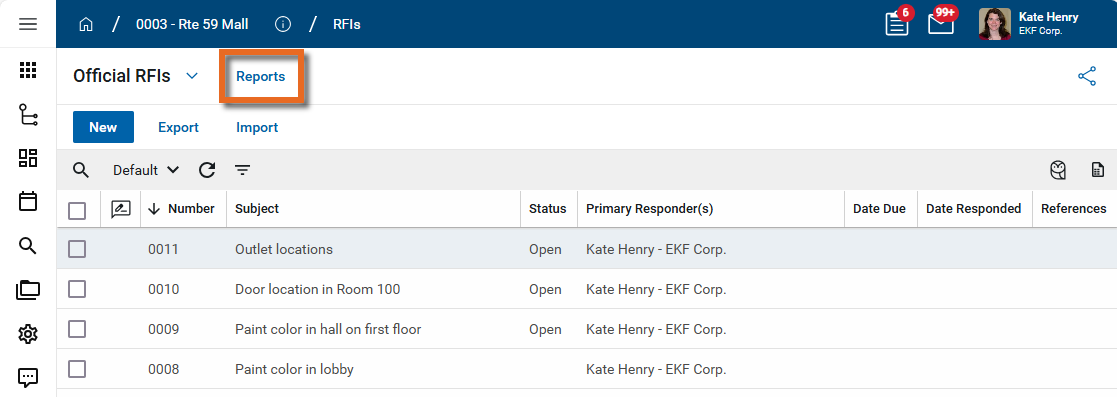
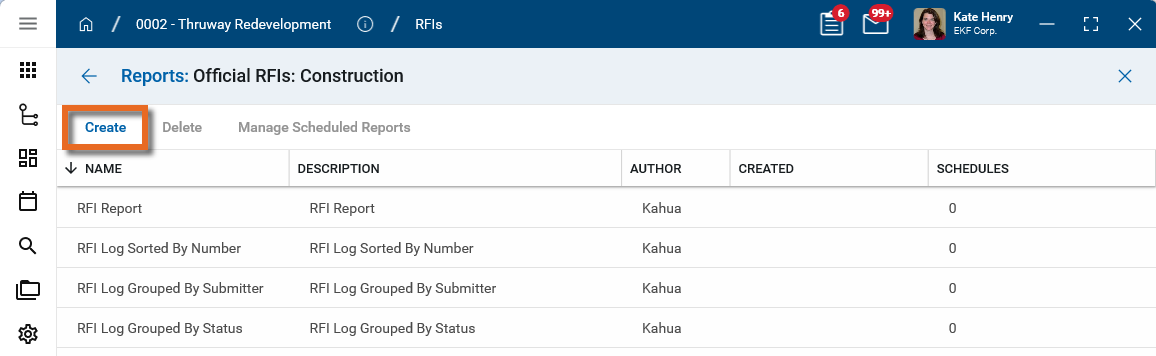
Open the application for which you want to build the report and click on Reports in the application title bar.
-
Select Create in the action bar.
-
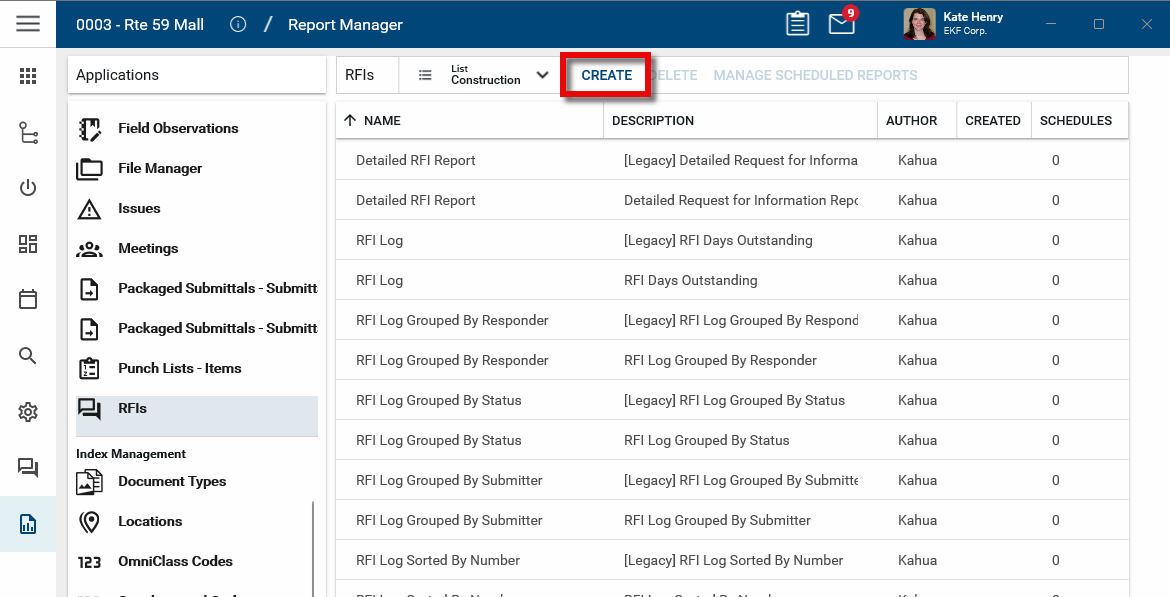
Alternatively, you can use the report wizard from the Report Manager application. Navigate to Apps > Administration > Report Manager application. Under Applications, select the application for which you want to build the report and click Create.
-
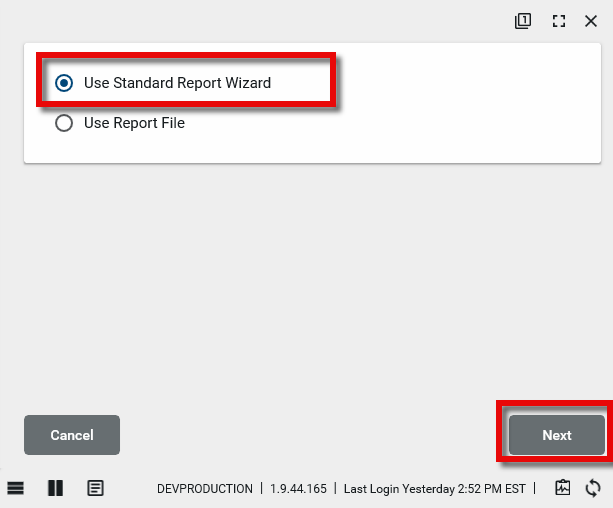
Select Use Standard Report Wizard and click Next.
-
The report wizard opens with multiple tabs visible. You will complete fields in each tab to build your report.
-
In the General tab, complete the following fields:
-
Project – Select this option to have the report be available only to the current project or partition and any projects or partitions lower in the hierarchy.
-
Domain – Select this option to have the report be available to all projects in your domain.
-
Everyone – The report is available to anyone with access to the app in which the report is being created.
-
Group – The report is available to anyone in the group or groups that you select. Once you select this option, another field appears where you can select one or multiple groups. For more information on groups, refer to Setting up groups.
-
Me – The report is only available to you, the current user.
-
Click Next to open the Layout tab. In the Layout tab, complete the following fields:
-
Report Title – This defaults to be the same as the Report Name. This will appear on the report itself.
-
Page Setup – Select the appropriate Paper Size, Margins and Orientation for the report output.
-
-
Click Next to open the Columns tab. On the Columns tab, select the report fields to include in your report.
-
On the left-hand side of the tab, the report fields are available for selection. Select a field to add it to the Selected Columns section on the right side of the tab.
Note Fields must be included in the report to be available for filtering. Ensure that you select all the fields that you or other users may want to filter by.
-
Some fields are related entities and they appear in the list with a chevron
 . Click on the chevron to see the fields related to the related entity. Selecting the related entity will select all of its fields. You can select individual fields of a related entity.
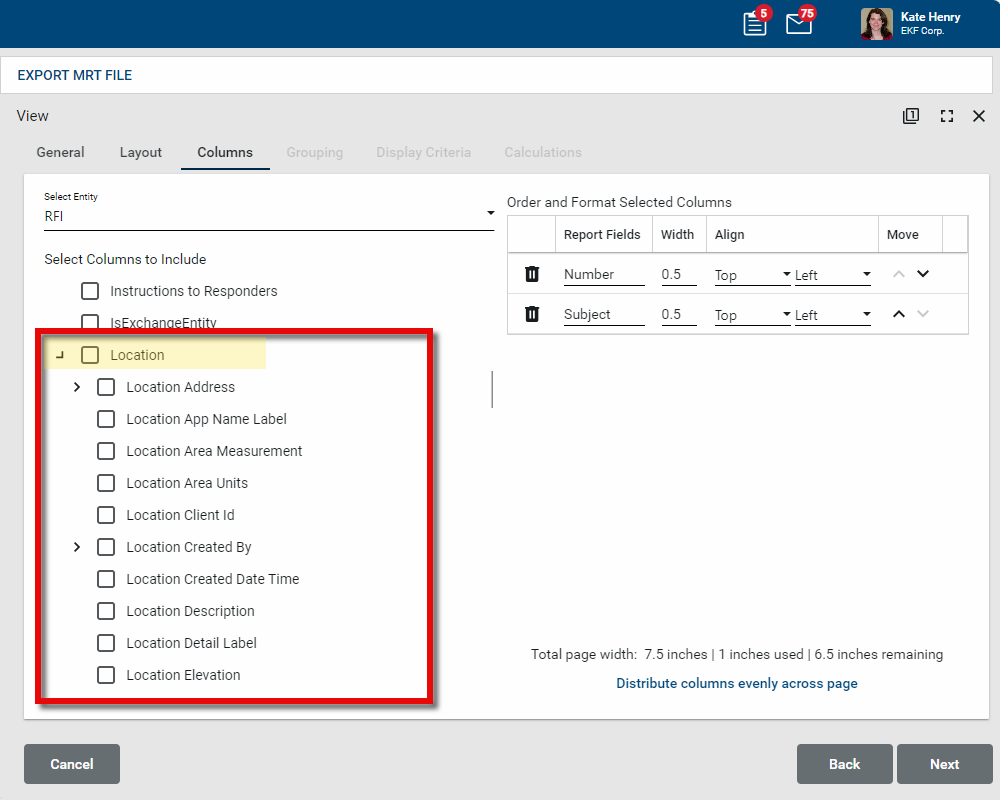
Note Note that when the related entity has potentially multiple child items for each record in a report, for example, reference items on an RFI, including those fields may produce unintended results.
-
Short Label - Some fields are the name of the entity followed by "Short Label". Entity Short Label is a Kahua system field that is defined for all entities. It is a calculated value which typically combines a couple of the primary identifying fields of a record. For instance, for a Contact, it is the First Name plus Last Name. For other entities it may be the item number plus the name.
-
To remove a field from the Selected Columns list, click the delete icon
 next to its name, or clear the selection on the list of available fields.
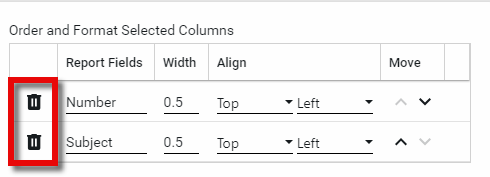
-
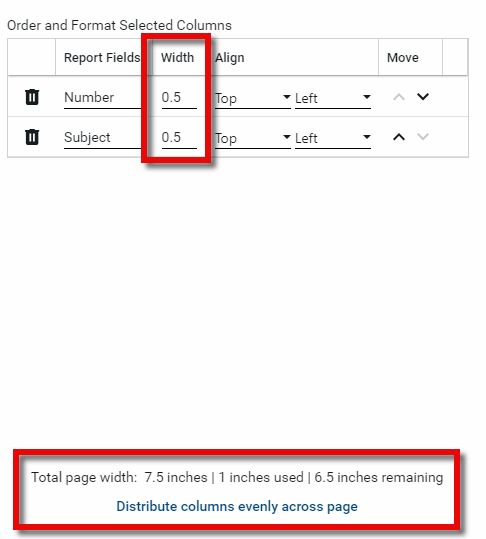
You can control the width of the field in the report by modifying the value in the Width column. The width appears in inches. Click Distribute columns evenly across page at the bottom of the screen to evenly distribute the report columns across the available page space.
-
-
Select the appropriate values in the Align column. You can modify both the vertical and the horizontal alignment.
-
Vertical alignment - Select Top, Center, or Bottom.
-
Horizontal alignment - Select Left, Center, or Right.
-
-
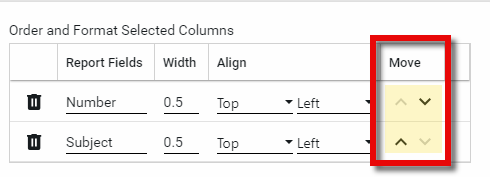
Use the arrows in the Move column to control the order of the fields in the report.
-
Click Next to open the Grouping tab. Select a field to group your data by. Select "None" to leave the data ungrouped. The columns in your report will appear at the top of the selection list, but you can select a field not in your report to group by.

-
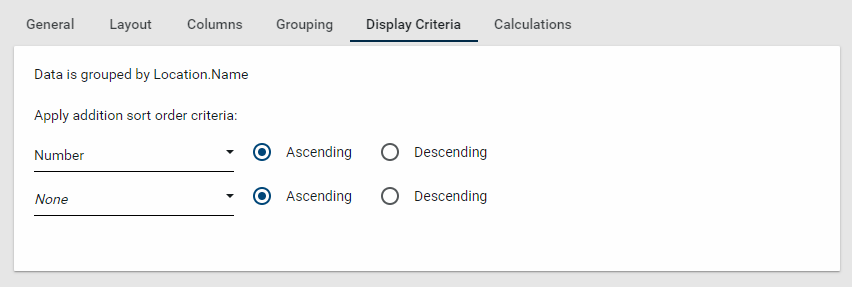
Click Next to open the Display Criteria tab. Select up to two fields to sort the data by, and whether the sort should be ascending or descending.
-
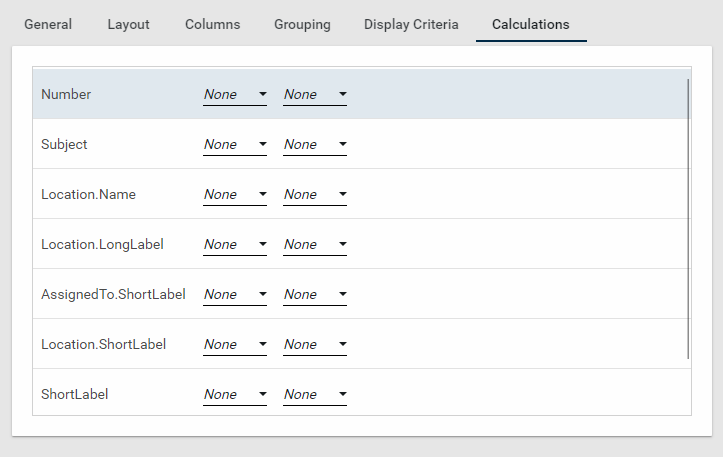
Click Next to open the Calculations tab. You can apply calculations to fields that appear in the report. Select where you want the calculated value to appear and a calculation method.
-
In the first column, select whether the calculated value will appear in the Group Footer or the Report Summary.
-
Calculations that appear in the Group Footer will be calculated for each group that appears in the report.
-
Calculations that appear in the Report Summary will be calculated for all the items in the report.
-
-
In the second column, select the calculation method. The calculation options will vary, depending the field the calculations are acting on. For example, a numeric field can have a Sum and an Average, while a text field can have only a Count (the number of times a report field is recorded) or a Count Distinct (the number of times there is a unique value for the field).
-
-
Once you are satisfied with your selections, click Save. Your report will now appear on the list of available reports for this entity. Other users will be able to access this report, depending on your selections for Scope and Availability on the General tab.
| Field | Description |
|---|---|
| Report Name |
Enter a name for the report. This value will appear where the report is selected. |
| Description | Enter a brief description of the report. |
| Scope |
This value determines where in the domain hierarchy the report will be available. Note that when users run the report, they will be able to select which projects to include. |
| Availability |
This value determines who will be able to access this report. |
The report is now available for viewing and editing in the Report Manager application and in the associated application. For information on viewing reports from their associated app, refer to Viewing Reports.
To view a report in the Report Manager app, complete the following steps:
-
Ensure you are in the partition or project where you want to view the report.
-
Navigate to the Report Manager app (Apps > Administration > Report Manager).
-
Select the appropriate application and report.
-
If desired, apply filters to your report. You can filter on multiple fields. A field must be included in the report to be available for filtering. If a field you want to filter by is not available, edit the report and add the field in the Columns tab.
Note You can use Save As to save a copy of the report to modify.
-
Select the projects to include in the report. You must have navigated to the appropriate level in the hierarchy to access the projects you want to include.
-
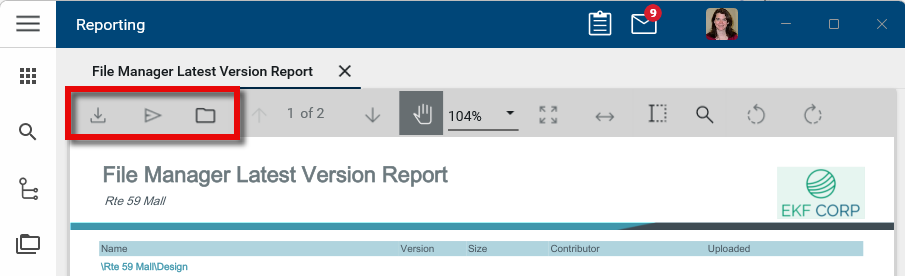
To see the report in Kahua, click View. To download a version of the report without a preview, select Download. Different formats will be available in different applications, including PDF, CSV, and TXT.
-
From the report view, you have several options for viewing or saving the report.
-
To open the report in PDF format or to download the report in CSV, XLSX, Data, or Data (no header row) format from this view, click the Download icon
 .
.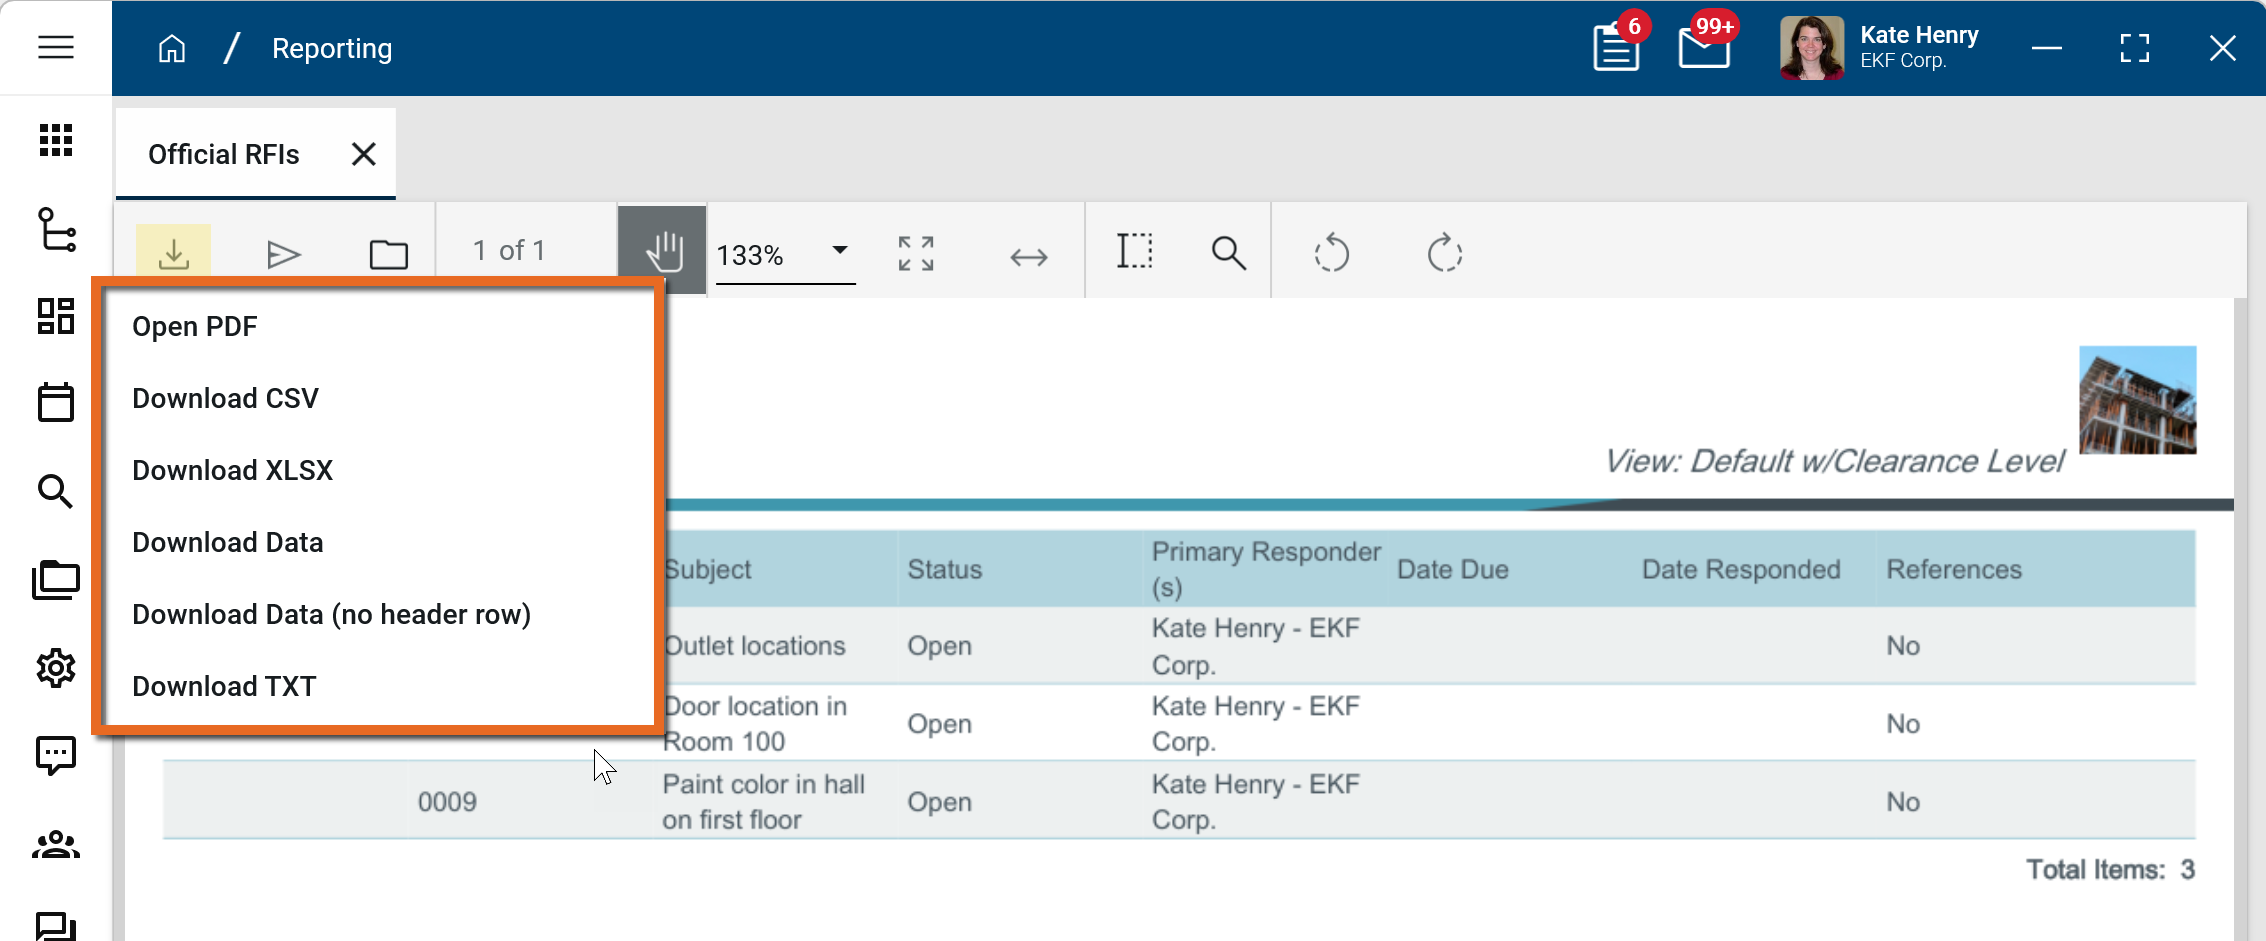
Note The Download Data and Download Data (no header row) options may be preferable if there is a large amount of data in your report, as they bypass the report engine and reduce the chances of a timeout error.
-
To send the report to another Kahua user or group of Kahua users, click the Send icon
 .
. -
To save the report in Kahua, select the Save to Kahua icon
 .
.
-
If you have navigated to the Northeast division partition, only the projects in the Northeast division will be available for selection for the report. If you want to include all of your projects in the report, you must navigate to the domain level before running the report.
To edit the report, click Edit. The report tabs will open and your previous selections can be modified.
To modify a report that was created with the report wizard, complete the following steps:
-
Navigate to the Report Manager app (Apps > Administration > Report Manager).
-
Select the appropriate application and report.
-
Select Edit.
-
Modify the report as necessary. For more information on ways to modify the report, refer to Create a new report.
Note You can use Save As to save a copy of the report to modify.
-
Once you are satisfied with your changes, click Save. Your report will now appear on the list of available reports for this entity. Other users will be able to access this report, depending on your selections for Scope and Availability on the General tab.
Built-in and custom reports can be scheduled to run on a set interval for a specified period of time. For information on setting up and managing scheduled reports, refer to Scheduling Reports.
To delete a report, complete the following steps:
-
Navigate to the Report Manager app (Apps > Administration > Report Manager).
-
Select the appropriate application and report.
-
Select Delete from the action bar.