Using the Markup Tool
Kahua’s file viewer includes its own built-in markup tool. The markup tool enables collaboration on documents and a visual way to identify issues on those files requiring clarification or action.
Key elements of the markup tool are as follows:
-
Markups can be added to files opened in the file viewer. This can be done in files in File Manager, files added to the References section of records in multiple applications, and other locations.
-
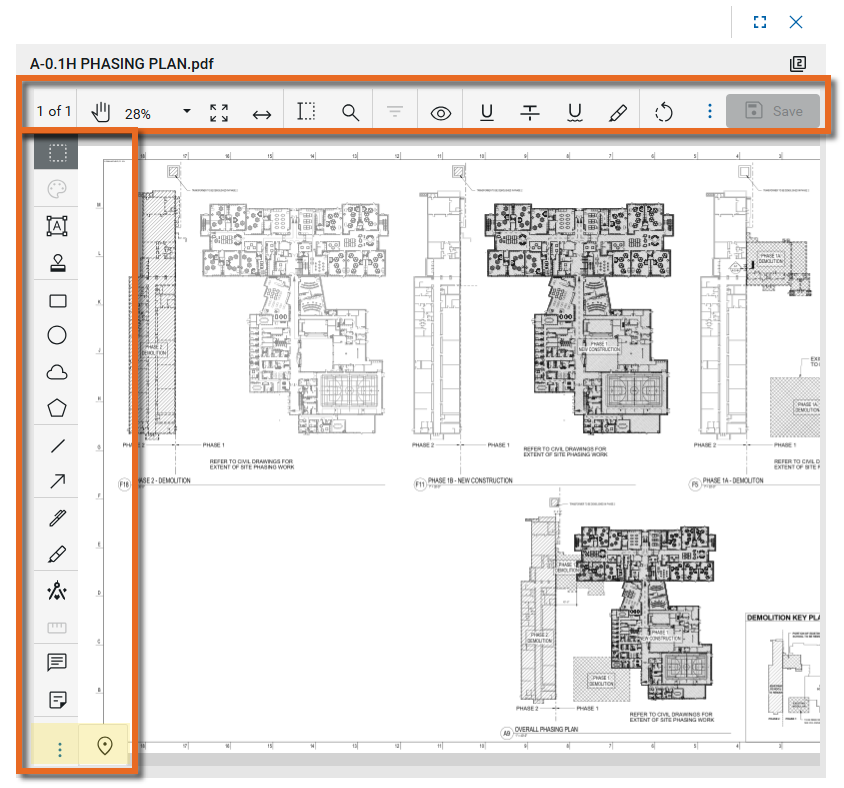
When a file is opened for markup, the viewer toolbar and markup toolbars appear. You can click on the Dock icon
 to dock them outside of the open document, or use the Drag icon
  to move them to another location.
 -
Similar markup tools are grouped together on the markup toolbar. The last selected tool appears in the toolbar.
-
When a markup is added to a document, information about who made the markup and when it was made is stored with the markup.
-
You can make changes to the properties of a selected markup, including the color, line weight, opacity, fill color, text size, etc. Changes you make to your style settings are saved to your device and applied the next time you use that tool.
-
Some tools share style settings, such as color or text size. The following tools share style settings with each other:
-
Rectangle, Ellipse, Cloud, Free Form, Line, Arrow, Pen, Calibrate, and Measurement.
-
Text and Callout.
-
-
Different colors for line and text markups can be assigned to different companies or contacts at the project, partition, or domain level in the Configuration app > Markups > Assigned Colors tab. Refer to Markups.
-
Markups can be made on files when you are working offline. For more information, refer to Apply markups when offline.
-
If you have a licensed copy of Bluebeam on your computer, you can click on the Bluebeam icon
 to use Bluebeam to markup your files instead of using the Kahua markup tool. For more information, refer to Markups using the Bluebeam integration.
How to . . .
The markup tool is available on files in File Manager, files added to the References section of records in multiple applications, and other locations.
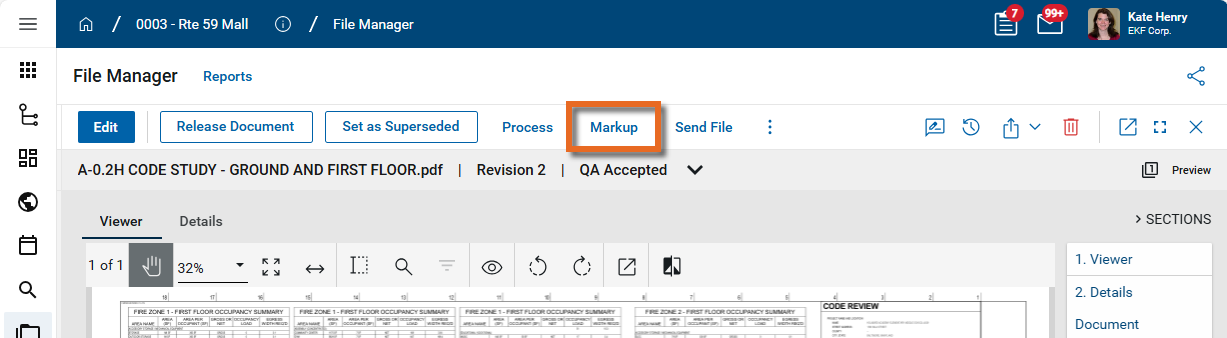
In File Manager, select the Markup option from the right-click menu or from the action bar.
In the References section of a record, select the checkbox next to the document and click Markup in the action bar.
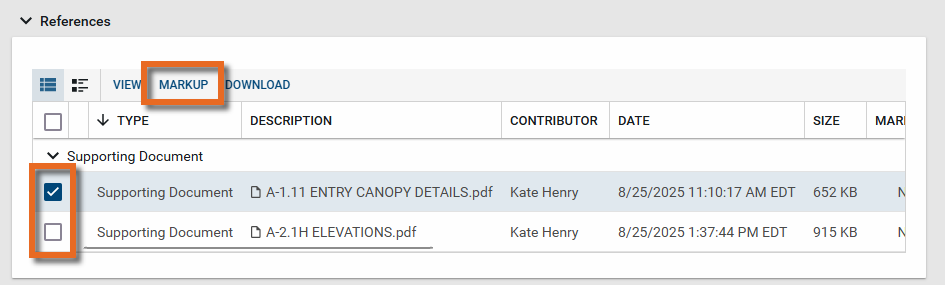
Note After uploading a file to the References section of a record, typically you will have to save the record before selecting Markup.
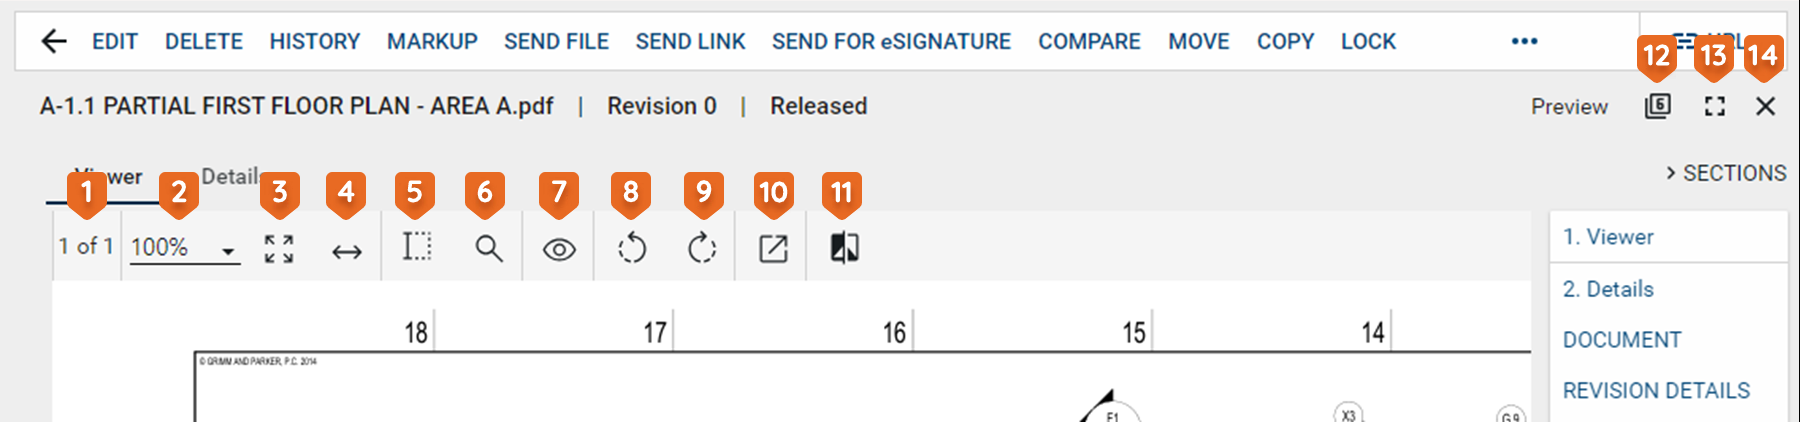
When a file is opened in the viewer, the viewer toolbar appears. To adjust your view of the image in the file viewer, use one of the following tools:
| Tool | Description |
|---|---|
| Drag toolbar |
This option appears when the toolbar is un-docked. Click on it and drag the toolbar to the desired location. |
| Text Selection |
Select this icon to enter text selection mode. In this mode, you can click and drag your mouse to select text on the image. Use Ctrl+C to copy the selected text to your clipboard. |
| Search |
Opens a text search window. When you enter the search criteria, the total number of search results will appear with the results highlighted in yellow on the page. You can use the arrows to scroll through the results on the image. |
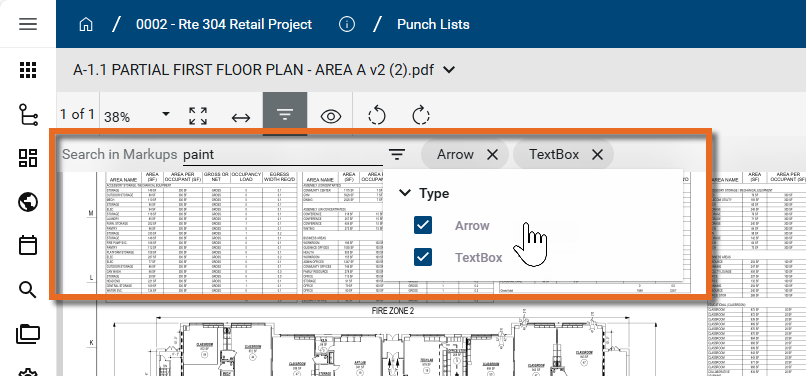
| Filter |
Select the Filter icon to open the search function, allowing you to search for a keyword in any markups on the drawing. You can additionally filter the results for markups of type Arrow or Textbox.
Note If no markups are present, the filter icon is disabled. |
| Page # of # |
Indicates which number page you are on of the total number of pages in the file or drawing. If there are multiple pages in the document file, you can use the arrow keys that appear to navigate through the pages. Additionally, you can click here to open a dialog box that allows you to enter a page number to jump to. Note that you can also use the keyboard shortcut Ctrl+Shift+G to open the dialog box. |
| Zoom |
Shows your current zoom level on the drawing. Select a level from the drop-down list, manually enter a level and press Enter on your keyboard, or use Ctrl + your mouse wheel to zoom in and out from the current cursor location. |
| Fit Page |
Click this icon to fit the file image to the display area. |
| Fit Width |
Click this icon to fit the file image to width of the display area. |
| Open File |
Opens a PDF file in the default browser or uses the default browser to download the PDF version of the file to the local downloads folder. |
| Pan mode |
Click this icon to switch between pan mode and selection / markup mode. In pan mode, clicking and dragging on the image will pan across the image. In selection mode, clicking and dragging on the image will select a section of the image and any markups in that selected area. |
| Rotate Counter Clockwise |
Rotates the image counter-clockwise or clockwise. When done while in markup mode and saved, the rotation is saved with the drawing and will appear rotated to anyone viewing the drawing. |
| View |
Select any of the following options:
|
| Bluebeam |
If you have a licensed copy of Bluebeam on your computer, you can use this option to open Bluebeam and access their markup tool. Refer to Markups using the Bluebeam integration. |
| Compare |
Opens the Compare Files dialog. Select a second file to compare with this one. To learn more about the Compare feature, refer to Using the Compare feature. |
| Dock toolbar |
Select this option to dock the toolbar outside the viewing pane. This can make it easier to view the whole document. Click the icon again to un-dock the toolbar. |
From the file viewer, select Markup to enter Markup mode.
The markup tools appear on the file viewer.
Note You may need to select the More icon ![]() to access tools hidden for space reasons.
to access tools hidden for space reasons.
Once in markup mode, you can add markups using the following tools:
| Tool | Description |
|---|---|
| Markup tool bar | |
| Text tools | |
| Text |
Click and drag to create a text box on the drawing. Enter the annotation text into the dialog that appears. To re-open the Edit Text dialog, double-click on the text box. Note With the text box selected, click on the Style tool |
| Callout |
Use this tool to create a callout that includes a text box and an arrow to a location on the image. First, click and drag to create a text box on the drawing. Once the text box is sized correctly, click again to start an arrow, then drag the mouse to the appropriate location and click again to create the arrow pointing to the appropriate location on the image. Enter the annotation text into the dialog box that appears. Note With the shape selected, click on the Style tool |
| Sticky Note |
Click to add a note at a specific location on the drawing. Enter the annotation text into the dialog box that appears. Once placed, users can hover over the sticky note to read the text. |
| Line and arrow tools | |
| Line |
Click a start and end point on the drawing to create a line. Note With the line selected, click on the Style tool |
| Arrow |
Click a start and end point on the drawing to create an arrow. Note With the arrow selected, click on the Style tool |
| Pen and highlight tools | |
| Pen |
Use your mouse to draw a free-form line on the image. Note With the line selected, click on the Style tool |
| Highlight Area |
Click and drag on the drawing to highlight a rectangular area on the image. Note With the shape selected, click on the Style tool |
| Rectangle and ellipse tools | |
| Rectangle |
Click and drag on the drawing to create a rectangle shape. Note With the shape selected, click on the Style tool |
| Ellipse |
Click and drag on the drawing to create an ellipse shape. Note With the shape selected, click on the Style tool |
| Cloud and Freeform tools | |
| Cloud |
Click end points on the drawing to create a multi-sided cloud shape. You must close the shape by clicking again at the beginning point for the cloud to appear. Note With the shape selected, click on the Style tool |
| Free Form |
Click end points to create a multi-sided polygon shape on the drawing. You must close the shape by clicking again at the beginning point for the polygon to appear. Note With the shape selected, click on the Style tool |
| Calibrate and measure tools | |
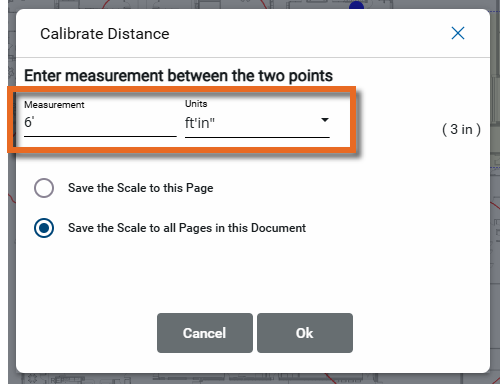
| Calibrate |
Use this tool to establish a measurement scale for this page or all pages in the document. Click and drag to select a known distance on the drawing. Enter that measurement (including the correct units!) in the Calibrate Distance dialog box.
Select to save the scale to the page you are on or to all pages in the document. Once saved, you can use the Measure tool Important If you re-do the calibration, existing Measure markups are not re-calculated. |
| Measure |
Once you have used the Calibrate tool Click and drag to create a line across the length you want to measure. The measurement is applied as a markup. Note With the measurement selected, click on the Style tool Important Once the measurement is placed, moving the end points does not re-measure the segment. To re-do a measurement, delete the existing markup and create another measurement markup. |
| Ungrouped items | |
| Pin |
The pinning feature in Kahua allows you to drop a virtual "pin" on a drawing in the File Manager app, and then link that "pin" to a record in one of several apps in Kahua. For more information, refer to Pinning functionality in File Manager. |
| Stamp |
Select to place a Dynamic or Simple stamp on the drawing. After selecting the tool and the stamp, select the location to place the stamp. After placement, drag the corner of the stamp to re-size it. Click on the Style tool For more information on stamps, refer to Using Stamps. |
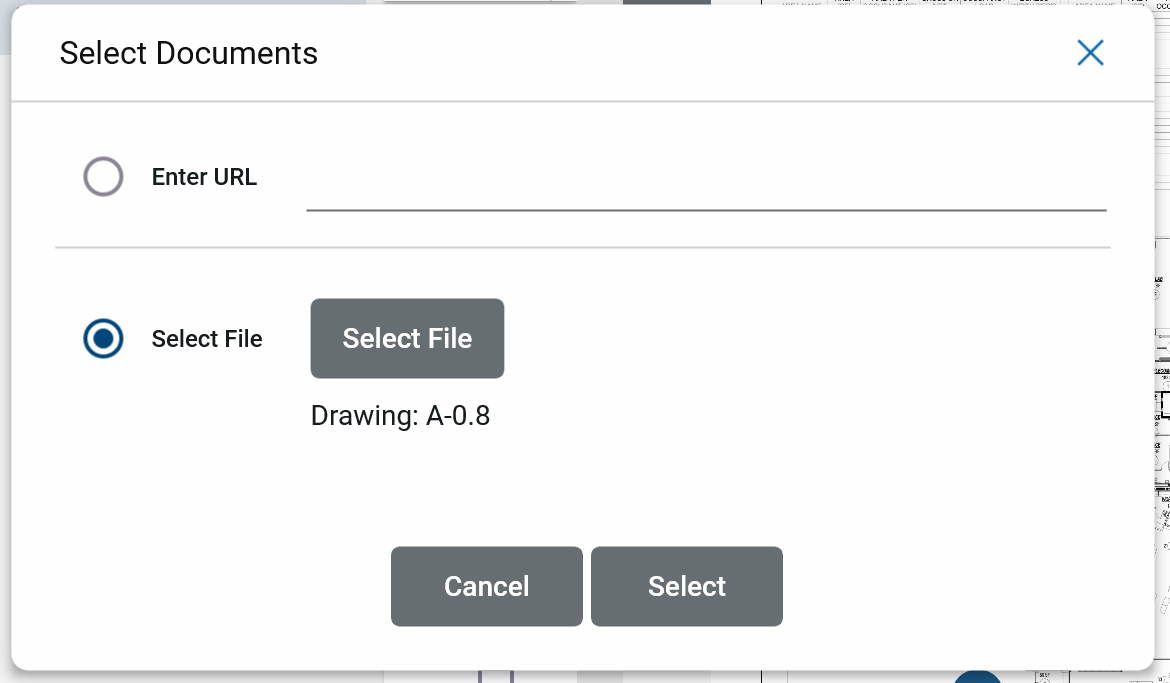
| Kahua Link |
Select this option to add a link to an external URL or existing file in File Manager. Once selected, click and drag to highlight a location on the drawing. The Select Documents dialog appears. Enter the appropriate URL or select an existing file in File Manager. Click Select when you are done.
To show or hide the links on the drawing, select Show Hyperlinks from the View dropdown menu Note If you are interested in this feature and it is not available in your domain, reach out to Support or your account representative for more information. |
| Dock toolbar |
Select this option to dock the toolbar outside the viewing pane. This can make it easier to view the whole document. Click the icon again to un-dock the toolbar. |
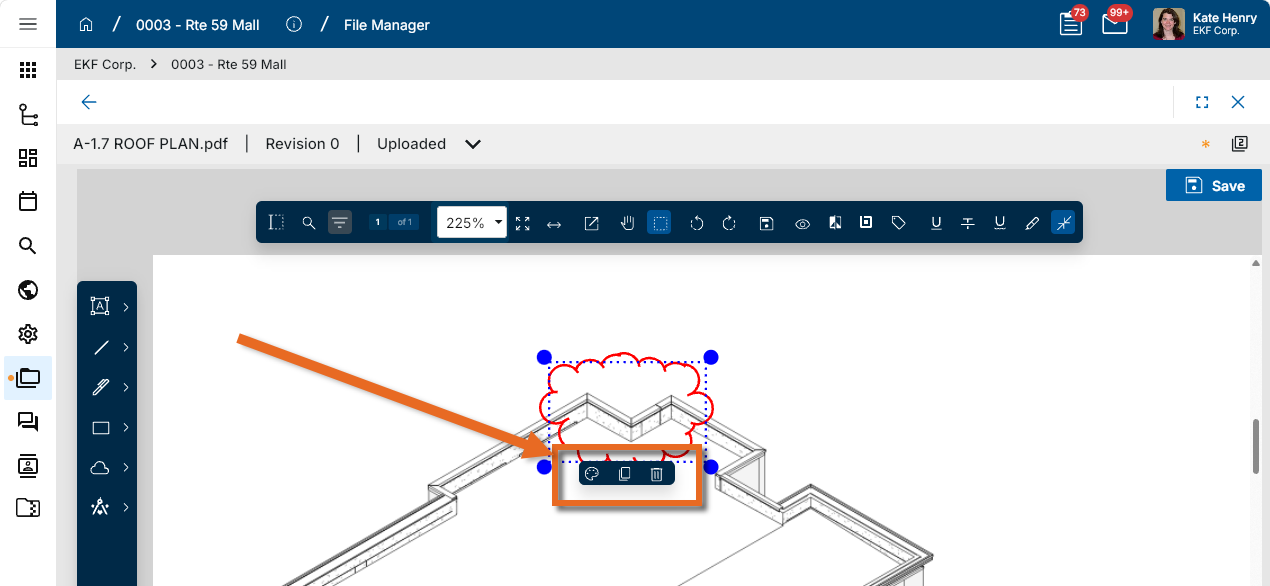
To act on an existing markup, click on it to select it. Once selected, a toolbar appears below the markup, allowing you to copy, style, or delete it.
| Tool | Description |
|---|---|
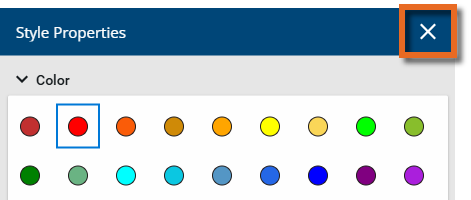
| Style |
Click on the Style icon to modify the properties of a selected markup, including color, line weight, opacity, fill color, text size, etc. The properties available for modification depend on the type of markup selected. When you are done, click the Close icon
Note Different colors for line and text markups can be assigned to different companies or contacts at the project, partition, or domain level in the Configuration app > Markups > Assigned Colors tab. Refer to Markups. |
| Copy |
Click the copy icon to copy the selected markup. Press Ctrl+V to paste the copy on the drawing. Once pasted, you can move and modify the new markup as needed. Note The copied markup is a new markup with the same shape and style as the original markup. The original markup's status and comments are not copied to the new markup. |
| Delete |
Click this icon to delete the selected markup. Note You can also press Delete on your keyboard to delete the selected markup. |
Additionally, once selected, you can move the markup by clicking and dragging it, and you can re-shape the markup by clicking and dragging the corners that appear when selected.
You can copy text from a document in the file viewer, or select text and apply the following formatting markups to that text: underline, strikethrough, squiggly line, or a highlight.
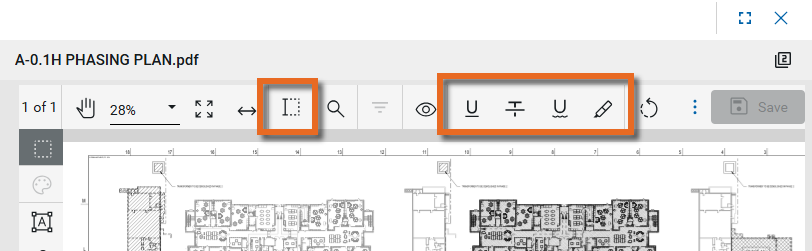
To copy text or apply text formatting, complete the following steps:
-
In markup mode, select the Text Selection tool
 .
. -
To copy the text to your clipboard, click and drag your mouse to select text on the document. Press Ctrl+C on your keyboard. The text is copied to your clipboard and can be pasted elsewhere.
-
To apply a formatting markup tool, select the tool, then click and drag your mouse to select text on the document. The selected formatting is applied. The available tools are the following:
Tool Description Text Selection Select this icon to enter text selection mode.
In this mode, you can click and drag your mouse to select text on the image.
Use Ctrl+C to copy the selected text to your clipboard.
Text Underline 
Adds an underline to the selected text on the image.
To select the text, click the text selection tool and use your mouse to make the selection.
Text Strikeout 
Adds a strikeout to the selected text.
Text Squiggly 
Adds a "squiggly" underline to the selected text. Text Highlight 
Highlights the selected text.
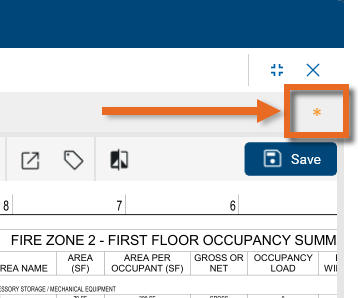
When you are done with markups, click the Save icon ![]() on the toolbar or Save on the drawing to save your changes.
on the toolbar or Save on the drawing to save your changes.

You can save your changes and continue to add or modify markups.
When there are unsaved changes, a star will appear above the drawing to indicate that you have not yet clicked Save.
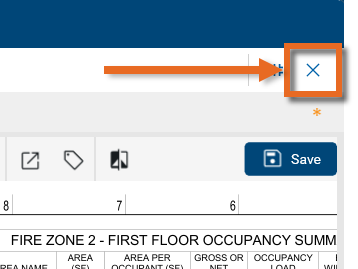
To exit markup mode, click the Close icon ![]() in the upper right corner.
in the upper right corner.
The markup panel is a list of all of the markups on a file in a table view.
To work in the markup panel, complete the following steps:
-
Click on the View icon
 and select Show Markup Panel to open the markup panel.
A checkmark appears next to Show Markup Panel and the markup panel appears at the bottom of the drawing.
Click Show Markup Panel again to close it.
-
You can add a comment to a markup in the Comments column.
-
You can update the status of a markup in the Status column.
-
To close a markup, select "Closed" in the Status column.
-
To hide closed comments, select Hide Closed.
-
To close the markup panel, return to the View icon and click Show Markup Panel again.