Project Tables
Notice Kahua is a very flexible and customizable platform. In your domain, this application may have been modified to meet your company's needs. The online help uses default field labels for field names and describes standard workflows. Please check with your domain administrator for specific information about working in your organization's domain.
The Project Tables app allows you to keep track of the cost of equipment, units, labor rates, and materials. Each of these are organized as sub-apps.
Key elements of the Project Tables app are as follows:
-
The Project Tables app is project specific.
-
You can enter the project table information into a project template. This allows you to copy the content into whatever projects in which the template is used.
-
Content entered into Project Tables will appear automatically in the Work Orders and Change Orders apps.
How to . . .
To create a new equipment record, complete the following steps:
-
Review the header to ensure that you are in the correct project or partition.
-
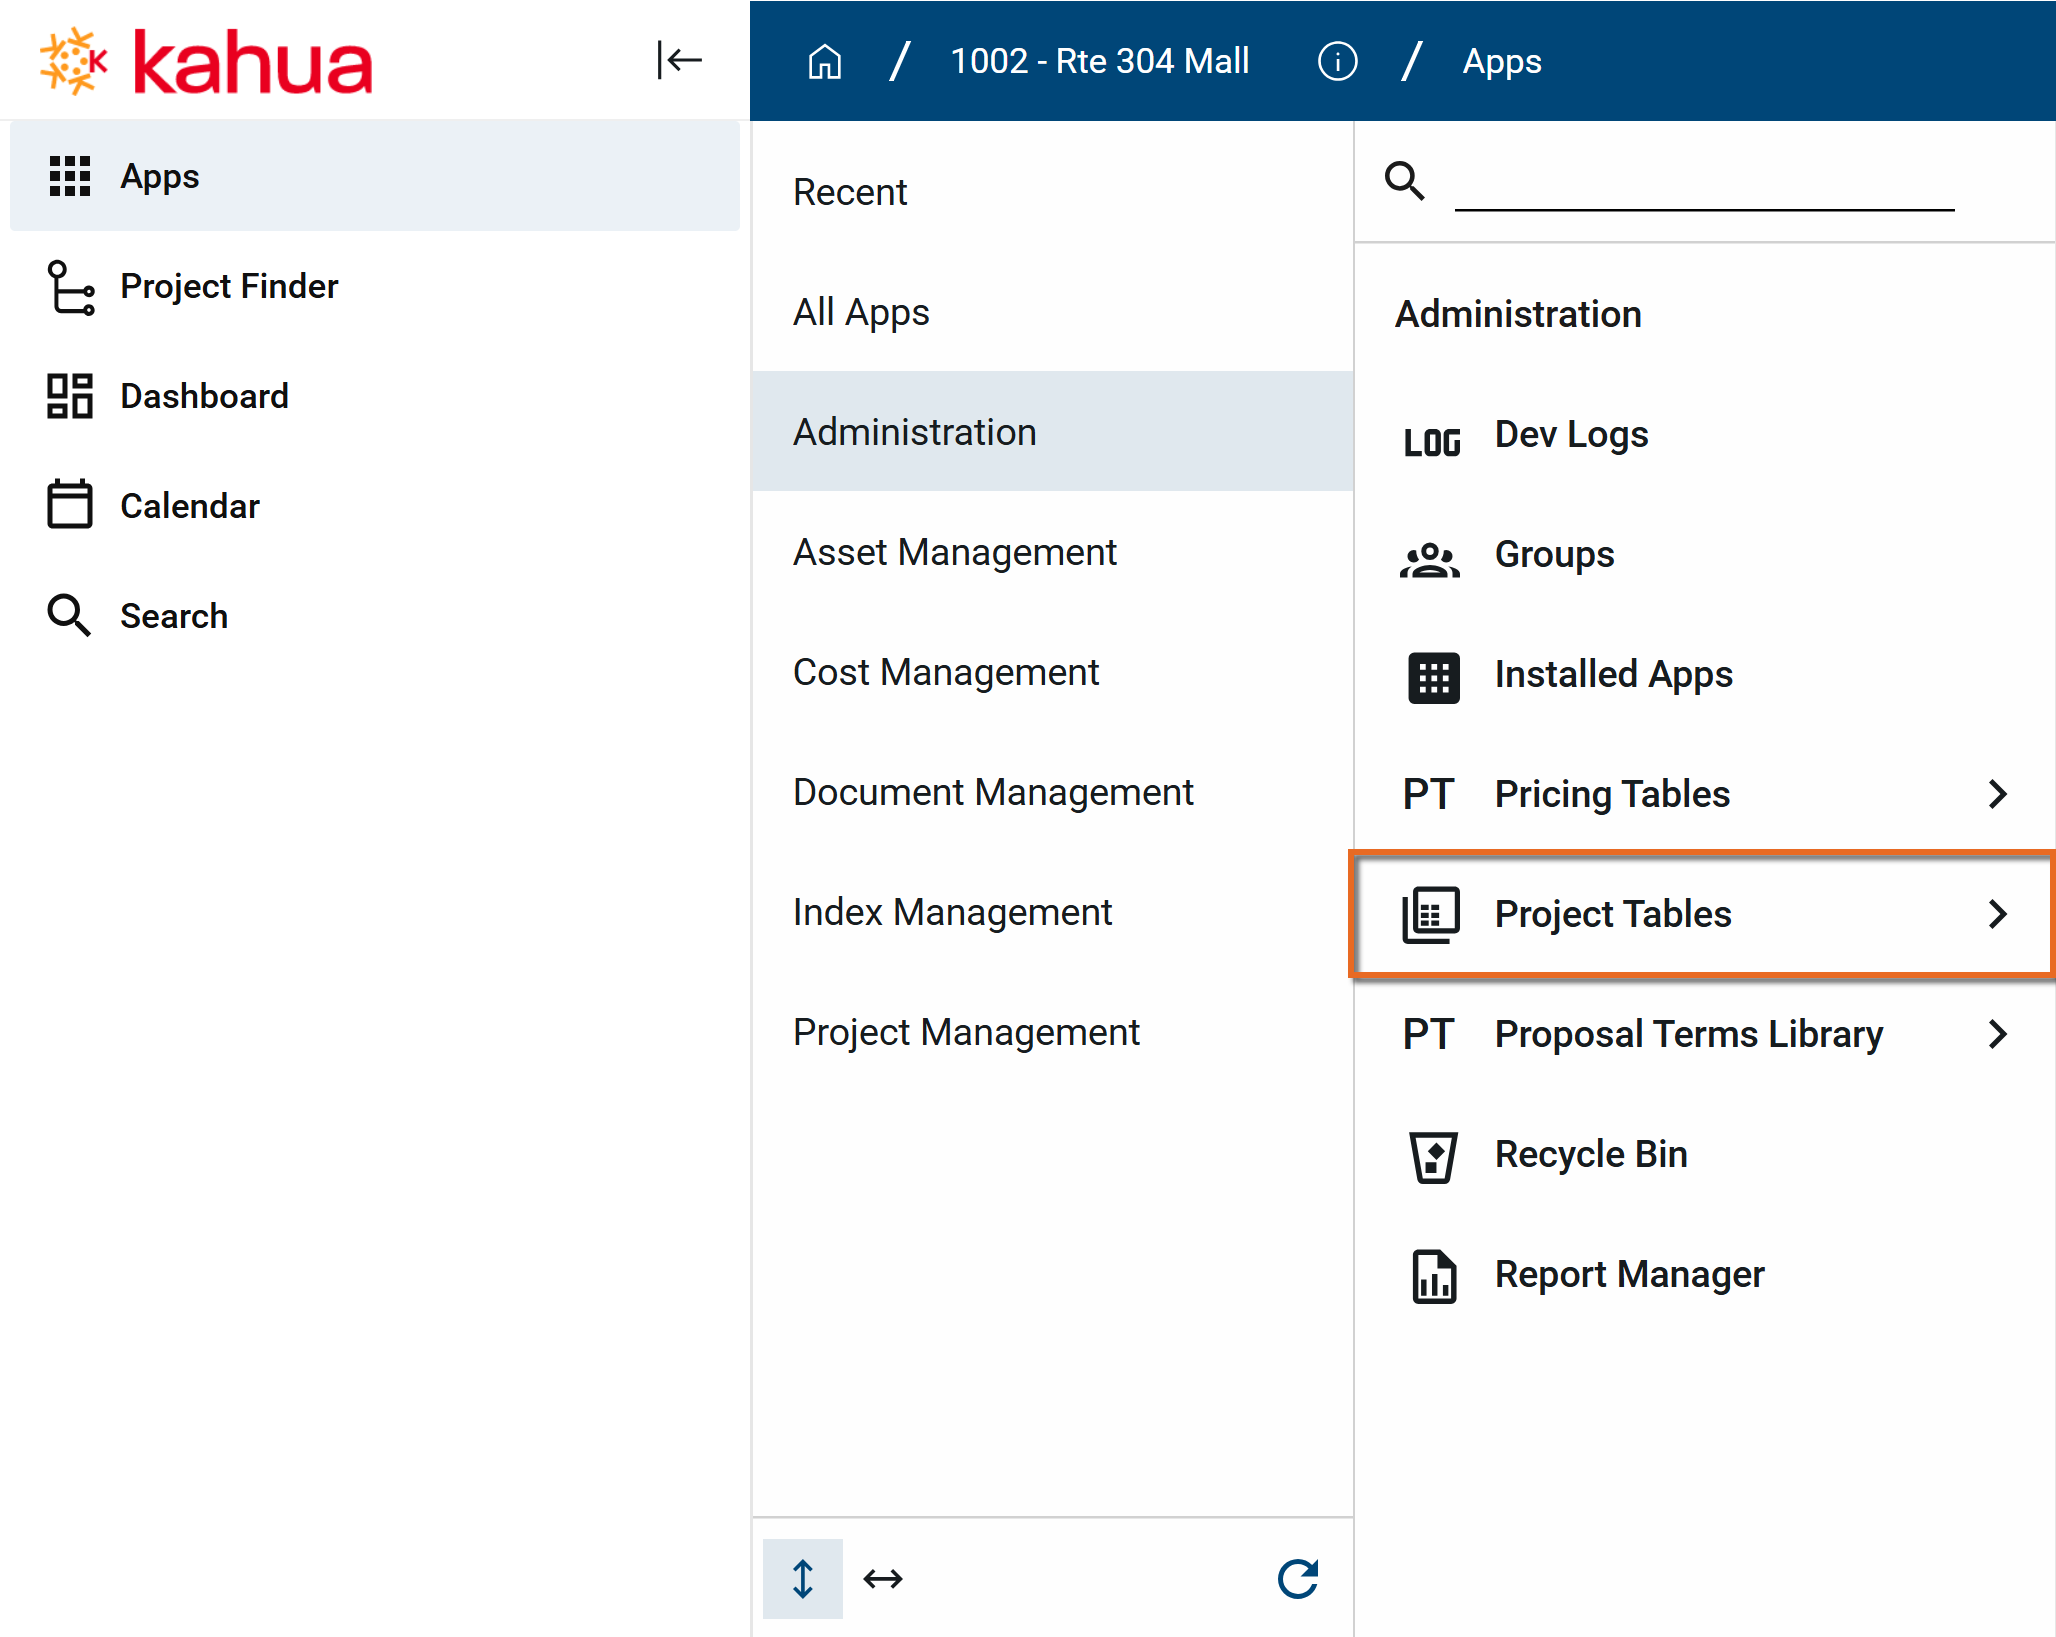
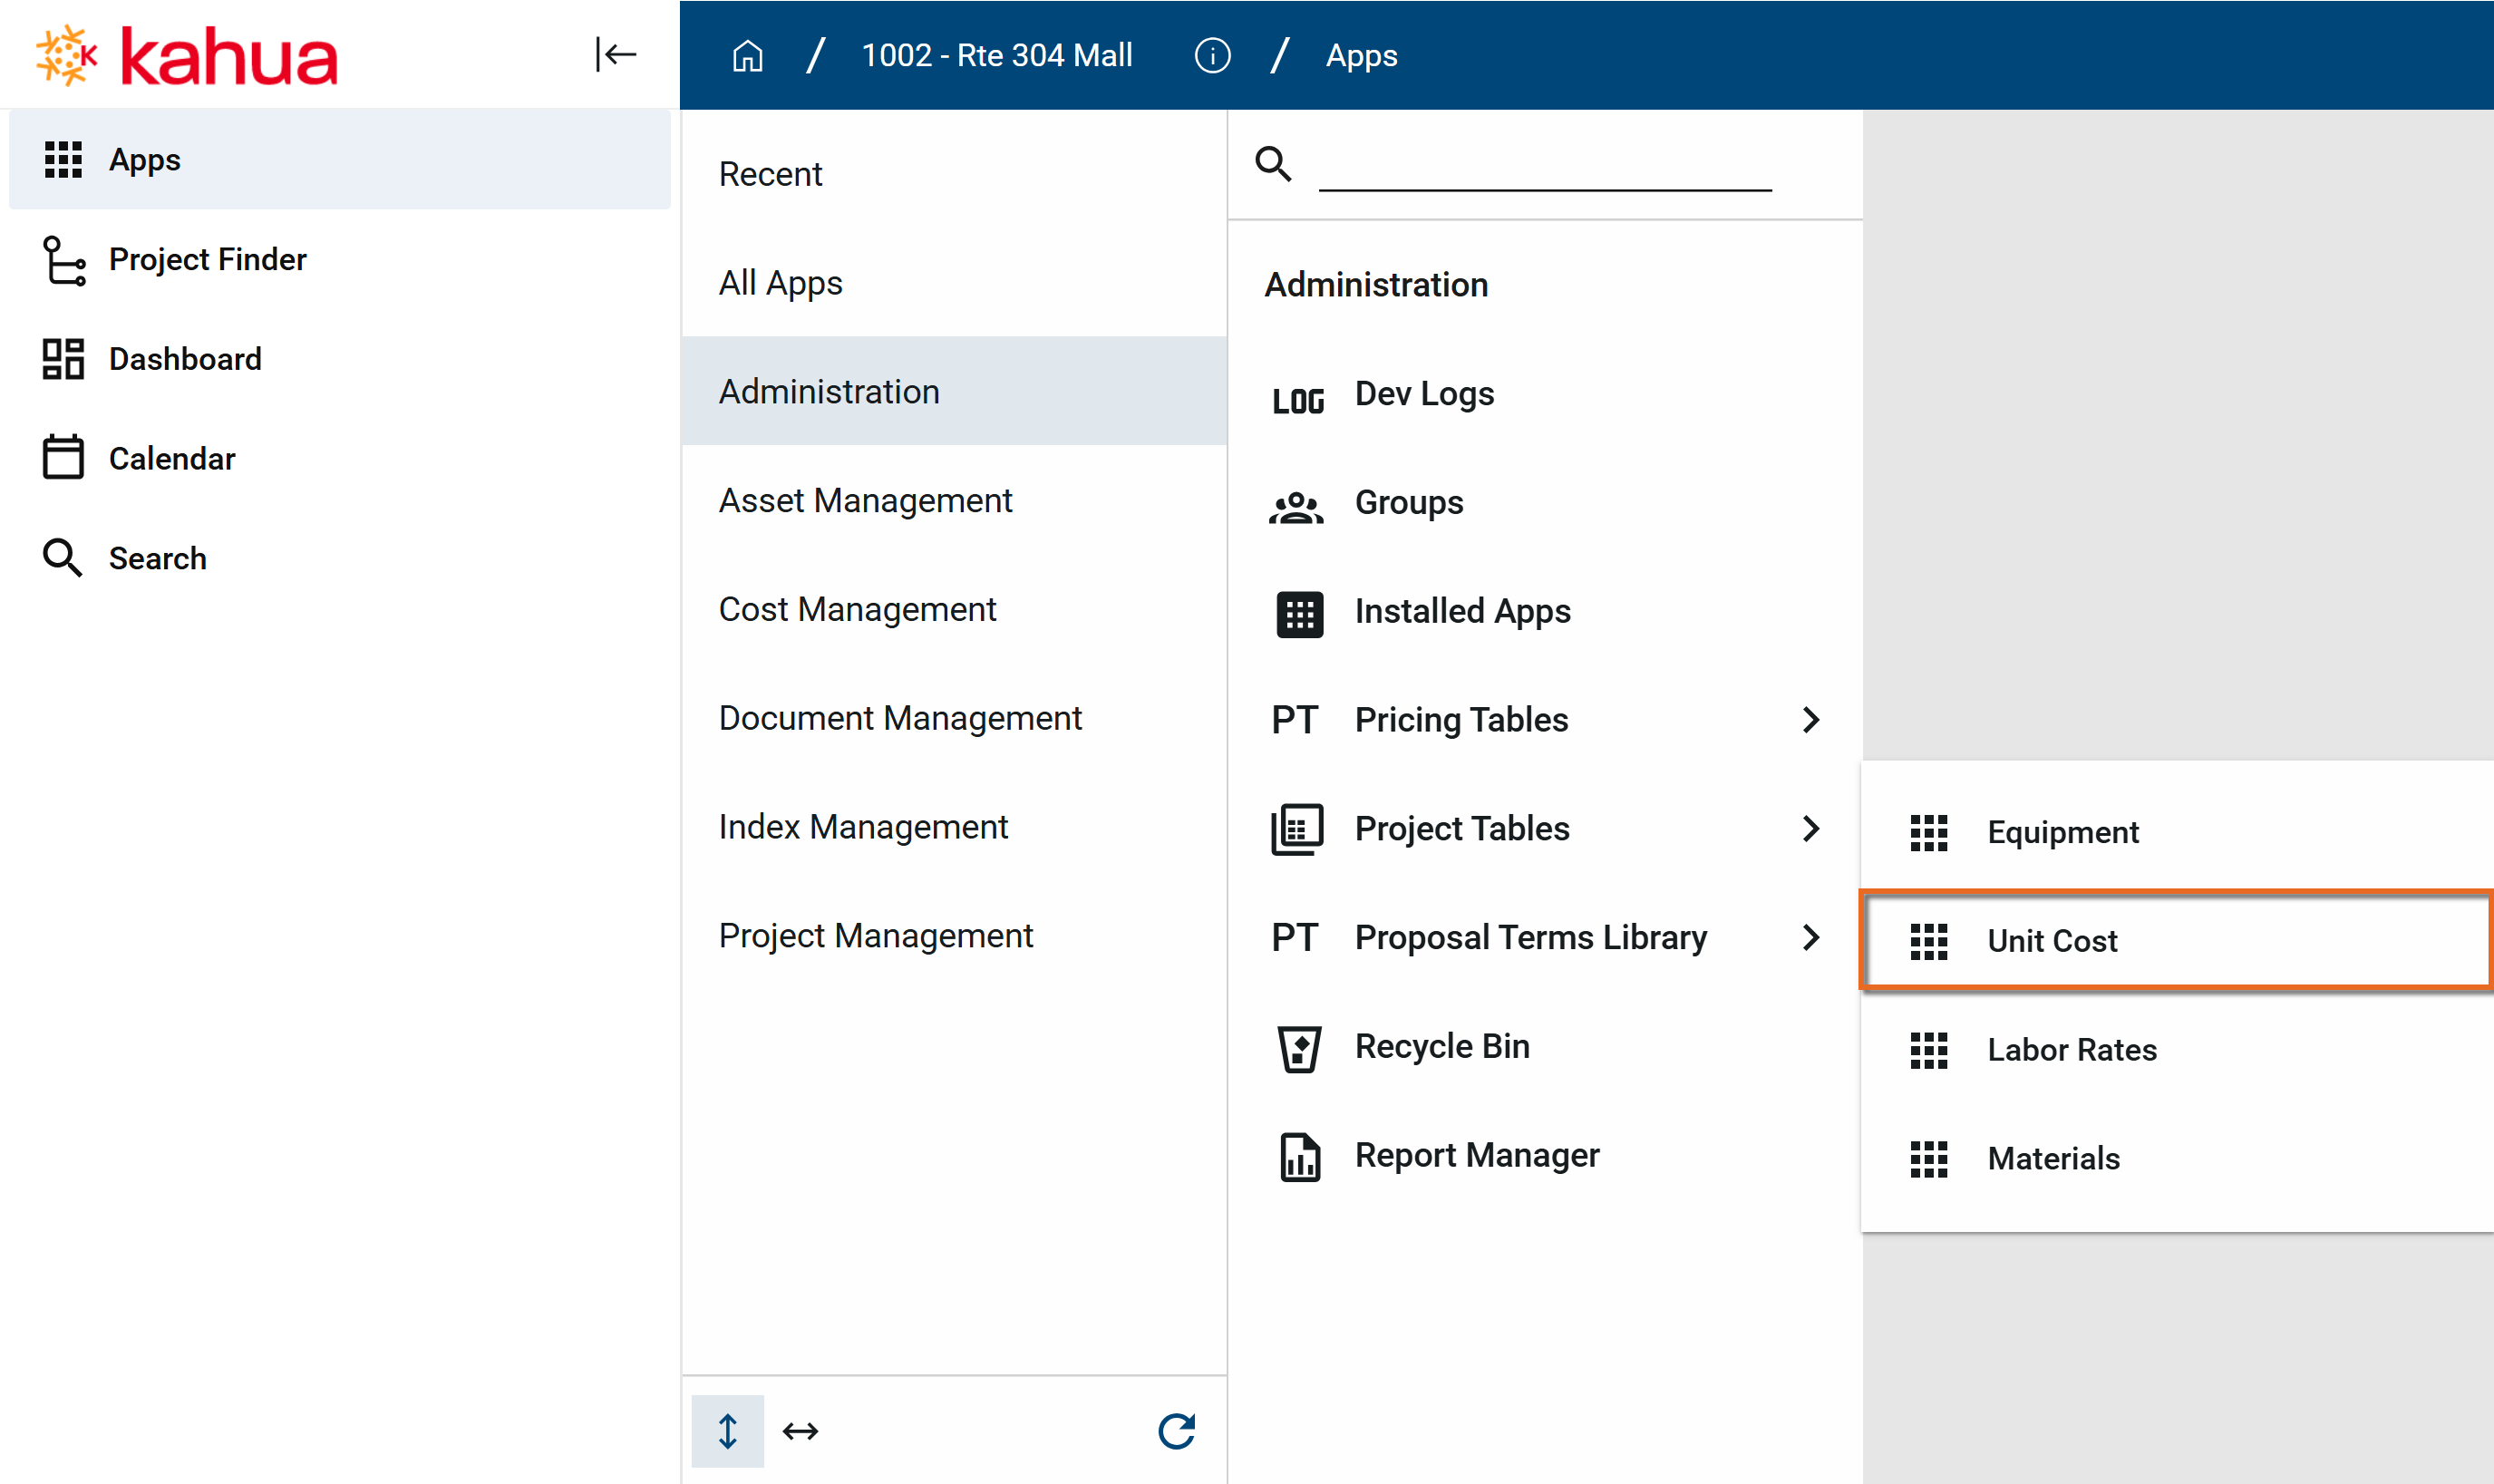
Navigate to the Project Tables app (Apps > Administration > Project Tables).
-
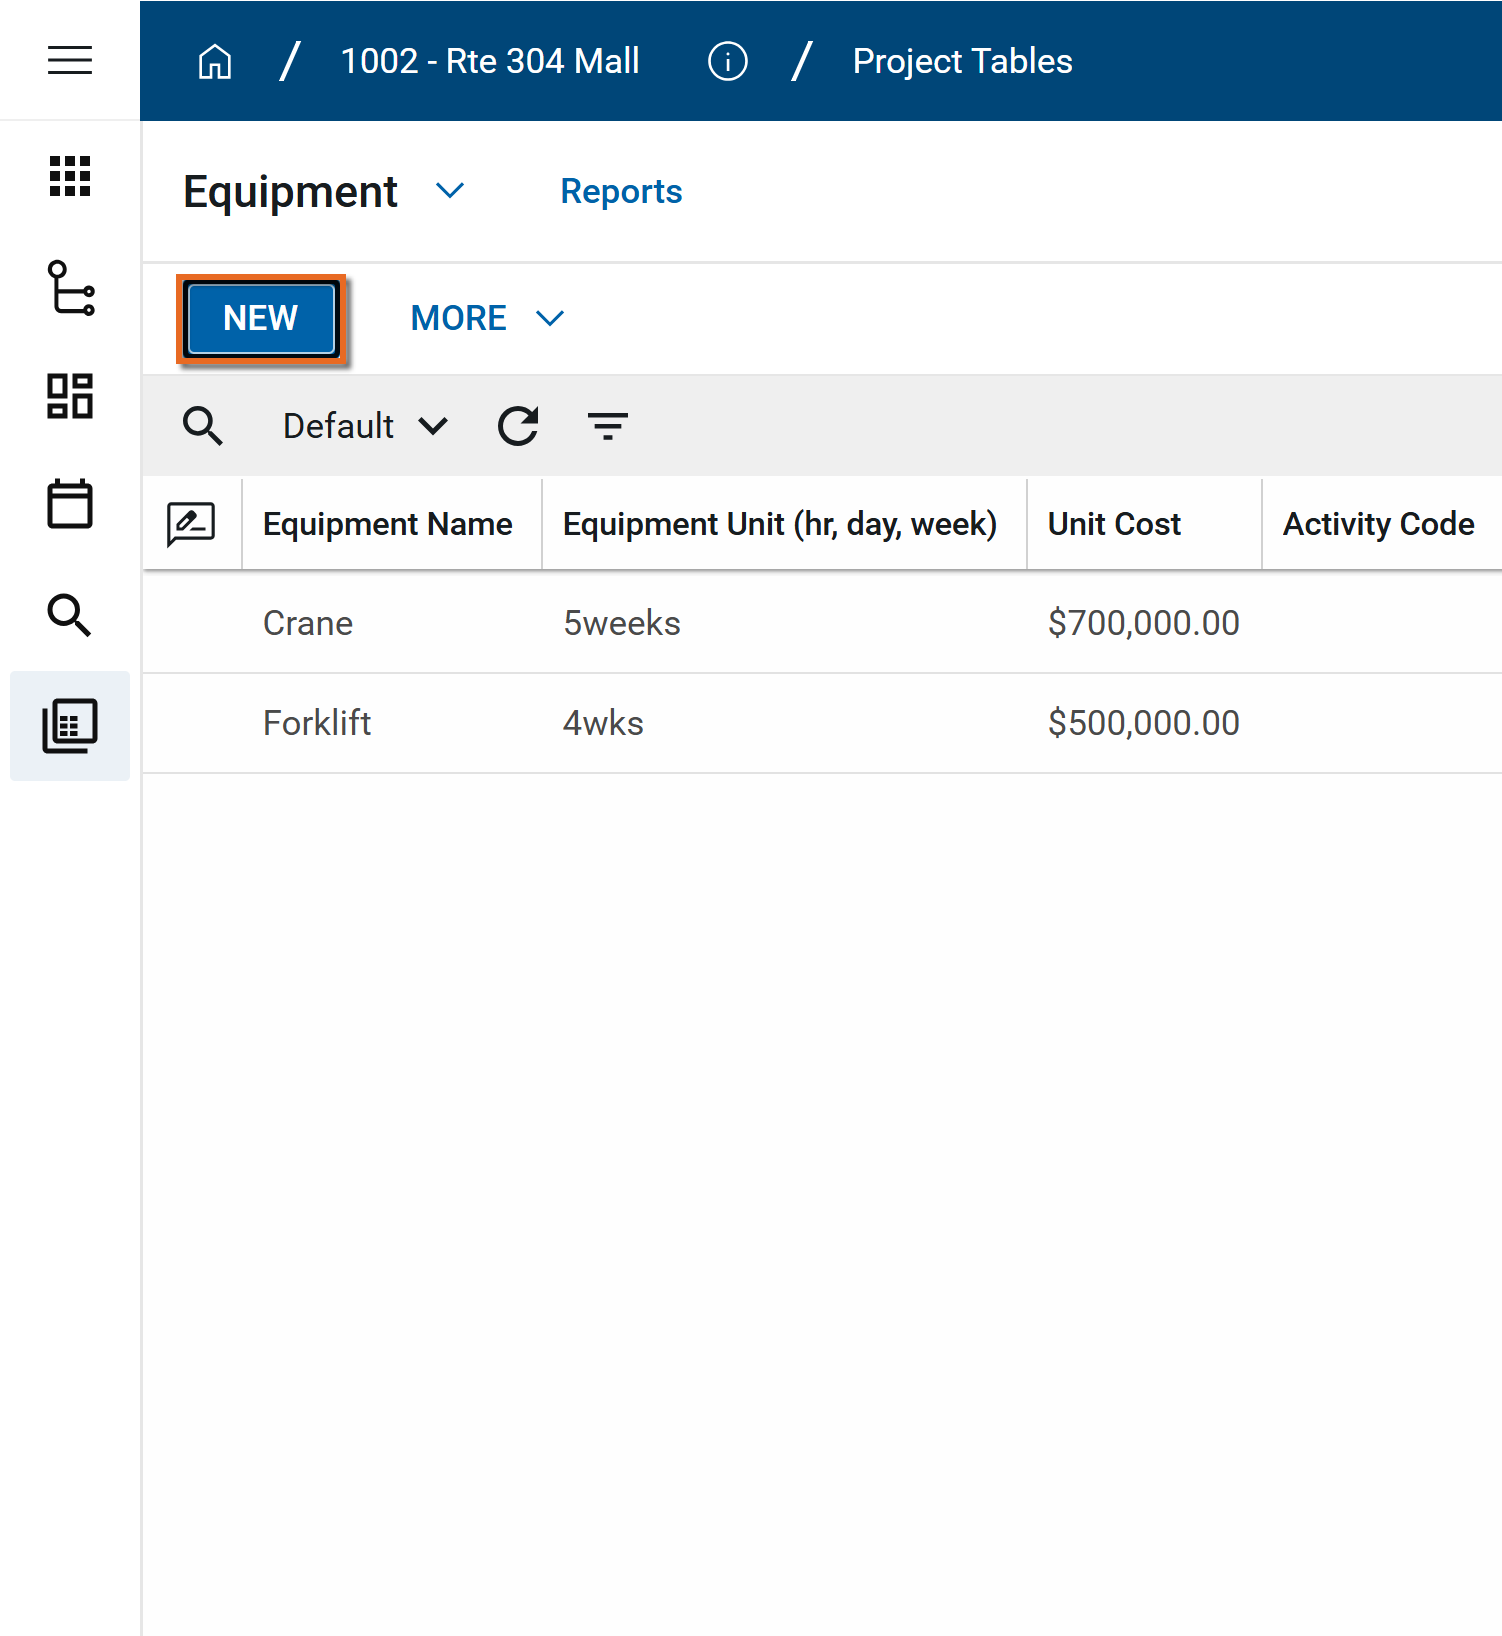
Select Equipment from the menu.

-
Click New in the action bar.
-
Complete the following fields as appropriate:
Note Depending on how this app is configured for your domain, there may be fields or sections listed here that do not appear for you, fields and sections that appear for you which are not listed here, or fields and sections which appear in a different order. If you have any questions, check with your domain administrator.
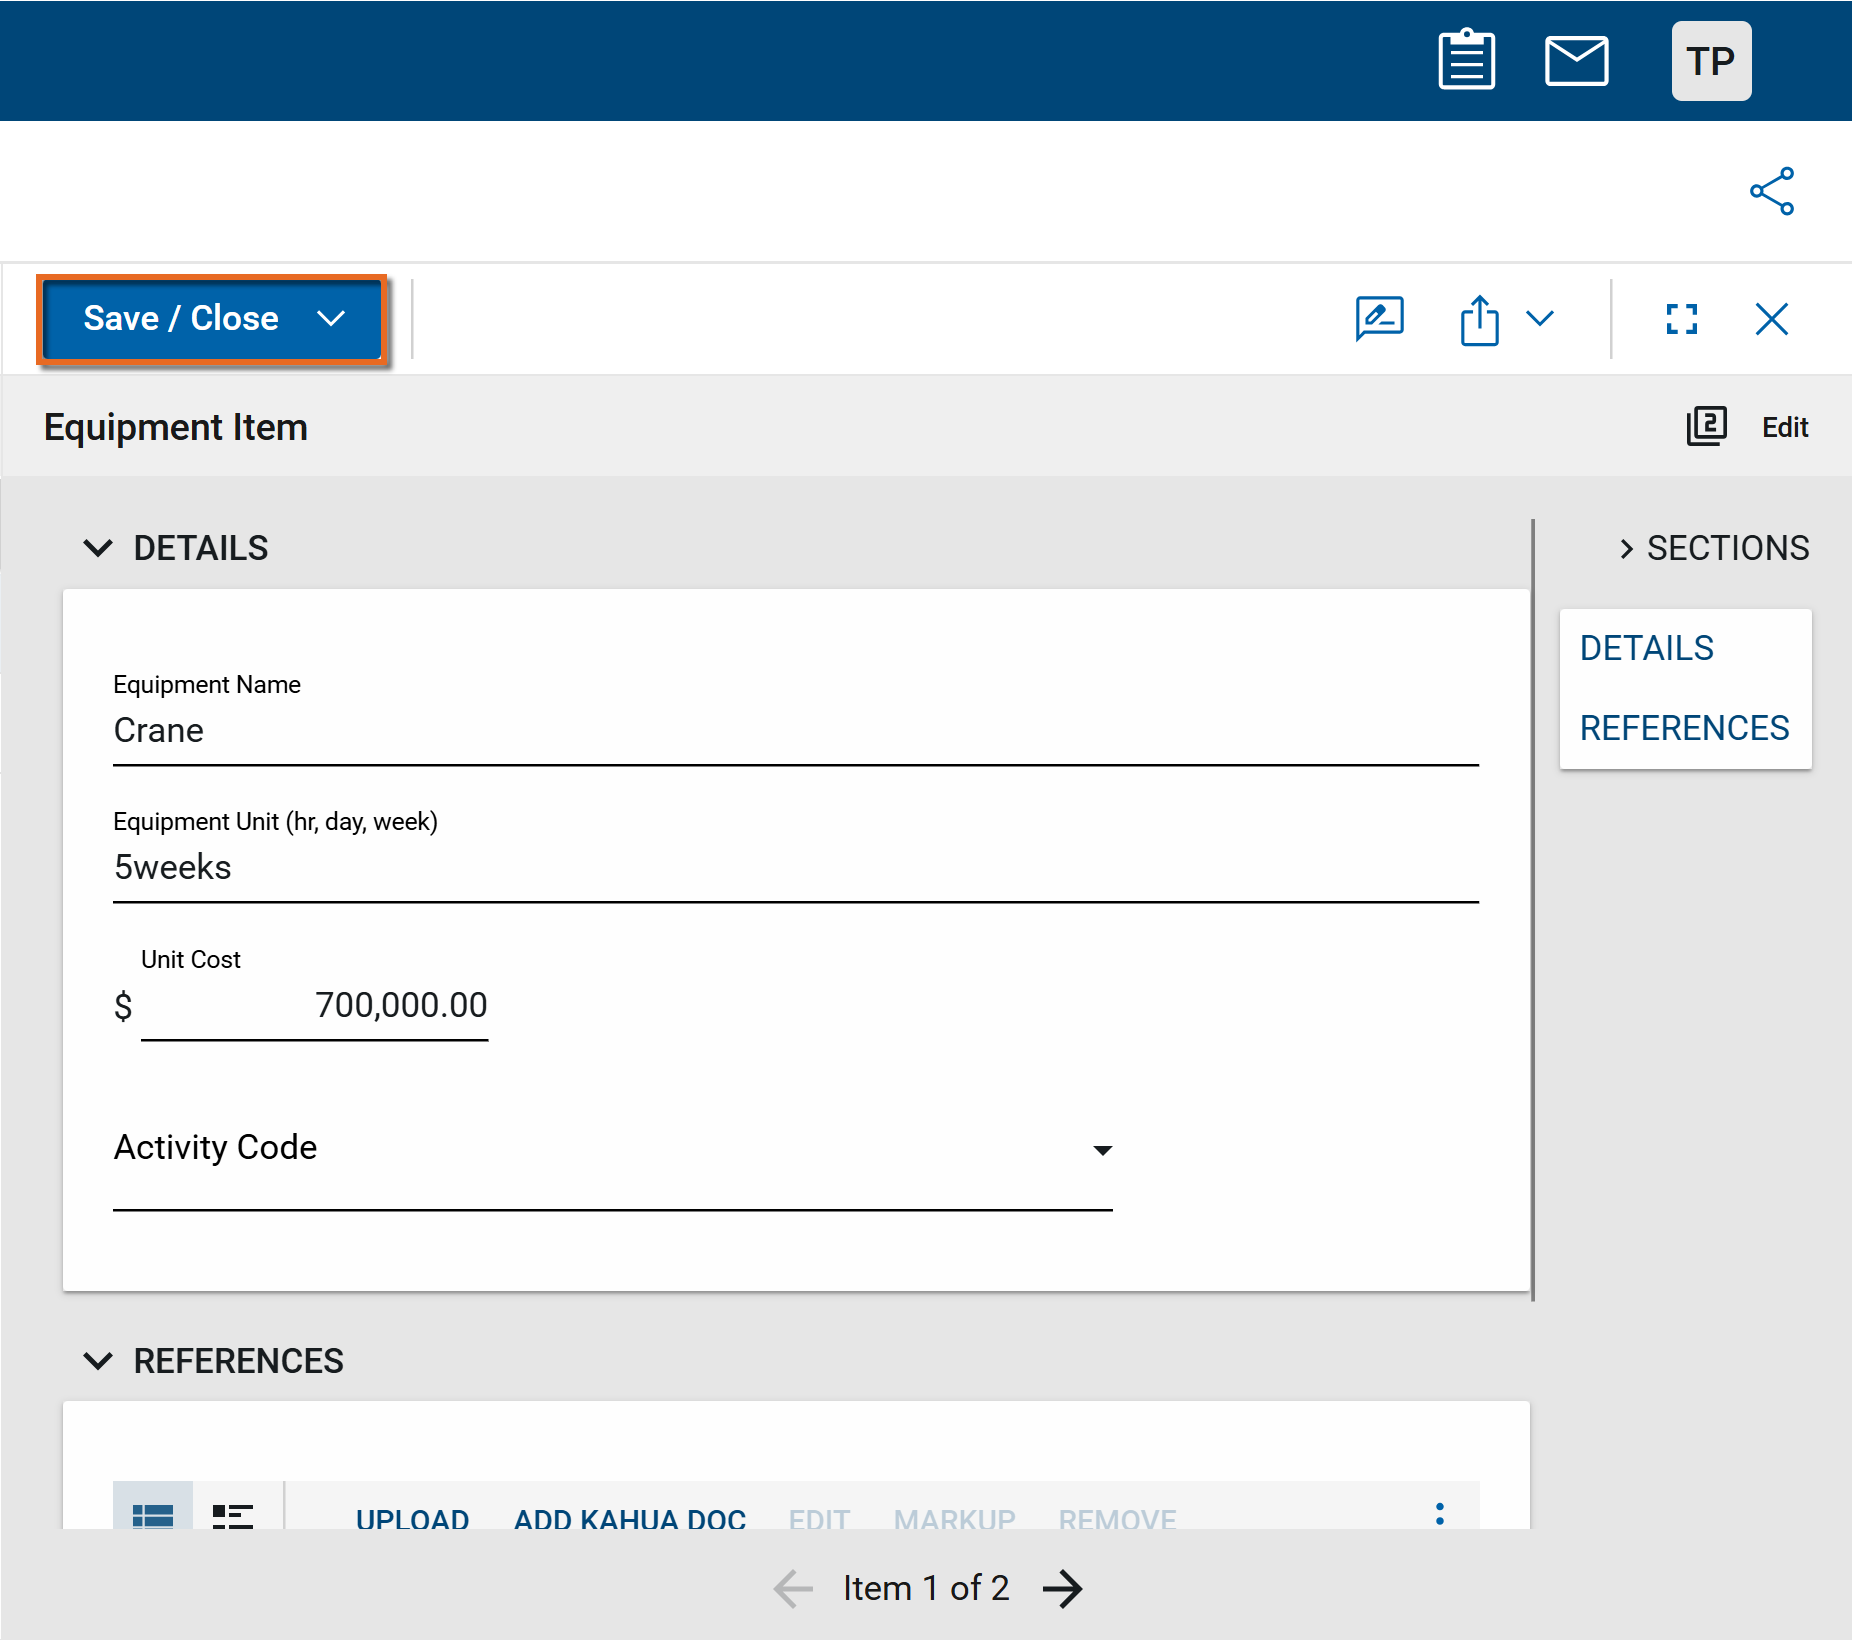
Field Description Details Name Enter the name of the equipment. Unit (hr, day, week) Enter the unit for the equipment.
Cost Enter the cost of the equipment. Activity Code Select an activity code. References Upload any relevant files or documents. For more information on using this section, refer to References section. -
Click Save when you are done. The equipment record will be saved.
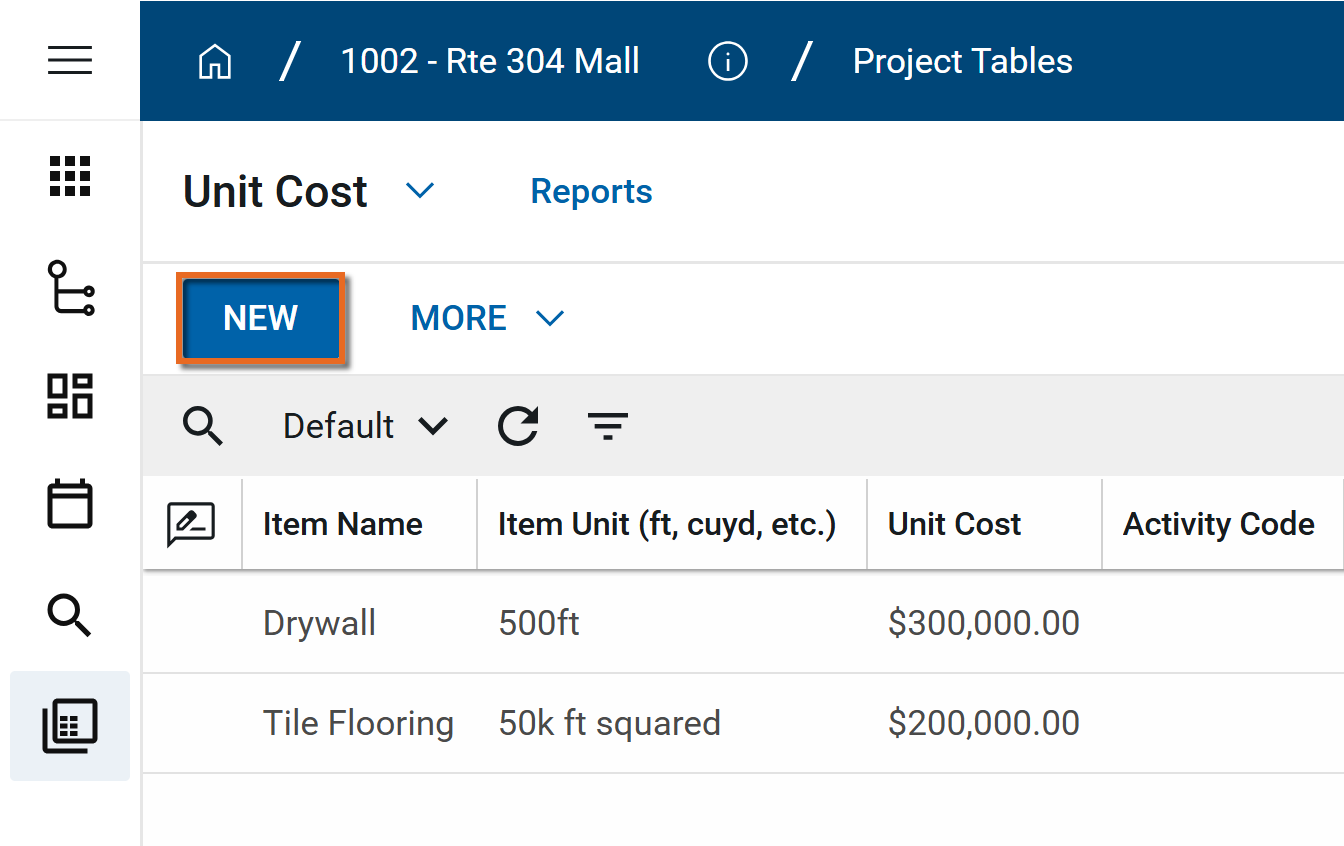
To create a new unit cost record, complete the following steps:
-
Review the header to ensure that you are in the correct project or partition.
-
Navigate to the Project Tables app (Apps > Administration > Project Tables).
-
Select Unit Cost from the menu.
-
Click New in the action bar.
-
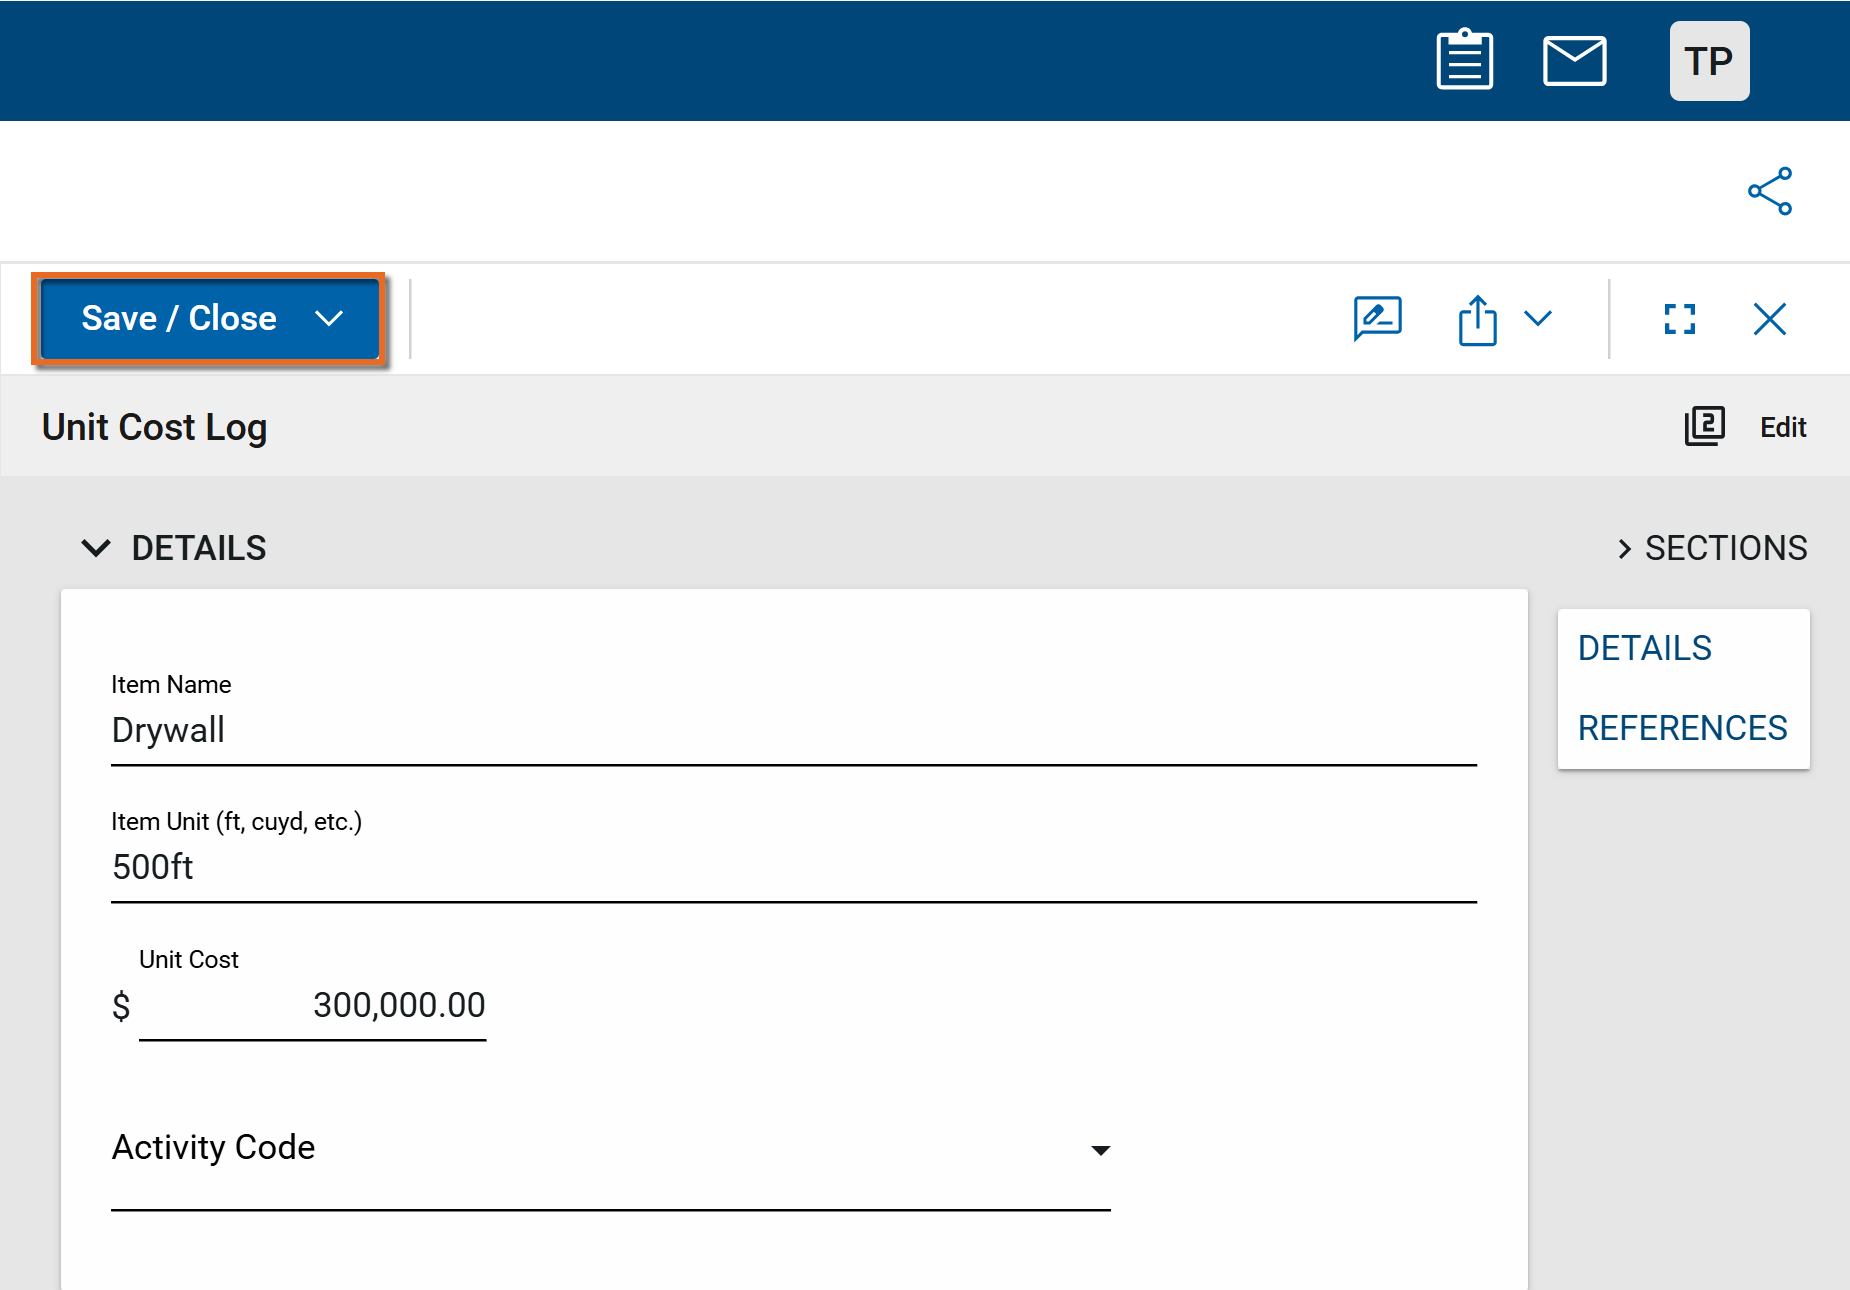
Complete the following fields as appropriate:
Note Depending on how this app is configured for your domain, there may be fields or sections listed here that do not appear for you, fields and sections that appear for you which are not listed here, or fields and sections which appear in a different order. If you have any questions, check with your domain administrator.
Field Description Details Name Enter the name of the item. Unit (ft, cuyd, etc.) Enter the unit for the item.
Cost Enter the cost of the item. Activity Code Select an activity code. References Upload any relevant files or documents. For more information on using this section, refer to References section. -
Click Save when you are done. The unit cost record will be saved.
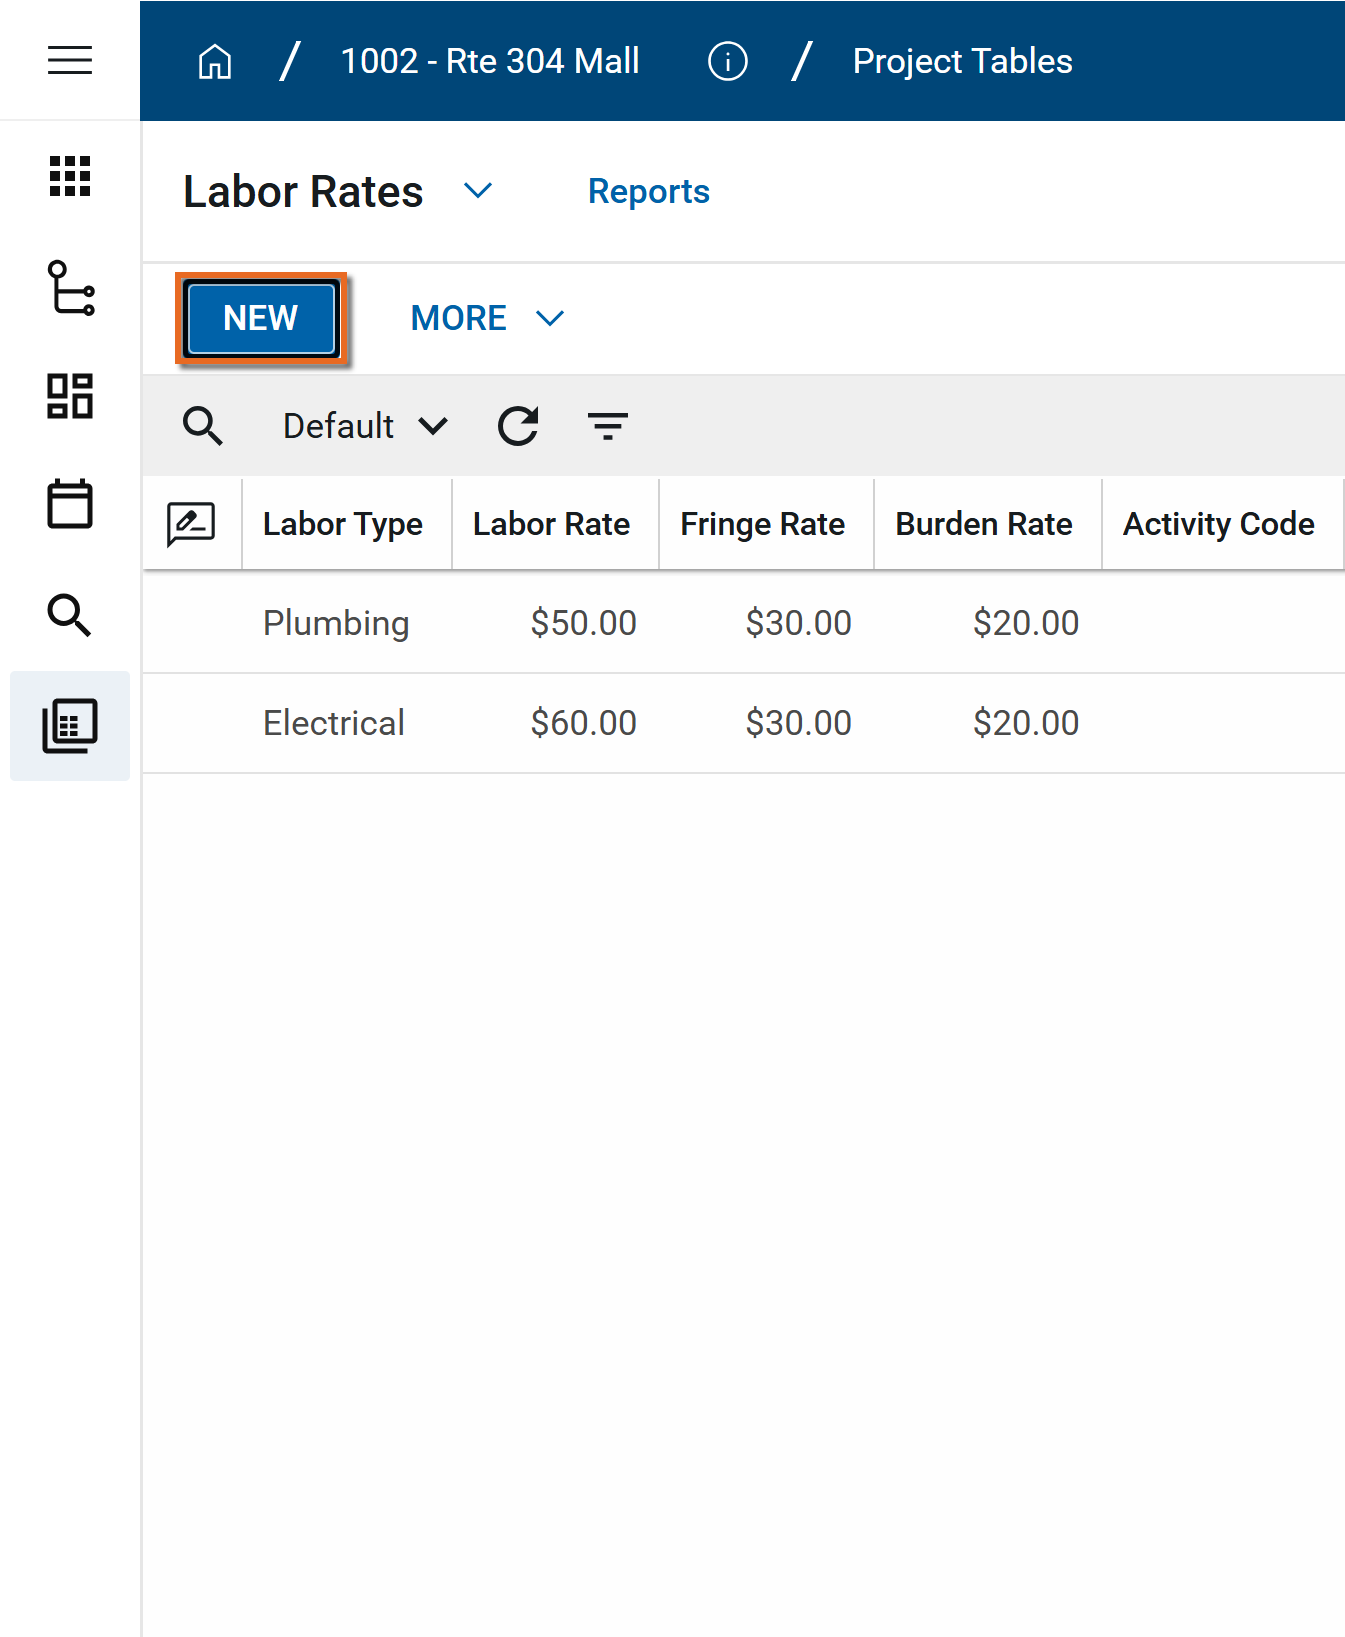
To create a new labor rates record, complete the following steps:
-
Review the header to ensure that you are in the correct project or partition.
-
Navigate to the Project Tables app (Apps > Administration > Project Tables).
-
Select Labor Rates from the menu.

-
Click New in the action bar.
-
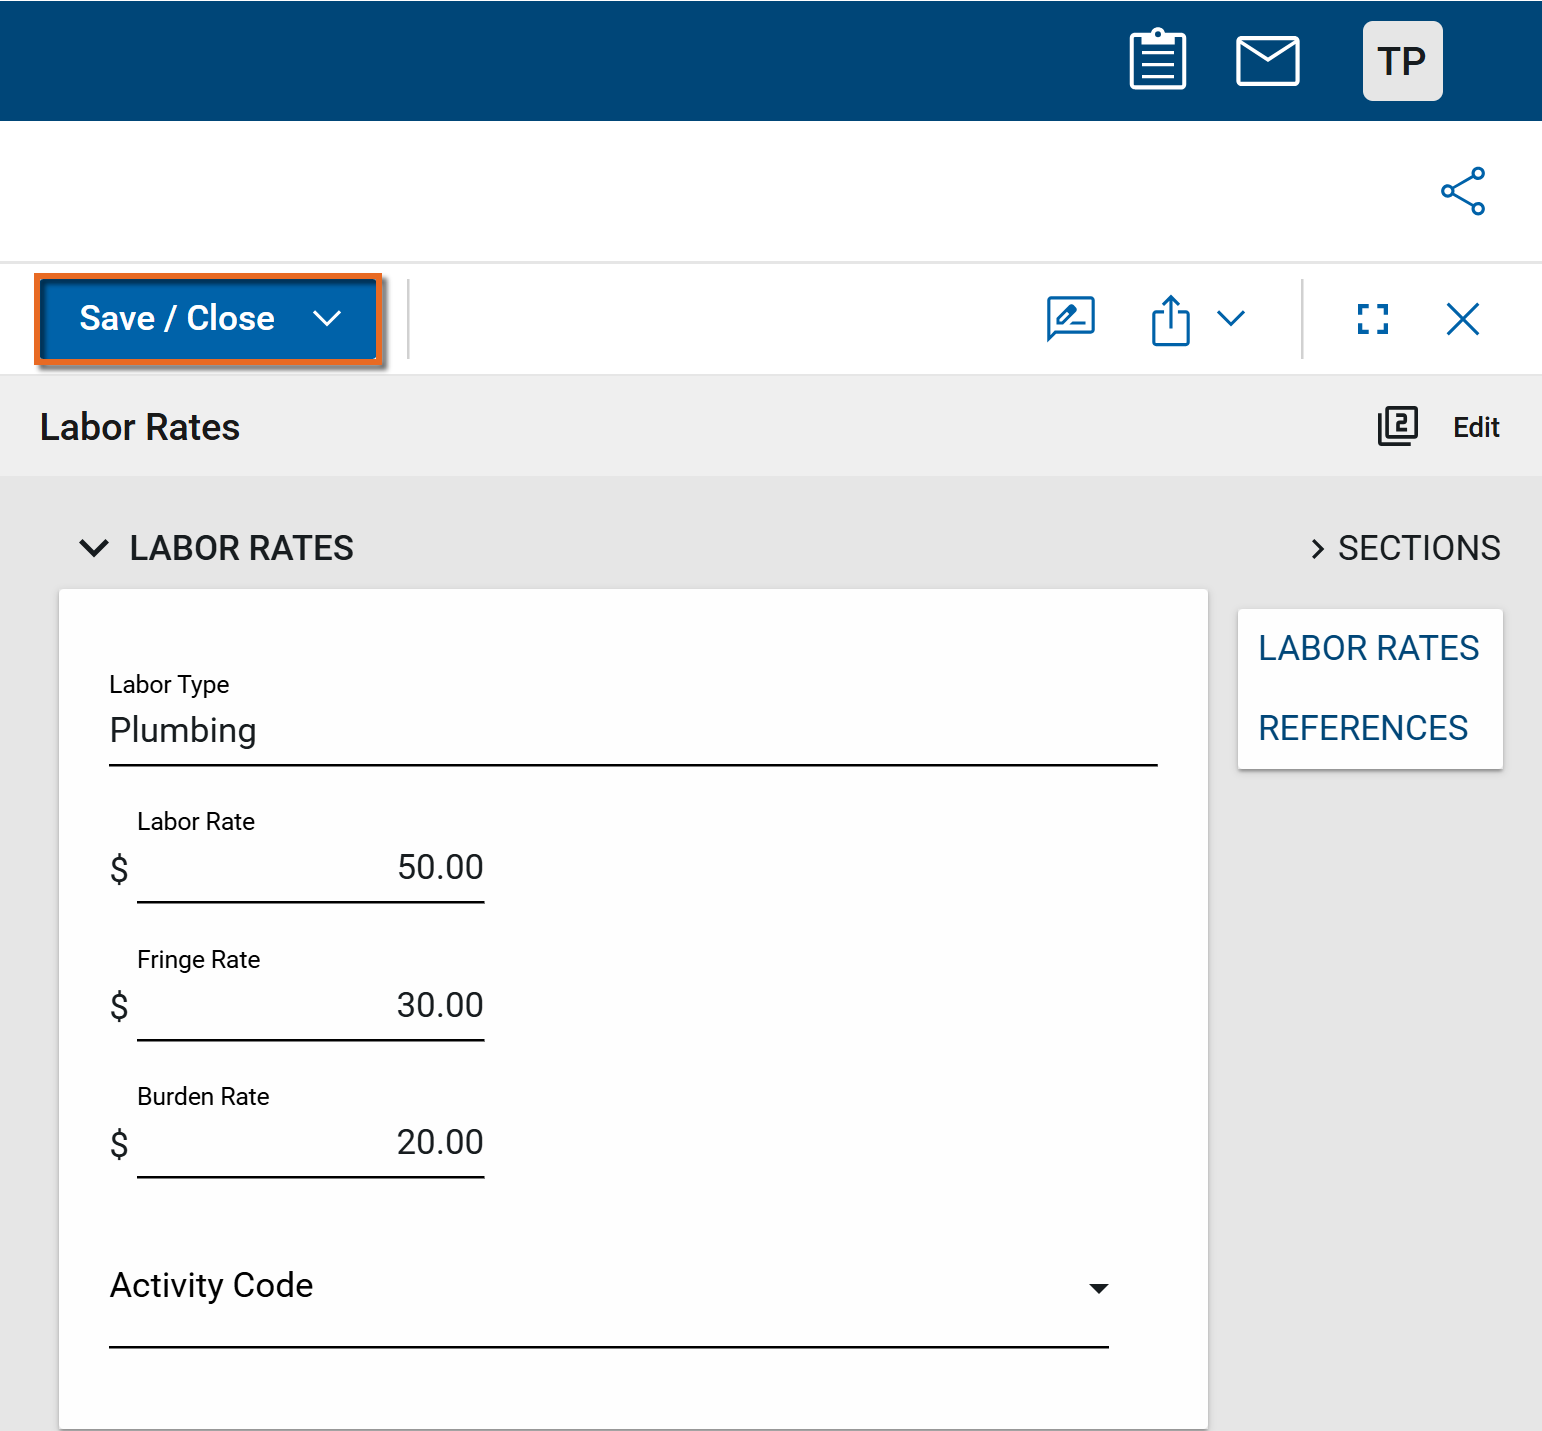
Complete the following fields as appropriate:
Note Depending on how this app is configured for your domain, there may be fields or sections listed here that do not appear for you, fields and sections that appear for you which are not listed here, or fields and sections which appear in a different order. If you have any questions, check with your domain administrator.
Field Description Details Type Enter the type of labor. Labor Rate Enter the labor rate. Fringe Rate Enter the fringe rate. Burden Rate Enter the burden rate. Activity Code Select an activity code. References Upload any relevant files or documents. For more information on using this section, refer to References section. -
Click Save when you are done. The labor rates record will be saved.
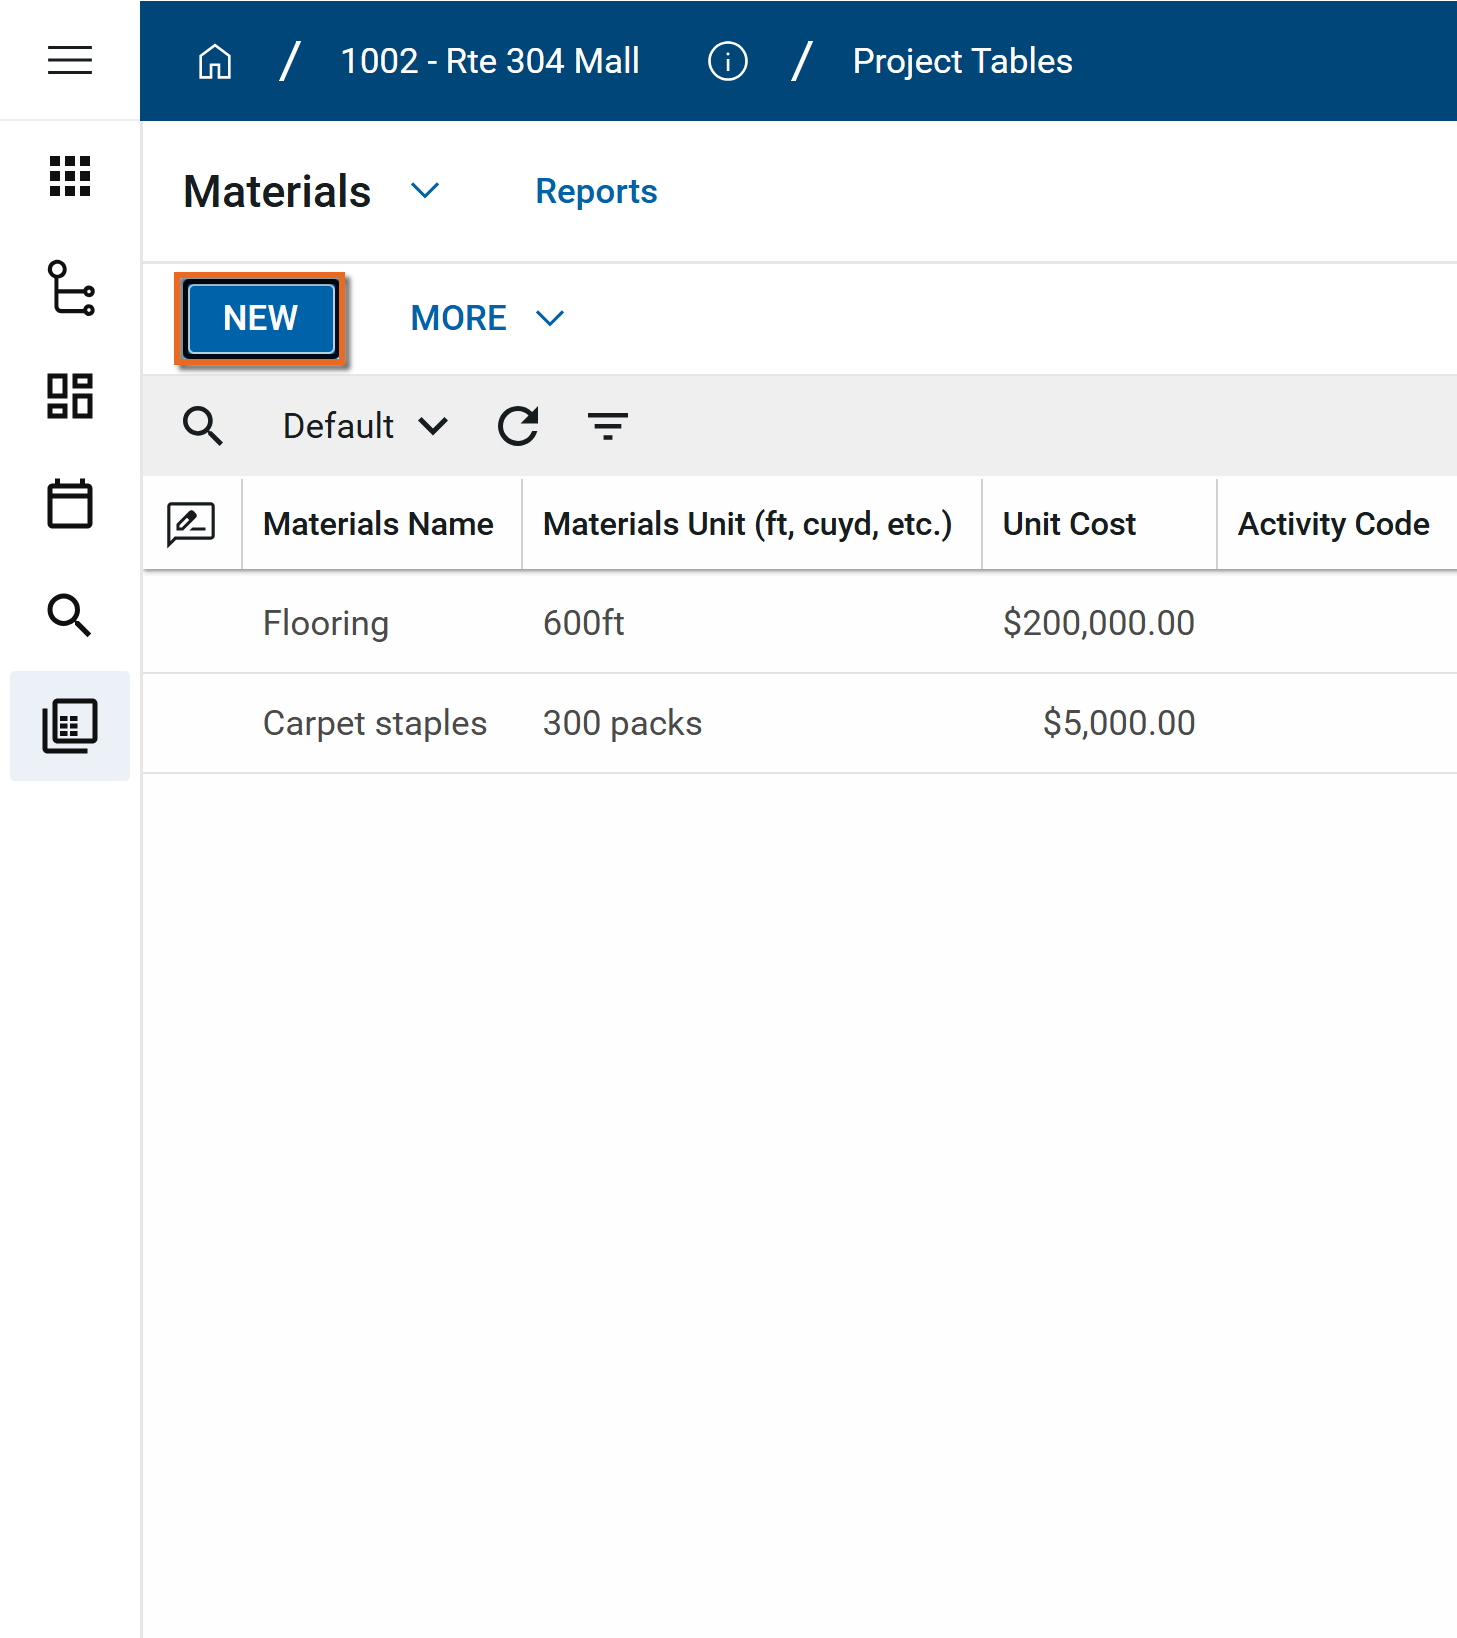
To create a new materials record, complete the following steps:
-
Review the header to ensure that you are in the correct project or partition.
-
Navigate to the Project Tables app (Apps > Administration > Project Tables).
-
Select Materials from the menu.
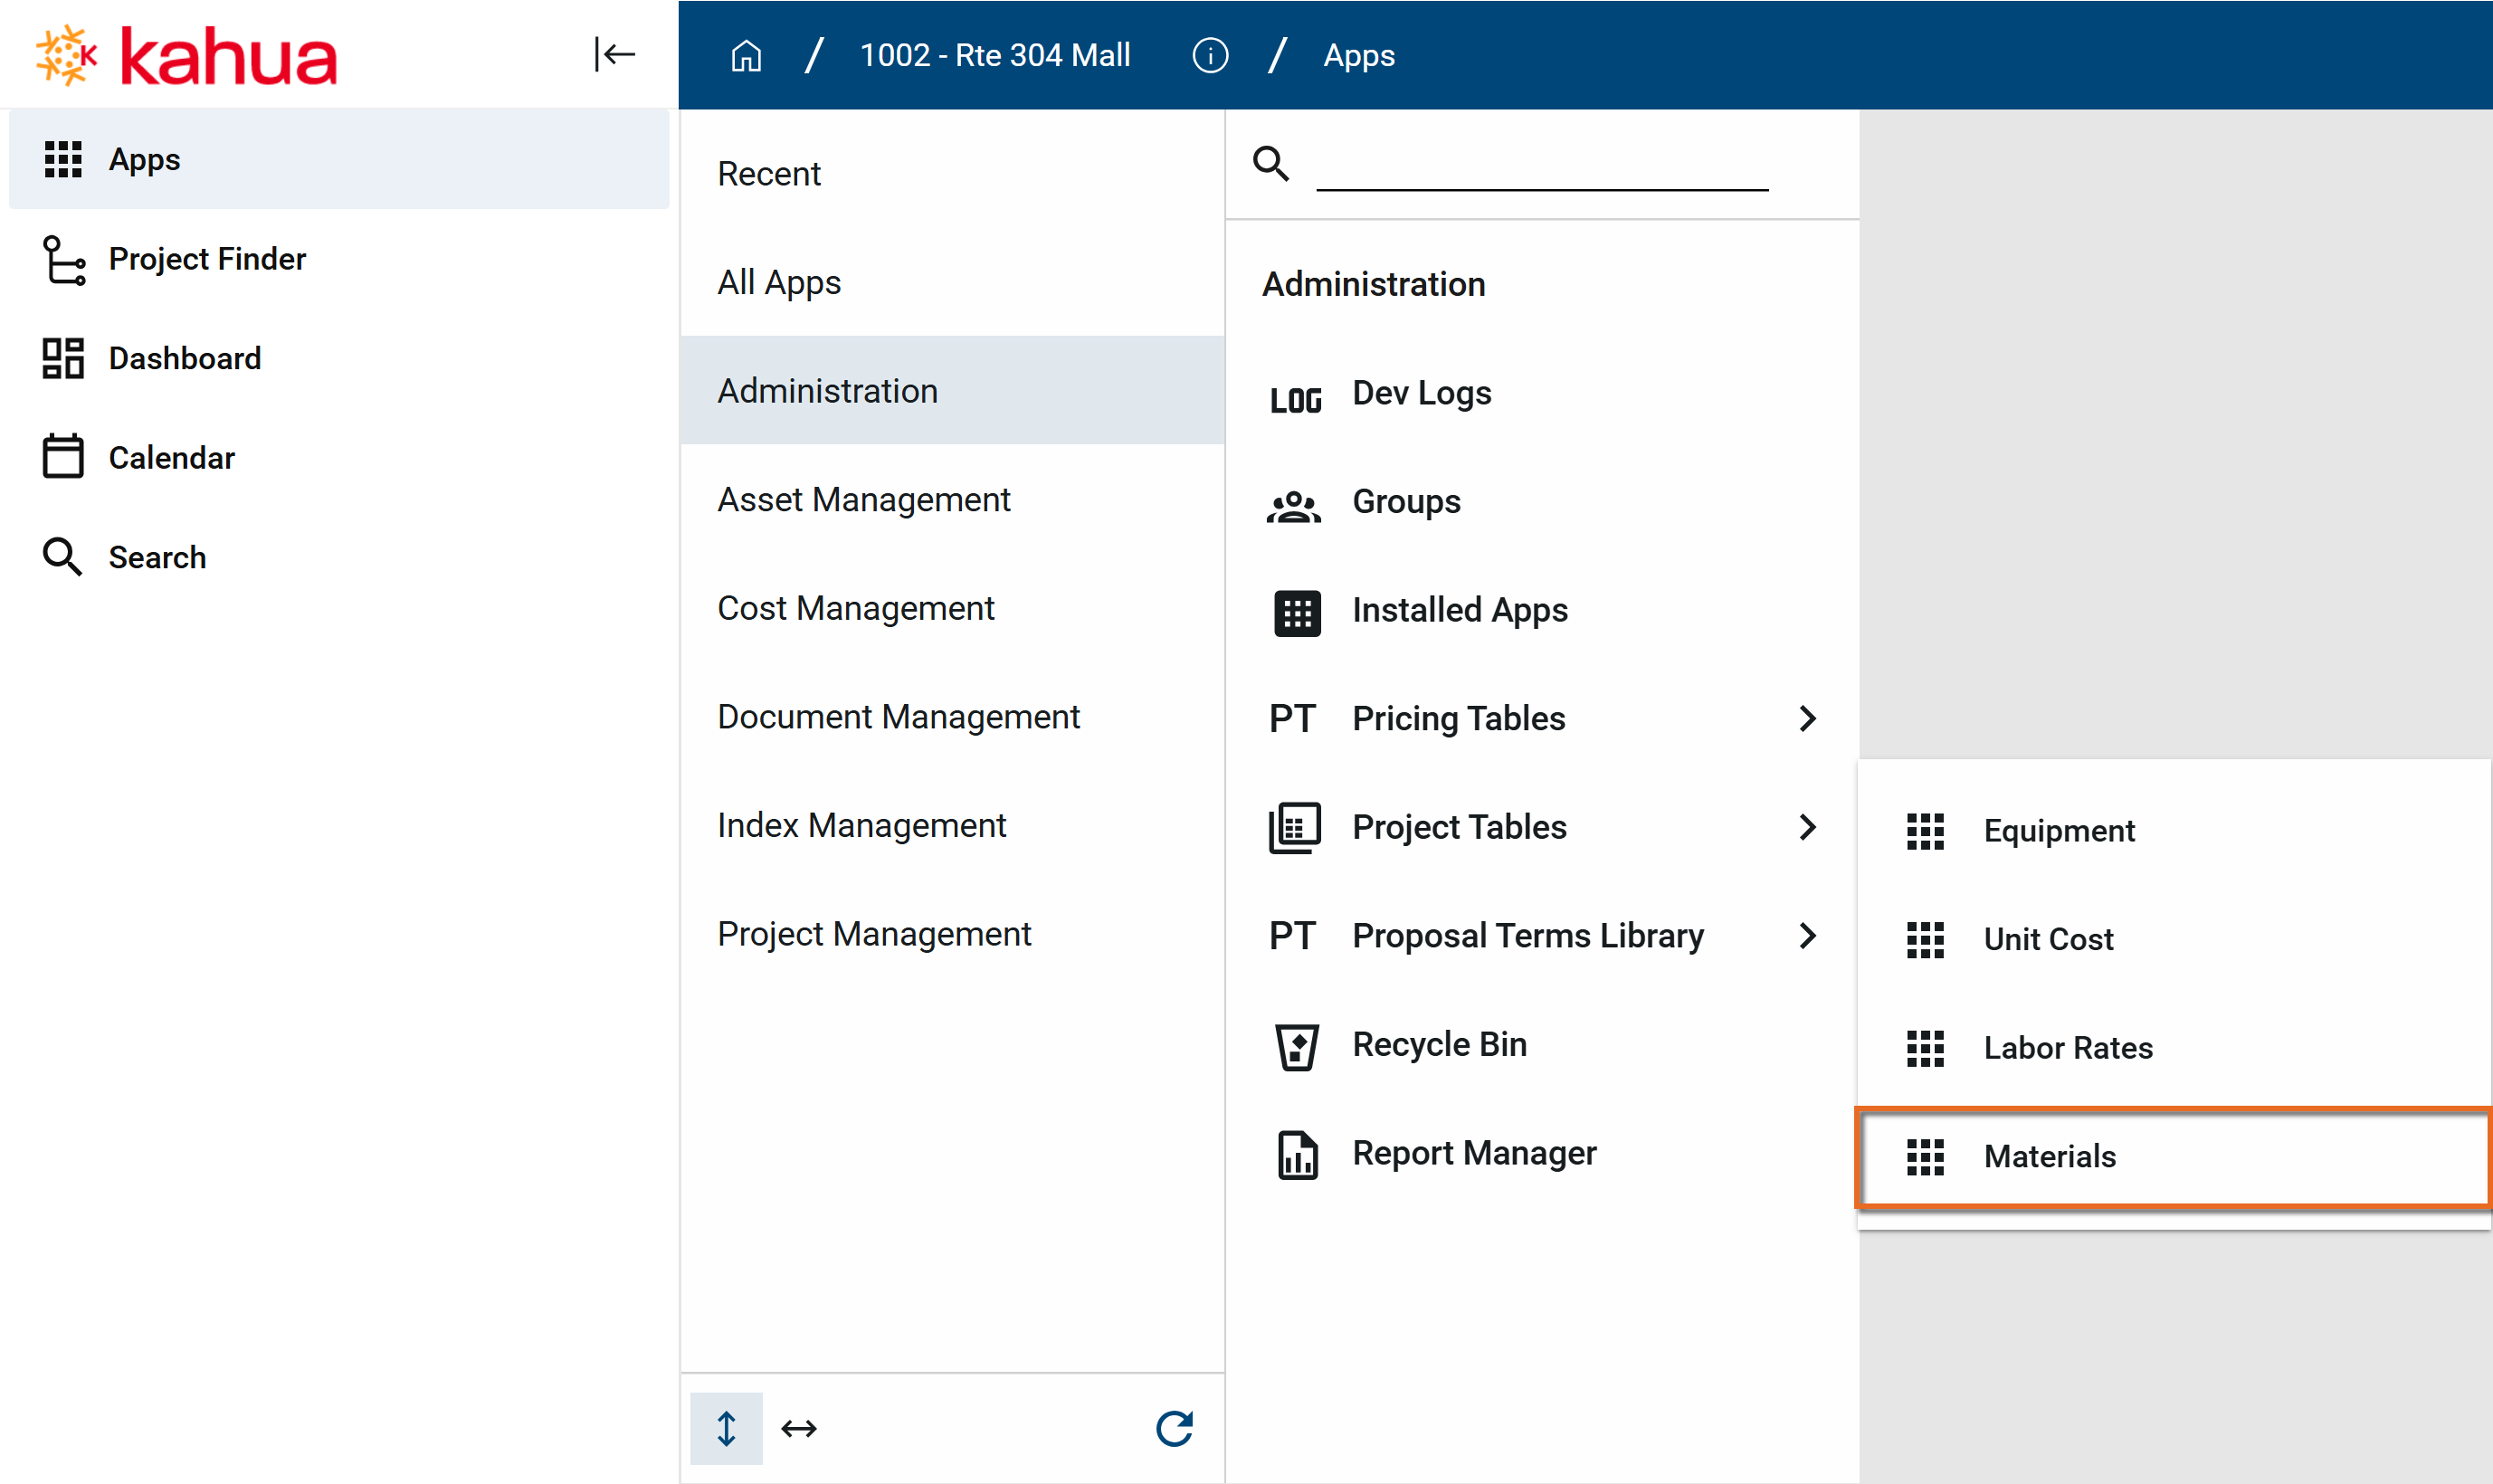
-
Click New in the action bar.
-
Complete the following fields as appropriate:
Note Depending on how this app is configured for your domain, there may be fields or sections listed here that do not appear for you, fields and sections that appear for you which are not listed here, or fields and sections which appear in a different order. If you have any questions, check with your domain administrator.
Field Description Details Name Enter the name of the materials. Unit (ft, cuyd, etc.) Enter the unit for the materials.
Cost Enter the cost of the materials. Activity Code Select an activity code. References Upload any relevant files or documents. For more information on using this section, refer to References section. -
Click Save when you are done. The materials record will be saved.

If you have existing data that you want to import into one of the Project Tables sub-apps, you can do so through the import process.
You will first generate an export of an existing record to access the correctly formatted spreadsheet file for the import. Once the exported file is available, add the appropriate values for the records you want to import to the exported spreadsheet. You can then import those records. For more detailed information on the importing process, refer to Importing records.
To delete a record from any of the four sub-apps, complete the following steps:
-
Review the header to ensure that you are in the correct project or partition.
-
Navigate to the Project Tables app (Apps > Project Management or Document Management > Field Observations).
-
Select the desired sub-app from the menu.
-
Select the desired record from the list.
-
Click the Delete icon
 in the action bar.
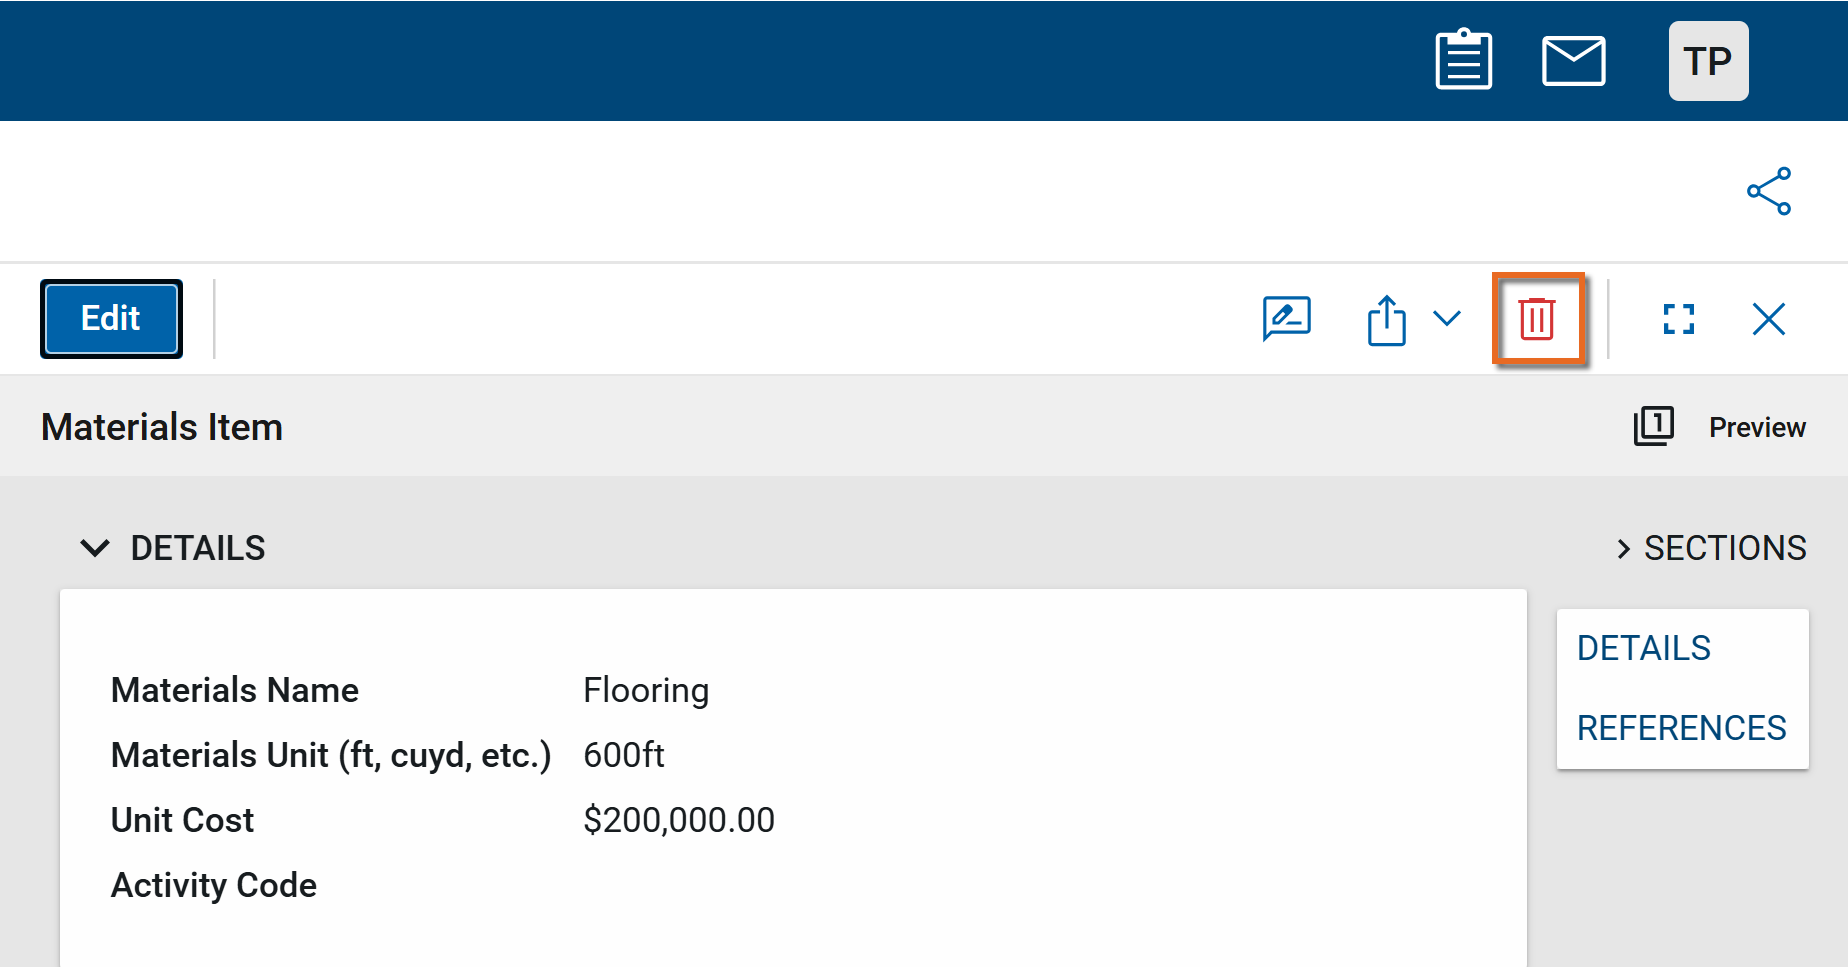
-
Click OK on the confirmation message.
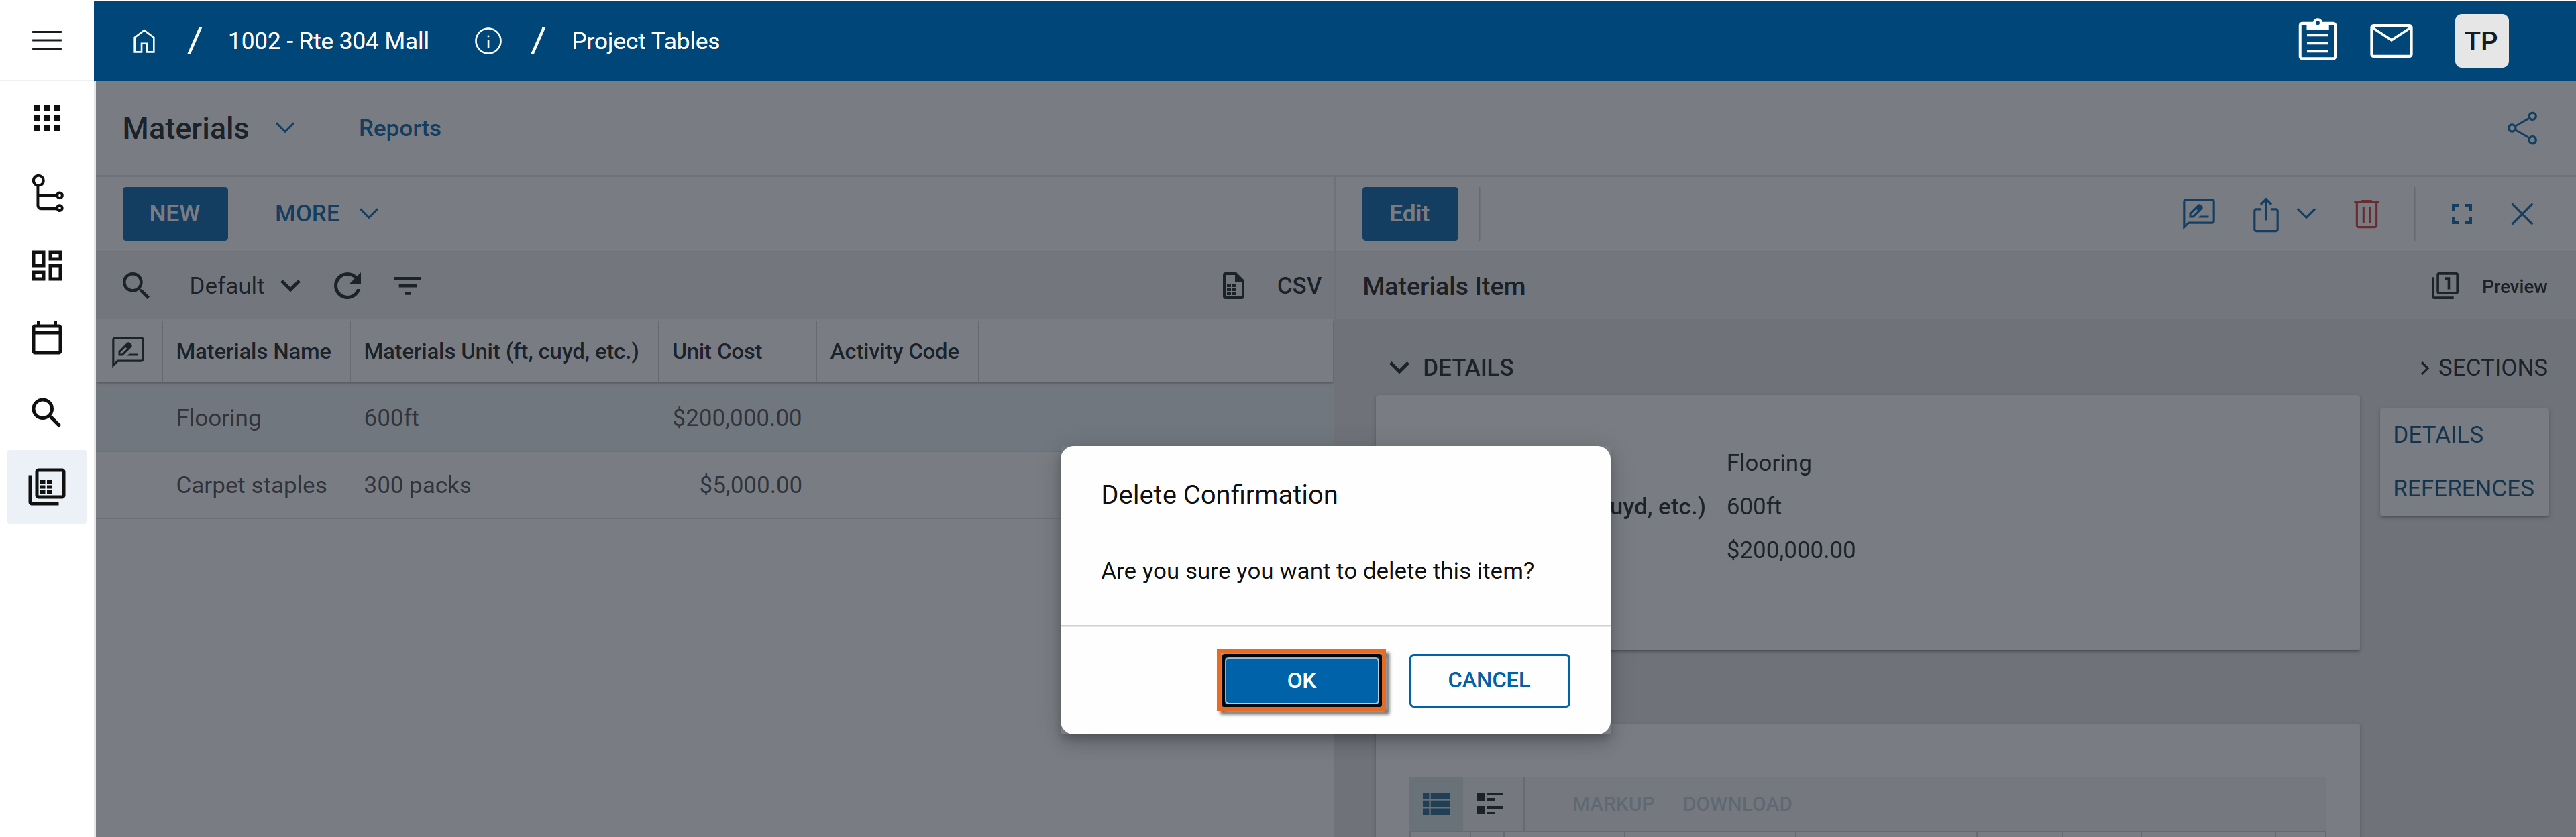
Note If a record was deleted in error, it can be recovered from the Recycle Bin application by an administrator. For more information, refer to Using the Recycle Bin.
Your domain administrator or another user with the appropriate permissions can configure the app in the Configuration application.
Important When working in the Configuration app, it is important to review the header and ensure that you are working at the correct level in the hierarchy, either the root domain or at a partition or project level.
Settings that you establish at the root domain or lower levels will inherit down the hierarchy until they are overridden. For more information on the hierarchical structure of Kahua, refer to Understanding the hierarchical structure of Kahua.
The Configuration app can be accessed directly through the apps list (Apps > Administration > Configuration), or by right-clicking on an application in the launch bar and selecting Configure. When you select Configure for an app from the launch bar, the detail view of the configuration page for that application opens automatically.
For general information on configuring this app in Configuration, refer to Application configuration.