Work Order
Notice Kahua is a very flexible and customizable platform. In your domain, this application may have been modified to meet your company's needs. The online help uses default field labels for field names and describes standard workflows. Please check with your domain administrator for specific information about working in your organization's domain.
The Work Order application keeps track of work orders for a specific project.
Key elements of the Work Order app are as follows:
-
If the signature approval workflow is set up, work orders can be sent for signature approval.
-
A work order can be shared with others via attachment to email or link.
-
Work orders can be canceled or deleted. Only domain administrators can reopen canceled work orders.
How to . . .
To create a new work order, complete the following steps:
-
Review the header to ensure that you are in the correct project or partition.
-
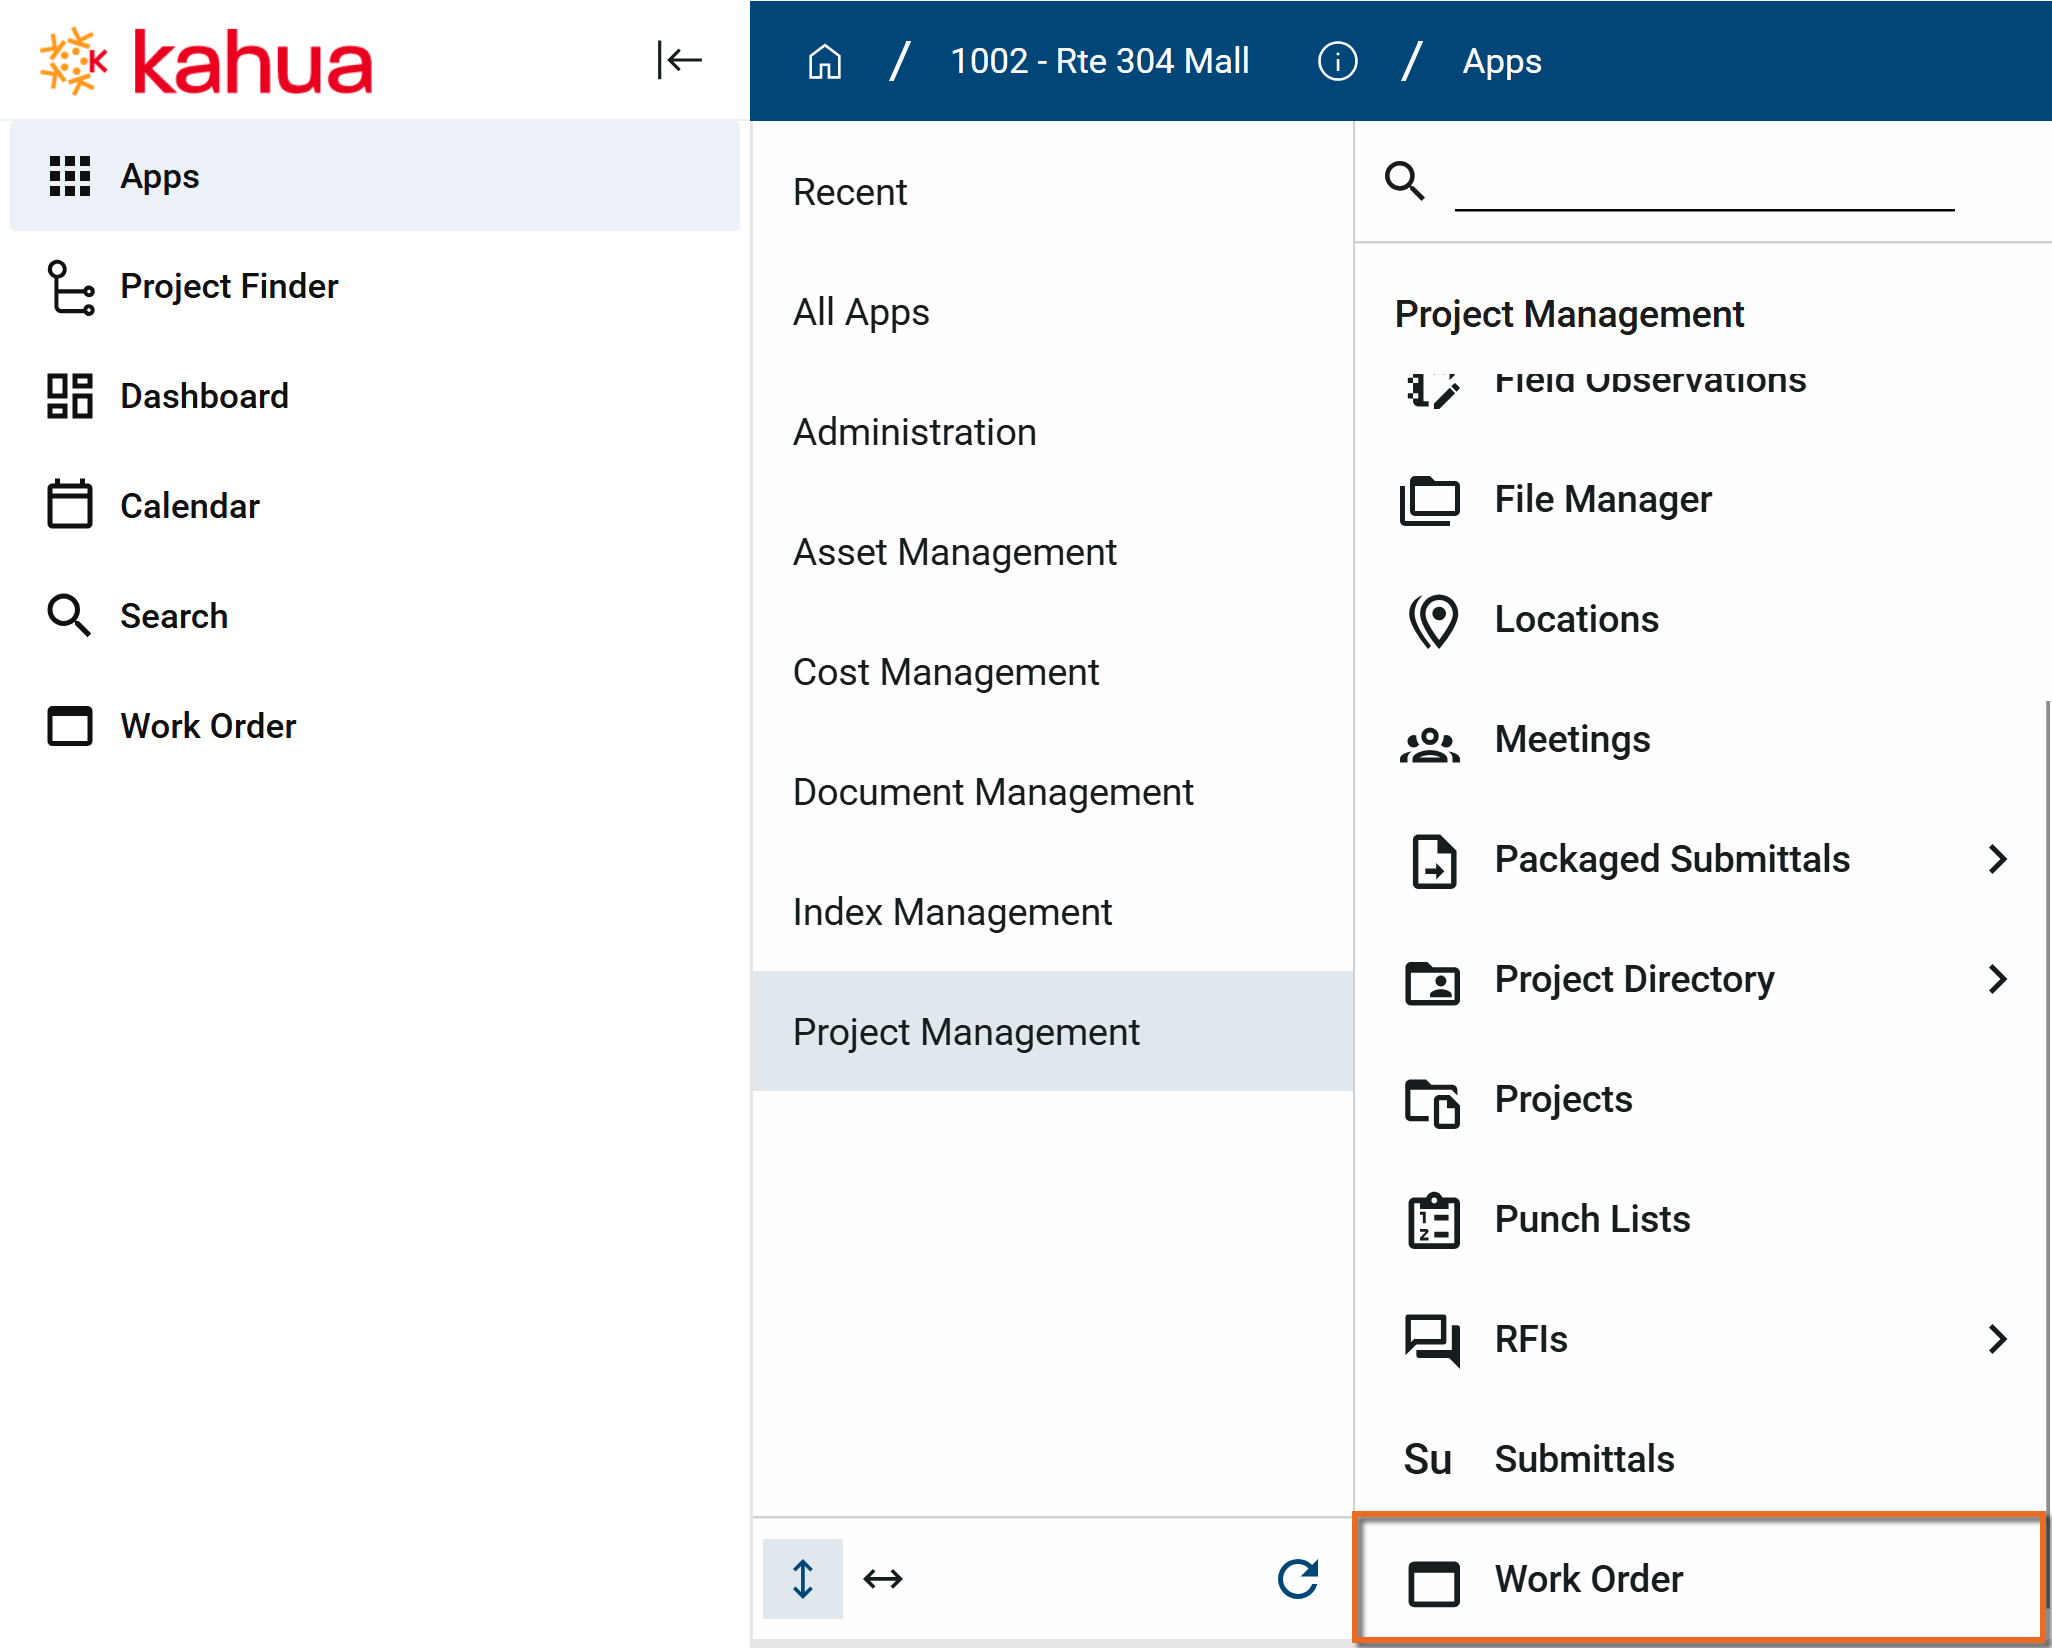
Navigate to the Work Order application (Apps > Project Management > Work Order). Alternatively, enter "Work Order" in the search bar.
-
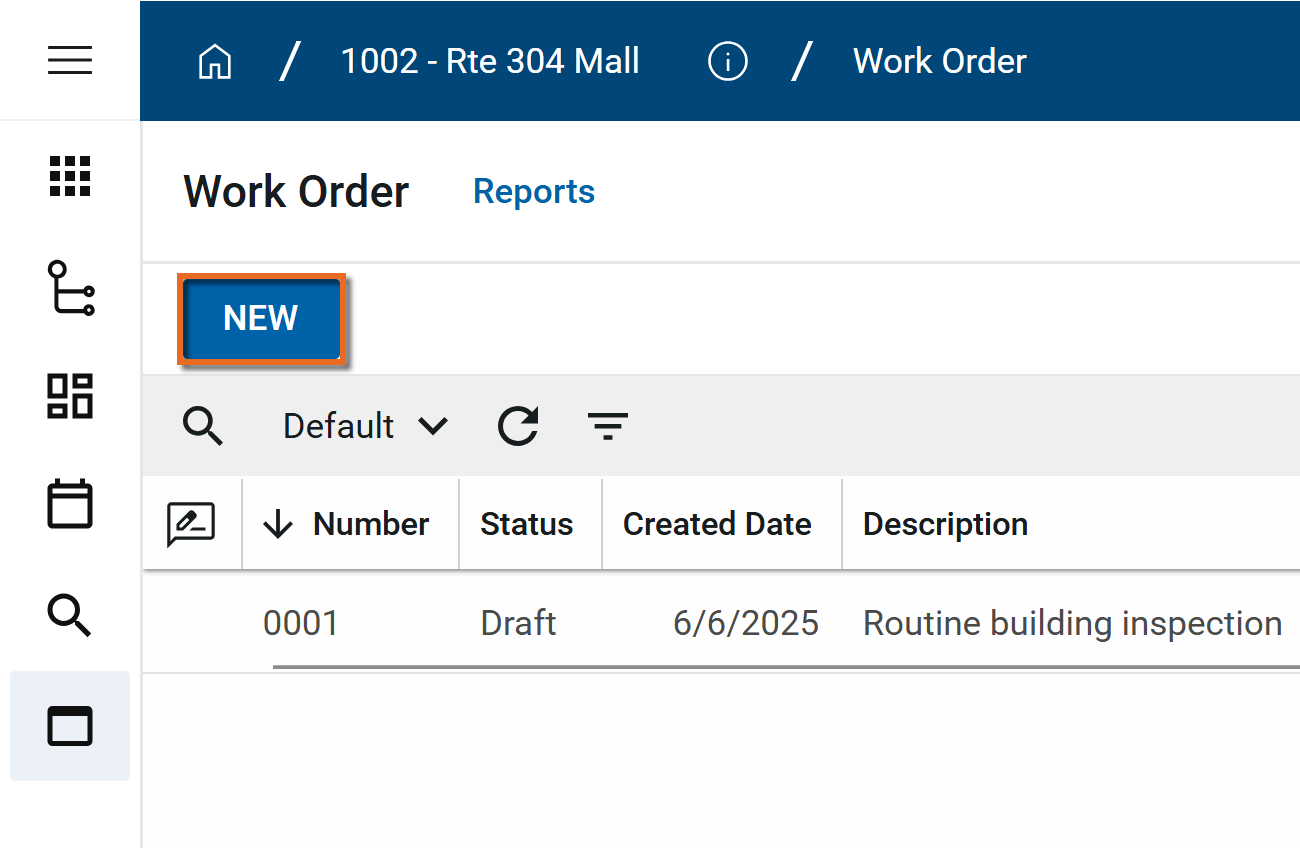
Click New in the action bar.
-
Complete the following fields as appropriate:
Note Depending on how this app is configured for your domain, there may be fields or sections listed here that do not appear for you, fields and sections that appear for you which are not listed here, or fields and sections which appear in a different order. If you have any questions, check with your domain administrator.
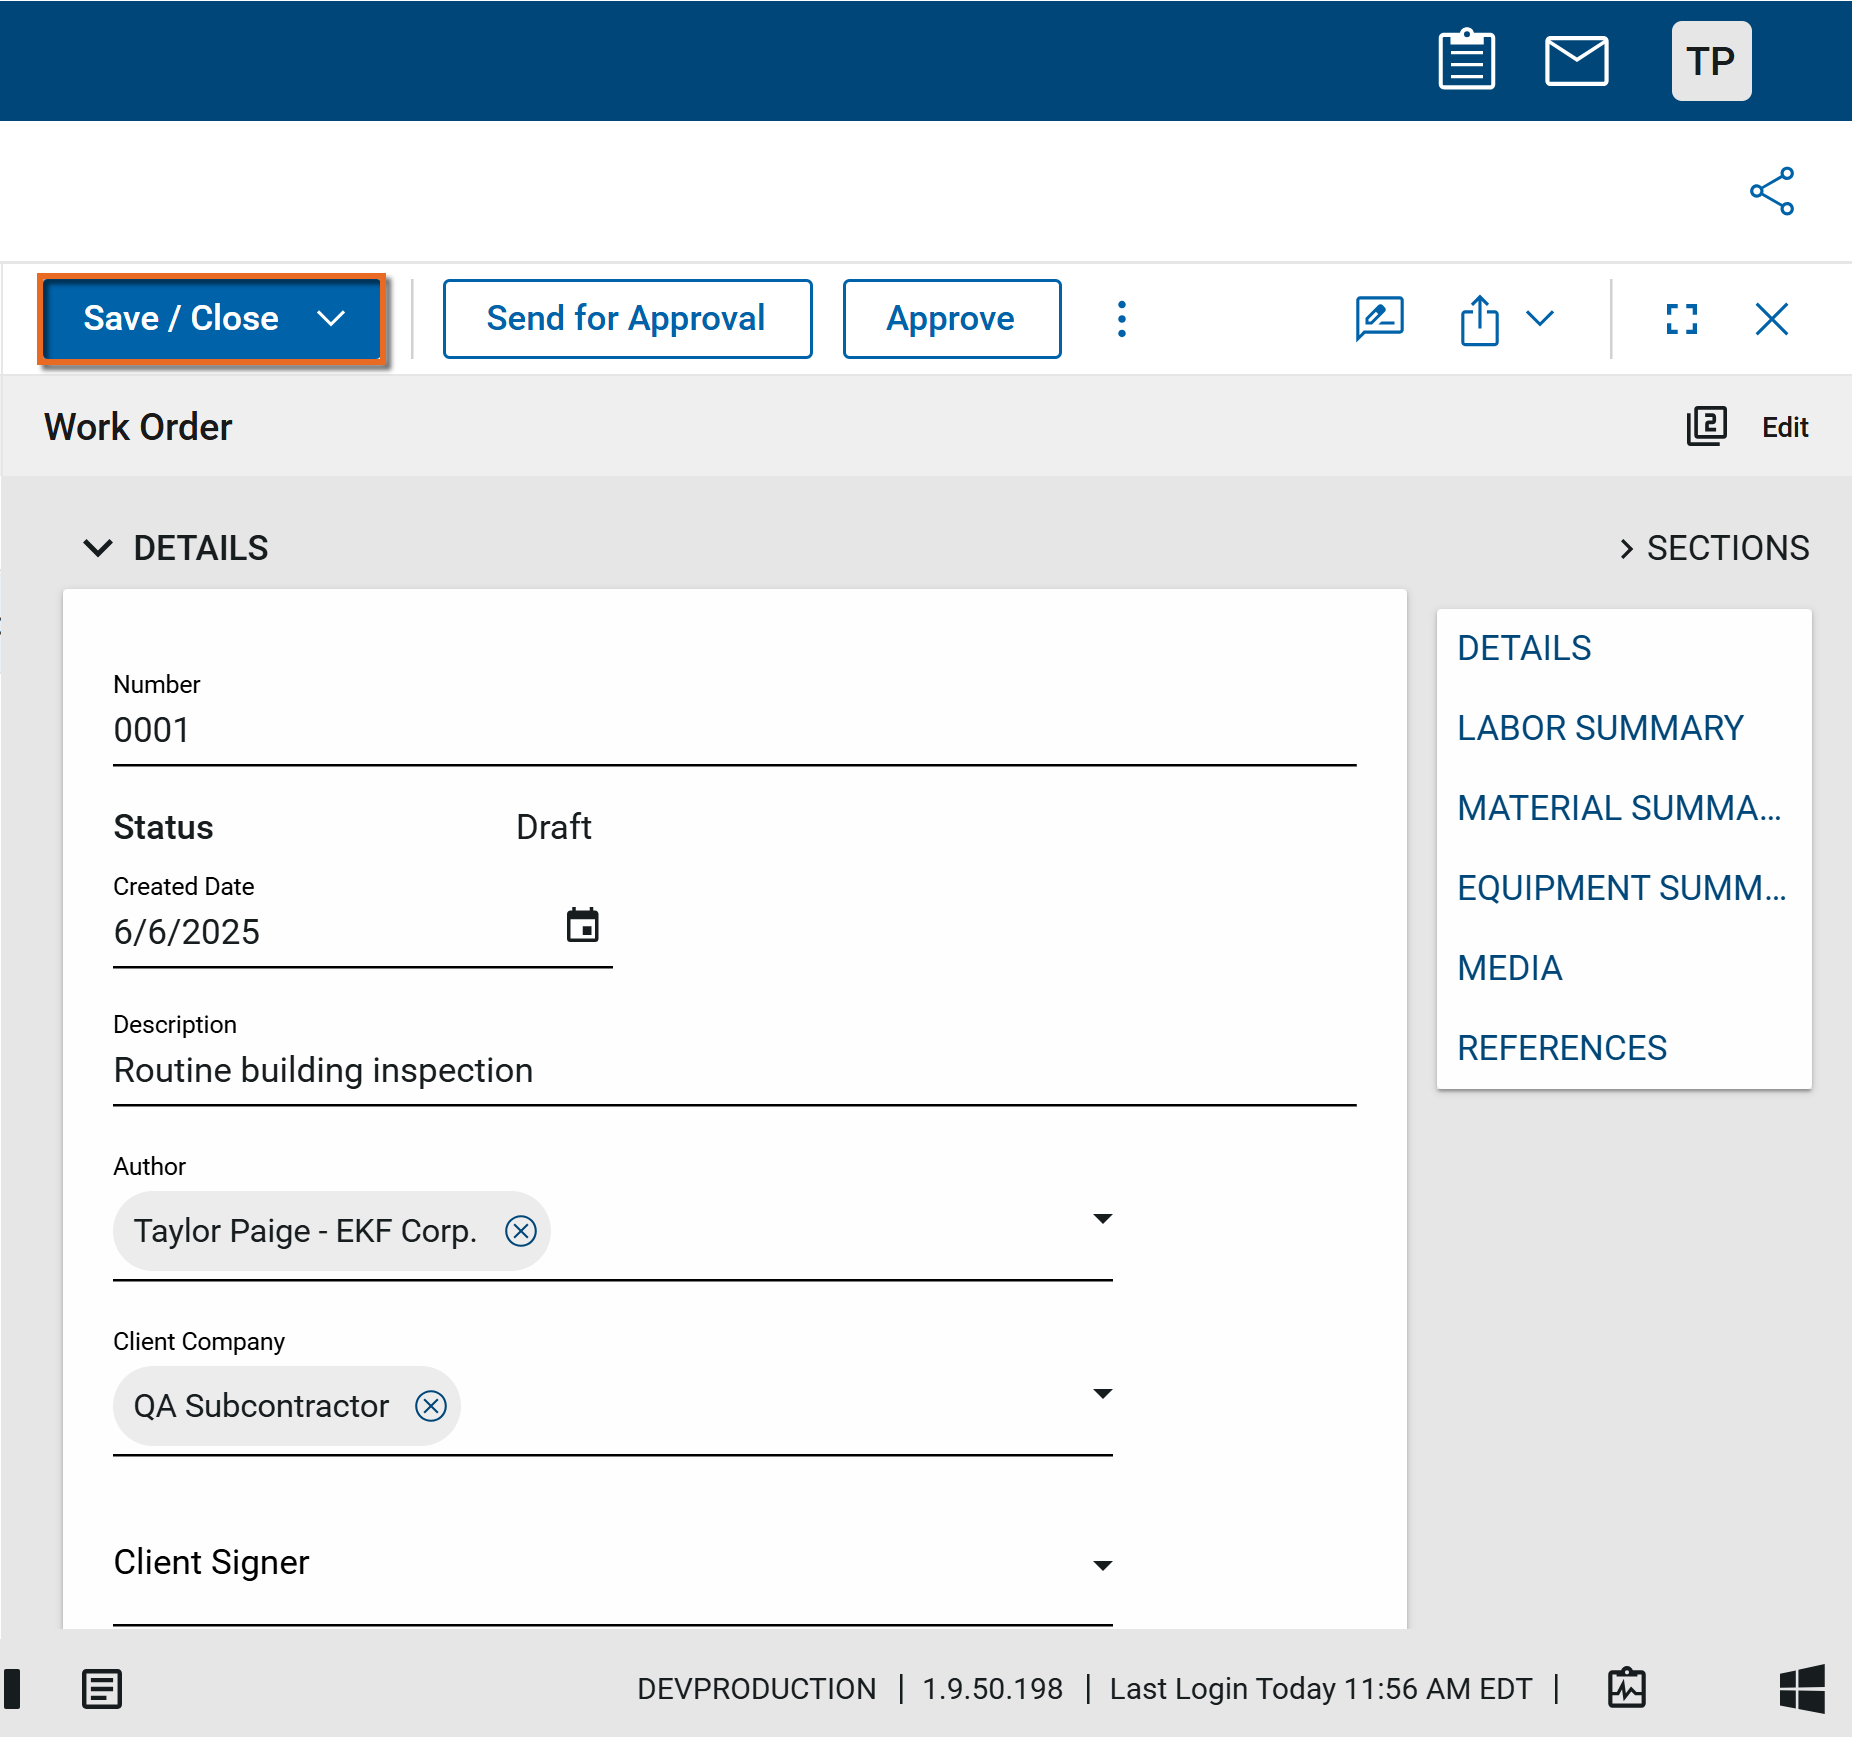
Field Description Details Number Allow Kahua to auto-number the record or enter a different value.
Note The number format can be configured by your domain administrator. Refer to Number.
Status This field is read-only. As the action item moves through the workflow, this value will update. Date By default, today's date appears. Modify if appropriate. Description Enter a brief description of the work order. Author By default, your name appears here. Select another contact if appropriate. Client Company Select the client company. Client Signer Select the client signer. Requester By default, your name appears here. Select another contact if appropriate. Reason Select a reason for submitting the work order.
Note This lookup list is managed in the Configuration app. Refer to Lookups.
Scope of Work (SOW) Enter the Scope of Work details. Schedule Impact Select the expected schedule impact.
Note This lookup list is managed in the Configuration app. Refer to Lookups.
Labor For more information on working with grids, refer to Item Grids. Type Select the labor type.
Note This list is managed in the Project Tables app. Refer to Project Tables.Quantity Enter the quantity Material For more information on working with grids, refer to Item Grids. Material Item Select the material item.
Note This list is managed in the Project Tables app. Refer to Project Tables.Quantity Enter the quantity. Unit Type By default, the data from the existing Project Table appears.
Note This list is managed in the Project Tables app. Refer to Project Tables.Equipment Equipment Name Select the equipment name.
Note This list is managed in the Project Tables app. Refer to Project Tables.Quantity Enter the quantity. Unit Type By default, the data from the existing Project Table appears. Media Upload any relevant image files. For more information on using this section, refer to Media section. References Upload any relevant files or documents. For more information on using this section, refer to References section. -
Click Save in the action bar when you are done. The work order is now saved as a draft.
An approval document is a combination of supporting files in a single PDF document that can be routed through the approval workflow.
To create an approval document, complete the following steps:
-
Review the header to ensure that you are in the correct project or partition.
-
Navigate to the application.
-
Select the appropriate record to open it in the detail pane and click Edit.
-
In the References section, select Add Approval Doc. You may need to click the More icon
 to access the option.
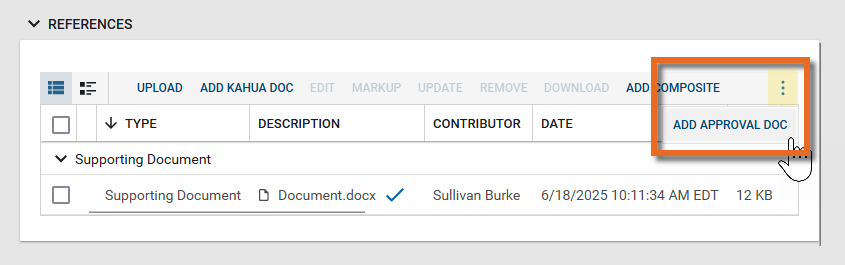
-
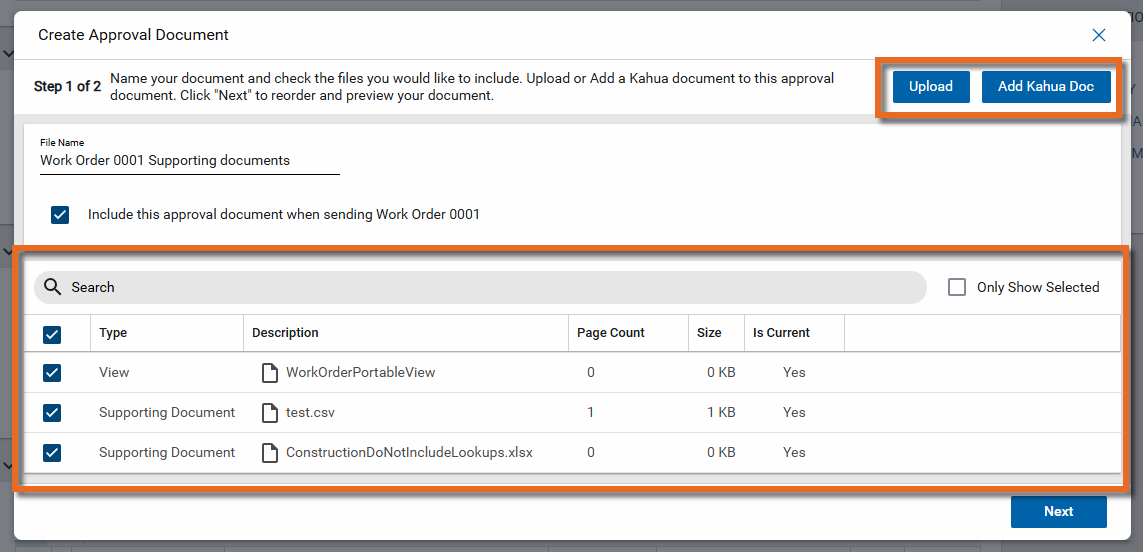
The Create Approval Document dialog appears. Enter a name for the resulting file. This is the name that will appear on the document as it routes through the approval process. Consider including information that identifies the original record, such as the item number and name. To include this approval document when routing the record for approval, select Include this approval document when sending . . . .

-
The file list includes the portable view of the record with the type "View". This is a summary PDF of the original record.
Any additional reference files from the record also appear. You can add additional files from your computer by selecting Upload, or select Add Kahua Doc to add existing documents from the File Manager app.
-
Select the files to include in the approval doc by clicking the check box next to the appropriate files. To only include the original document, select the "View" file.
Important Your organization may require specific documents be included in an approval document for records from this application. Refer to your organization's policies to determine what records to include.
-
Click Next when you have added all the appropriate files. You must enter a File Name and select at least one file to move to the next step.
-
In this next step, you can re-order documents by selecting the grabber icon
 next to an item and dragging it to the appropriate location. You can also select Move to Top or Move to Bottom, or use the
  icons. Click Remove to remove a file.
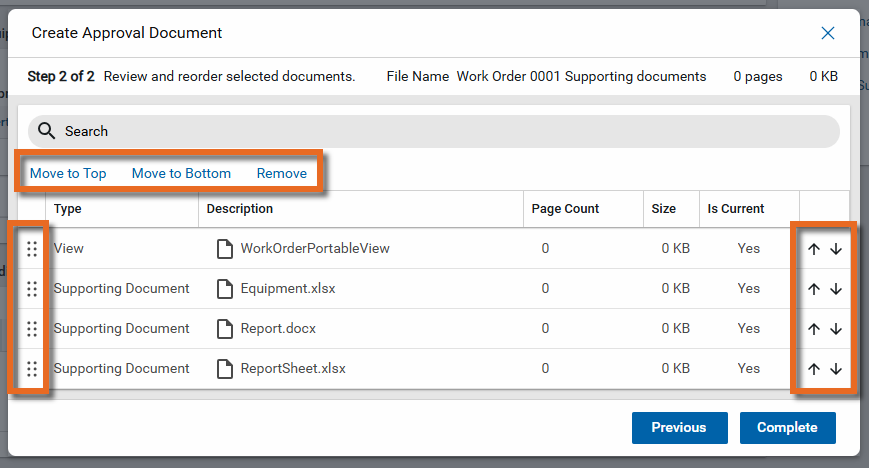
-
Once you are satisfied with the order of the included documents, click Complete. The new document with the assigned file name appears in the record's References section under the Approval Document grouping.

Important The approval document is included in the approval workflow if Use Approval Document is selected in the Approval configuration. If that option is not selected, the standard portable view of the record will be used in the approval process. Refer to Use Approval Document.
To cancel a work order, complete the following steps:
-
Review the header to ensure that you are in the correct project or partition.
-
Navigate to the Work Order application (Apps > Project Management > Work Order). Alternatively, type "Work Order" into the search.
-
Click the desired Work Order from the list.
-
Click Cancel in the action bar. You may need to click the More icon
to access this option if it is hidden for space reasons.
-
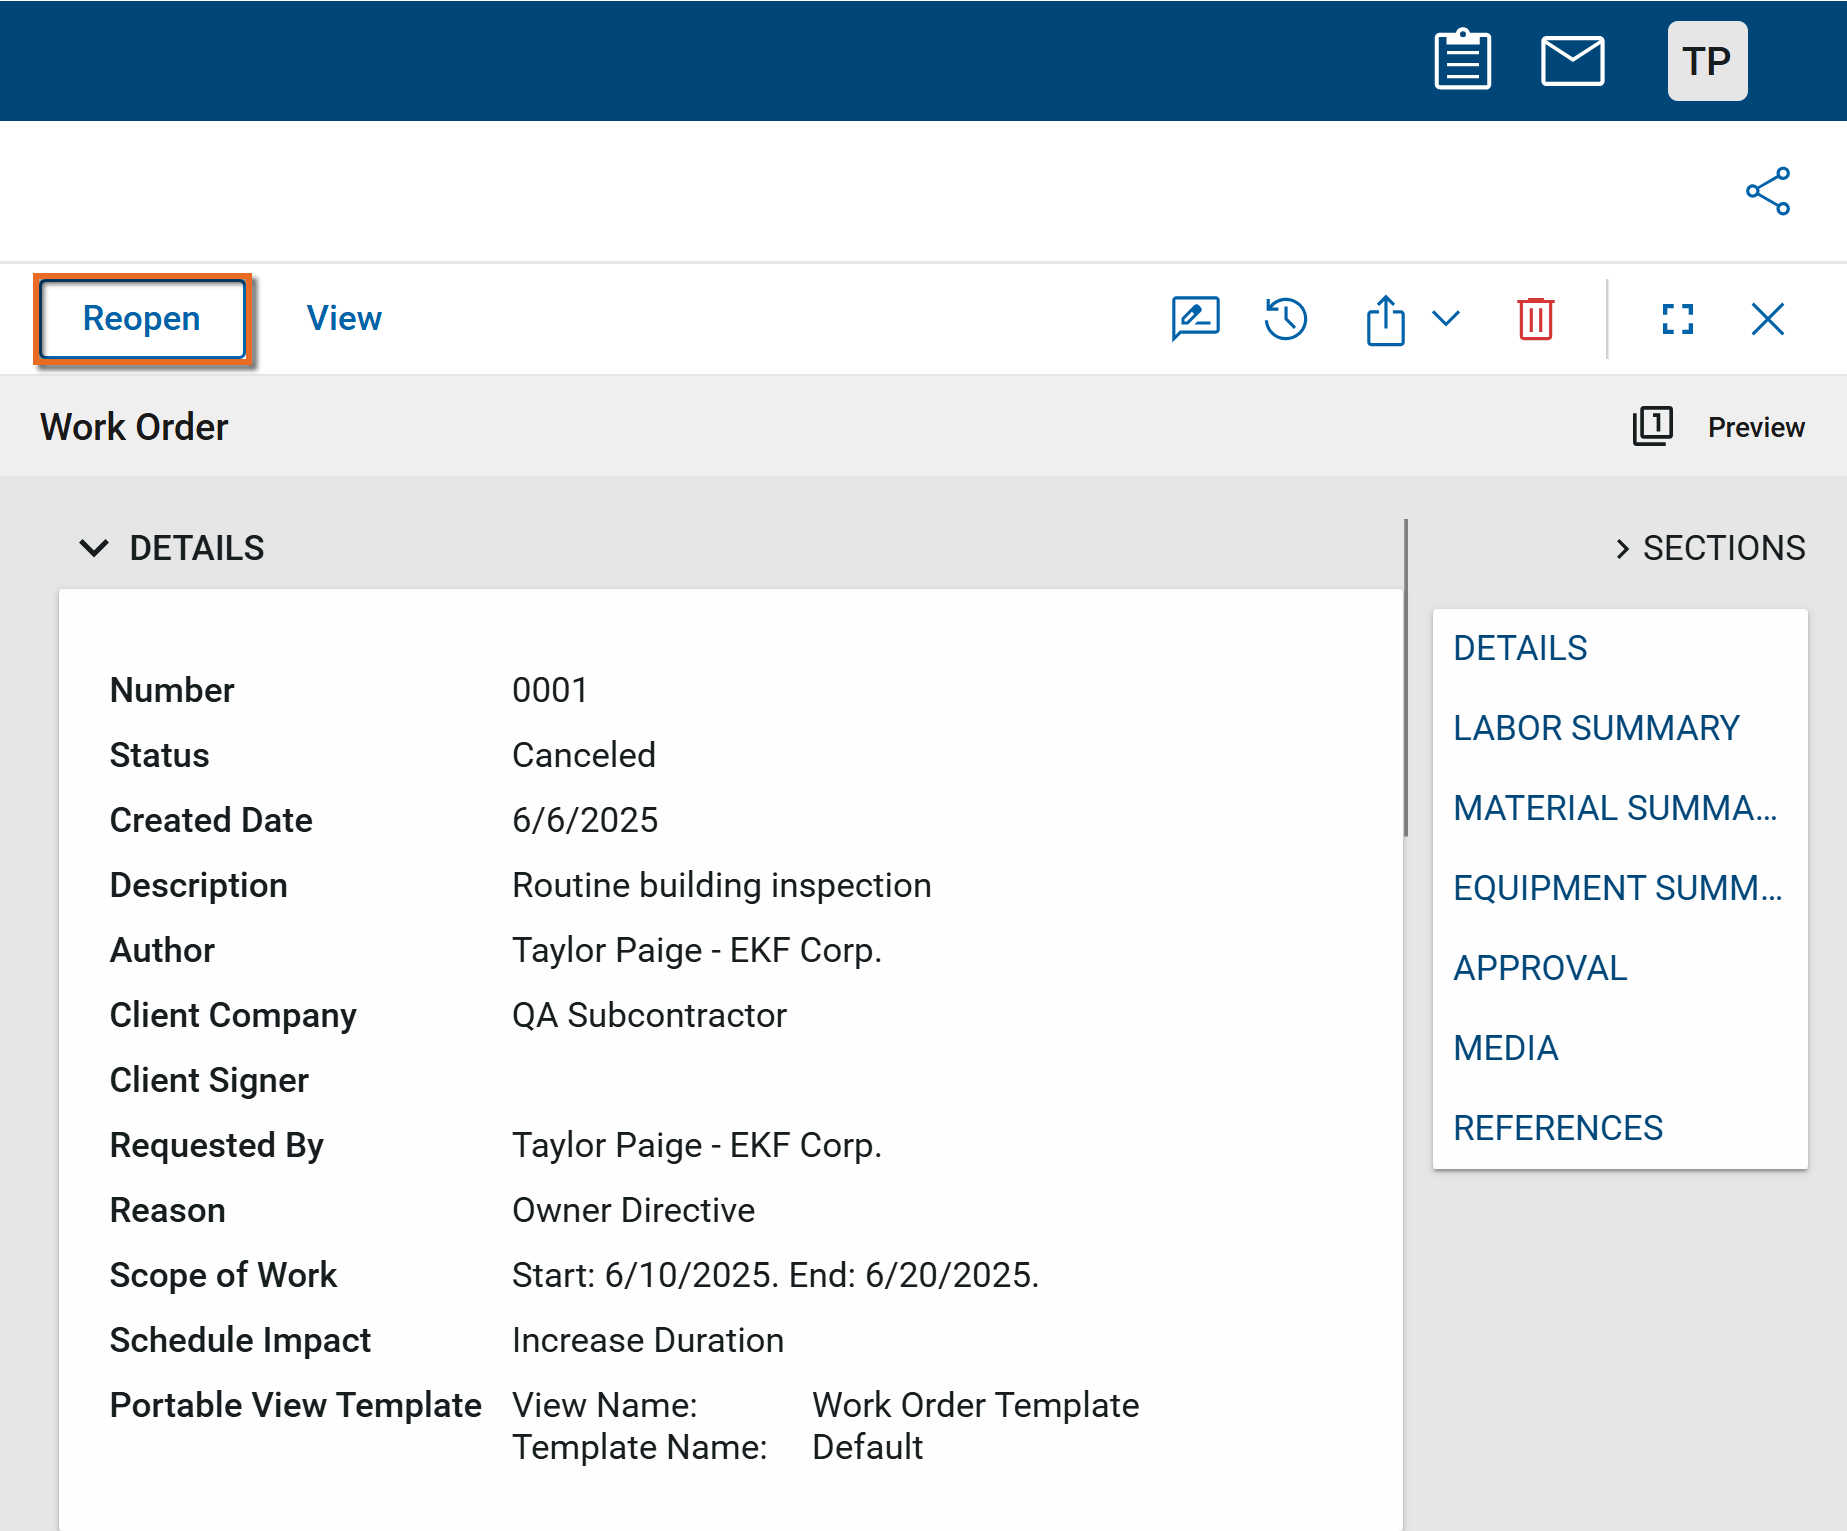
The work order will now show its status as "Canceled." It can no longer be edited or sent for approval.
Note Only the domain administrator can reopen canceled work orders. -
Click Reopen in the action bar to reopen the work order.
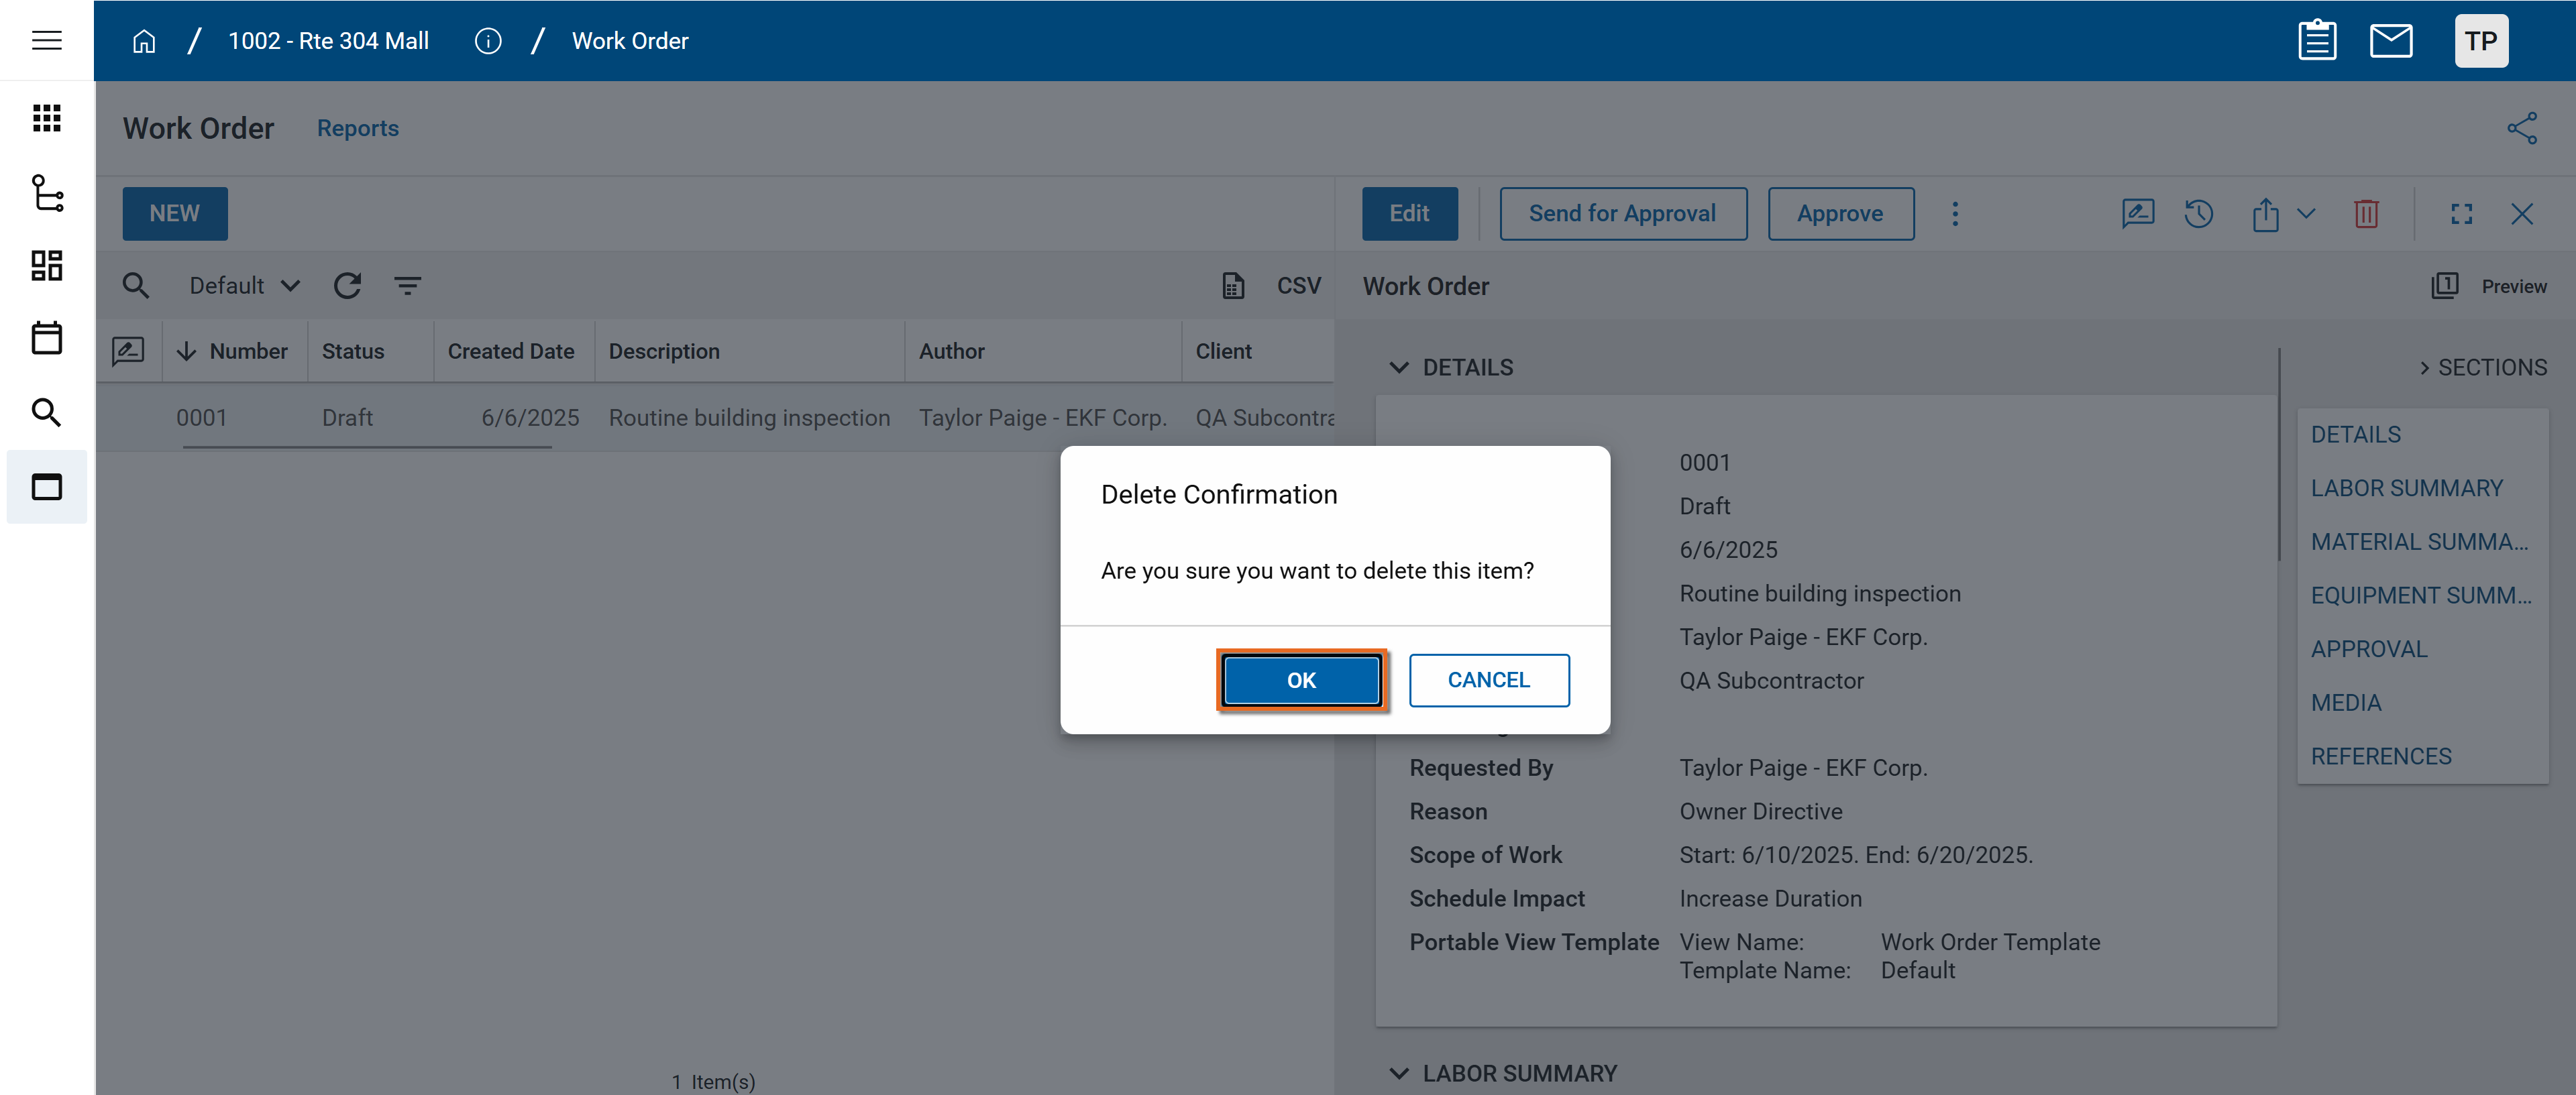
To delete a work order, complete the following steps:
-
Review the header to ensure that you are in the correct project or partition.
-
Navigate to the Work Order application (Apps > Project Management > Work Order). Alternatively, type "Work Order" into the search.
-
Click the desired Work Order from the list.
-
Click the Delete icon
 in the action bar.
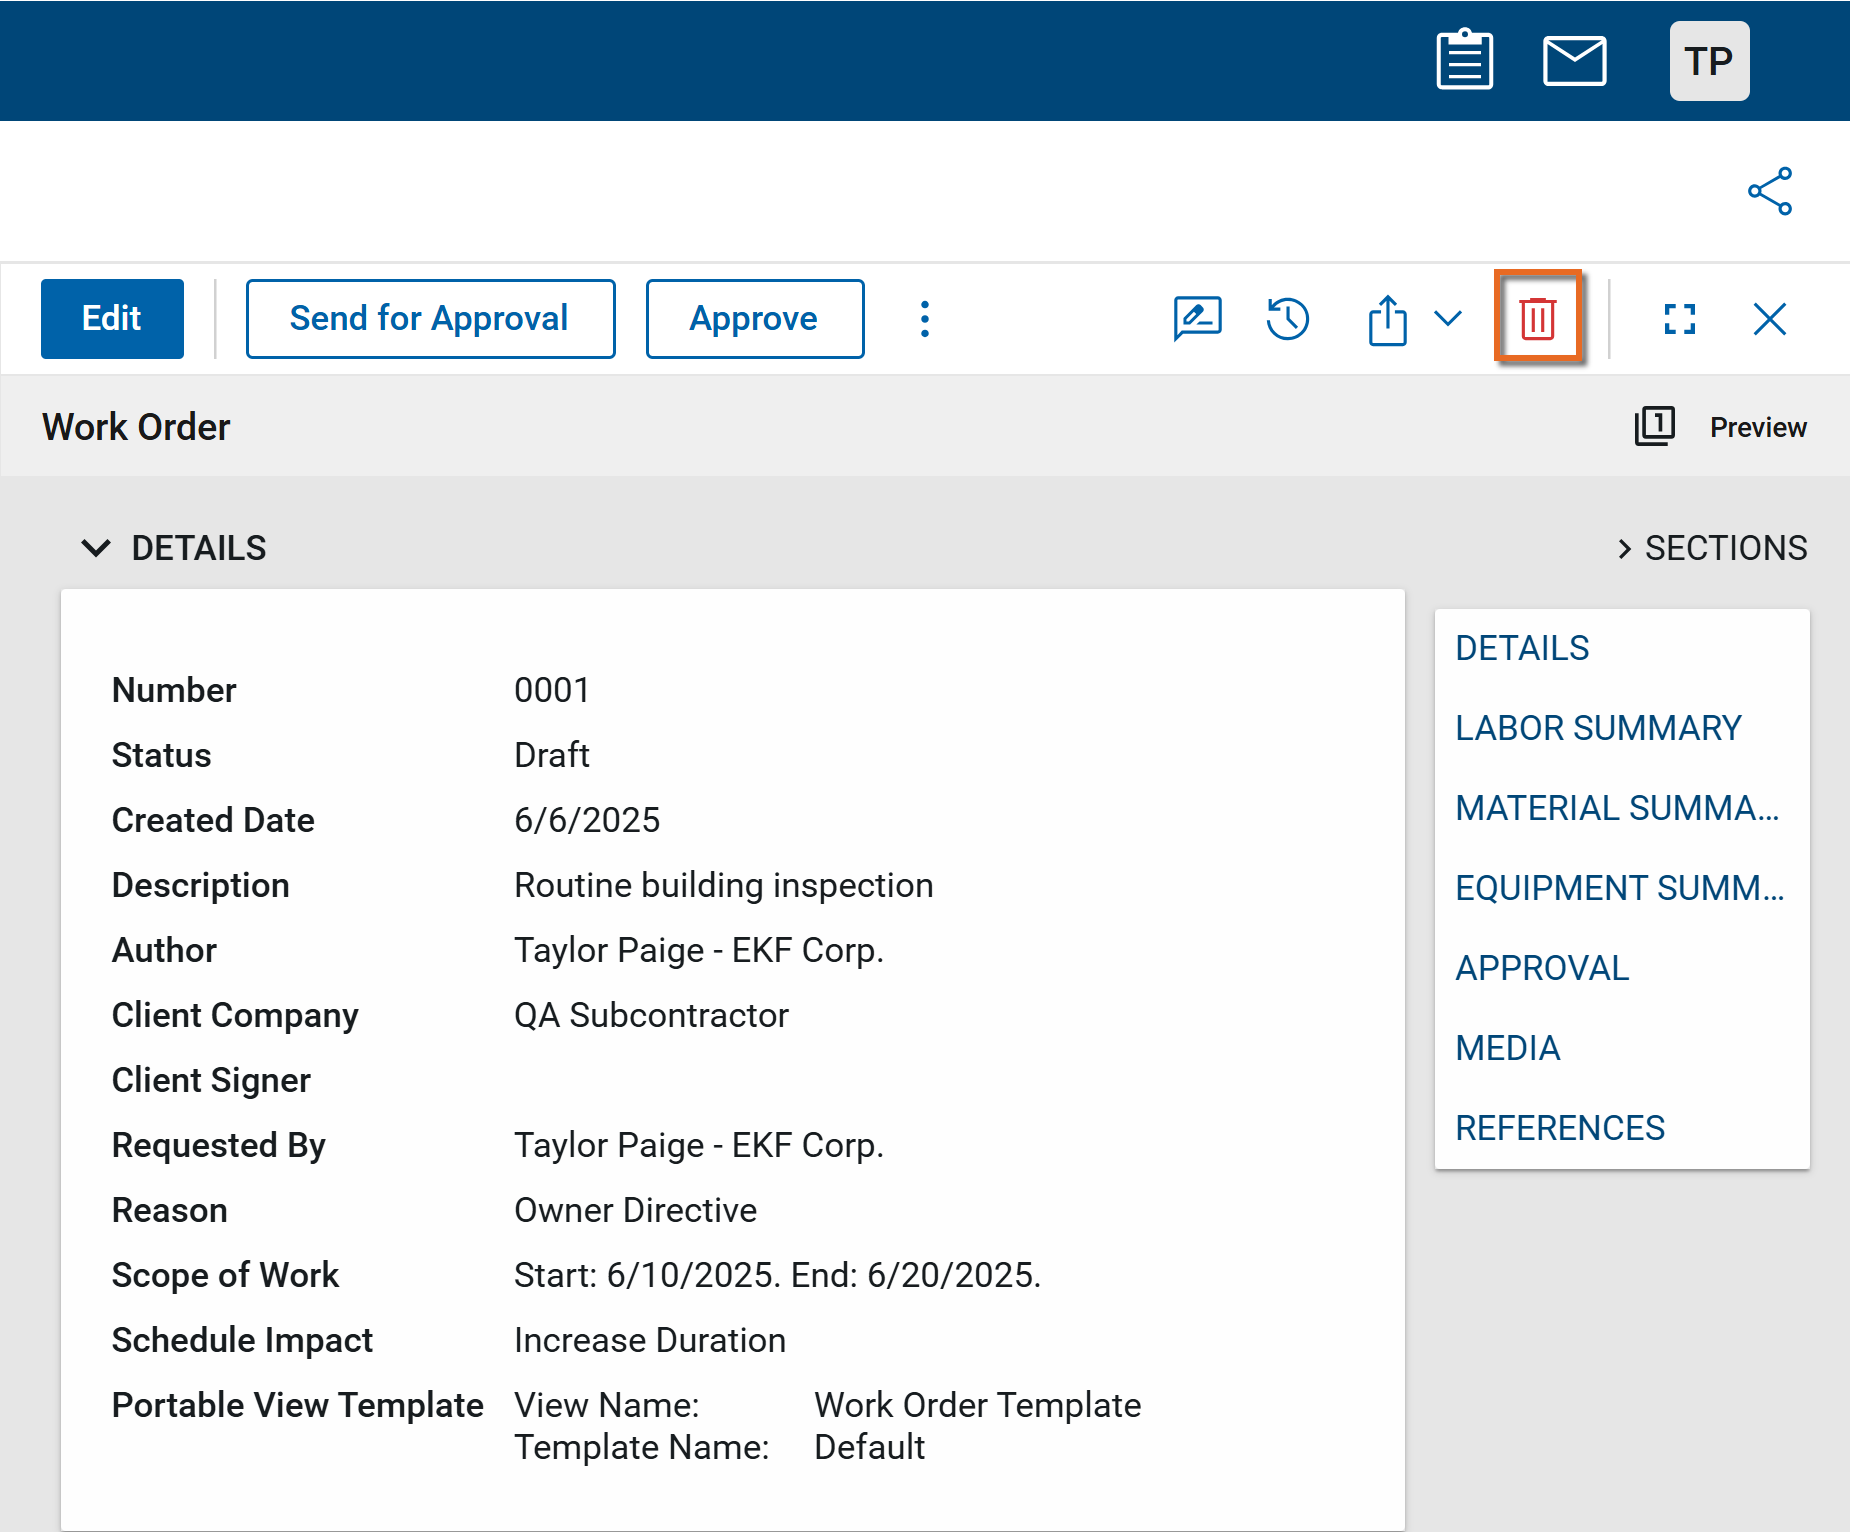
-
Click OK on the confirmation message. The work order will be deleted.
Your domain administrator or another user with the appropriate permissions can configure Work Orders in the Configuration application.
Important When working in the Configuration app, it is important to review the header and ensure that you are working at the correct level in the hierarchy, either the root domain or at a partition or project level.
Settings that you establish at the root domain or lower levels will inherit down the hierarchy until they are overridden. For more information on the hierarchical structure of Kahua, refer to Understanding the hierarchical structure of Kahua.
The Configuration app can be accessed directly through the apps list (Apps > Administration > Configuration), or by right-clicking on an application in the launch bar and selecting Configure. When you select Configure for an app from the launch bar, the detail view of the configuration page for that application opens automatically.
For general information on configuring this app in Configuration, refer to Application configuration.