Form Letters
The Form Letters app allows you to upload and manage Microsoft Word form letters and make them available for use in selected Kahua applications. The Microsoft Word file can include "tokens" representing data from the associated record, in the same manner as a portable view template. When the form letter is generated, data from the associated record is merged into the MS Word file, resulting in a form letter saved in the References section of the record. Form letters created in the Form Letters app are inherited down the project hierarchy. You can create project-specific versions when a specific project requires different wording on a document.
Note If you are interested in this app and it is not available in your domain, reach out to Support or your account representative for more information.
Key elements of the app include the following:
-
In the Form Letters app, you upload the tokenized Microsoft Word file to be used to create the form letters and select which apps the form letter will be available for.
-
Form letters can be associated with one or more applications, allowing you to maintain standard letter templates for use with those apps.
-
Form letters can be created at the domain or partition level to be inherited by projects below that level.
-
If a project needs a different version of a form letter, you can add a form letter in the project partition. If the project-level form letter has the same name as the inherited form letter, the project-level version is used.
-
Once a form letter is created in the Form Letters app, you can use it to generate a form letter by selecting Add Form Letter from the References section of a record in one of the designated apps. The resulting file is generated and saved in the References section of that record.
How to . . .
The Word file uploaded to a Form Letters record is created in the same general way as a portable view template. Create a Microsoft Word document, add the text you want to appear in the letter, and insert tokens where Kahua data should appear when the form is used. Tokens are placeholders that Kahua replaces with values from the selected record, or from the current project, partition, or domain. This functions similarly to a mail merge in Microsoft Word.
For more detailed information on this step, refer to Building a New Portable View Template.
To create the Word form file, complete the following steps:
-
Open a Microsoft Word document. You can use an existing file or create a new one.
Note If you use an existing file, ensure there are no macros or hidden markups. These items can cause unexpected results.
-
Enter the standard text of the form letter in the Word document.
-
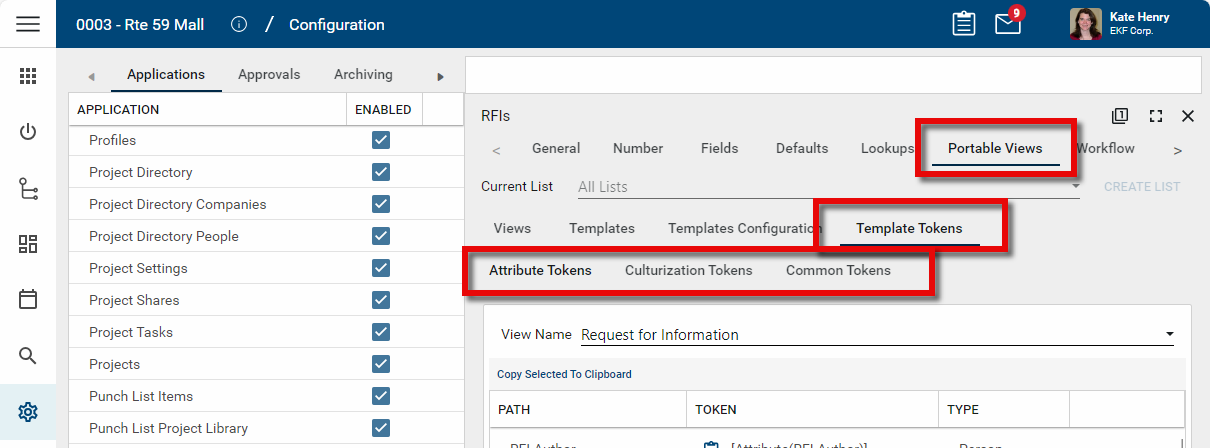
In Kahua, navigate to the Configuration app for the application that the form letter will be used with.
-
Select the appropriate application, then open the Portable Views tab and the Template Tokens tab.
-
Review the available tokens and copy the ones you want to use into your Word document.
-
Place the tokens where you want Kahua values to appear in the finished letter.
Example You might enter text such as Project: [ProjectName] or insert an application-specific token for a record field, such as the document number, title, or author.
-
Apply Microsoft Word formatting as needed. You can format token text in Word just as you would any other text, including font, size, bold, italics, alignment, tables, headers, and spacing.
-
Save the file as a Word document (.docx) in an accessible location.
-
Upload the saved Word file to the Form field on the Form Letters record.
Common token types include the following:
-
Attribute Tokens - These are app-specific tokens that pull values from fields on the selected record.
-
Common Tokens - These are tokens that pull values such as the current project, partition, domain, user, or current date and time.
-
Culturization Tokens - These are tokens for standard text values used by the app.
Note Be sure to use tokens from the correct application so the form letter can resolve the values correctly when it is used.
To create a new form letter for use in one or more applications, complete the following steps:
-
Review the header to ensure that you are in the correct project or partition.
-
Navigate to the Form Letters application (Apps > All Apps > Form Letters).
-
Click New in the action bar.
-
Complete the following fields as appropriate:
Field Description Details Name Enter a name for the form letter.
Important If you are creating a project-specific version of an inherited form letter, enter the same name as the inherited form letter so the project-level version is used for that project.
Description Enter a description to help identify the purpose of the form letter.
Applications Select one or more applications where you want this form to be available.
Form Select the appropriate Microsoft Word file to use for the form letter.
Note A form letter must have one form file attached.
-
Click Save when you are done.
If a form letter has been set up for an application, you can generate that letter from the References section of a record in that application. The generated letter is then saved to the References section of the record.
To add a form letter to the References section of a record, complete the following steps:
-
Review the header to ensure that you are in the correct project or partition.
-
Navigate to the appropriate application and open the record you want to work with.
-
Select Edit to open the record in edit mode.
-
Scroll to the References section.
-
In the References action bar, select Add Form Letter. You may need to click the More icon
 to access this option.
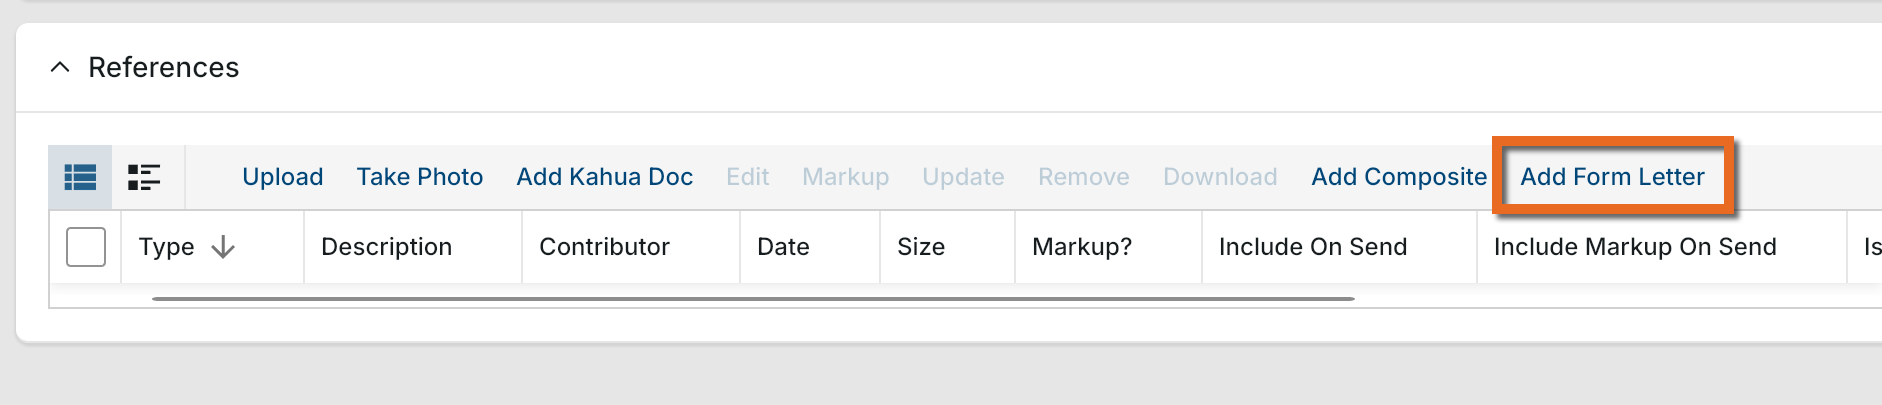
-
Select the appropriate form letter from the list and click Attach.
-
The letter is generated using the Microsoft Word form file and the applicable token values from the record, project, partition, or domain.
-
The generated letter is saved as a PDF file and added to the References section of the record.
Note It may take several minutes for the newly created file to be fully rendered and available for viewing or download.
-
Click Save to save the record.
Note Only form letters associated with the current application are available for selection.
(view history, delete, etc.)
From the detail view of a record, there are several standard actions you can take. Depending on your permissions, some or all of the following options may be available to you:
-
Discussions
 - Select this icon to open the Discussions panel. If enabled in your domain, the discussions feature allows you to participate in public or private conversations associated with specific records. For more information, refer to Discussions.
 -
View History
 - Select this icon to open the History page for the record. The history page provides details regarding all activity (creation, edits, saves, etc.) performed on the record. Click view edit to drill down into more detail on a specific action. Click hide edit to close the action detail. Click the Close icon
  to close the history page.
 -
Send actions
 - Click this icon to select an appropriate Send action for the record. The following options may be available to you:
-
Copy Link - Select this option to copy a URL link for the record to your clipboard. This link can be sent outside of Kahua. Users with the appropriate permissions will be able to open Kahua directly to that record by using the link.
-
Copy QR Code - Select this option to generate a QR code for the currently open record. The QR code can be shared directly from your screen, or copied to your clipboard to be shared as appropriate. This QR code can be shared outside of Kahua. Users with the appropriate permissions will be able to open Kahua directly to that record by using the link.
-
Send - Select this option to open a new Kahua message with the open record included as an attachment. References with the Include on Send value set to "Yes" are also included. For more information, refer to Messages app.
-
-
Delete
 - Select this option to delete the open record. You must agree to the confirmation message before the record is deleted.
Alternatively, right-click on the record in the log view and select Delete, or select multiple records from the log view and select Delete.
Note If a record is deleted in error, your domain administrator may be able to recover it through the Recycle Bin app. For more information, refer to Using the Recycle Bin.
-
Open in a new window
 - Select this option to open the current record as read-only in a new window (desktop host) or browser tab (web host). This allows you to navigate to other records in the original Kahua instance while keeping the read-only window or tab open for reference. To re-open the record on the read-only window or tab in Kahua, select Open in the header.
-
Maximize
 and Minimize
  - Select Maximize to open the record to a full screen view. From the full screen view, select Minimize
  to return to the original view.
 -
Close
- Select the close icon to close the currently open item.
Your domain administrator or another user with the appropriate permissions can configure the app in the Configuration application.
Important When working in the Configuration app, it is important to review the header and ensure that you are working at the correct level in the hierarchy, either the root domain or at a partition or project level.
Settings that you establish at the root domain or lower levels will inherit down the hierarchy until they are overridden. For more information on the hierarchical structure of Kahua, refer to Understanding the hierarchical structure of Kahua.
The Configuration app can be accessed directly through the apps list (Apps > Administration > Configuration), or by right-clicking on an application in the launch bar and selecting Configure. When you select Configure for an app from the launch bar, the detail view of the configuration page for that application opens automatically.
For general information on configuring this app in Configuration, refer to Application configuration.