Classes - Project
The Asset Definition > Classes-Project sub-application is a project-specific application that allows you to select which asset classes are available for use on your project. They can be added one at a time, or as a group by selecting a template from the Classes - Template sub-application.
Important things to know about this app include the following:
-
Asset classes must be set up in the Asset Definition > Classes - Master app to be available for selection in this app. Refer to Classes - Master.
-
Asset classes can be grouped together into a template in the Asset Definition > Classes - Template app. This makes it easier to add a number of asset classes to a project by using Select Template to add all the classes from a template to a project at once. Refer to Classes - Template.
-
You can optionally exclude attributes that you do not want to collect for the project.
How to . . .
To add asset classes to a project, complete the following steps:
-
Review the header to ensure that you are in the correct project or partition.
-
Navigate to the Asset Definition > Classes - Project app (Apps > Asset Management > Asset Definition > Classes - Project).
-
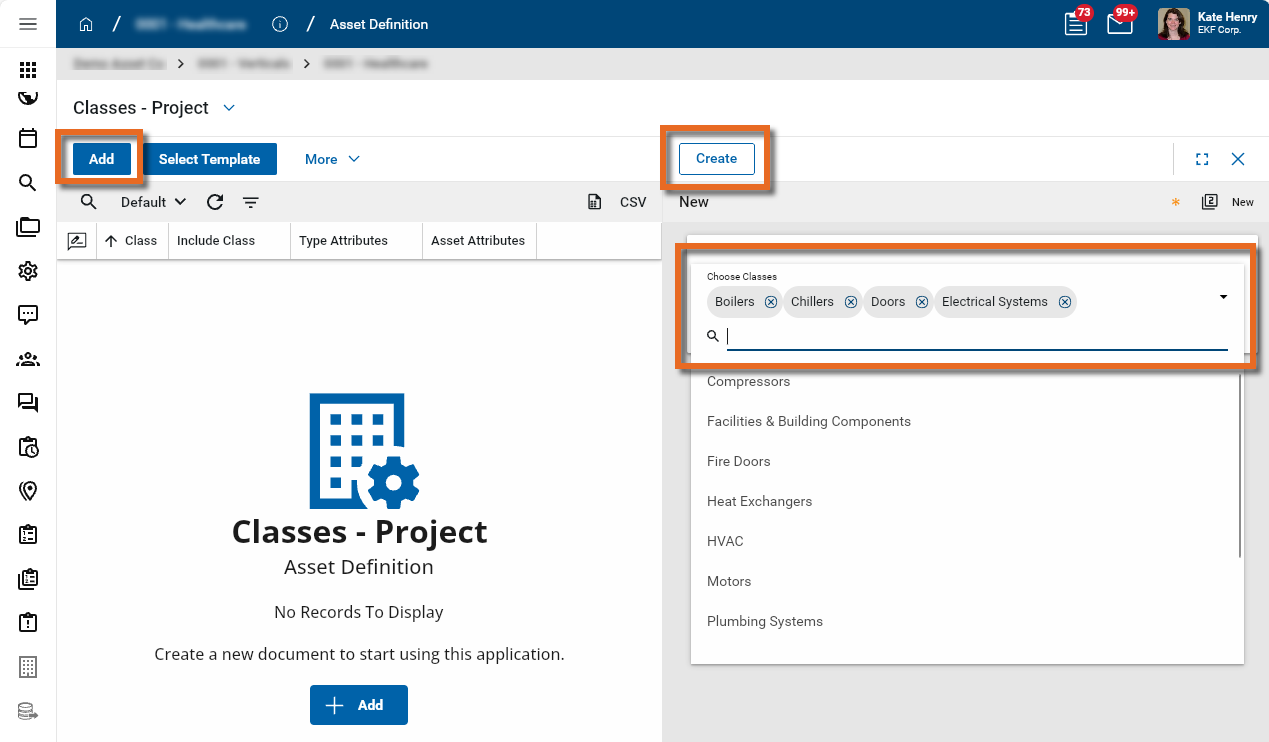
To add a single asset class, select Add from the action bar. The Choose Classes dialog appears.
Select one or more asset classes. Click Create to add them to the list of classes for this project.
-
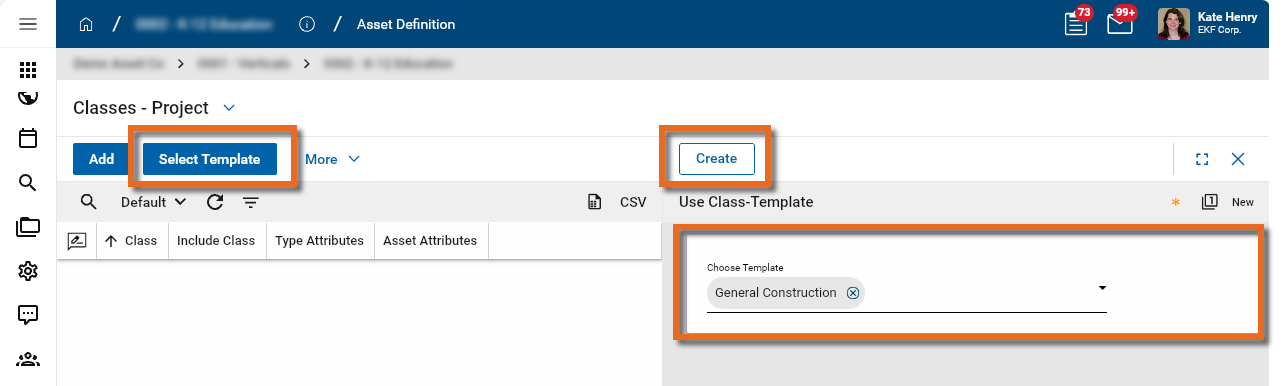
To add a group of asset classes from a template set up in the Classes - Template app, click Select Template from the action bar. The Choose Template dialog appears.
Select a template from the list. Click Create to add the asset classes from the template to the list of classes for this project.
If there are attributes on a selected class that you do not want to track for assets on your project, you can remove them by clearing the Include Class check box on the attribute.
Additionally, if you have added a class to a project and later want to remove it from being an option for selection when creating new asset types in your project, you can do that by clearing the Include check box on the class.
To remove asset classes from selection on your project or to remove attributes from a particular class, complete the following steps:
-
Review the header to ensure that you are in the correct project or partition.
-
Navigate to the Asset Definition > Classes - Project app (Apps > Asset Management > Asset Definition > Classes - Project).
-
To modify a class, right -click on it in the log view and select Edit, or click on it to open the detail view and select Edit from the action bar.
-
In the Details section, clear the Include Class option to remove this option from future selection on this project.
-
In the Type Attribute or Asset Attribute sections, clear the Include check box next to any attributes you want to remove from this class for your project.
-
Click Save when you are done.
If you need to add or update many records at once, you can do so through the import process.
You will first generate an export of an existing record to access the correctly formatted spreadsheet file for the import. Once the exported file is available, add the appropriate values for the records you want to import to the exported spreadsheet. You can then import those records. For more detailed information on the importing process, refer to Importing records.
To delete a record, complete the following steps:
-
Review the header to ensure that you are in the correct project or partition.
-
Navigate to the application.
-
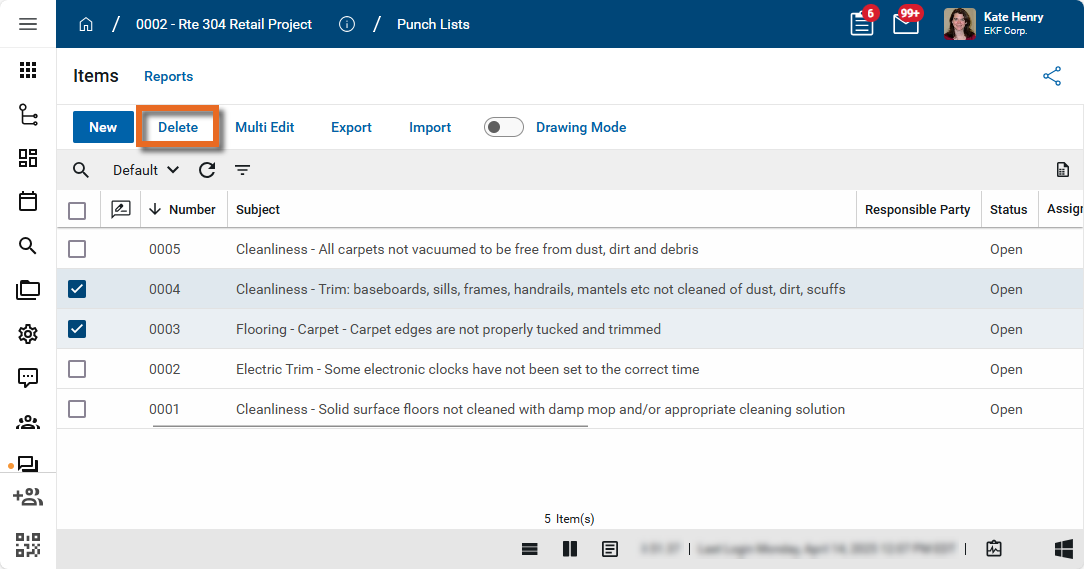
In the log view, select the check box next to the record or multiple records that you want to delete. Select Delete from the action bar.
-
Alternatively, right-click on the record in the log view and select Delete.
-
Click OK on the confirmation message. The record or records will be deleted.
Note If a record was deleted in error, it can be recovered from the Recycle Bin application by an administrator. Deleted records are available for restoration for a set number of days as configured in domain settings. For more information, refer to Using the Recycle Bin.
Your domain administrator or another user with the appropriate permissions can configure the app in the Configuration application.
Important When working in the Configuration app, it is important to review the header and ensure that you are working at the correct level in the hierarchy, either the root domain or at a partition or project level.
Settings that you establish at the root domain or lower levels will inherit down the hierarchy until they are overridden. For more information on the hierarchical structure of Kahua, refer to Understanding the hierarchical structure of Kahua.
The Configuration app can be accessed directly through the apps list (Apps > Administration > Configuration), or by right-clicking on an application in the launch bar and selecting Configure. When you select Configure for an app from the launch bar, the detail view of the configuration page for that application opens automatically.
For general information on configuring this app in Configuration, refer to Application configuration.