OmniClass Codes
OmniClass codes are a industry-standard classification system used to organize information about projects in the built environment through their full life cycle, from conception through completion of construction and on to the maintenance of a facility and its components.
The OmniClass Codes application allows you to create and manage OmniClass classification codes for reference in various apps in Kahua.
Key elements of the OmniClass Codes app include the following:
-
The OmniClass Codes app is a domain level app. The values entered here are available for use in all projects in your domain, regardless of which project or partition is open when records are added.
-
You can import the codes or enter them manually.
-
Because this is a domain level app, you must navigate to the root domain to access it in Configuration.
How to . . .
To create a new OmniClass code, complete the following steps:
-
Navigate to the OmniClass Codes application (Apps > Index Management > OmniClass Codes).
Note Your current partition or project selection does not matter, as the app is a domain-level app and all entries are available to all projects and partitions.
-
Click New in the action bar.
-
Complete the following fields as appropriate:
Field Description Table Select the OmniClass Table number for the code.
Note This lookup list is managed in the Configuration app. Refer to Lookups.
Number Enter the OmniClass code number. Title Enter the code title. Definition Optionally enter a longer definition of the code. -
Click Save when you are done.
You can import a list of OmniClass codes through the import process.
You will first generate an export of an existing record to access the correctly formatted spreadsheet file for the import. Once the exported file is available, add the appropriate values for the records you want to import to the exported spreadsheet. You can then import those records. For more detailed information on the importing process, refer to Importing records.
You can generate a report from a selected log view, or use one of the built-in reports available by default in each application. For more information on creating your own reports, including how to set up scheduled reports, refer to Creating ad hoc reports.
Note For information on modifying the logo that appears on reports in your project, refer to Managing report logos.
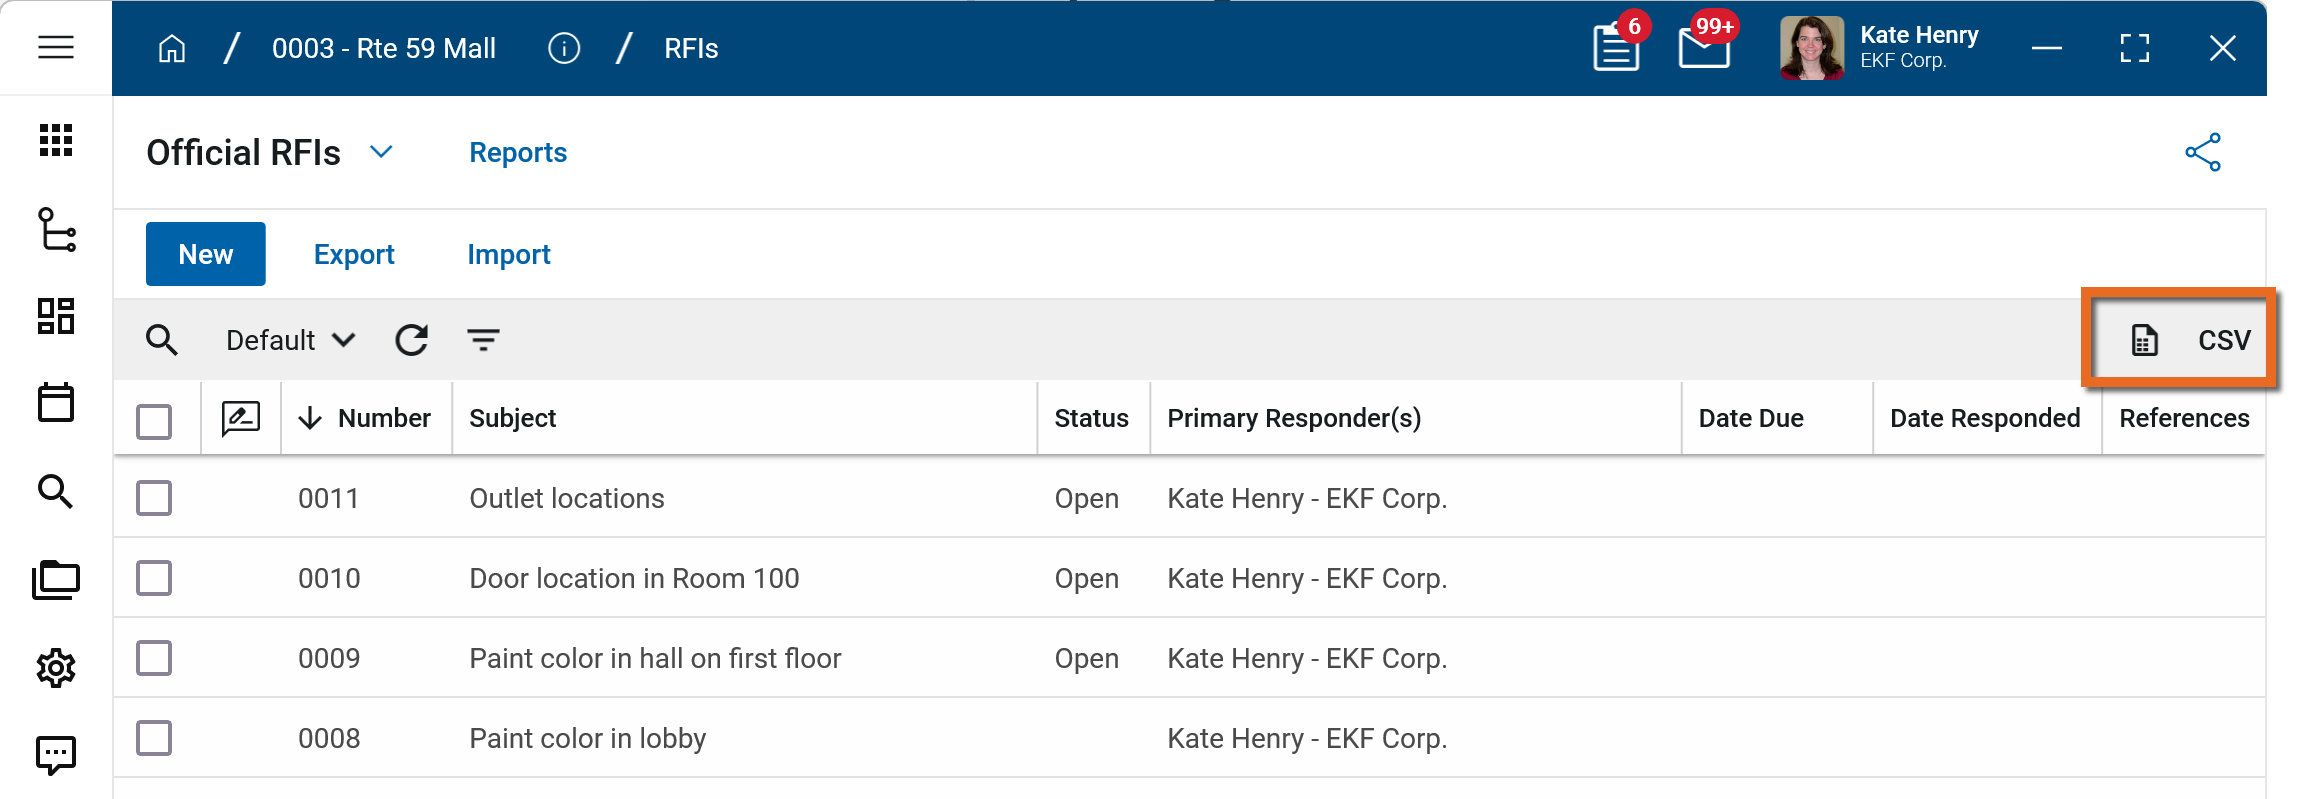
To generate a report from a log view with up to 10,000 records, select the report icon ![]() . If your log view contains more than 10,000 records, the report icon will be disabled and you can select to download the records to a CSV file instead. For more information, refer to Generate a report from a log view.
. If your log view contains more than 10,000 records, the report icon will be disabled and you can select to download the records to a CSV file instead. For more information, refer to Generate a report from a log view.
To generate an application report, complete the following steps:
-
Navigate to the application.
-
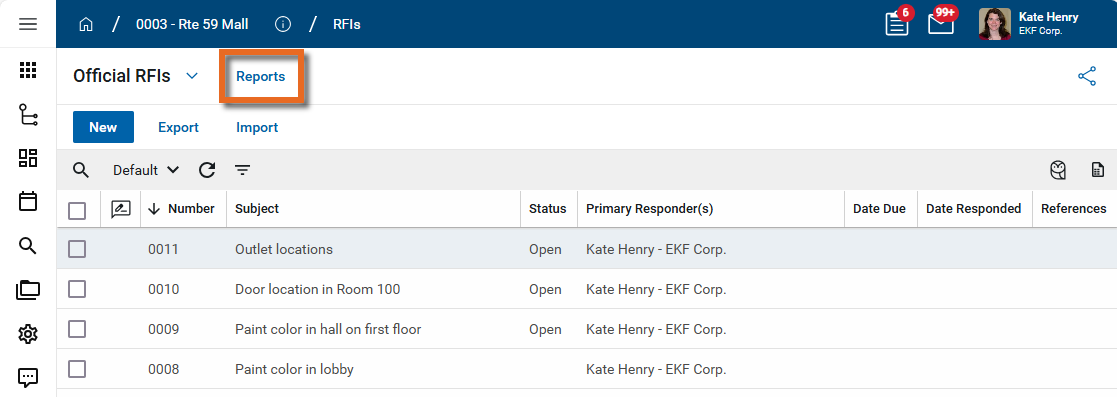
Select Reports in the application title bar.
-
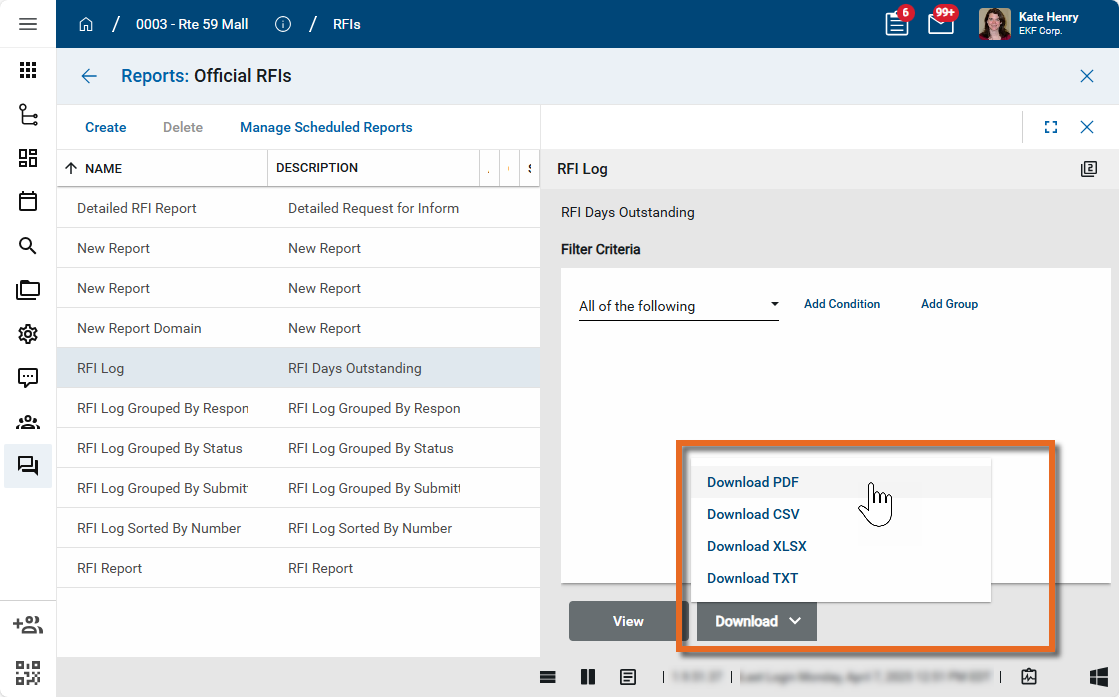
Select the report you want to run.
-
Apply any desired filters.
-
Select View or Download as appropriate. For more information, refer to Viewing Reports.
-
Click the Close icon
 when you are done.
Your domain administrator or another user with the appropriate permissions can configure the app in the Configuration application.
Important Because this is a domain-level app, you must navigate to the root domain to access Configuration for this app.
The Configuration app can be accessed directly through the apps list (Apps > Administration > Configuration), or by right-clicking on an application in the launch bar and selecting Configure. When you select Configure for an app from the launch bar, the detail view of the configuration page for that application opens automatically.
For general information on configuring this app in Configuration, refer to Application configuration.