Setting up locations
Locations refer to physical locations on your project site. You can use the Parent field to create a hierarchy of locations, such as Building Unit, Floor, and Room, or leave the parent field blank and have a flat list of locations.
You can also create locations at the root level of your Kahua domain. Those locations can be added to any project or partition as Domain Locations. Domain Locations can only be edited at the root domain and any edits will appear in projects and partitions where the Domain Locations have been added.
Locations created at the partition or project level can be promoted to the domain level and become Domain Locations.
Locations are set up in the Locations app and can be referenced from many other applications. Applications that can reference locations include:
-
Daily Reports
-
Drawings
-
Punch Lists
-
QR Codes
-
RFIs
-
Submittals
If you plan to use QR Codes to reference locations on your project site, you will have to set up locations first.
How to . . .
To add new location, complete the following steps:
-
Ensure that you are in the correct project or partition. To create Domain Locations, ensure that you are in the root domain. For more information, refer to Use Domain Locations.
-
Navigate to the Locations application (Apps > Index Management > Locations).
-
Select New from the action bar.
-
Complete the following fields as appropriate:
Note Depending on how this app is configured for your domain, there may be fields or sections listed here that do not appear for you, fields and sections that appear for you which are not listed here, or fields and sections which appear in a different order. If you have any questions, check with your domain administrator.
Field Name Description Details Type Select the appropriate location type from the list. Types are a way of categorizing locations. Different supporting fields will appear in the Details section based on your selection here. Location ID The Location ID can be used to identify the location. By default, the Location ID is required to be unique but that can be modified in the application configuration. Name Enter a name for the location. Name is required and will be used to identify the location throughout the Kahua platform. Description Enter a description for the location. Parent Optionally, select another location as a parent to this location.
Example You may want to have individual rooms in a building set up as separate locations, and be able to identify which floor the rooms are on. In this case, you can set up each building floor as a location, and then select the floor as the parent location for each room on that floor.
Address fields (Country, Line 1, Line 2, City, State, County, Postal Code) These fields appear when the Location Type is set to "Address/Property", "Facility", or "Municipality". Enter the appropriate values. OmniClass Code / Linear Units / Area Units / Volume Units / Area Measurement These fields appear when the Location Type is set to "Facility". Enter the appropriate values.
Note The fields Linear Units, Area Units, and Volume Units are lookup lists managed in the Configuration app. Refer to Lookups.
Floor Type / Elevation / Height These fields appear when the Location Type is set to "Floor". Enter the appropriate values.
Note The field Floor Type is a lookup list managed in the Configuration app. Refer to Lookups.
OmniClass Code / Room Tag / Usable Height / Gross Area / Net Area These fields appear when the Location Type is set to "Space". Enter the appropriate values. Zone Type / Space(s) These fields appear when the Location Type is set to "Zone". Select the appropriate values.
Note The field Zone Type is a lookup list managed in the Configuration app. Refer to Lookups.
Status Select the appropriate status. Notes Enter any additional notes. Geocode Boundaries Type Select the appropriate value from the list.
Note This lookup list is managed in the Configuration app. Refer to Lookups.
Latitude / Longitude / Elevation Enter the appropriate values for each field. External Links Enter URL Optionally, enter one or more external links for this location. This can be useful for linking a location to a map location or other purpose.
After entering the link, click Add to save it. Once saved, click the Edit icon
 to modify the Title of the link if desired. Click the Delete icon
  to remove it.
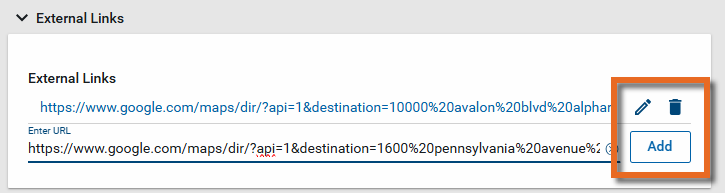
References Upload or select any relevant files or documents. You can use drag and drop to add a file to this section. For more information on using this section, refer to References section.
-
Click Save when you are done.
You can import a list of locations. To complete an import, you will first need to do an export to obtain the properly formatted Excel workbook. Enter the data according to the instructions on the first sheet of the exported workbook. Consider entering at least one record to make it easier to understand how the data is organized in the Excel workbook when you complete the export. For more information, refer to Importing records.
-
Ensure that you are in the correct project or partition.
-
Navigate to the Locations application (Apps > Index Management > Locations).
-
Select More > Export from the action bar.
-
Save the resulting excel file in an accessible location.
-
Open the Excel file and enter the location information according to the information on the first sheet of the workbook.
-
Save the Excel file.
-
Select More > Import from the action bar of the Locations application and select the saved file.
-
Click Import. Select Close when the import is complete.
To edit multiple locations at once, complete the following steps:
-
Select the check boxes next to the records you want to edit.
-
Select Multi Edit from the action bar.
-
The Multi Edit page will open.
-
You can edit individual fields. To copy a field value to other records, select the value on the record. Select Copy to All to copy the value to all other records, or select Copy to Selected to copy the value to selected records.
Note The Multi Edit page lists fields from the log view applied when Multi Edit is selected. To update fields which are not present on the default log view, create a new log view that includes all the fields you want to edit and then apply that log view before selecting Multi Edit.
-
Click Save when you are done.
Locations at the partition or project level can be promoted to the domain level and become Domain Locations.
To do so, complete the following steps:
-
Ensure that you are in the correct project or partition.
-
Navigate to the Locations application (Apps > Index Management > Locations).
-
Select one or more records from the log view.
-
Select Promote to Domain from the action bar.
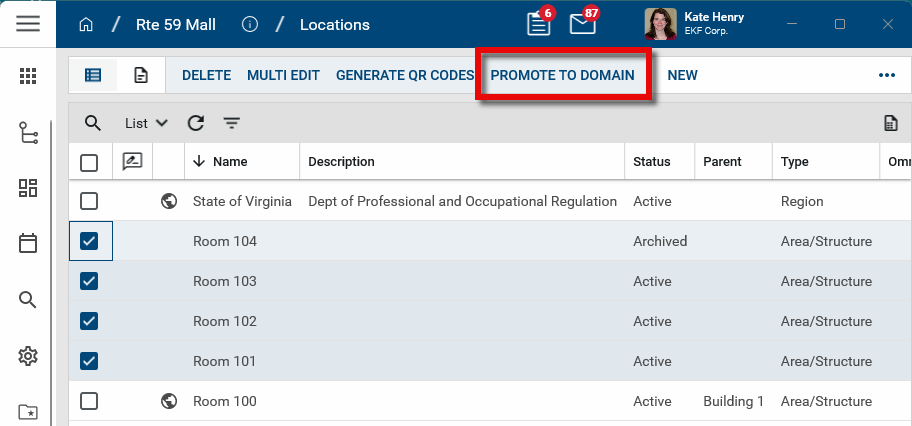
-
Click Continue on the confirmation message.
-
The results page appears, confirming the locations were successfully promoted as Domain Location.
Note If the Location ID value for the location being promoted is the same as the Location ID for an existing domain location and the Enable Duplicate Location ID setting is not enabled for Locations in the Configuration app at the root domain, a notification message will appear and the location will not be promoted. Refer to Enable Duplicate Location ID.
- Click Close on the message. The newly promoted domain locations appear in the log view with a globe icon
 .
.
QR Codes can be generated in the QR Codes application, or from the Locations application. For more information on using QR Codes in Kahua, refer to Using QR Codes.
To generate QR Codes for locations from the Locations application, complete the following steps:
-
Ensure that you are in the correct project or partition.
-
Navigate to the Locations application.
-
Select the locations you want to generate QR Codes for.
-
Select Generate QR Codes from the action bar.
-
QR Codes will be created for locations that do not already have them. If a location already has a QR Code, it will be ignored.
-
Click OK on the confirmation message that appears.
Note QR Codes can be printed from the QR Code application. The location name will appear beneath the QR Code by default. You can modify the value that appears with the QR code by modifying the Label field on the QR Code record. For more information, refer to Create a QR Code in the QR Codes app.
Locations created at the root of your Kahua domain can be included in any project throughout your domain. This acts as a master library of locations that can be re-used in the event multiple projects occur in the same space and provides significant time savings when starting up a new project.
Note To edit an existing domain location, you must navigate to the root domain and edit it there. They cannot be edited at the project or partition level. Updating a domain location will also update it in all projects where it has been added.
To promote a location from a partition or project to a domain location, refer to Promote a partition/project location to a Domain Location. To add domain locations directly to your domain, complete the following steps:
-
Use the Project Finder app to navigate to the root domain.
-
Navigate to the Locations application.
-
Enter the locations you want to make available to other projects as Domain Locations. Refer to Add a new location for more information.
To add one or more domain locations on a project, complete the following steps:
-
Ensure that you are in the correct project or partition.
-
Navigate to the Locations application.
-
Click Use Domain Locations in the action bar.
-
Select the locations to use for the project and click Update. To search through the list of domain locations, click All and select List for the list view. Click the search icon, select the field to search, and enter your search term. Select the locations to use and click Update. To use all the domain locations, click Use all domain locations.
-
The domain locations will be added to your project. They will appear in the grid with a globe icon
to indicate that they are domain locations. Domain locations must be edited at the root domain level. Any edits will impact all projects where they have been added.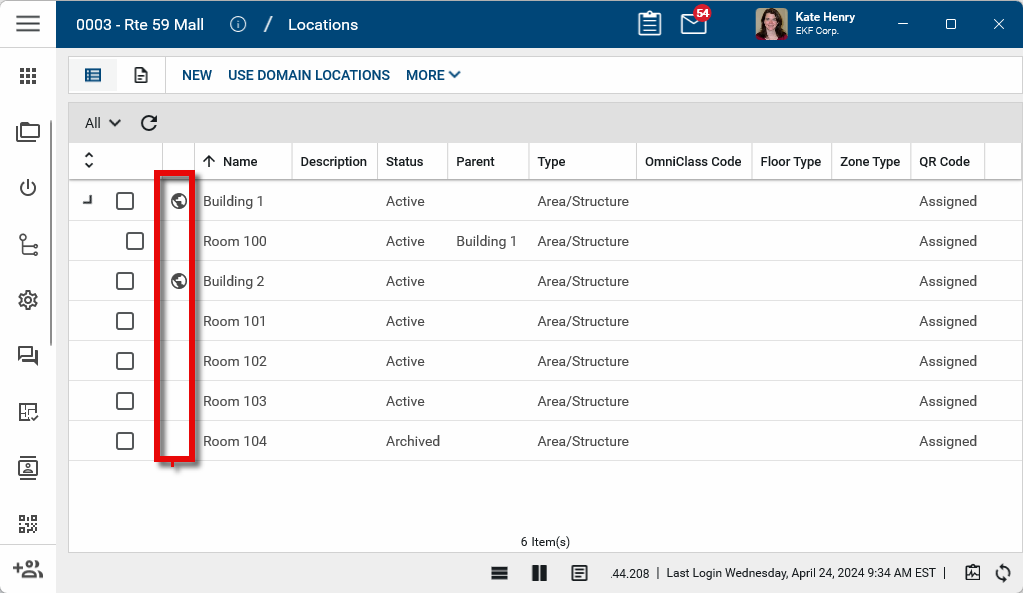
To delete a record, select the item and click Delete in the action bar.
Project and partition level locations can be deleted from both the log view and the detail view. Domain locations can only be deleted from the log view.
Note If a record was deleted in error, it can be recovered from the Recycle Bin application by an administrator. For more information, refer to Using the Recycle Bin.
Your domain administrator or another user with the appropriate permissions can configure the app in the Configuration application.
Important When working in the Configuration app, it is important to review the header and ensure that you are working at the correct level in the hierarchy, either the root domain or at a partition or project level. Settings that you establish at the root domain or lower levels will inherit down the hierarchy until they are overridden. For more information on the hierarchical structure of Kahua, refer to Understanding the hierarchical structure of Kahua.
The Configuration app can be accessed directly through the apps list (Apps > Administration > Configuration), or by right-clicking on an application in the launch bar and selecting Configure. When you select Configure for an app from the launch bar, the detail view of the configuration page for that application opens automatically.
For general information on configuring this app in Configuration, refer to Application configuration.
The following items are specific to this application: