Vendors
The Vendors app is where you will enter and manage your list of vendors. Here you will set up vendor records, enter information about the company, key contacts, services performed, and track information about the certifications, licenses, insurances, and bonds that they hold, including effective and expiration dates and other important information. You can also upload copies of related documents, such as the certificates of insurance. Vendor records can be linked to Company records in the Contacts > Companies app, and users with the appropriate permissions can update company records with information from the vendor record.
How to . . .
To create or edit a vendor record, complete the following steps:
-
Ensure you are in the root domain or desired partition or project level.
Generally speaking, most organizations will want to place vendor records at the root domain level. Records placed here will be available to all partitions and projects in the domain. However, your organization may have a specific reason for placing vendors within a lower-level partition or project level. Enter the vendor record at the appropriate level for your organization.
Note that to edit a vendor record, you must access it at the domain, project, or partition level where it was added. In the log view, records that were created at the domain level will appear with a globe icon
 .
. -
Click New to create a new record or open an existing record and select Edit.
-
If the vendor you are entering already has a record in your Contacts > Companies sub-app, select that record from the Company drop-down list. You are not required to make a selection from this field. If the vendor you are entering data for does not already exist in your Companies app, leave this field blank.
The following fields will fill in automatically with any pre-existing values from the company record:
-
In the Summary section - Name, Number, Prequalified, Preferred, Overview, Notes.
-
In the Company section - Legal Name, Company Office, Address information, Company Phone, Email, Government ID, DUNS Number.
-
-
Complete the remaining fields below as needed. Click Save when you are done.
Complete the following sections and fields:
-
The Summary section contains basic information about the vendor. Complete the remaining fields in the Summary section:
Field Description Summary section Name Enter vendor name. If you selected a company from the Contacts > Companies app in the Company field, this field will be pre-filled. Number Optionally enter a number for the vendor record. This may be a reference number from another system, such as your accounting software. Type Select a type of vendor.
Note This lookup list is managed in the Configuration app. Refer to Lookups.
Status Select one of the following options to indicate your review status for the vendor:
-
Inactive
-
Pending Review
-
Active
-
Approved
Note This lookup list is managed in the Configuration app. Refer to Lookups.
Approved Date Enter the date the vendor was approved for contract awards or use on projects. Approved Limit The total amount the vendor is approved for. License Numbers / License Classifications The numbers and classifications from the items listed for this vendor in the Licenses section appear here. CSI Codes Optionally, select the CSI Codes which represent the type of work the vendor performs.
Note This list is managed in the CSI Codes app. Refer to CSI Codes.
Locations Optionally, select the locations that the vendor does business in. Only locations with a type of "Region" or "Municipality" will be available on the selection list.
The locations you are using must be at the domain, project or partition level you are currently in to appear on the selection list. That is, if you are entering a vendor at the root domain level, the locations must also be at the root domain level to be available for selection here.
Similarly, if you are entering a vendor at the project or partition level, the locations with the type of "Region" or "Municipality" must be added to the Locations app at the same project or partition level to be available for selection here. Domain level locations are not automatically available at the project or partition level, they must be selected by using the Use Domain Locations action in the Locations app. Refer to Use Domain Locations.
Score If you are using a prequalification process with a numeric scoring system, optionally enter that score here. Prequalified Select this check box to indicate that the vendor is prequalified. Preferred Select this check box to indicate that the vendor is a preferred vendor. Last Updated Manually enter a last updated date for the vendor profile. Overview Enter a summary of information regarding the services the vendor offers. Notes Enter any internal notes about the vendor. -
-
The Services section contains information about the services the vendor performs. Select the appropriate values for the following fields:
-
Typical Services - The typical services provided by the vendor.
-
Specialty Services - Additional specialty services provided by the vendor.
The values available in the selection list are set up in the Classifications app. Refer to Add a new classification.
-
-
The Company section contains more detailed information about the company including the address. Complete the following fields:
Field Description Company section Legal Name Enter the full legal name of the vendor. DBA Enter the DBA (Doing Business As) name of the vendor. Business Entity Type Select a type of vendor (e.g., Corporation, LLC, etc.).
Note The lookup values for the vendor Business Entity Type are managed in the Configuration application for the Vendors app.
Business Entity Label Optionally, enter additional text to describe the legal business entity. This text could be used when generating contract documents (e.g., "a California Corporation").
Company Office If you selected a Company record from the Contacts > Company app in the Company field above, this field will contain a list of offices from that record. Select the appropriate office, typically this will be the Primary Office. Company Address / Phone / Fax / Email / Website Enter the information into the appropriate fields. Government ID Enter the Federal or other appropriate government issued ID number for the company. DUNS Number Optionally, enter the Dun & Bradstreet number for the company. PO Delivery Method Select the appropriate PO delivery method for the vendor.
Note This lookup list is managed in the Configuration app. Refer to Lookups.
-
In the Contact section, select or enter the primary contact for the vendor.
If you selected a Company record from the Contacts > Company app in the Company field above, the Contact field will contain a list of contacts from that record to choose from. If there are no contacts to choose from, enter in the contact's name, email address and phone number.
-
In the Billing section, select or enter the Remit Contact, the primary billing contact for the vendor.
If you selected a Company record from the Contacts > Company app in the Company field above, the Remit Contact field will contain a list of contacts from that record to choose from. If there are no contacts to choose from, enter in the contact's name, email address and phone number.
If you selected a Company record from the Contacts > Company app in the Company field above, the Remit Office field will contain a list of offices from that record. Select the appropriate office, typically this will be the Primary Office. If there are no offices to choose from, enter in the address information and complete the remaining fields.
Select the appropriate Payment Terms. This lookup list is managed in the Configuration application for the Vendors app.
These sections allow you to track information on the certifications, license, insurances, and bonds that your vendors carry, including expiration dates. Each section is optional.
-
The Certifications section is for tracking permits and certifications such as Small-Business designations, Woman-Owned Business, Disabled Veteran-Owned Business designations, etc.
Certifications can be created in the Vendor > Certifications app by a domain administrator and selected here, or you can enter the information manually. For more information on setting up certifications, refer to Vendor Certifications.
To add or update a certification record, ensure that you are in edit mode and click Insert to add a new line. Complete the following fields for each certification you are tracking:
Field Name Description Certification If available, select the appropriate certification from the list. Certifications are managed in the Vendor > Certifications app. Selecting a certification will automatically complete the Jurisdiction, Issuing Agency, Type, and Classification fields. You will need to manually enter in the Reference Number, Issued Date, and Expiration Date. Jurisdiction Select the appropriate jurisdiction from the list. Jurisdictions are set up in the Locations app. Refer to Set up Jurisdictions. Issuing Agency Enter the appropriate Issuing Agency, the agency that issues or authorizes the certification. Type Enter the appropriate certification type. This typically references the program that the certification is a part of, as defined by the Issuing Agency. Classification Enter the certification abbreviation, e.g., DBE, SBE, WBE, etc. Reference Number Enter the reference number issued to the vendor for this certification. Issued Date Enter the date the certification was issued. Expiration Date Enter the date the certification expires. The following fields are available in the detail view of the Certification. Select the Expand icon
 to view the detail.
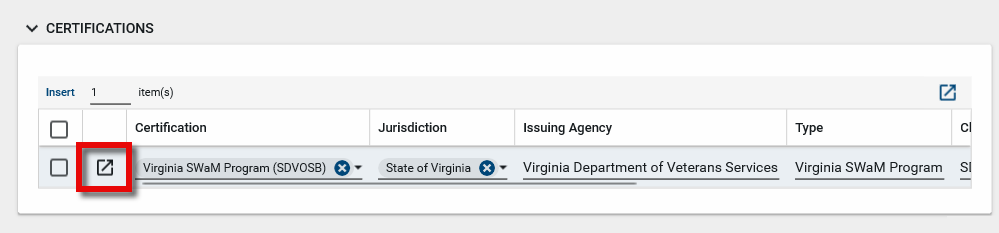
URL/Link This field can contain a link to the issuing agency's description of the certification, or directly to a copy of the certification or permit.
Notes Enter any internal notes about this certification. References Select Upload to upload a copy of the certification document, or select Add Kahua Doc to add a file previously uploaded to Kahua. -
The Licenses section is for tracking the licenses that the vendor holds. Licenses are created in the Vendor > Classifications app by a domain administrator and selected here. For more information on setting up classifications, refer to Vendor Classifications.
To add or update a license record, ensure that you are in edit mode and click Insert to add a new line. Complete the following fields for each license you are tracking:
Field Name Description Type Select the license type for the license. This may be a list of issuing agencies for licenses, or some other categorization. The lookup list for this field is managed in the Vendor app configuration. For more information, refer to Set up License Types. Jurisdiction Select the appropriate jurisdiction from the list. Jurisdictions are set up in the Locations app. Refer to Set up Jurisdictions. Classification Select the license from the drop-down list. For more information on setting up licenses, refer to Vendor Classifications. Number Enter the license number. Effective Date Enter the effective date for the license. Expiration Date Enter the date the license expires. The following fields are available in the detail view of the Certification. Select the Expand icon
to view the detail.
Notes Enter any internal notes about this license. References Select Upload to upload a copy of the license document, or select Add Kahua Doc to add a file previously uploaded to Kahua. -
The Insurance section is for tracking the insurance policies that the vendor holds. Licenses are created in the Vendor > Classifications app by a domain administrator and selected here. For more information on setting up classifications, refer to Vendor Classifications.
To add or update an insurance record, ensure that you are in edit mode and click Insert to add a new line. Complete the following fields for each license you are tracking:
Field Name Description COI Required Type Select the type of insurance. The application includes a list of common insurance types, but the list can be modified. The lookup list for this field is managed in the Vendor app configuration. Jurisdiction Select the appropriate jurisdiction from the list. Jurisdictions are set up in the Locations app. Refer to Set up Jurisdictions. Issued By Enter the name of the company that issued the policy. Number Enter the insurance policy number. Effective Date Enter the effective date for the insurance. Expiration Date Enter the date the insurance expires. Aggregate Limit Enter the aggregate limit amount. Per Project Limit
Enter the per project limit amount. Available Amount The following fields are available in the detail view of the license. Select the Expand icon
to view the detail.
Notes Enter any internal notes about this insurance. References Select Upload to upload the insurance certificate, or select Add Kahua Doc to add a file previously uploaded to Kahua. -
The Bonds section is for tracking information on the bonds for the vendor. Licenses are created in the Vendor > Classifications app by a domain administrator and selected here. For more information on setting up classifications, refer to Vendor Classifications.
To add or update a bond record, ensure that you are in edit mode and click Insert to add a new line. Complete the following fields for each bond that you are tracking:
Field Name Description Type Select the type of bond. The application includes a list of common insurance types, but the list can be modified.
Note This lookup list is managed in the Configuration app. Refer to Lookups.
Jurisdiction Select the appropriate jurisdiction from the list. Jurisdictions are set up in the Locations app. Refer to Set up Jurisdictions. Issued By Enter the name of the surety company that issued the bond. Number Enter the bond policy number. Effective Date Enter the effective date for the bond. Expiration Date Enter the date the bond expires. Aggregate Limit Enter the bond amount for all projects. Per Project Limit
Enter the bond amount for a single project. Available Amount The following fields are available in the detail view of the license. Select the Expand icon
to view the detail.
Notes Enter any internal notes about this bond. References Select Upload to upload a copy of the bond document, or select Add Kahua Doc to add a file previously uploaded to Kahua.
The Vendor Comments and References sections allow you to capture additional information about the vendor. Some types of additional information you may want to upload would include pre-qualification forms, multi-coverage insurance policies, financial statements, etc.
To add a new comment, type your comment in the New Comment line. When you save the record, your comment will be saved with your name, your company name, and the date and time the comment was saved.
To add a document in the references section, select Upload or Add Composite to add a new document. Select Add Kahua Doc to link to a file that has already been uploaded to Kahua.
Vendor records can be imported using the standard import process in the application.
To complete an import, you will first need to do an export to obtain the properly formatted Excel workbook. Enter the data according to the instructions on the first sheet of the exported workbook. Consider entering at least one record to make it easier to understand how the data is organized in the Excel workbook when you complete the export. For more information, refer to Importing records.
-
Ensure that you are in the correct project or partition.
-
Navigate to the Vendor Management > Vendors application.
-
Select More > Export from the action bar.
-
Save the resulting excel file in an accessible location.
-
Open the Excel file and enter the location information according to the information on the first sheet of the workbook.
-
Save the Excel file.
-
Select More > Import from the action bar of the Vendorsapplication and select the saved file.
-
Click Import. Select Close when the import is complete.
If you are an Administrator or Moderator in the Vendors app, and a company from the Contacts > Companies app is in the Company field, information you add or edit in the Vendor record can update the related fields in the Contacts app, including new contacts added in the Contact or Billing section.
When you are done editing the Vendor record, select Update Contacts to save your edits and update the Company and Contact records.
The company fields that will be updated are the following:
-
From the Summary section - Name, Number, Prequalified, Preferred, Overview, Notes.
-
From the Company section - Legal Name, Company Office, Address information, Company Phone, Email, Government ID, DUNS Number.
-
From the Contact or Remit Contact sections - Name, Email, Direct Phone
To delete a record, right-click on it from the log view and select Delete, or open the record and click the delete icon ![]() in the action bar.
in the action bar.
If a record was deleted in error, it can be recovered from the Recycle Bin application by an administrator. Deleted records are available for restoration for a set number of days as configured in domain settings. For more information, refer to Using the Recycle Bin.
Your domain administrator or another user with the appropriate permissions can configure the app in the Configuration application.
Important When working in the Configuration app, it is important to review the header and ensure that you are working at the correct level in the hierarchy, either the root domain or at a partition or project level.
Settings that you establish at the root domain or lower levels will inherit down the hierarchy until they are overridden. For more information on the hierarchical structure of Kahua, refer to Understanding the hierarchical structure of Kahua.
The Configuration app can be accessed directly through the apps list (Apps > Administration > Configuration), or by right-clicking on an application in the launch bar and selecting Configure. When you select Configure for an app from the launch bar, the detail view of the configuration page for that application opens automatically.
For general information about the Configuration app, including how to set up an approval workflow, refer to Configuration app.
For general information on configuring this app in Configuration, refer to Application configuration.