Communications app
The Communications app allows you to create and track multiple types of communication for a project in a central location, where they become part of the project record.
From the Communications app, you can create and distribute letters, memos, records of conversation, transmittals, and faxes. Any message created in Kahua can be copied to the Communications app, including messages used to distribute documents from other applications. Emails from Outlook or Gmail can be copied to the Communications app, when you are using the appropriate email plugin for Kahua.
Records from the Communications app can be processed into Issues, RFIs, or Punch List Items. Selecting Process from the record will generate a new item in the selected app and copy field values from the communication to the destination record.
Key things to know about the Communications app include the following:
-
From the Communications app, you can create and distribute letters, memos, records of conversation, transmittals, and faxes.
-
Any message created in Kahua can be copied to the Communications app, including messages used to distribute documents from other applications.
-
When you are using the appropriate email plugin for Kahua, emails from Outlook or Gmail can be copied to the Communications app.
-
Records from the Communications app can be processed into Issues, RFIs, or Punch List Items. Selecting Process from the record will generate a new item in the selected app and copy field values from the communication to the destination record.
-
You can have the Copy to Communications option selected by default for all users in a partition or project by enabling the Copy App Messages to Communications by Default setting on the Settings tab of the Configuration app. Refer to Settings.
How to . . .
To create a new document in the Communications app, complete the following steps:
-
Review the header to ensure that you are in the correct project or partition.
-
Navigate to the Communications app (Apps > Document Management > Communications).
-
Click New and select a communication type. By default, the following options are available:
-
Letter
-
Fax
-
Transmittal
-
Memo
-
Conversation
-
-
Complete the fields as appropriate. Different communication types will have different fields available.
-
If necessary, modify the document Number. By default, the number will auto-increment. The numbering scheme for each communication type can be modified in Configuration.
-
The Date will be entered automatically, but can be modified.
-
If present, enter the appropriate contacts in the To, CC, or Participants fields. If you want to include a person who is not yet set up in the Contacts app, select Add Person. This will allow you to add the person as a contact in your domain.
- If present, enter additional people to the CC Other or Additional Participants fields as appropriate. These fields do not require selection from the Contacts app and can be used for people who are not listed in the Contacts app in your domain.
-
-
Enter text in the Home field. Use the Insert tab to enter a Table or a Hyperlink.
-
Use the Media section to add photos or other media files. For more information on using this section, refer to Media section.
-
Use the References section to add additional files. For more information on using this section, refer to References section.
-
Click Save when you are done.
-
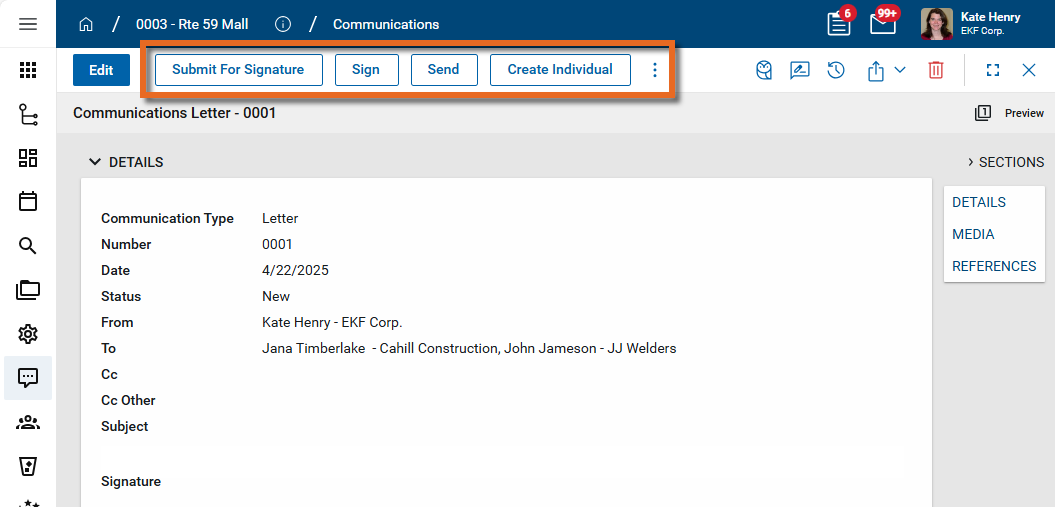
Once saved, depending on the document type, you will have one or more of the following options available to you:
-
Submit For Signature: If the document is intended to come from someone other than yourself (i.e., another user is listed in the From field), select this option to submit the document to the person in the From field so they can add their signature and return it to you.
-
Sign: If you are the named author of the document, select this option to add your signature. You will be required to enter your signature pin to add your signature. For more information on setting up your signature and pin, refer to Signature.
-
Send: Select this option to send the document to all the parties in the To, CC, CC Other, or Additional Participants fields.
-
Create Individual: Select this option when you have multiple recipients and want each of them to receive a copy of the document addressed only to them. For more information, refer to Create multiple documents from one record.
-
-
Select the appropriate action.
You can choose to create multiple documents from one Communications record, with each document addressed to one individual, rather than having one document with multiple contacts listed on the distribution. For example, if you are creating Notice to Proceed letters, you may want a separate letter generated for each contractor.
To do this, complete the following steps:
-
Follow the steps above to create a document. Refer to Create a document in the Communications app.
-
Once the record is saved, select Create Individual. You may need to click the More icon
 to access this option if it is hidden for space reasons. Note that this action is only available if the document has not yet been signed or submitted for signature.
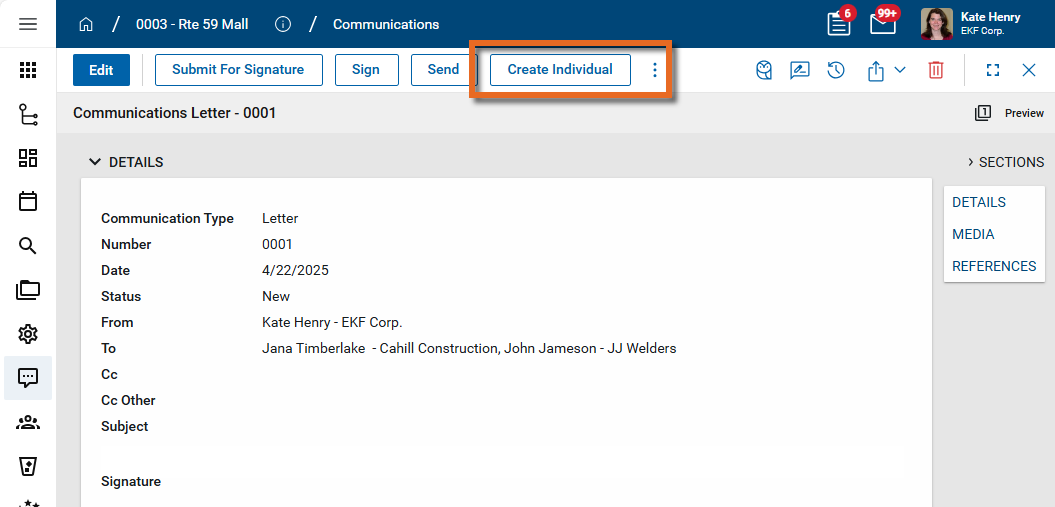
-
Multiple documents will be created, one for each of the recipients listed on the To or CC lines. Each document is assigned its own document number. You can access all the newly created documents from the log view.
-
If you want to sign the documents or submit them to someone else for their signature, you can now do so. It is not possible to sign the document prior to creating the individual records.
-
When you are ready, select Send to send the document to the appropriate recipient. A message appears. Click Send on the message.
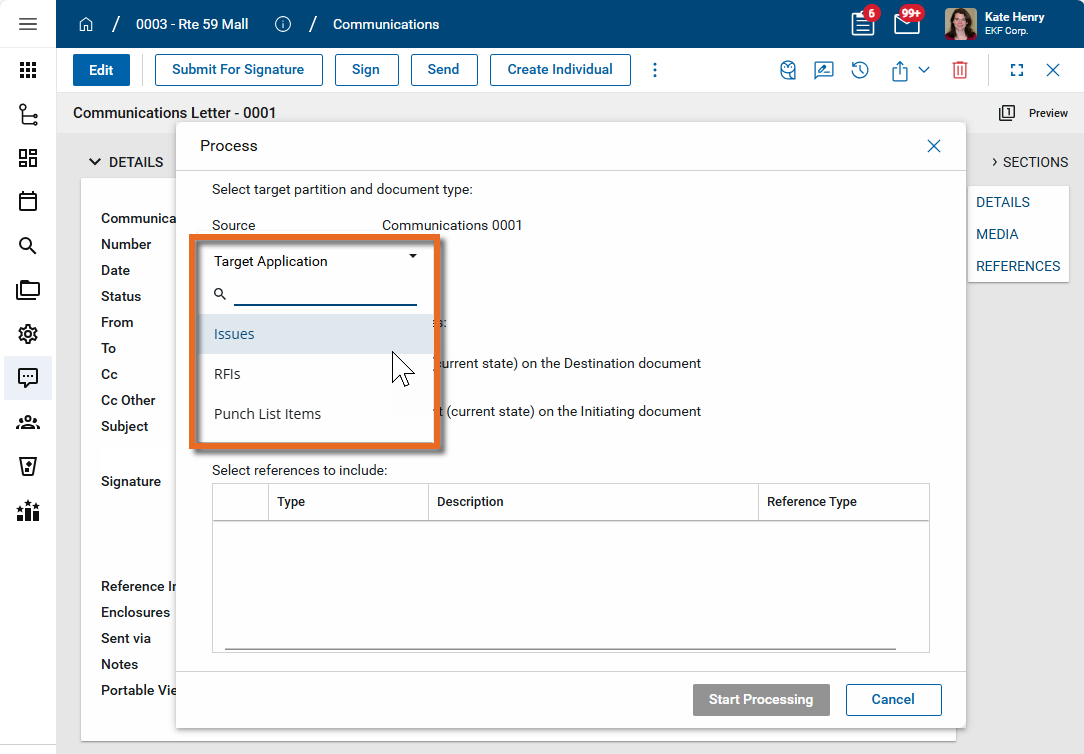
Records from the Communications app can be processed into Issues, RFIs, or Punch List Items. Selecting Process from the record will generate a new item in the selected app and copy field values from the communication to the destination record.
To process a record from the Communications app to another app, complete the following steps:
-
Review the header to ensure that you are in the correct project or partition.
-
Navigate to the Communications app (Apps > Document Management > Communications).
-
Select the document from the log view. The detail view appears.
-
Select Process from the action bar.

-
The Process dialog appears. Select the appropriate Target Application.
-
Select the references you want to include.
-
Click Start Processing. A new record in the selected app will open. Add and edit the field values as necessary and select Save to save the new record.
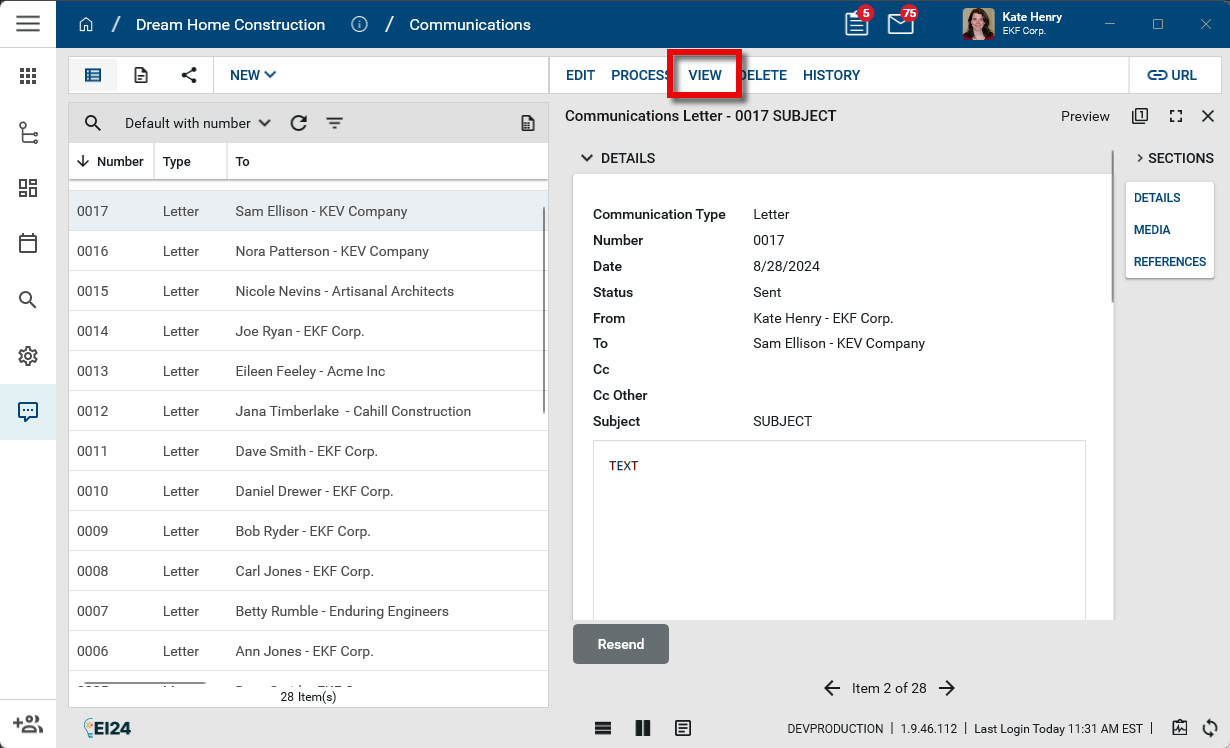
Documents in the Communications app can be opened and printed from the portable view. For more general information on portable views, refer to Portable Views.
To print a document from the Communications app, complete the following steps:
-
Review the header to ensure that you are in the correct project or partition.
-
Navigate to the Communications app (Apps > Document Management > Communications).
-
Select the document from the log view. The detail view appears.
-
Select View from the action bar.
-
A PDF of the document appears. Click the Expand icon
 to open the PDF in a printable view.
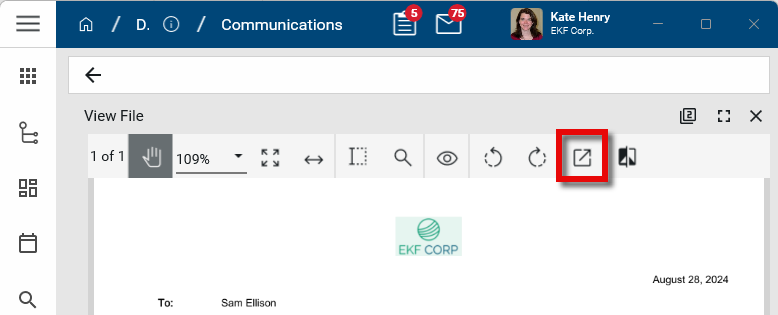
Important Note that the address on the portable view may be pulling from the company's primary address, not the address of the individual sending the communication.
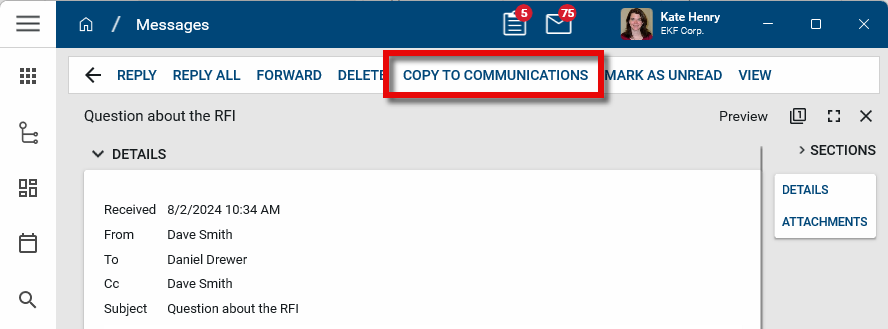
Messages can be copied to the Communications app by selecting Copy to Communications where appropriate. This option is available in the following applications:
-
From the Messages app, refer to Messages app.
-
In Outlook, if you use the Kahua for Outlook plugin. Refer to Add an email from Outlook to Kahua.
-
In Gmail, if you use the Gmail plugin. Refer to Add an email message from Gmail to Kahua.
Copy to Communications is available in other applications where the Send option creates a message to distribute a document. Select the Copy to Communications check box on the resulting message prior to selecting Send. If you do not select Copy to Communications prior to sending the message, you can do so later from the list of Sent Items in your Messages app by opening the message in the detail view and selecting Copy to Communications from the action bar.
Additionally, you can have the Copy to Communications option selected by default for all users in a partition or project by enabling the Copy App Messages to Communications by Default setting on the Settings tab of the Configuration app. Refer to Settings.
Each Communication Type follows its own numbering scheme that can be managed in the Configuration app. For more information on configuring document numbering schemes, refer to Number.
Your domain administrator or another user with the appropriate permissions can configure the app in the Configuration application.
Important When working in the Configuration app, it is important to review the header and ensure that you are working at the correct level in the hierarchy, either the root domain or at a partition or project level.
Settings that you establish at the root domain or lower levels will inherit down the hierarchy until they are overridden. For more information on the hierarchical structure of Kahua, refer to Understanding the hierarchical structure of Kahua.
The Configuration app can be accessed directly through the apps list (Apps > Administration > Configuration), or by right-clicking on an application in the launch bar and selecting Configure. When you select Configure for an app from the launch bar, the detail view of the configuration page for that application opens automatically.
For general information on configuring this app in Configuration, refer to Application configuration.
The following items part of the application configuration and are specific to this application:
| Options | Description |
|---|---|
| Settings tab | |
| Communication Types to Enable | Select or clear the check boxes for the Communication Types you want to enable or disable. These settings will be inherited by partitions and projects lower in the hierarchy until they are overridden. |