Project Home Page
The Project Home Page is a configurable project-level landing page where you can quickly review project information and access commonly used actions.
Note There are two types of home pages in Kahua, the global home page for the domain you are currently in, and a project home page for the project your are currently in. For more information on the global home page, refer to Kahua Global Home Page.
Important things to know about the project home page include the following:
-
All users who can access a project can view its Project Home Page.
-
The Project Home Page includes widgets for project photos and webcams, project information, tasks and discussions, quick actions, and project contacts.
-
Domain administrators and users assigned to a group with the Project Home Page Administrator permission can configure shared widget content and the Project Home Page layout.
-
Each user can configure their own Quick Actions shortcuts.
-
The Project Home Page feature can be disabled at the domain level or at the partition or project level through the configuration app.
How to . . .
 Access the Project Home Page
The Project Home Page opens when you navigate to a project from the global Kahua home page or from another project's project home page.
Additionally, you can access the project home page by selecting the home icon  in the Kahua header.

By default, when you switch to a different project while in an app or the Apps page, the current app or Apps page remains open.
If you would prefer to open the project's home page every time you open a new project regardless of what application is currently open, navigate to My Settings > General tab > Partition navigator section and disable the Preserve navigation context when switching projects option. For more information, refer to Preserve navigation context when switching projects .
Review Announcements
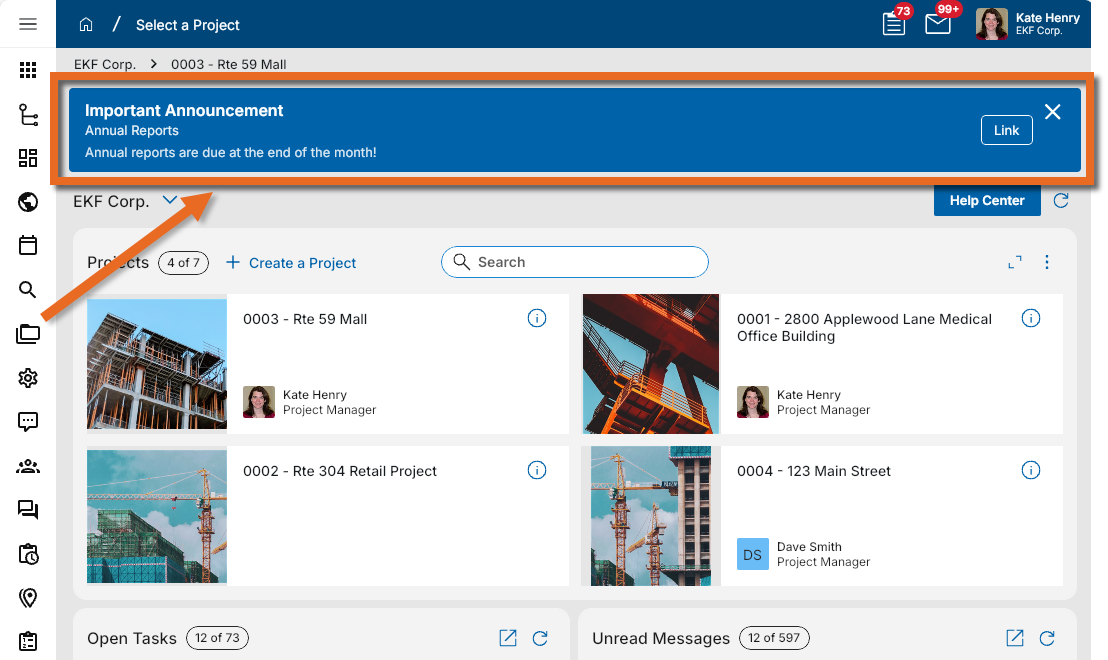
Your domain administrator can publish an announcement that appears on your global domain home page and project home pages. The announcement may contain text and URL links.
To close the announcement, click on the Close icon  . The announcement is dismissed from all your home pages for the current session.
For more information on setting up announcements, refer to Home Page Settings.
Review the Project Home Page
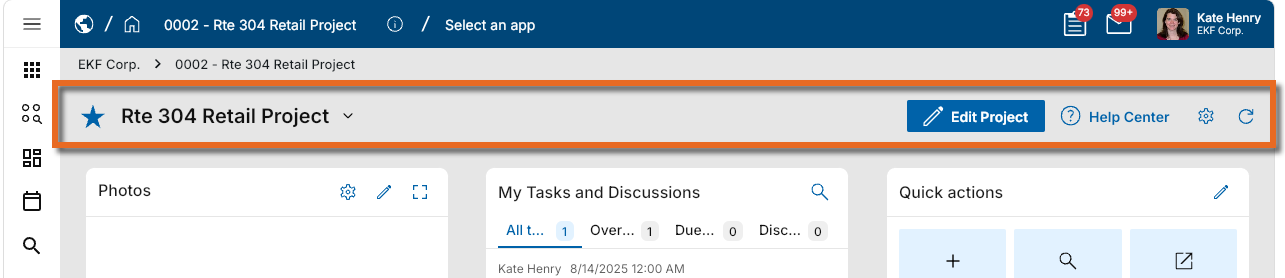
Each project home page has the same elements across the top of the page. Depending on your permissions, some or all of the following may appear:
-
Star icon
 - The star icon indicates if this project is designated as a "favorite". Favorited projects can automatically appear in the Projects section of the global home page. To designate a project as a "favorite", click on the star to select it. Once selected, the star appears as a solid icon. To clear the designation, click on the star again. Once cleared, the star appears as an outline.
-
Project name - The name of the currently selected project appears here. You can navigate to another project by clicking on the project name and selecting another project from the dropdown list. Projects that you selected as "favorites" appear for selection here.
-
Edit Project - if you have the appropriate permissions, this option appears. Click on it to open the Project Information page. For more information, refer to Project Information.
-
Help Center - The Help Center button opens either Kahua's online help or a help page specific to your organization. Your domain administrator can rename this button. Your domain administrator manages the text and the link for the Help Center button in the Domain Settings application. Refer to Custom Support URL.
-
Configure
 - Select this icon to open the configuration options for the project home page. Users with the appropriate permissions can customize the Project Home Page by moving widgets between three layout lanes, grouping widgets into tabs, and hiding widgets that are not needed. For more information, refer to Configure the project home page layout.
-
Refresh
 - Select this icon to refresh the data on the page.
Below these elements are multiple widgets containing information related to the project. A user with the appropriate permissions can configure the appearance of the home page for your project.
Depending on the current width of the page, the widgets appear in three "lanes" (i.e., column) or a in a single lane. Each lane can be configured with a header that contains a color and a title. Unneeded widgets can be hidden, and widgets can be configured to appear in any of the lanes.
The following types of widgets may appear on your project home page:
| Widget type | Description |
|---|---|
|
Gallery (Photos and Live)
|
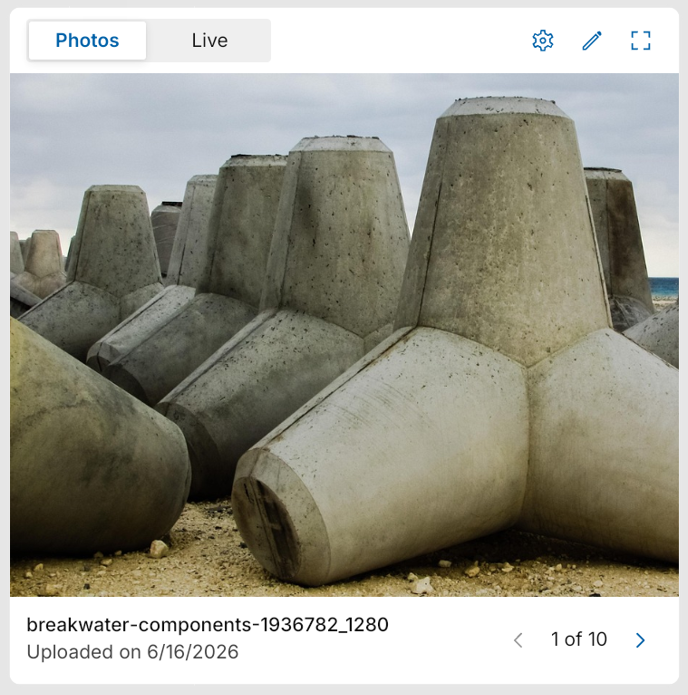
The Gallery widget includes a Photos tab and a Live tab. You can view up to ten project photos and, if configured, up to ten live webcam feeds.
Select the Expand icon to view the photos or webcam feeds in full screen. Note Webcam functionality is available only on the Kahua Commercial Network (KCN). |
|
Project Information
|
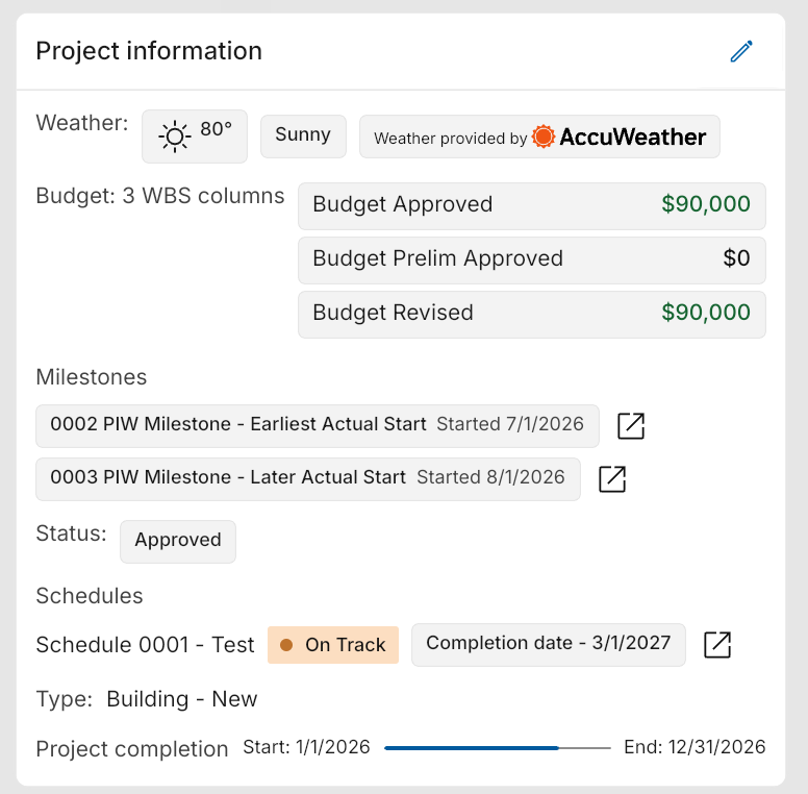
View important project details in one location. Administrators can select the pencil icon to configure six built-in widget options (Status, Milestones, Project Completion, Budget, Schedules, and Weather) and select additional fields from the Project record to appear on the widget. Administrators can control who views budget information by selecting Enforce WBS Permissions. When enabled, budget information only appears to users with access to the WBS application. The project status can be updated directly from the widget if you have permission to edit the Project record. |
|
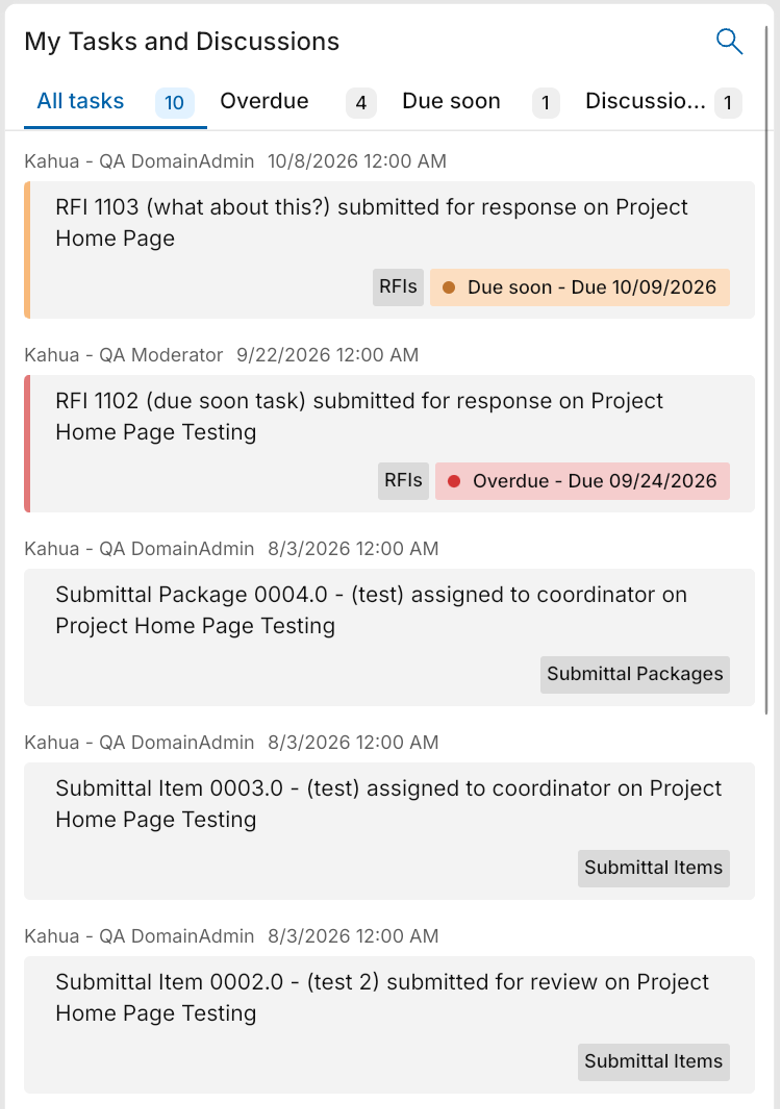
My Tasks and Discussions
|
View your open project tasks and unread discussion posts. Overdue tasks are identified, and tasks due within the next seven days are marked as due soon, helping you prioritize your work. |
|
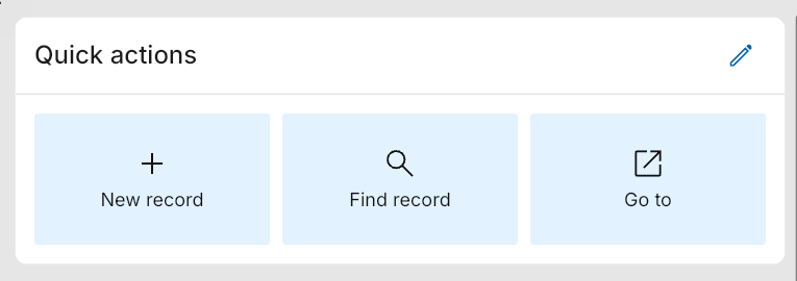
Quick Actions
|
Create personalized shortcuts to frequently used applications and actions. You can configure up to six actions of each type:
By default, Quick Actions are available across all projects. Enable Project-specific Quick Actions to configure a different set for the current project. |
|
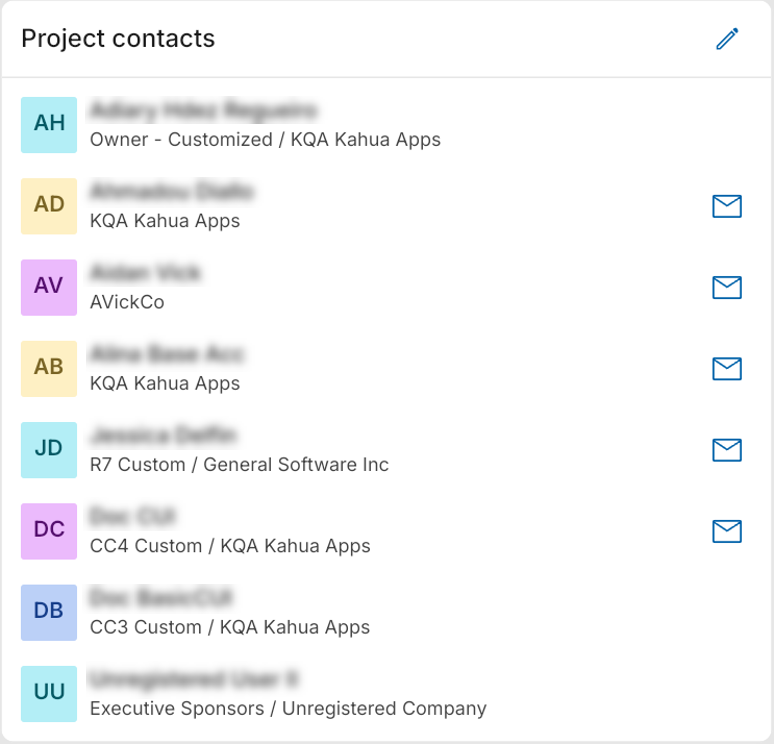
Project Contacts
|
View up to eight key contacts from the Project record or Project Directory. Administrators can select and reorder the contacts that appear. For contacts registered in Kahua, select the message icon to send a Kahua message directly from the widget. |

 Use the My Tasks and Discussions widget
Your open tasks and unread discussion posts for the current project appear in the My Tasks and Discussions widget.
The widget consists of the following four tabs:
-
All tasks - All your open tasks for the current project.
-
Overdue - All your tasks for the current project that are past their due date.
-
Due soon - All tasks for the current project that are due within seven days.
-
Discussions - All your unread discussion posts for the current project.
Click on a task to open it in the Tasks app, or click on an unread discussion to open it in the appropriate location.
Configure your Quick Actions widget
Quick Actions provide shortcuts to your frequently used areas of Kahua. You can configure your own Quick Actions widget.
The quick actions you select are available across all your projects. If desired, you can configure different quick actions for a specific project
You can configure the following action types for the apps you have access to:
| Action | Description |
|---|---|
| New Record | Starts a new record in the selected application. |
| Find Record | Searches for a record in the selected application. |
| Go To | Navigates to a selected application, list, and view. |
You can configure up to six actions of each type. When configuring an action, search by application name or filter by action type.
By default, your Quick Actions apply to all projects. Enable Project-specific Quick Actions to configure a different set of Quick Actions for the current project.
To configure your Quick Actions widget, complete the following steps
-
Click on the Edit icon
 .
-
Navigate to the appropriate app and action combination. You can use the Search at the top of the list to search for an application.
-
Click on the Add icon
 to add the app and action combination to the Selected panel.
-
For each action type (New Record, Find Record, Go to), you can select up to six apps to apply the action to.
-
The Selected list is organized by action type. Within the action type, you can control the order in which the options appear. Click and drag the options or use the arrow keys to manage the order.
-
To remove an item from the list, click on the Delete icon
 or click Remove all to remove all the options.
-
To have this list apply to only this project, select Project-specific quick actions at the top of the Selected section and agree to the confirmation message.
-
Click Save when you are done.
Configure the Project Home Page
Domain administrators and users with the Project Home Page Administrator permission can modify the page layout and configure the individual widgets.
Configure the project home page layout
Kahua provides a default Project Home Page template for all domains. The template controls the layout of the project home page.
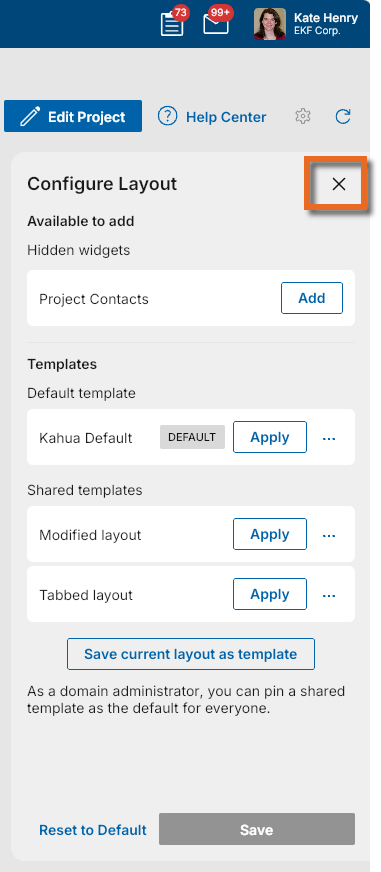
Domain administrators and users with the Project Home Page Administrator permission can modify the Project Home Page layout by moving, grouping, and hiding widgets. They can also create reusable layout templates.
To modify the layout, complete the following steps:
-
On the Project home page, select the Configure icon
to enter layout editing mode. -
Complete the following actions as desired:
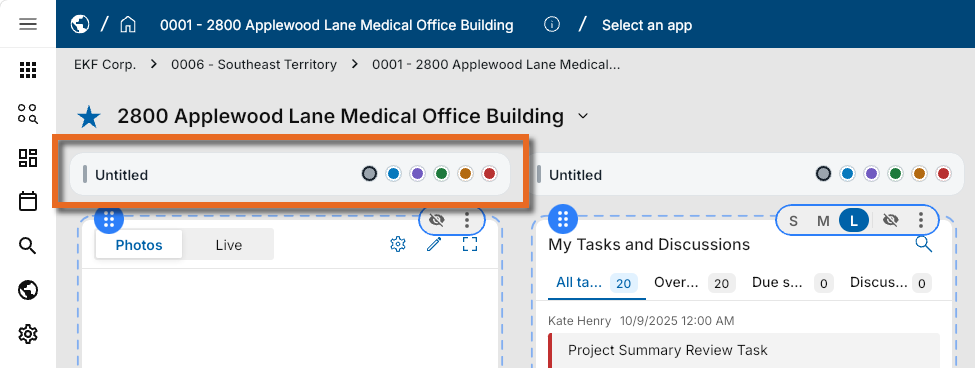
Action Steps Add a title or color to a "lane"
Enter a name in the lane header. Select a color as desired.
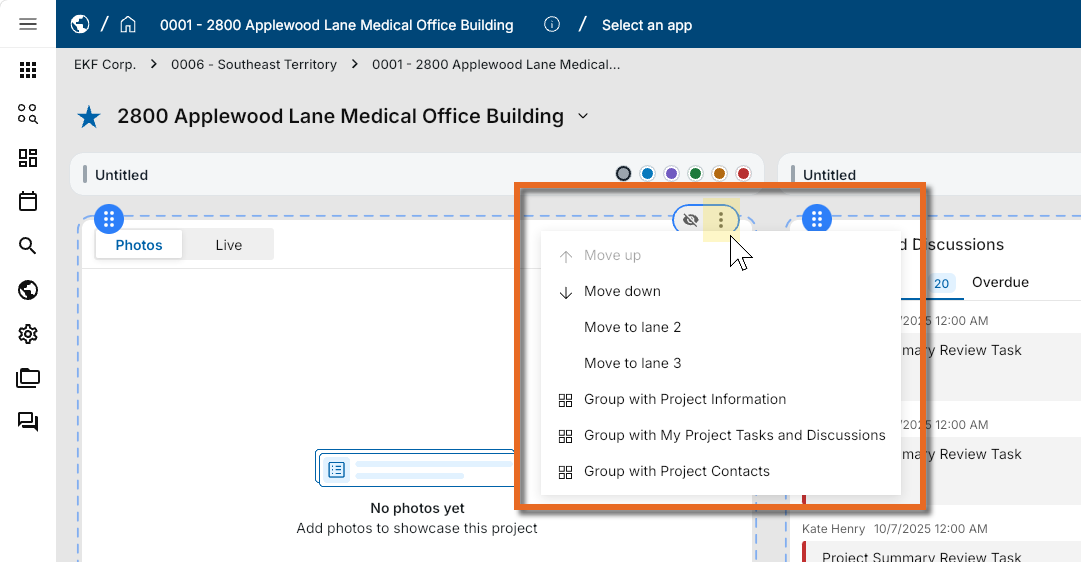
Move a widget Click and drag a widget to a desired location, or click on the More icon
 and select the appropriate option to move the widget.
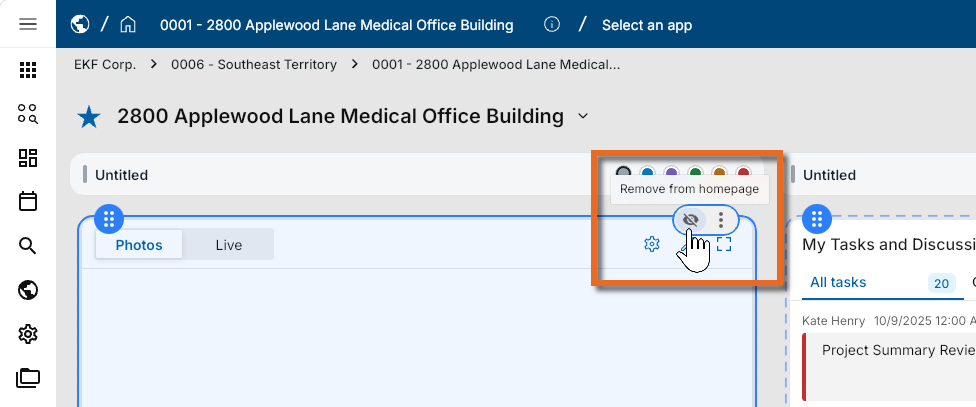
Hide a widget Click on the Remove from homepage icon
 on the widget. The widget is removed from the page and can be selected again from the Hidden widgets section on the Configure Layout panel.
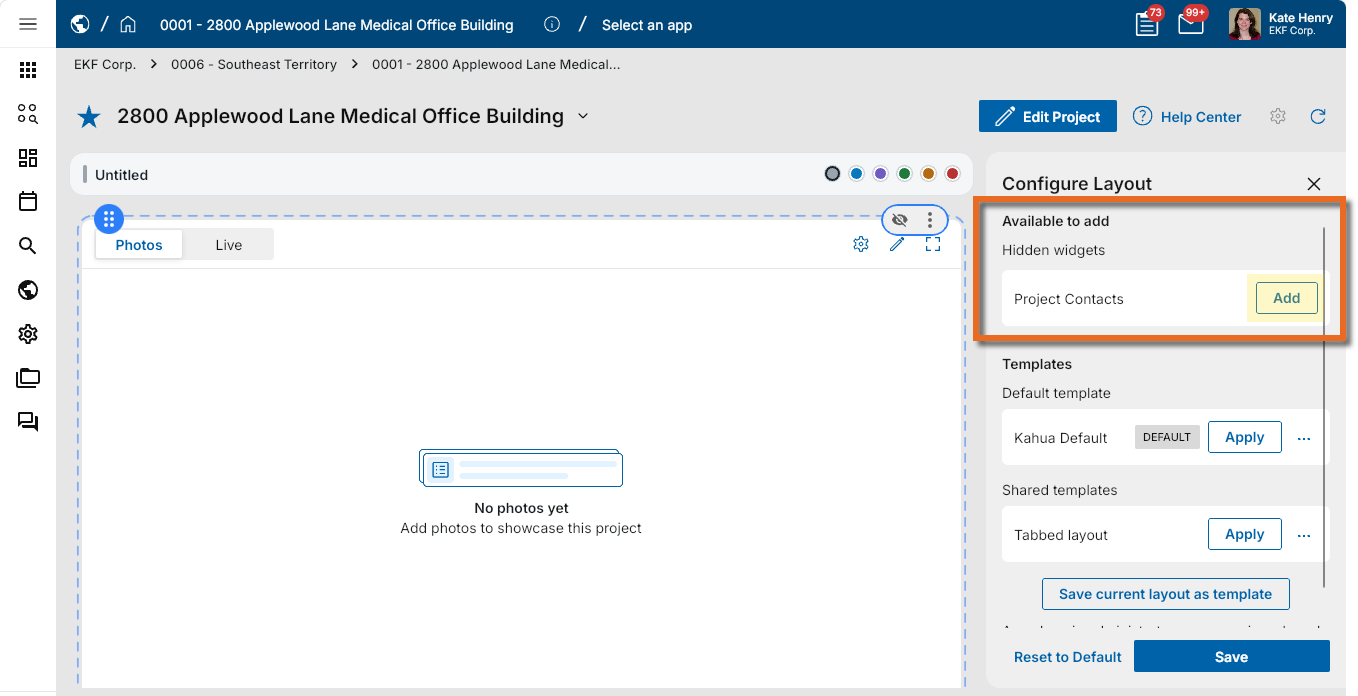
Re-add a hidden widget Hidden widgets can be added from the Configure Layout panel. Click Add next to the widget name to return it to the layout. Move or group it as desired.
Group widgets together Widgets can grouped together into a tabbed group. Click and drag a widget to the one you want to group it with, or click on the More icon
and select the widget you want to group it with.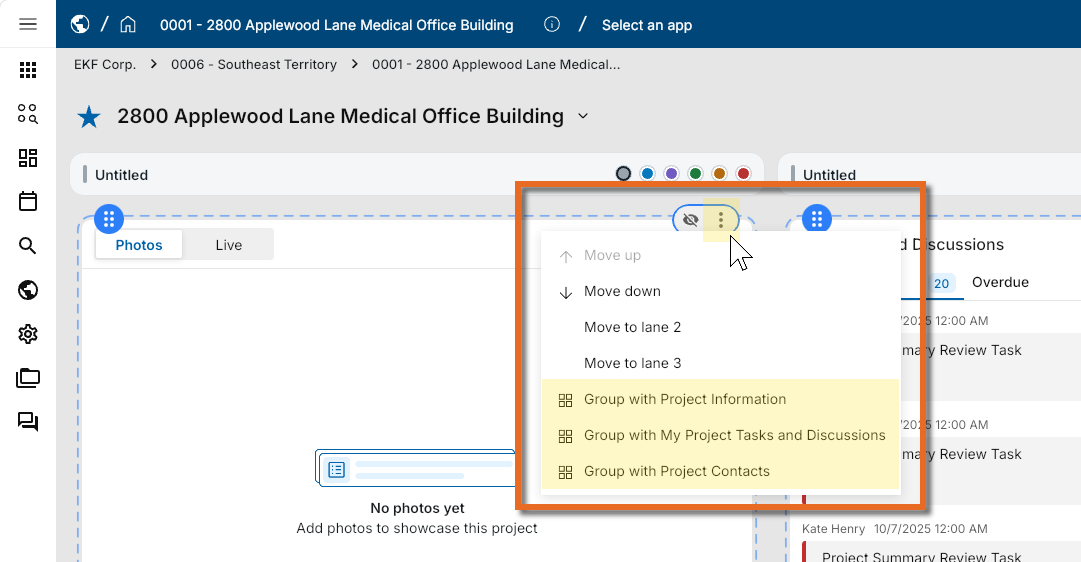
Ungroup widgets To remove a widget from a group, click on the Ungroup icon. Alternatively, click on the More icon
and select Ungroup widgets to remove all widgets from the group.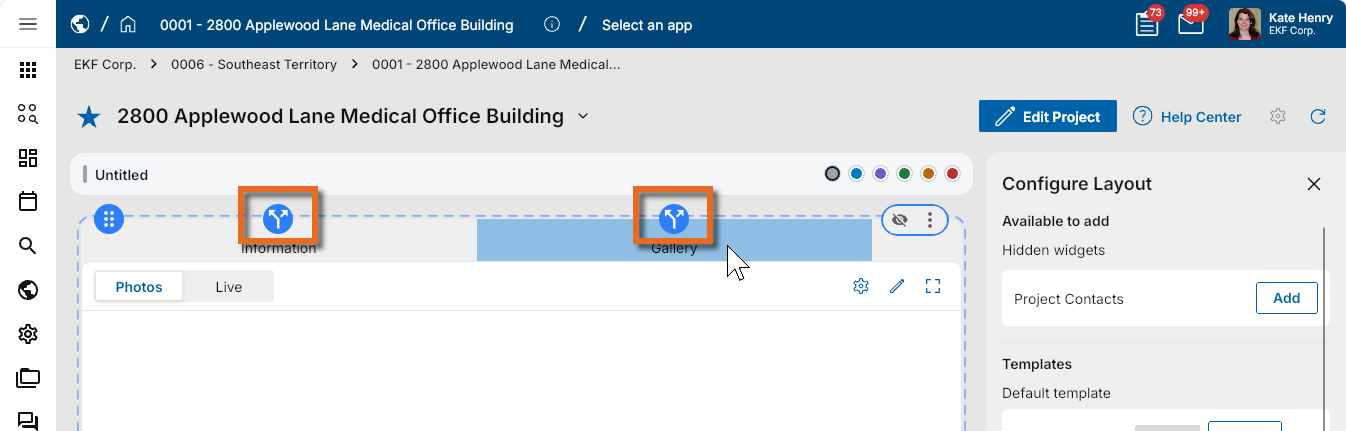
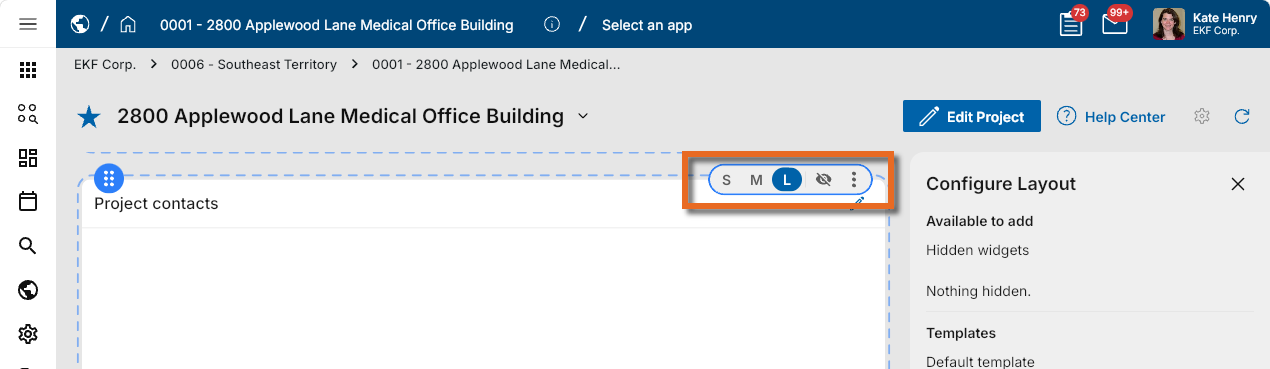
Select a widget size Some widgets allow you to select a height of small, medium, or large. Select S, M, or L on the widget as appropriate.
-
When you are done, click Save on the Configure Layout panel to save your changes.
-
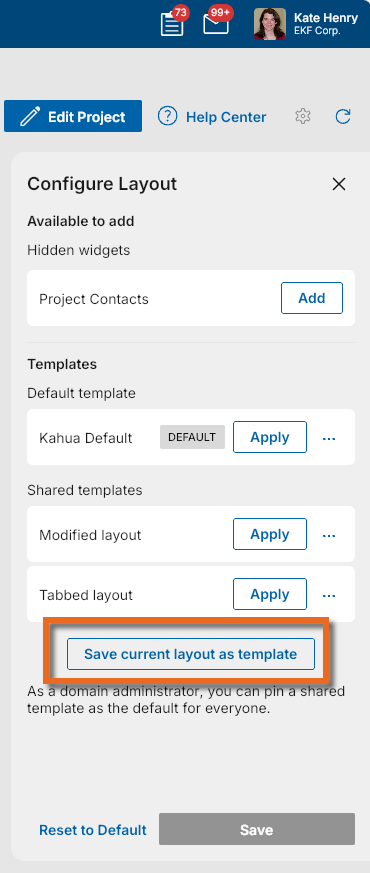
To save this layout as a template for use in other projects, select Save current layout as template. Assign a name to the template and click Save.
-
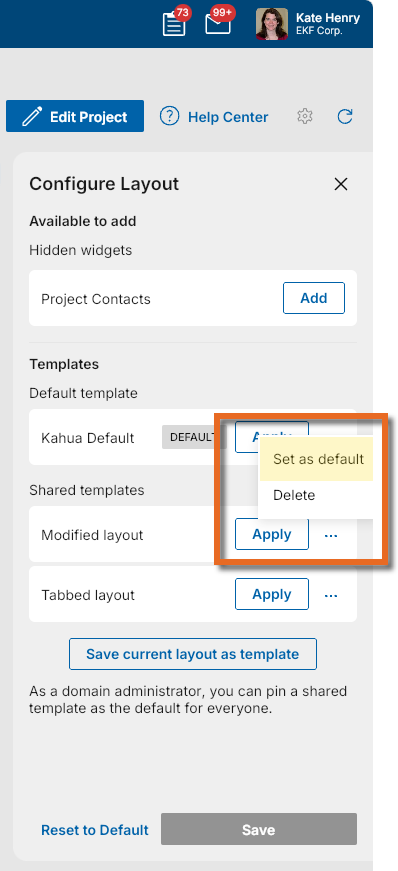
To make a saved template the default in your domain, domain administrators can click the More icon
 and select Set as default.
-
To modify the default template, domain administrators can click the More icon
next to the designated default template and select Edit default. -
To apply a saved template to a project, select Apply next to the layout name.
-
To apply the default template to a project, select Apply next to the default template name, or select Reset to Default at the bottom of the Configure Layout panel.
-
To delete a layout, click the More icon
and select Delete. -
To close out of the layout configuration mode, click the Close icon in upper right corner of the Configure Layout panel.
Configure individual widgets
Domain administrators and users assigned to a group with the Project Home Page Administrator permission can configure shared widget content in addition to the Project Home Page layout.
The Configure Layout panel must be closed to configure widgets.
Configure the Gallery widget
The Gallery widget can include Photos and Live tabs.
To enable or disable the Photos and Live tabs, select the Configure icon . Select or clear the Photos and Live tabs as appropriate. In the Tab Order section, click and drag the tabs to the appropriate order, or click on the arrow icons.
Note Kahua webcam functionality is available only on the Kahua Commercial Network (KCN).
To configure the Photos tab, complete the following steps:
-
On the Gallery widget, select the Photos tab.
-
Click on the Edit icon
. -
Project photos from Media Manager app appear. Click on the appropriate photos to select them, or select Upload to add additional photos. Uploaded photos are added to the Media Manager app. Select up to ten photos.
-
Users with permission to edit the Project record can click the star icon on a photo to set that image as the project icon.
-
In the Featured panel, click and drag photos to control the order in which they appear. The selected Project Photo is always the top photo.
-
To remove a photo, click on the Delete icon
. To remove all images, click Remove all. -
Click Save when you are done.
To configure the Live tab, complete the following steps:
-
On the Gallery widget, select the Live tab.
Note The Live tab only appears when webcams are configured for the project. For information on configuring webcams, refer to Webcam.
-
Click on the Edit icon
. -
Configured webcams appear for selection. Select up to 10 webcams tp appear on the tab.
-
In the Selected panel, click and drag the webcams to control the order in which they appear.
-
To remove a webcam, click on the Delete icon
or clear its selection. To remove all webcams, click Remove all. -
Click Save when you are done.
Configure the Project Information widget
The Project Information widget displays key project information using built-in widget settings and fields from the Project record. You can select up to twelve fields to appear on the widget.
To configure the Project Information widget, complete the following steps:
-
Click on the Edit icon
. -
In the Add to Widget section, there are two tabs, Widget Settings and Project Fields. From these two tabs, you can select up to twelve fields to appear on the widget.
-
On the Widget settings tab, select any of the following sections to appear on the widget. Some sections are configurable.
Setting Description Status Select this option to have the status from the project information page appear. Users who have permission to edit the Project record can change the project status from the widget.
Milestones Select this option to have the next five upcoming milestones appear. Refer to Milestones.
Project Completion Select this option to have a completion bar based on the project's start date and estimated completion date appear.
These values are managed on the Project Information page. Refer to Project Information.
Budget Click the Edit icon to select and order the WBS columns to appear for the current project.
Select Enforce WBS Permissions to have these values only appear to users who have access to the WBS application.
Schedules Display all current schedules or select specific schedules to display. Weather Select this option to have the current weather data appear. Weather must be configured for the project. Refer to Configuring weather data for a project.
-
On the Project Fields tab, select the fields from the Project Information page to appear on the widget.
Select Show only fields with values to limit the list to fields that contain data.
Note Some field types cannot be added to the widget and appear disabled in the field list.
-
In the Selected fields section, the fields selected from the Widget settings tab and the Project Fields tab appear. Click and drag the fields or use the arrow keys to control the order in which they appear.
-
To remove a field from the list, click on the Delete icon
or clear its selection. -
Click Save Changes when you are done.
Configure the Project Contacts widget
The Project Contacts widget shows up to eight contacts, selected from the Project record or Project Directory.
To configure the Project Contacts widget, complete the following steps:
-
Click on the Edit icon
. -
In the Project contacts section, contacts from the Project Information page appear. Click on the Pin icon
 to add a contact to the Selected contacts section.
To modify the contacts on the Project information page, select Edit in project record. Refer to Project Information.
-
In the Project directory section, contacts from the Project Directory app appear. Click on the Pin icon
to add a contact to the Selected contacts section.To modify the contacts in the Project Directory, select Edit in project directory. Refer to Project Directory.
-
In the Selected contacts section, the contacts selected from the Project contacts tab and Project directory appear. Click and drag the fields or use the arrow keys to control the order in which they appear.
-
To remove a contact from the list, click on the Delete icon
or click on the Pin icon in the original selection to clear it. -
Click Save when you are done.
Configure the app
Your domain administrator or another user with the appropriate permissions can enable or disable the Project Home Page feature in the Configuration application. It appears alongside other apps in the Configurations app > Applications tab. It can be enabled or disabled from the General tab at the domain, partition, or project level.
Important When working in the Configuration app, it is important to review the header and ensure that you are working at the correct level in the hierarchy, either the root domain or at a partition or project level.
Settings that you establish at the root domain or lower levels will inherit down the hierarchy until they are overridden. For more information on the hierarchical structure of Kahua, refer to Understanding the hierarchical structure of Kahua.
The Configuration app can be accessed directly through the apps list (Apps > Administration > Configuration). For general information about the Configuration app, refer to Configuration app. For information on configuring this app in Configuration, including how to disable this feature on the General tab of the application configuration, refer to Application configuration.
Available application roles
Application roles determine which actions users can perform in the app. Roles are assigned to groups in the Groups app > Permissions tab. Members of the group then have the permissions associated with the roles assigned to the group.
The following roles are available for this application:
| Role | Details |
|---|---|
|
Administrator |
These users can configure shared widget content and the Project Home Page layout. |
Note To manage these permissions, open the Groups app and assign the appropriate application role to the group. Only users with the appropriate permissions can manage application roles. For more information, refer to Managing Permissions.