Milestones
Notice Kahua is a very flexible and customizable platform. In your domain, this application may have been modified to meet your company's needs. The online help uses default field labels for field names and describes standard workflows. Please check with your domain administrator for specific information about working in your organization's domain.
The Milestones app allows you to track and have visibility into key milestones dates for your project.
Key elements of the Milestone app are as follows:
-
Milestone records can be entered manually, through an import, or created when a new project is created through the use of a project template.
-
Baseline date values can be recorded and compared against revised and actual values.
-
Milestones can be viewed in a Gantt chart format. You can select some or all of the milestones to be included in the Gantt view.
-
Multiple milestone records can be edited at the same time through the multi-edit feature.
How to . . .
To create a new milestone or edit an existing one, complete the following steps:
-
Review the header to ensure that you are in the correct project or partition.
-
Navigate to the Milestones app (Apps > All Apps > Milestones).
-
To create a new milestone, click New in the action bar.
To edit an existing one, click on it from the log view to open the detail panel.
-
Complete the following fields as appropriate:
Note Depending on how this app is configured for your domain, there may be fields or sections listed here that do not appear for you, fields and sections that appear for you which are not listed here, or fields and sections which appear in a different order. If you have any questions, check with your domain administrator.
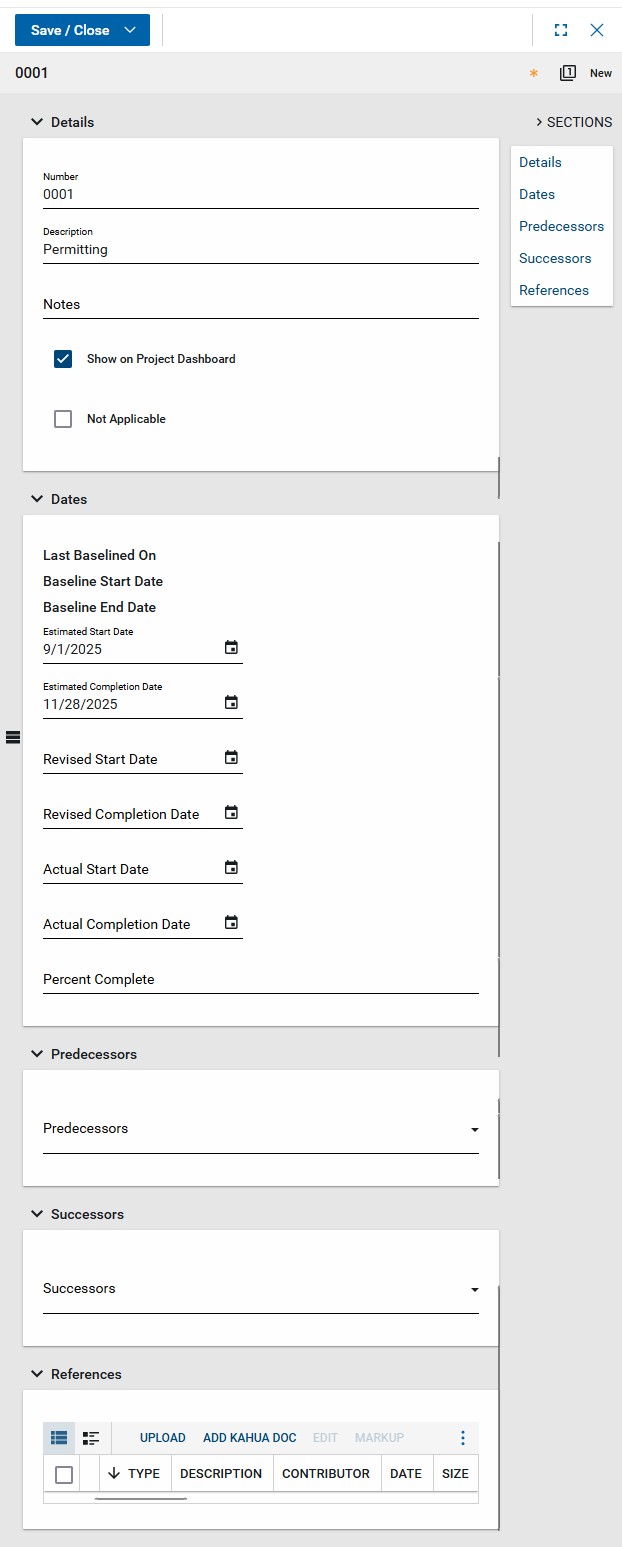
Field Description Details Number Allow Kahua to auto-number the record, or enter a different value.
Note The number format can be configured by your domain administrator. Refer to Number.
Description Enter the name of the milestone. Notes Enter any notes for this milestone as appropriate. Show on Project Dashboard This field can be used as a filter for reporting. If you are not using it, an administrator can hide the field in Configuration. Refer to Fields. Not Applicable Select this option to mark this milestone as not applicable for this project.
Note This is useful in situations where a standard set of milestones has been added to this project when the project was created from a template or through an import. Select this field to indicate this milestone is not being used on this project.
Use the "Applicable" log view to only view milestones relevant to the project. Refer to Log Views and Log Reporting.Dates Last Baselined On The date that a baseline was last recorded for this milestone appears here. Baseline Start Date / Baseline End Date The baseline start and end dates appear here. Estimated Start Date / Estimated Completion Date Enter the estimated start and completion dates. Revised Start Date / Revised Completion Date Enter the revised start and completion dates.
Note In order for some reports to display data properly, a milestone with Revised Start or Completion dates should also have Estimated Start and Completion dates entered.
Actual Start Date / Actual Completion Date Enter the actual start and completion dates. Calculated Start Date / Calculated Completion Date These values are set automatically when values are added to the Estimated, Revised, and Actual date fields and saved. They are used in Cashflow forecasting.
By default, values from the Actual date fields are used if present. If not present, then the Revised date fields are used. If those are not present, then the Estimated date fields are used. You can control the order in which fields are used in the Configuration app, Refer to Calculated Date - Highest Priority / Secondary Priority / Third Priority.
Note The Calculated Start and Calculated End dates are evaluated independently of each other.
Percent Compete Enter a percent complete value for this milestone.
Note This value does not update automatically when actual dates are modified, nor do the actual dates update when the percent complete is adjusted.
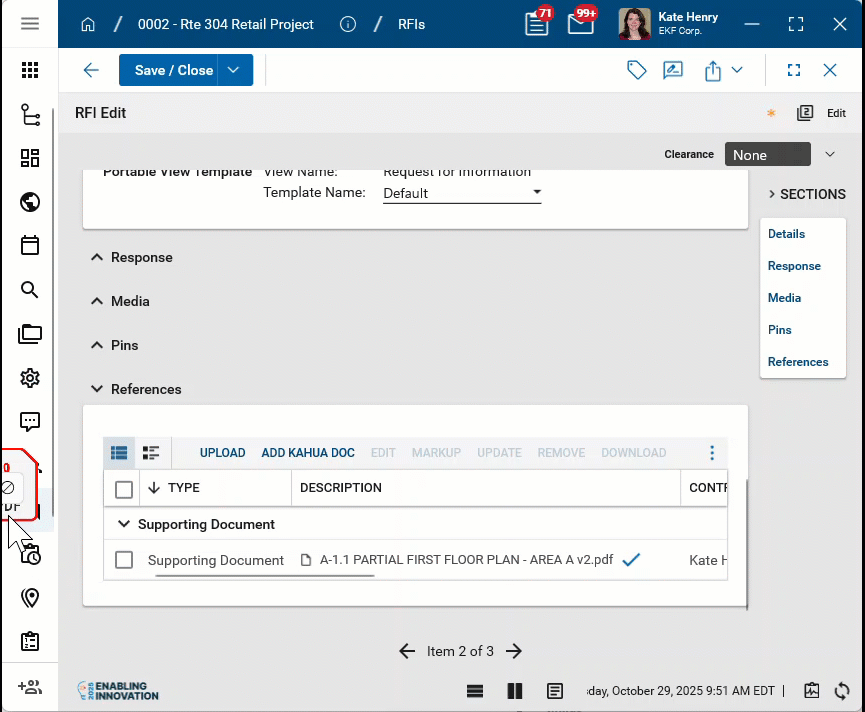
Predecessors Select one or more existing milestones as predecessor items. To filter the list, enter a portion of the milestone Number or Description. Successors Select one or more existing milestones as predecessor items. To filter the list, enter a portion of the milestone Number or Description. References Upload or select any relevant files or documents. You can use drag and drop to add a file to this section. For more information on using this section, refer to References section.
-
Click Save when you are done.
Baseline dates are the dates recorded as the planned dates for the schedule, typically established after a review or approval process. In the Milestones app, you can establish baseline dates for one or more milestones at a time.
When you baseline the milestones, the Estimated Start Date and Estimated Completion Date are recorded as the Baseline Start Date and Baseline End Date.
To establish baseline dates, complete the following steps:
- Review the header to ensure that you are in the correct project or partition.
-
Navigate to the Milestones app (Apps > All Apps > Milestones).
-
From the log view, select the milestones for which you want to create a baseline.

-
Select Baseline from the action bar. Click Continue on the confirmation message.
-
A table of the baselined milestones appears. Click Close to close the page.
-
Alternatively, you can capture the baseline values for a single milestone. Click on the milestone from the log view to open the detail panel and select Baseline Milestones from the action bar (you may need to click on the More icon
 to access the menu).
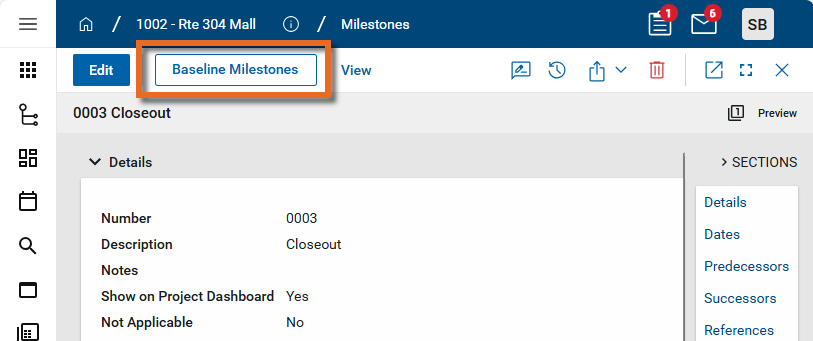
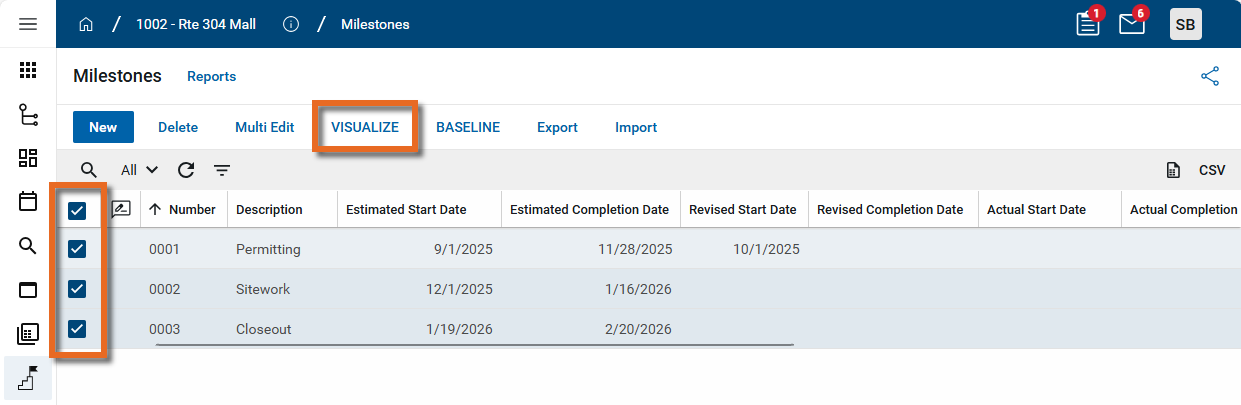
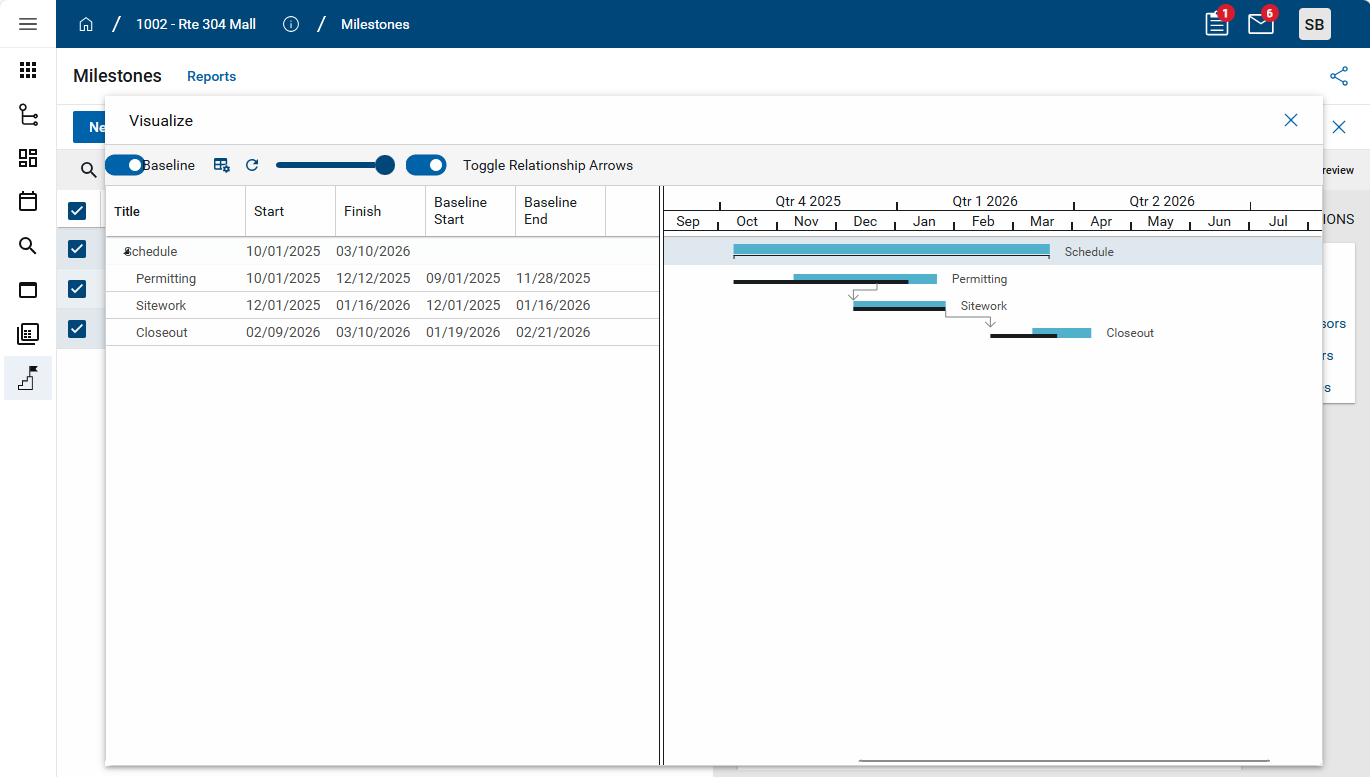
Milestones can be viewed in a Gantt chart format. You can select some or all of the milestones to be included in the Gantt view.
To view milestones in a Gantt chart format, complete the following steps:
- Review the header to ensure that you are in the correct project or partition.
-
Navigate to the Milestones app (Apps > All Apps > Milestones).
-
From the log view, select the milestones you want to include in the Gantt chart.
-
Select Visualize from the action bar. The Gantt chart appears.
-
Use the following options to modify your view:
Tool Description Baseline toggle

Select this option to include baseline dates in the table and visualization. Column Chooser 
Click on this icon to open or close the Column Chooser.
You can use the column chooser to control what fields appear in the table next to the visualization.
Reset 
Click this icon to reset the view zoom. View Zoom 
Use this slider to zoom in and out of the Gantt chart. Toggle Relationship Arrows

Use this toggle to enable or disable the display of arrows between predecessor and successor items. -
Click the Close icon
 to close the page.
If you have existing data that you want to import into this app, you can do so through the import process.
You will first generate an export of an existing record to access the correctly formatted spreadsheet file for the import. Once the exported file is available, add the appropriate values for the records you want to import to the exported spreadsheet. You can then import those records. For more detailed information on the importing process, refer to Importing records.
You can generate a report from a selected log view, or use one of the built-in reports available by default in each application. For more information on creating your own reports, including how to set up scheduled reports, refer to Creating ad hoc reports.
Note For information on modifying the logo that appears on reports in your project, refer to Managing report logos.
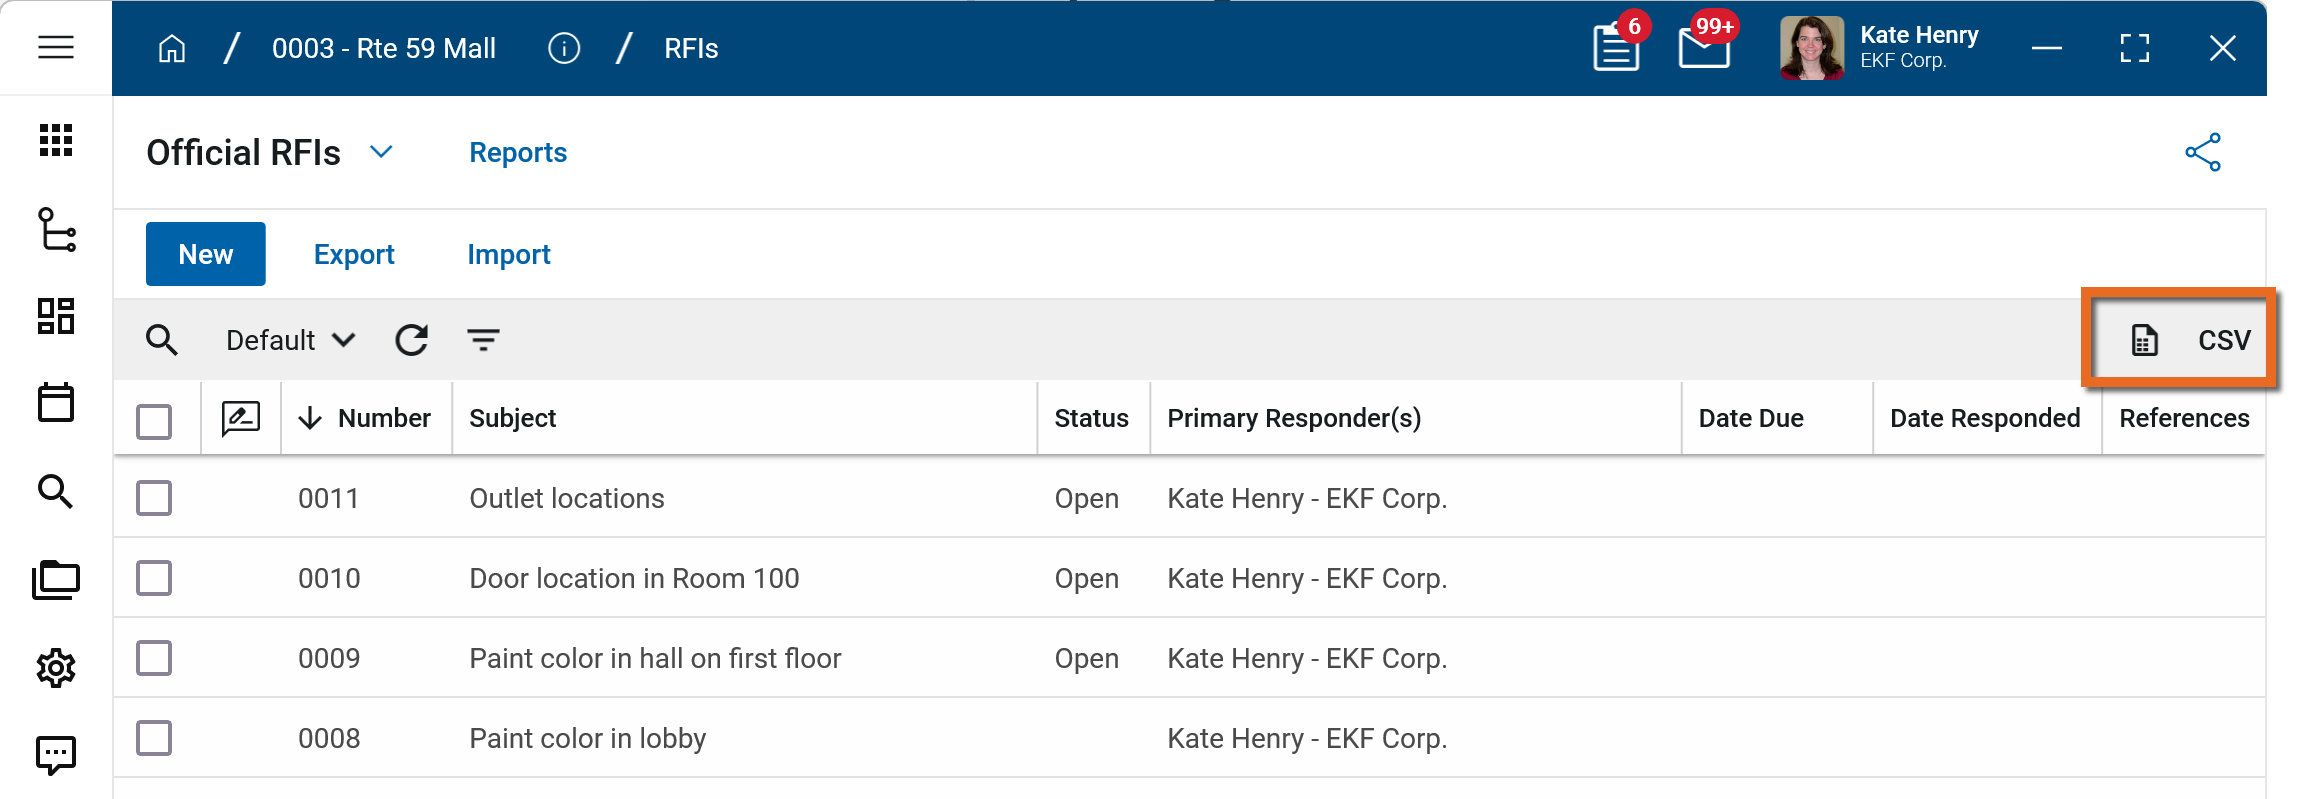
To generate a report from a log view with up to 10,000 records, select the report icon ![]() . If your log view contains more than 10,000 records, the report icon will be disabled and you can select to download the records to a CSV file instead. For more information, refer to Generate a report from a log view.
. If your log view contains more than 10,000 records, the report icon will be disabled and you can select to download the records to a CSV file instead. For more information, refer to Generate a report from a log view.
To generate an application report, complete the following steps:
-
Navigate to the application.
-
Select Reports in the application title bar.
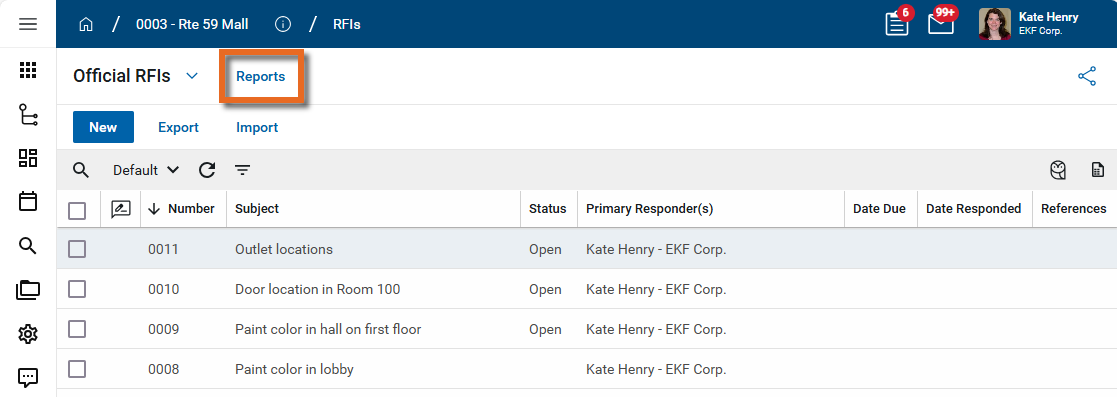
-
Select the report you want to run.
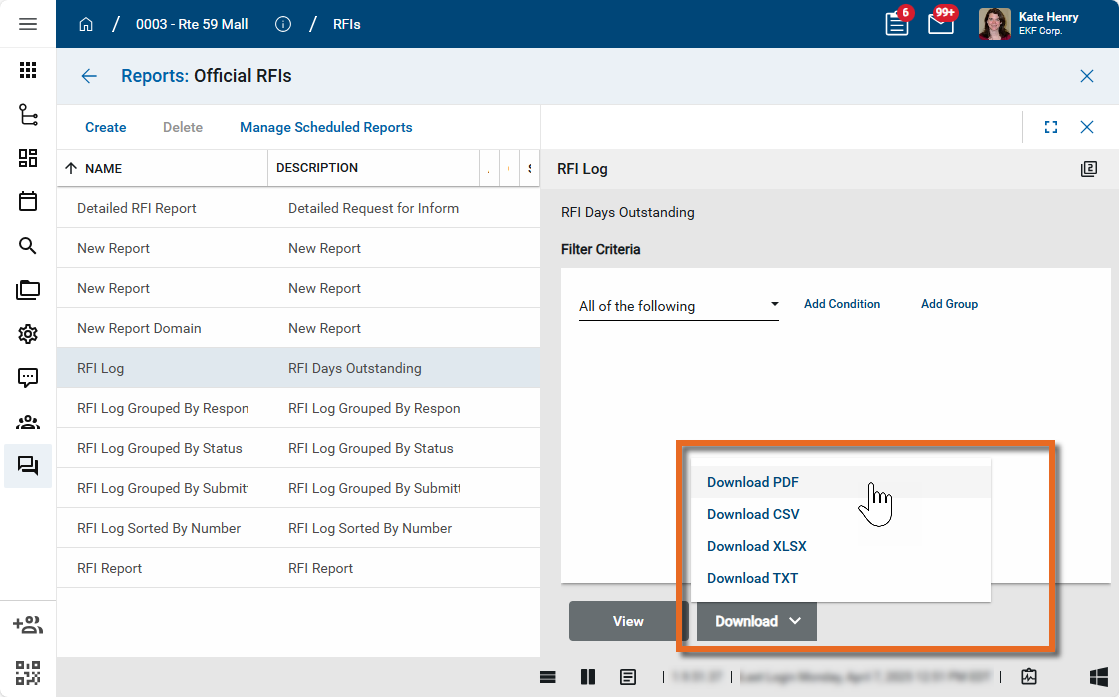
-
Apply any desired filters.
-
Select View or Download as appropriate. For more information, refer to Viewing Reports.
-
Click the Close icon
 when you are done.
To delete a record, complete the following steps:
-
Review the header to ensure that you are in the correct project or partition.
-
Navigate to the application.
-
In the log view, select the check box next to the record or multiple records that you want to delete. Select Delete from the action bar.
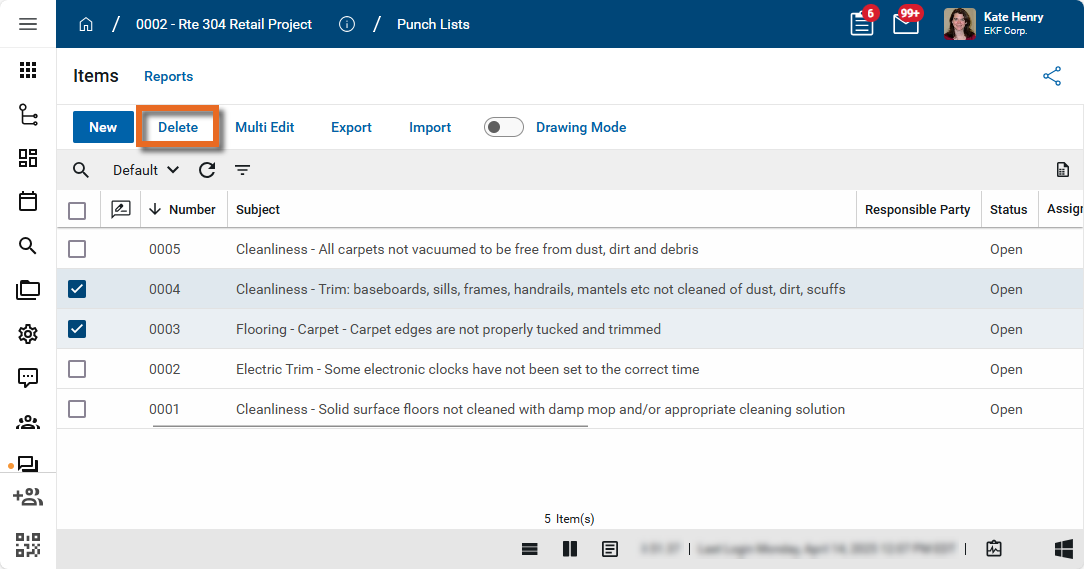
-
Alternatively, right-click on the record in the log view and select Delete, or open it in the detail pane and select the Delete icon
 in the action bar.
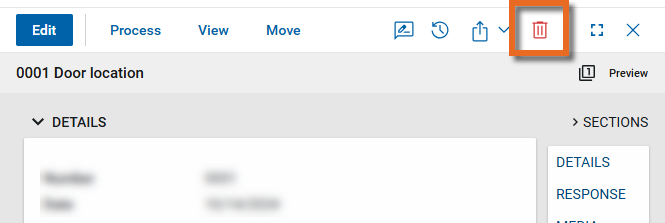
-
Click OK on the confirmation message. The record or records will be deleted.
Note If a record was deleted in error, it can be recovered from the Recycle Bin application by an administrator. Deleted records are available for restoration for a set number of days as configured in domain settings. For more information, refer to Using the Recycle Bin.
Your domain administrator or another user with the appropriate permissions can configure the app in the Configuration application.
Important When working in the Configuration app, it is important to review the header and ensure that you are working at the correct level in the hierarchy, either the root domain or at a partition or project level.
Settings that you establish at the root domain or lower levels will inherit down the hierarchy until they are overridden. For more information on the hierarchical structure of Kahua, refer to Understanding the hierarchical structure of Kahua.
The Configuration app can be accessed directly through the apps list (Apps > Administration > Configuration), or by right-clicking on an application in the launch bar and selecting Configure. When you select Configure for an app from the launch bar, the detail view of the configuration page for that application opens automatically.
For general information on configuring this app in Configuration, refer to Application configuration.
The following items are specific to this application: