Issues
Notice Kahua is a very flexible and customizable platform. In your domain, this application may have been modified to meet your company's needs. The online help uses default field labels for field names and describes standard workflows. Please check with your domain administrator for specific information about working in your organization's domain.
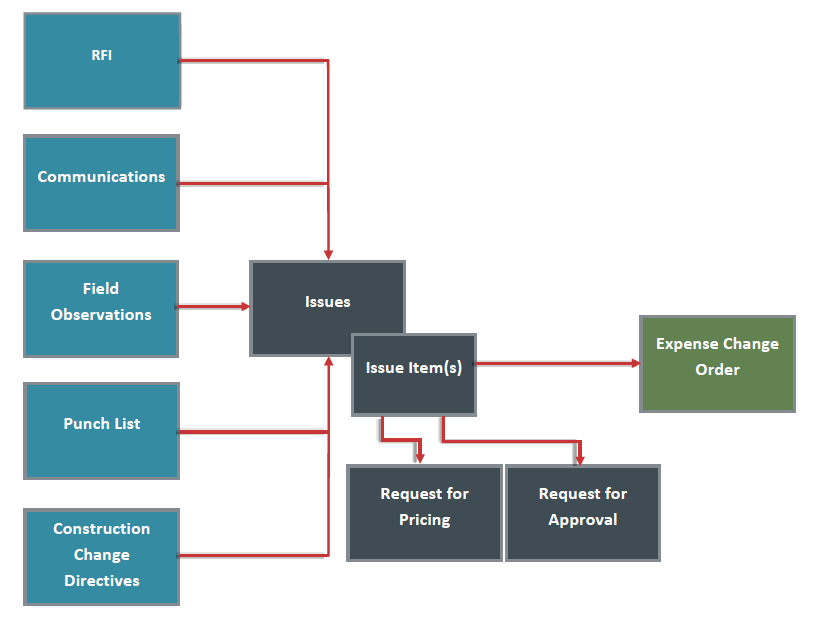
The Issues application allows you to track, log, and manage issues on projects. Issues are often precursors to Change Orders and Change Requests.
Key elements of the Issues app are as follows:
-
Issues can be initiated from other applications (RFIs, Punch Lists, etc.)
-
You can create a new Issue without processing it from another app.
-
Issues can be sent for pricing.
-
Issues can be submitted into Review and / or Approval Workflows.
-
Approved Issue Items can be escalated to Change Orders or Change Orders Requests.
A visual representation of the Issues workflow is below:
How to . . .
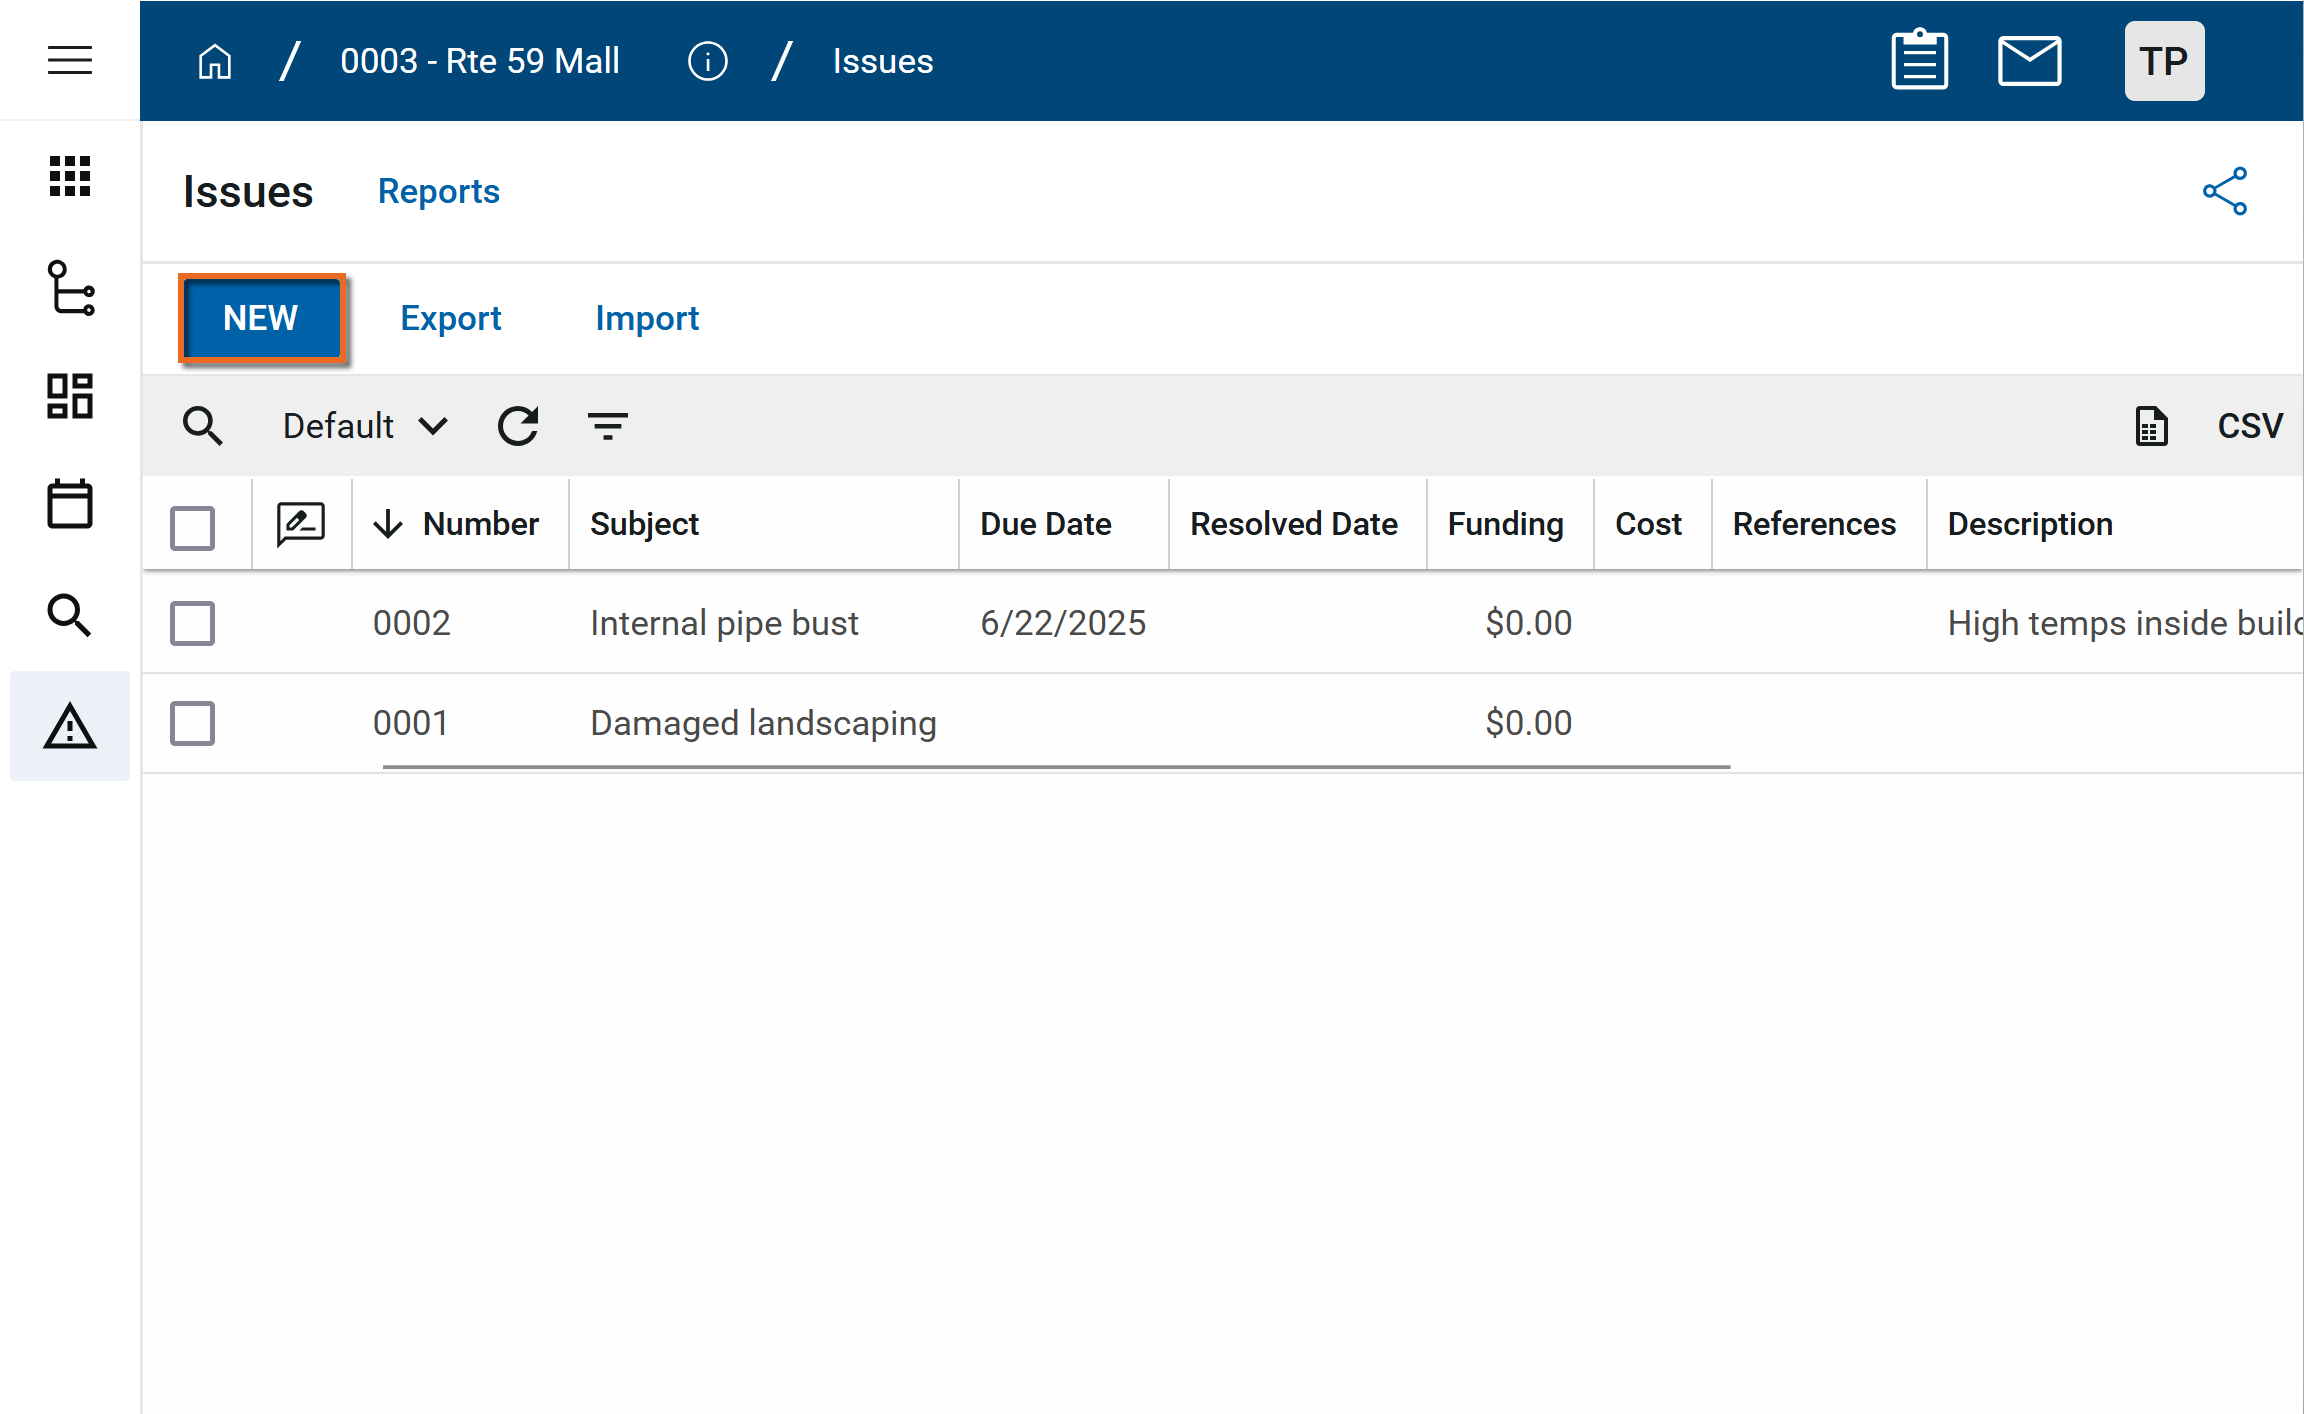
To create a new issue, complete the following steps:
-
Review the header to ensure that you are in the correct project or partition.
-
Navigate to the Issues app (Apps > Cost Management > Issues ).

-
Click New in the action bar.
-
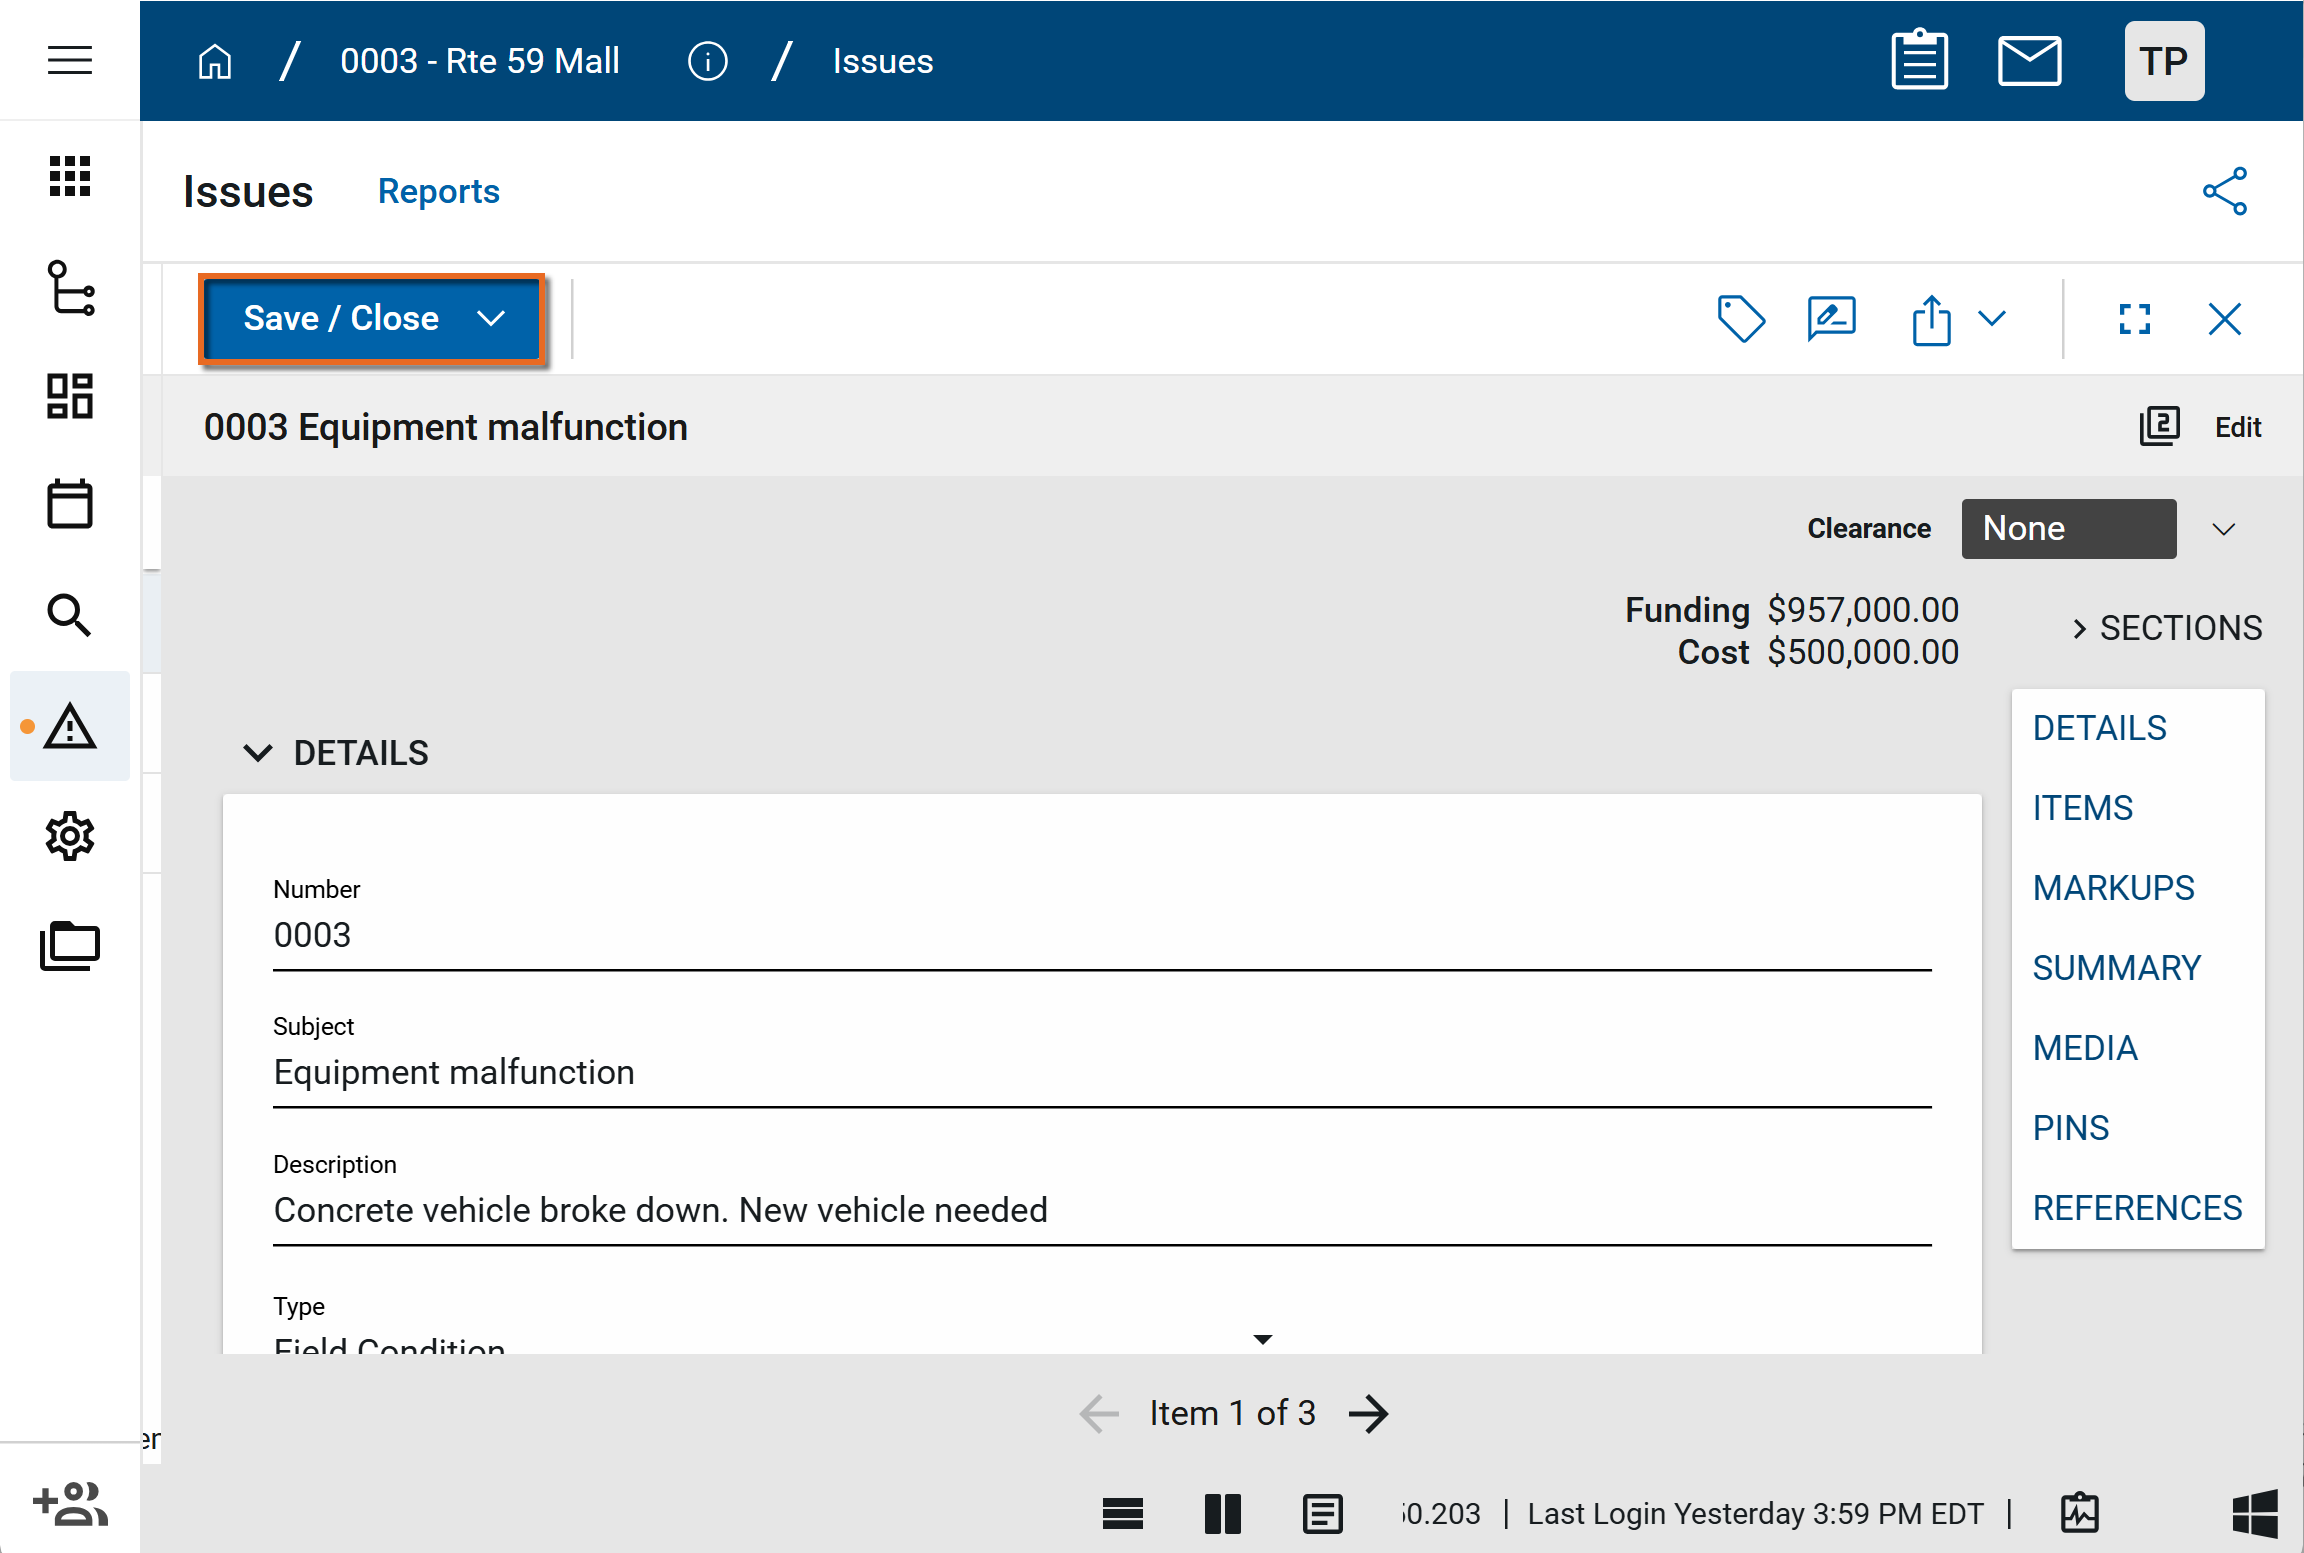
Complete the following fields as appropriate:
Note Depending on how this app is configured for your domain, there may be fields or sections listed here that do not appear for you, fields and sections that appear for you which are not listed here, or fields and sections which appear in a different order. If you have any questions, check with your domain administrator.
Field Description Details Number Allow Kahua to auto-number the record, or enter a different value.
Note The number format can be configured by your domain administrator. Refer to Number.
Subject Enter the subject of the issue. Description Enter a brief description of the issue.
Type Select the issue type.
Note This lookup list is managed in the Configuration app. Refer to Lookups.
Priority Select the level of priority.
Note This lookup list is managed in the Configuration app. Refer to Lookups.
Category Select the appropriate category.
Note This lookup list is managed in the Configuration app. Refer to Lookups.
Location Select the issue location.
Note This list is managed in the Locations app. Refer to Setting up locations.Initiated By Select the individual who initiated the issue. Requested Date Select the requested date. Responsible Contact Select the contact responsible for the issue.
Note If using the Get Pricing workflow, this value should be selected.Due Date Select the due date. Resolved Date Select the resolved date, if applicable. Outcome Enter the appropriate outcome. Notes Enter necessary notes. Status Select the status. Calculation Template Select a calculation template.
Note This lookup list is managed in the Configuration app. Refer to Lookups.
Currency This field auto-populates with the project currency. Select a different currency if appropriate. Items For more information on working with grids, refer to Item Grids. Details Number This field auto-populates. Enter a different value if appropriate. Description Enter a brief description. Activity Code Select an activity code. Funding Quantity Enter the quantity. Unit of Measure (UOM)
Select the unit of measure. Unit Price Enter the unit price. Status Select the status. Total This field auto-populates when the issue is saved. It will display the total cost of the item. Expense Quantity Enter the quantity. Unit of Measure (UOM) Select the unit of measure. Unit Price Enter the unit price. Status Select the status. Total This field auto-populates when the issue is saved. It will display the total cost of the item. Markups For more information on working with grids, refer to Item Grids. Description This field is read only.
Activity Code Select an activity code. Status Select the status. Total This field auto-populates when the issue is saved. It will display the total cost of the item. Is Manual Check if appropriate. Summary The fields in this section auto-populate and are read only. They will display a breakdown of the total cost of the issue once it has been saved. Media Upload any relevant image files. For more information on using this section, refer to Media section. Pins Any pins related to this Issue will appear in this section. From this section, you can open the drawing and review the pin. Click on the pin you want to open to select it, and click Open to open the file in File Manager that contains that pin. For more information, refer to Pinning functionality in File Manager.
References Upload or select any relevant files or documents. You can use drag and drop to add a file to this section. For more information on using this section, refer to References section.
-
Click Save when you are done.
Your project may include an RFQ Contact who is part of the workflow as Issues are submitted. An administrator can configure the Issues app in your project to use the Get Pricing Workflow.
To send an issue item through the Get Pricing Workflow, complete the following steps:
-
Review the header to ensure that you are in the correct project or partition.
-
Navigate to the application (Apps > Cost Management > Issues).
-
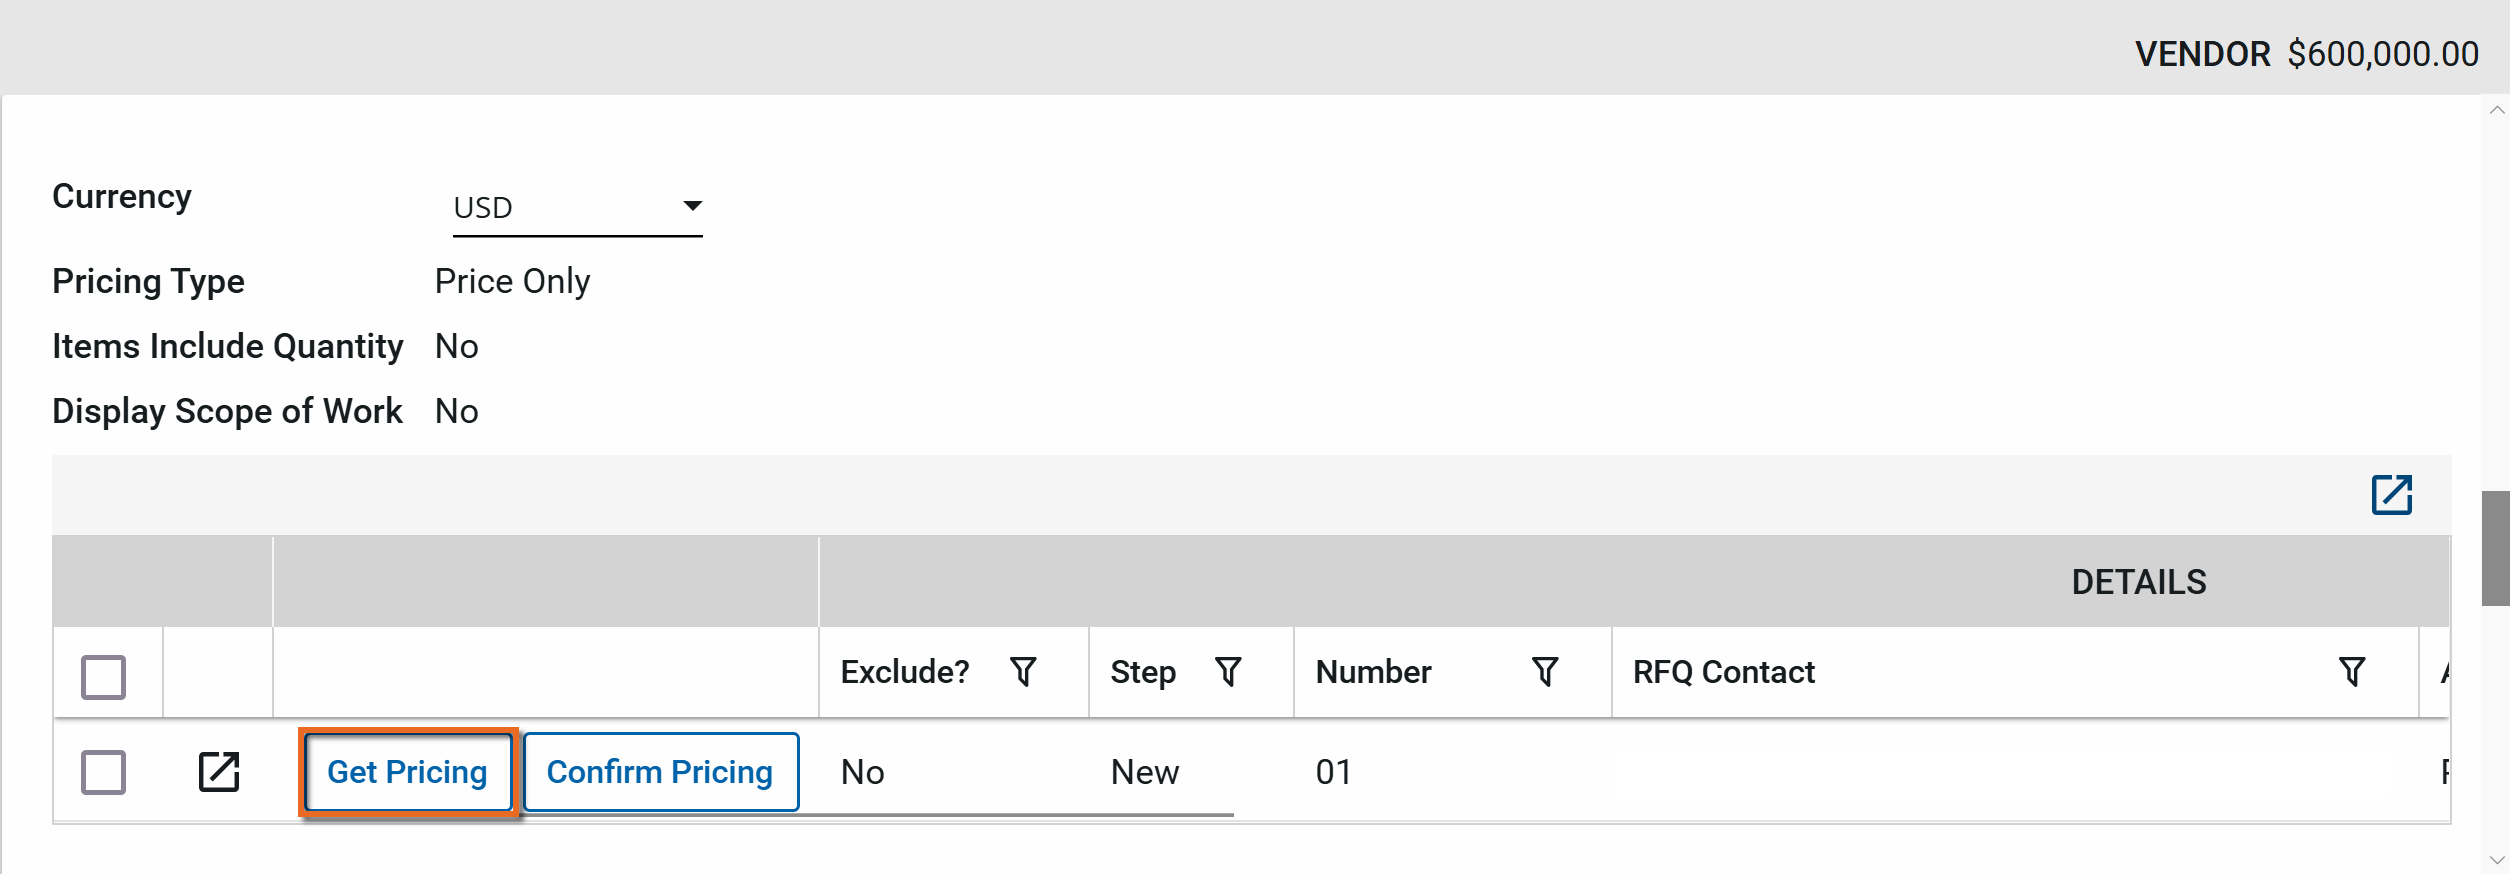
In the Items section, click the Get Pricing button beside the desired line item. The Pricing Step will update to Sent for Pricing.
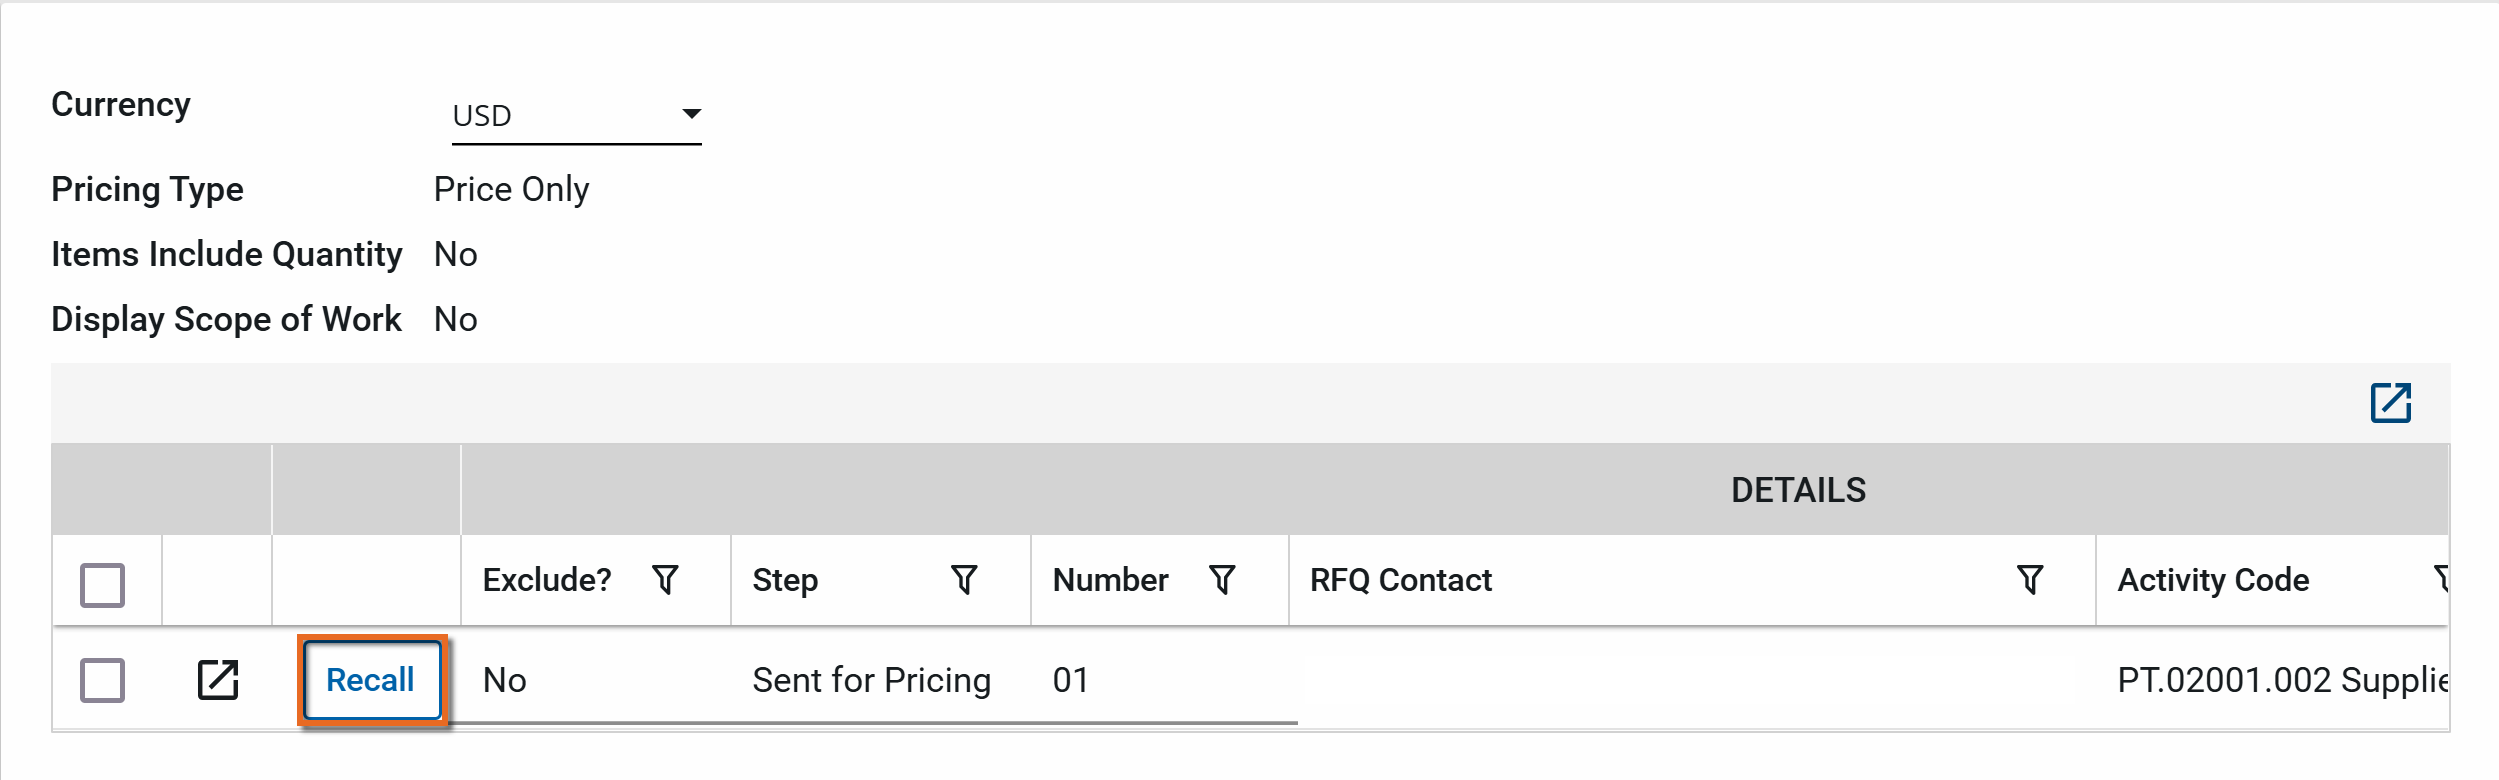 Note If you need to return the workflow to the original step, click the Recall button beside the desired line item.
 -
Once the Contractor / Vendor has responded to the request, you will receive notification of the pricing submission.
Note This and the following steps only apply if you are the Responsible Contact for the Issue. -
Click the More Details icon
 on the submitted line item.
 -
Click Edit if you need to make any updates.
-
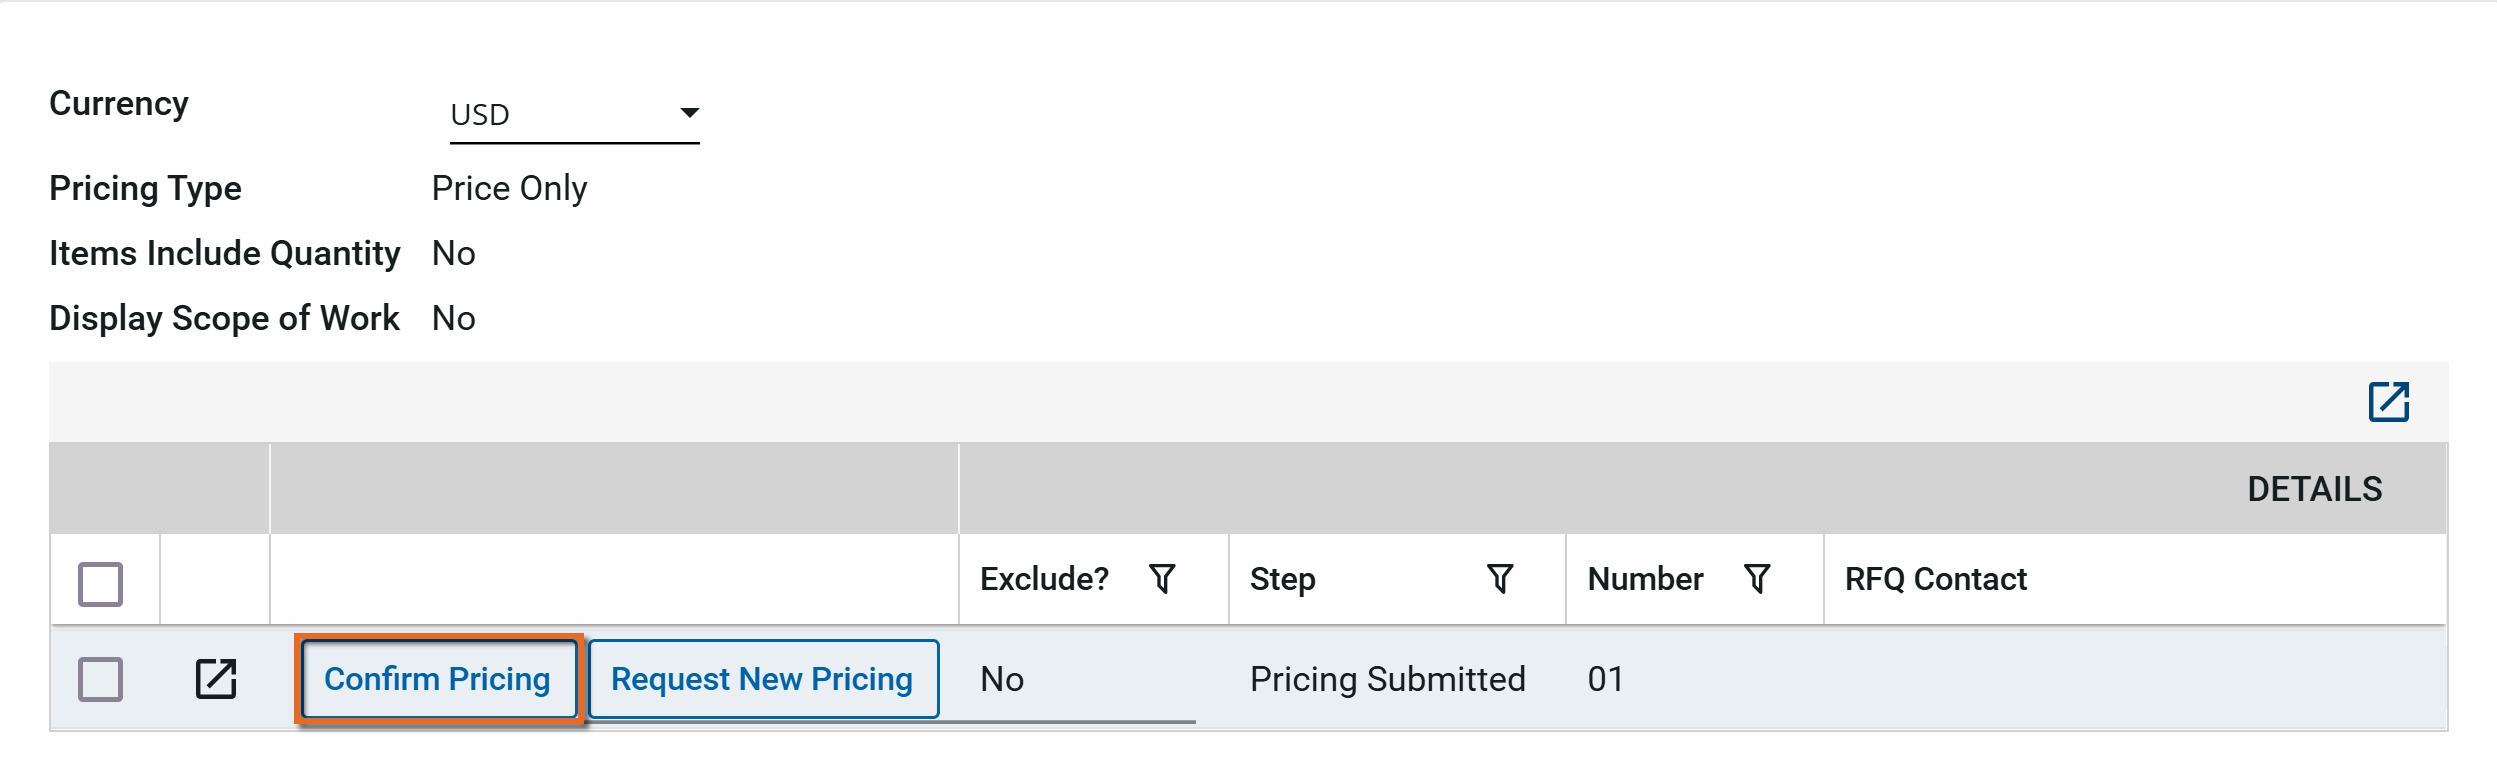
Click Confirm Pricing to accept the proposal. The status will change to Approved.
Sometimes a record in another app, such as RFIs or Punch List Items needs to escalate to an Issue. You can use the Process function to copy information from a record in one application into a new Issue in the Issues application.
To copy information from the original record into a new Issue in the Issues app, complete the following steps:
-
Review the header to ensure that you are in the correct project or partition.
-
Navigate to the desired application.
-
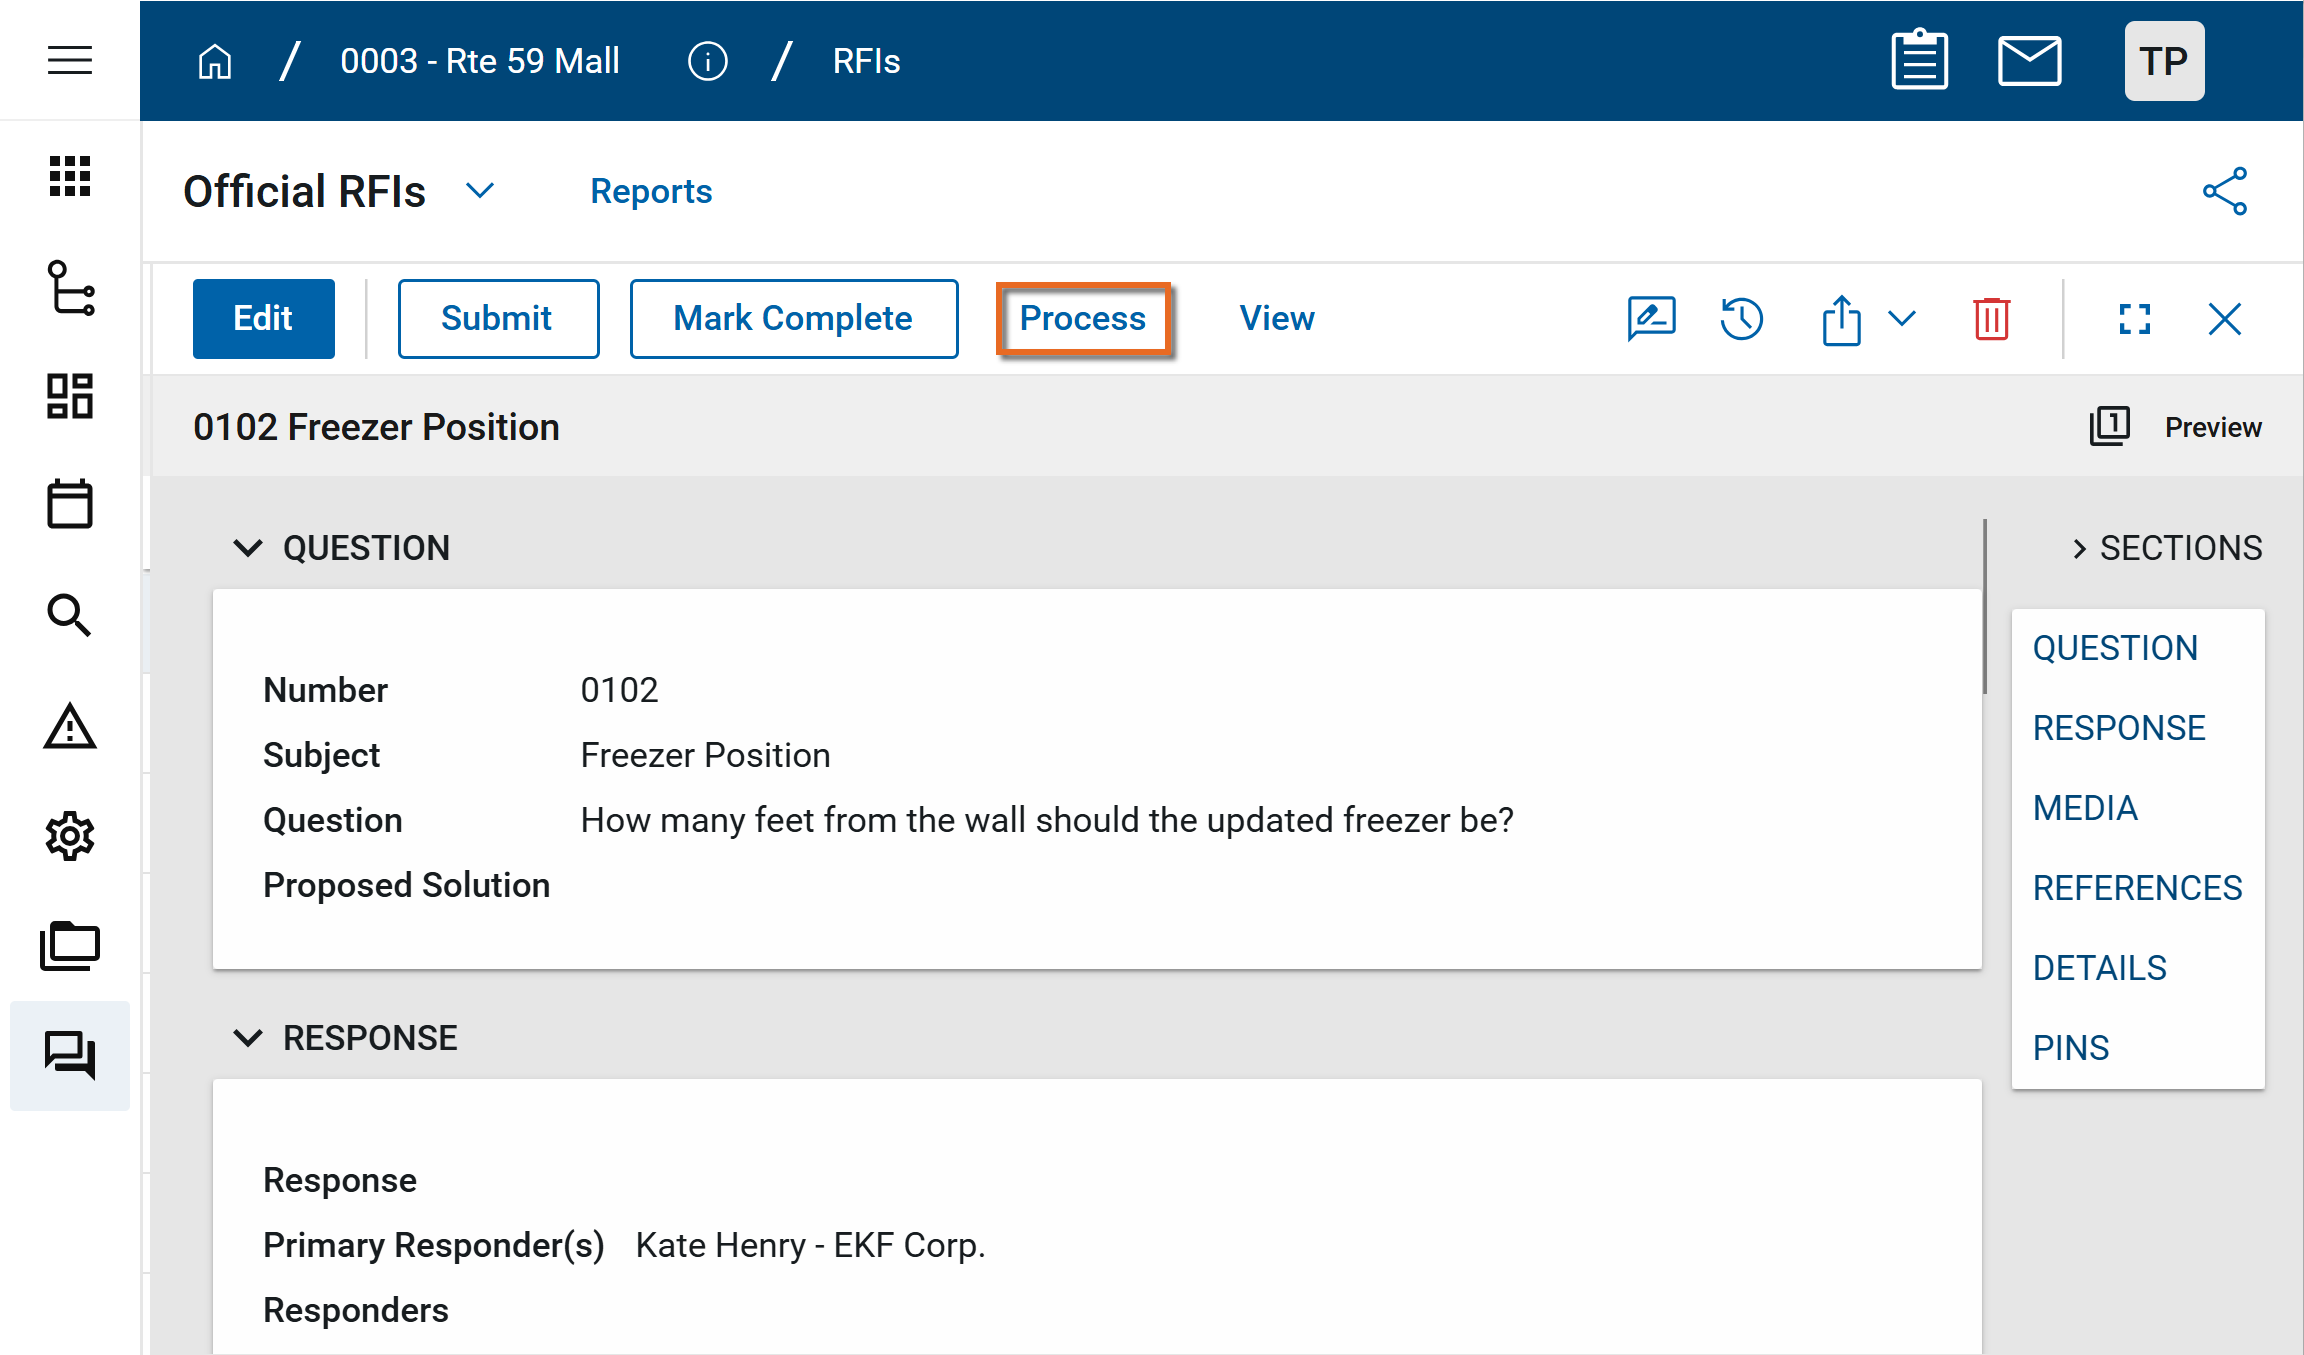
Right-click on the desired record and select Process, or open the detail view and select Process from the action bar.
-
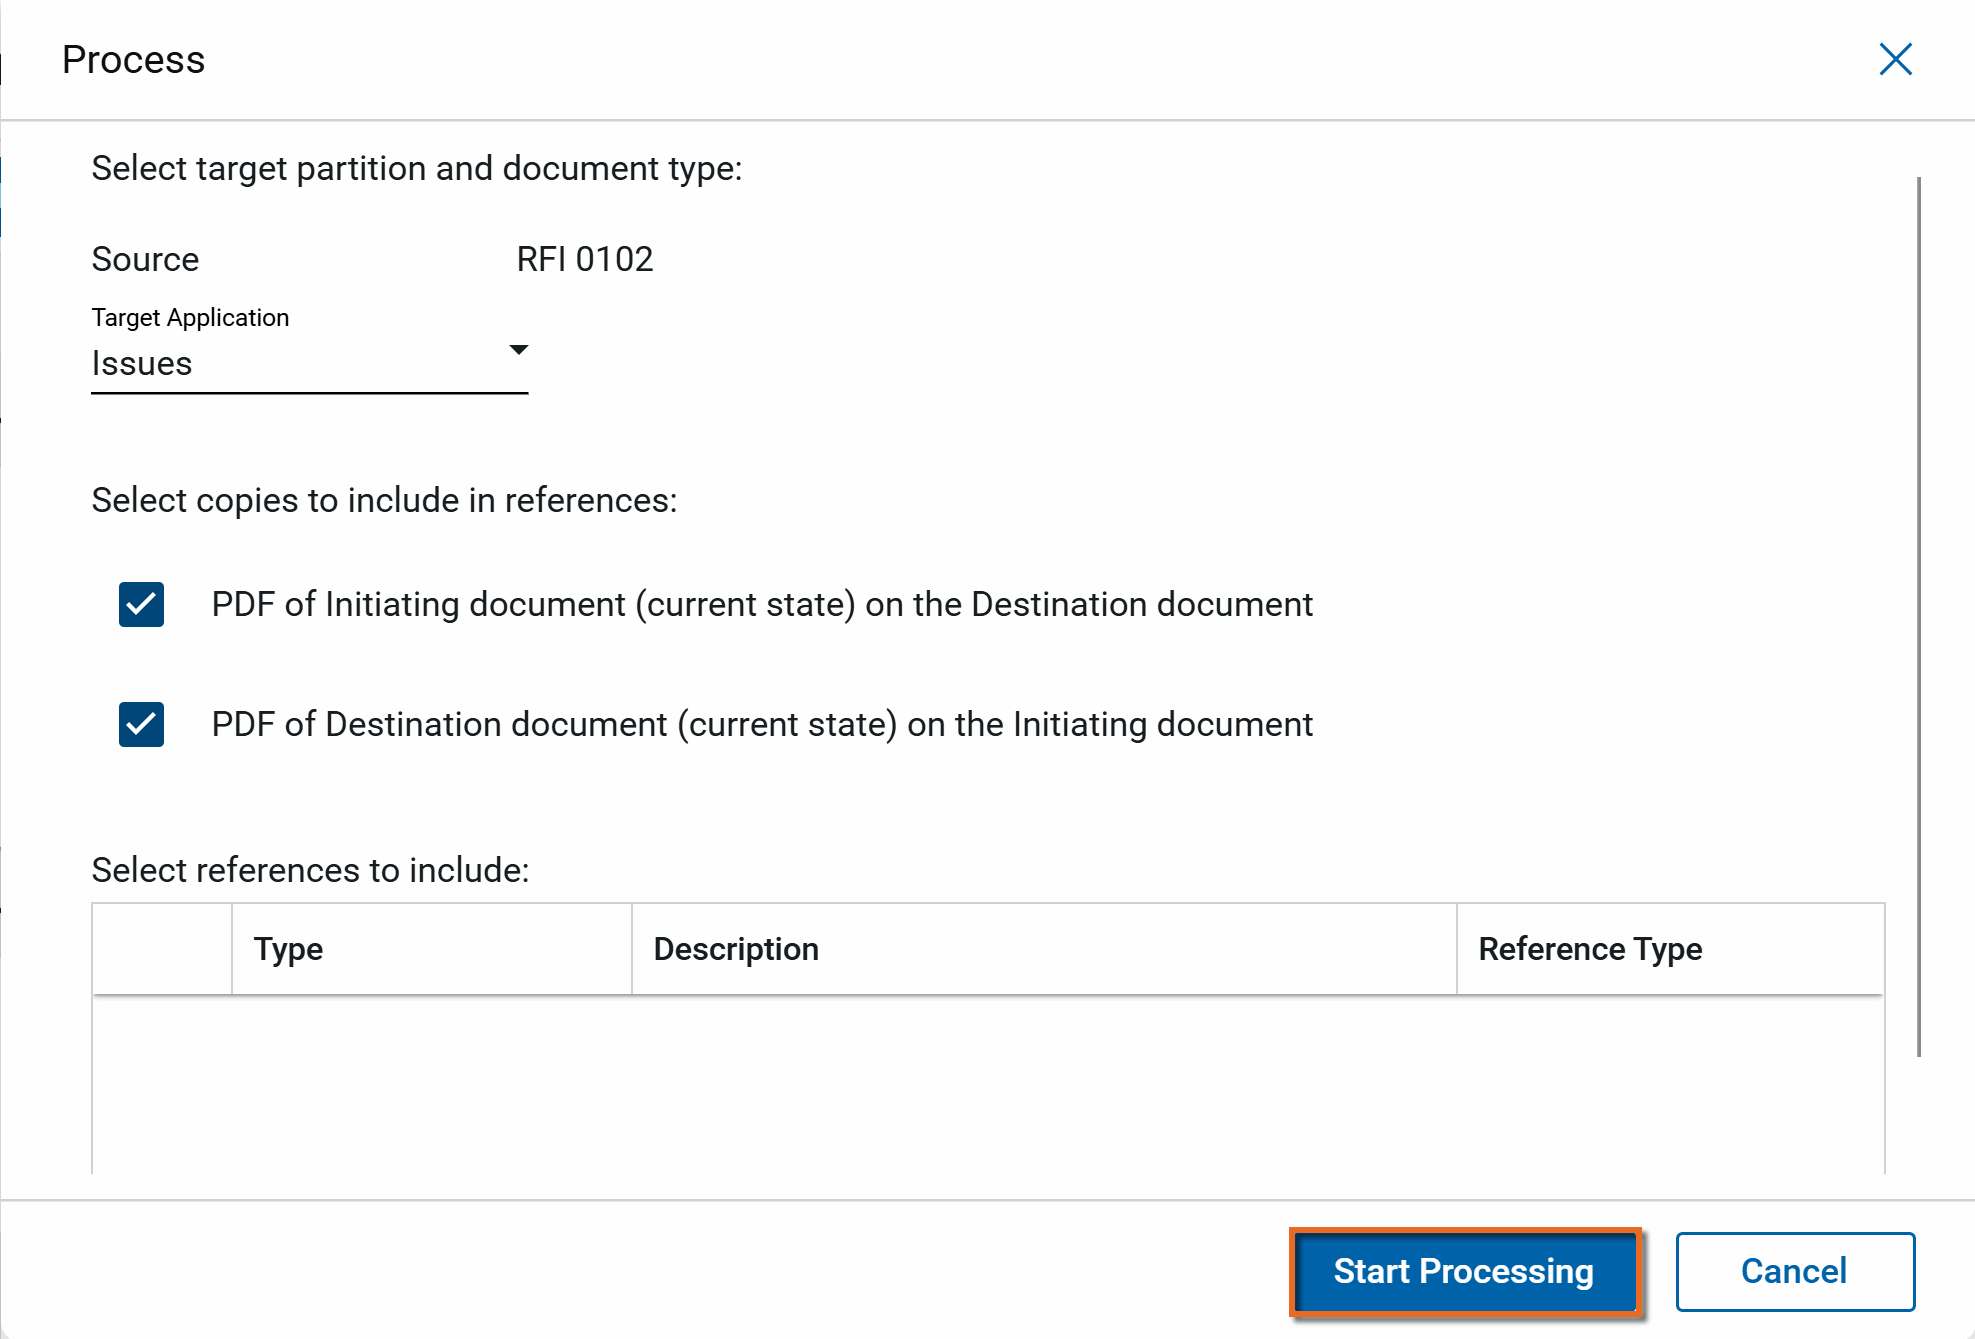
In the Target Application field, select the "Issues" application. By default, reference files are included. Clear the check boxes for any files you do not want to include.

-
Click Start Processing.
-
The target application opens to a new record with information from the desired application. Complete any additional fields and click Save.
Sometimes the Issue recorded should additionally be tracked in another app, such as RFIs, Punch List Items, Funding Change Orders, or Funding Change Requests. You can use the Process function to copy information from an Issue record into a new record in another application.
To copy information from the Issues record into a new record in another app, complete the following steps:
-
Review the header to ensure that you are in the correct project or partition.
-
Navigate to the Issues app (Apps > Cost Management > Issues ).
-
If you want to process an individual Issue line item, navigate to the Items grid and select Process. If you want to process the entire Issue record, right-click on the Issue and select Process, or open the detail view and select Process from the action bar.
Note The Issue must be approved before you can process an individual Issue line item.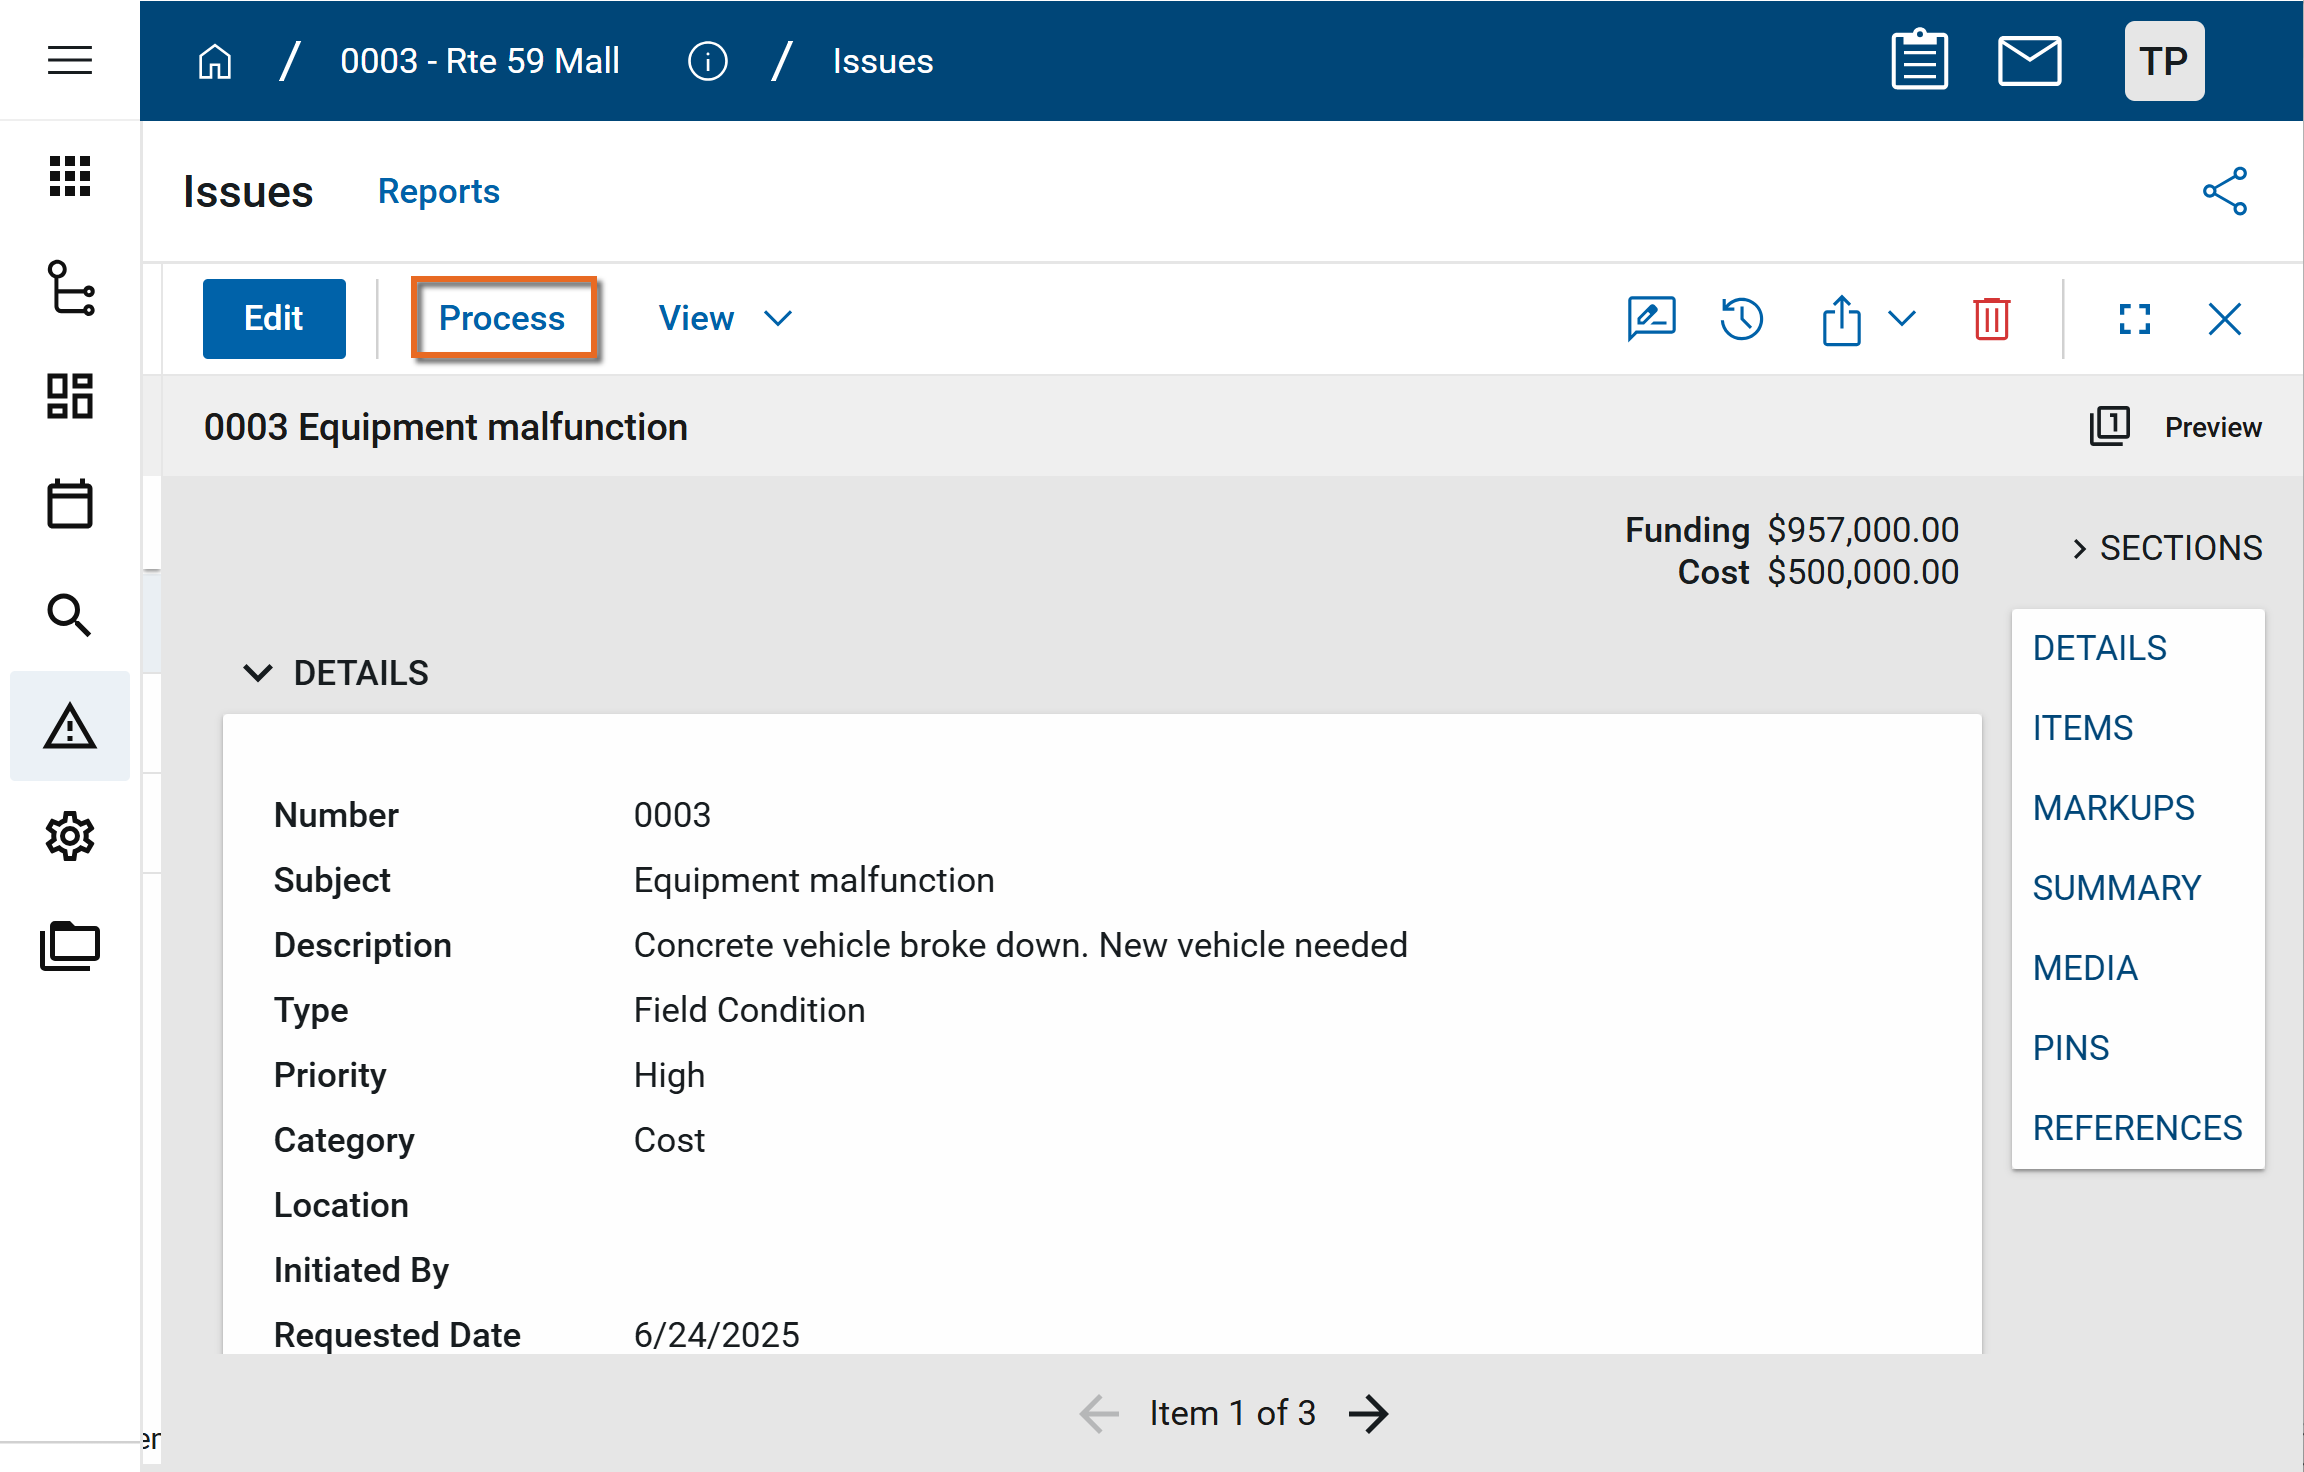
-
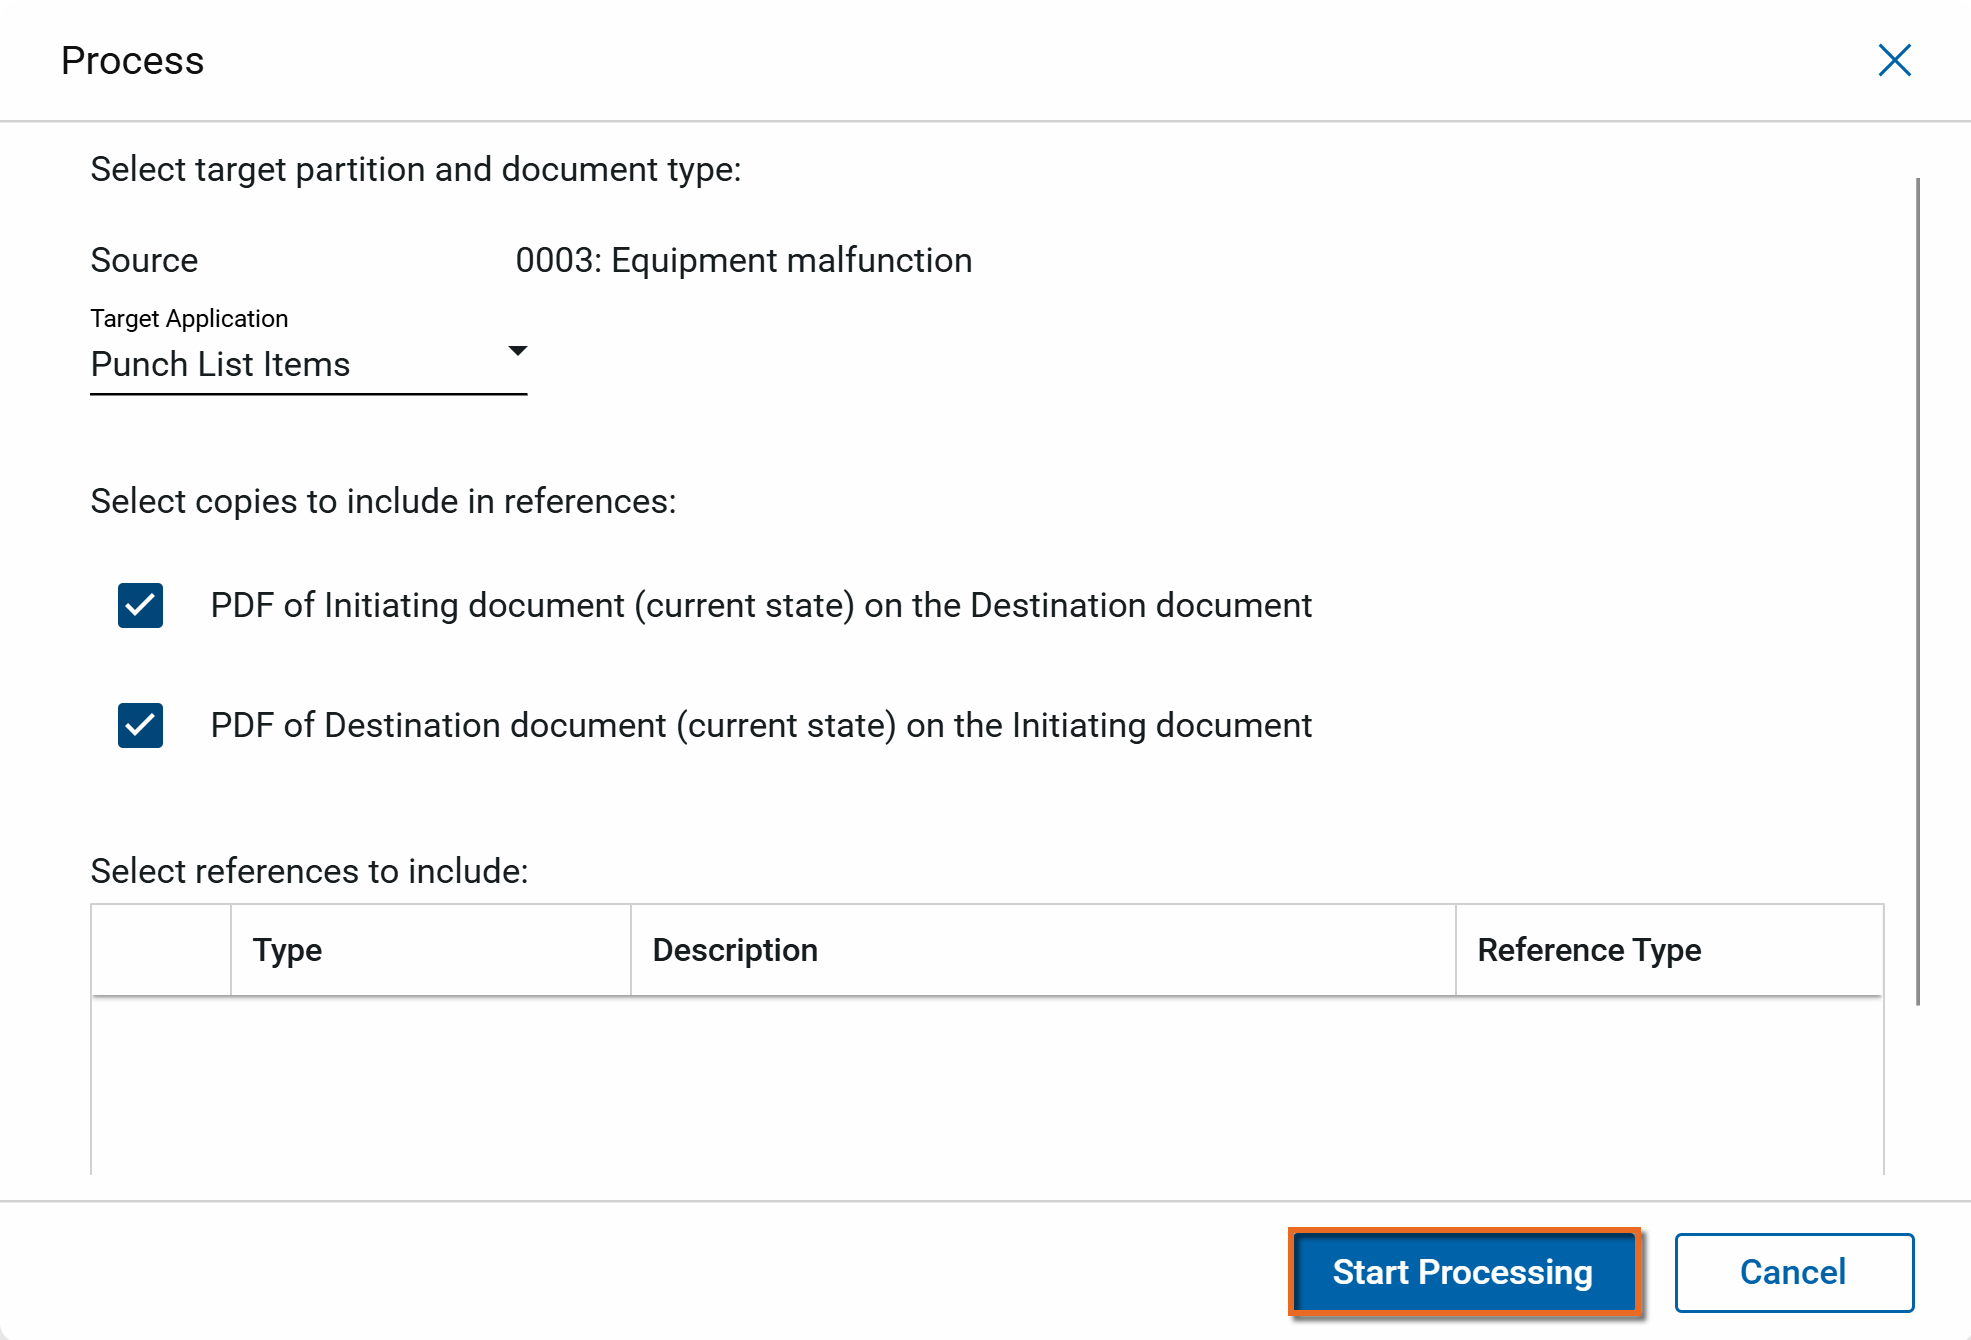
In the Target Application field, select the appropriate app. By default, reference files are included. Clear the check boxes for any files you do not want to include.
Note If Funding Change Orders or Funding Change Requests is chosen as the Target Application, you will have the option to either add the Issue to an existing record or create a new record.
-
Click Start Processing.
-
The target application opens to a new record with information from the Issue. Complete any additional fields and click Save.
You can generate a report from a selected log view, or use one of the built-in reports available by default in each application. For more information on creating your own reports, including how to set up scheduled reports, refer to Creating ad hoc reports.
Note For information on modifying the logo that appears on reports in your project, refer to Managing report logos.
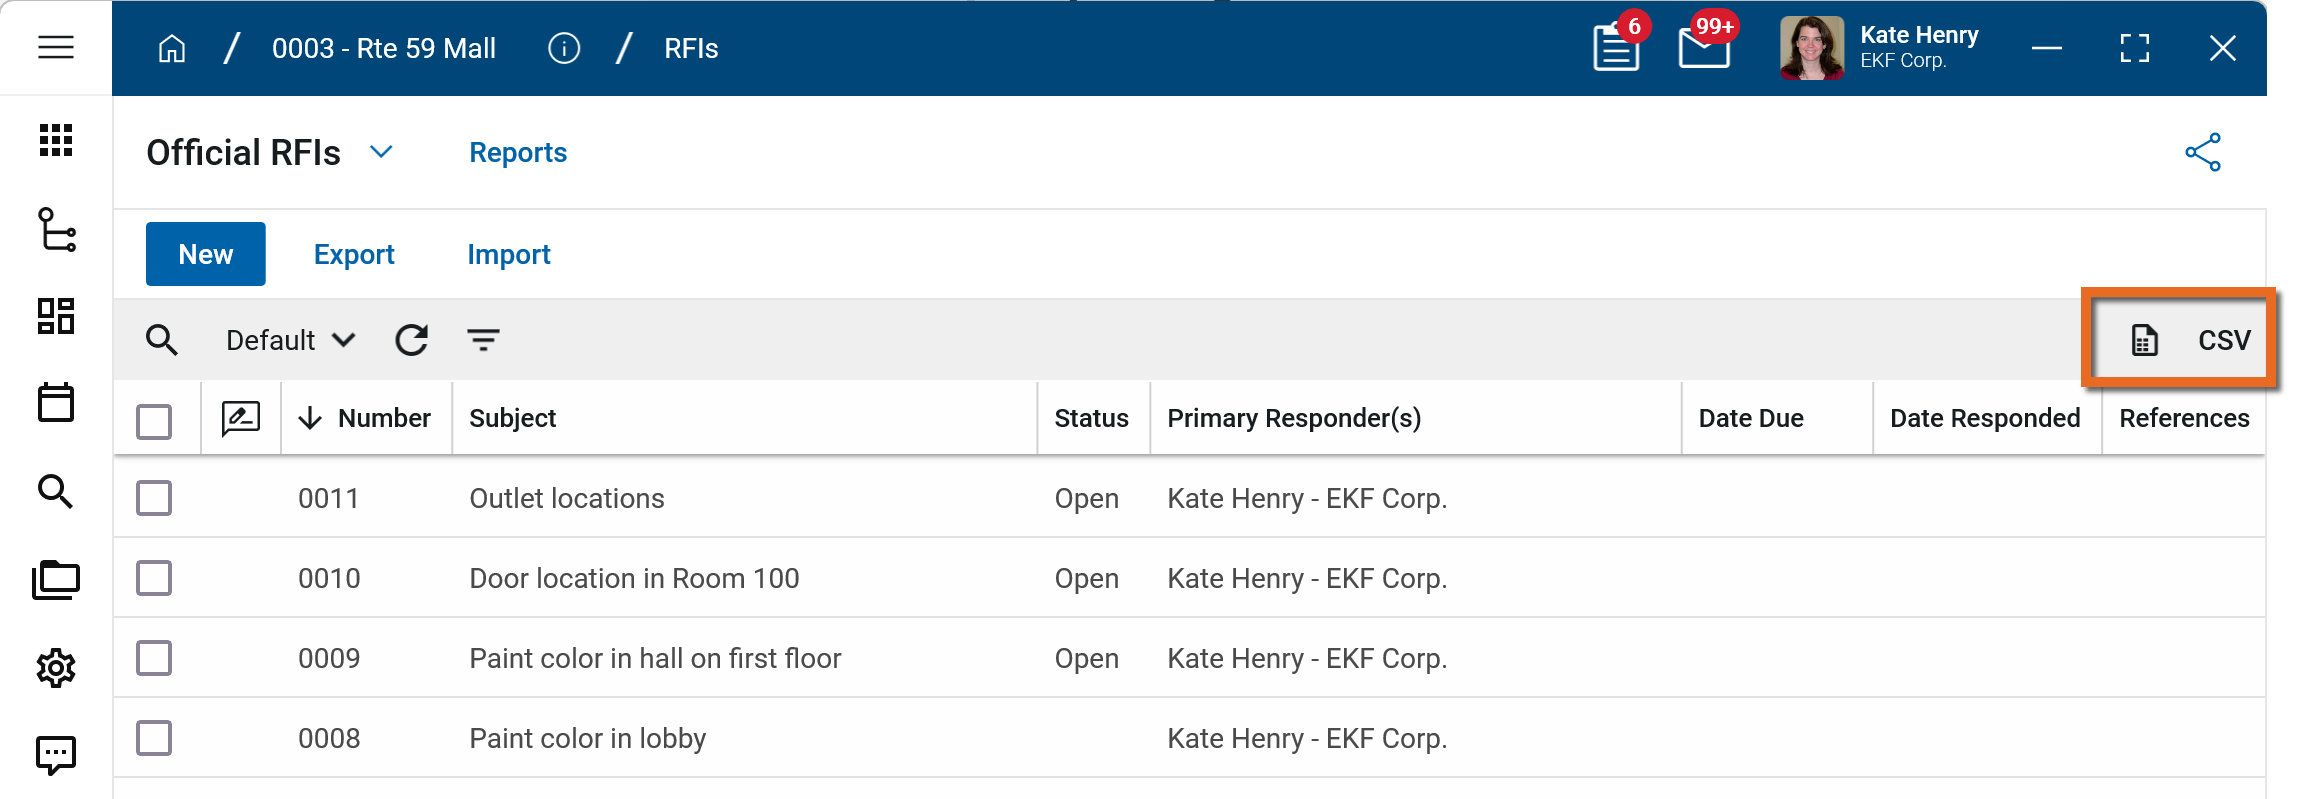
To generate a report from a log view with up to 10,000 records, select the report icon ![]() . If your log view contains more than 10,000 records, the report icon will be disabled and you can select to download the records to a CSV file instead. For more information, refer to Generate a report from a log view.
. If your log view contains more than 10,000 records, the report icon will be disabled and you can select to download the records to a CSV file instead. For more information, refer to Generate a report from a log view.
To generate an application report, complete the following steps:
-
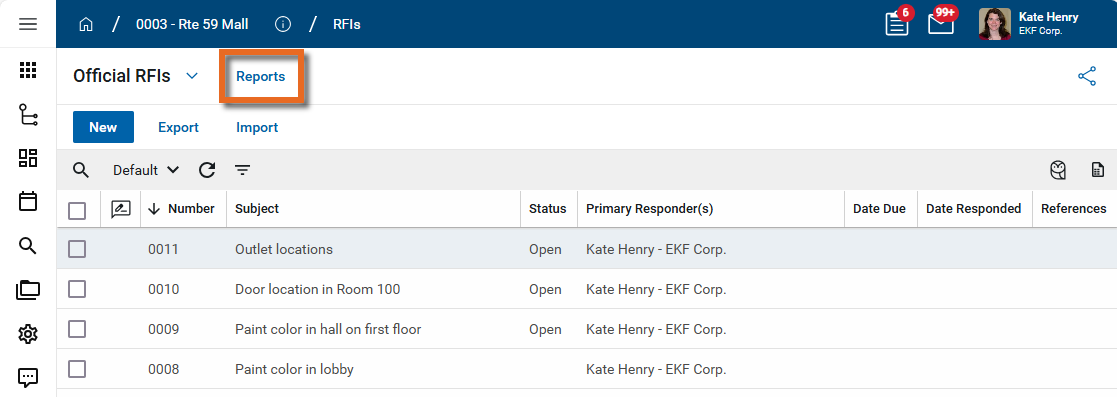
Navigate to the application.
-
Select Reports in the application title bar.
-
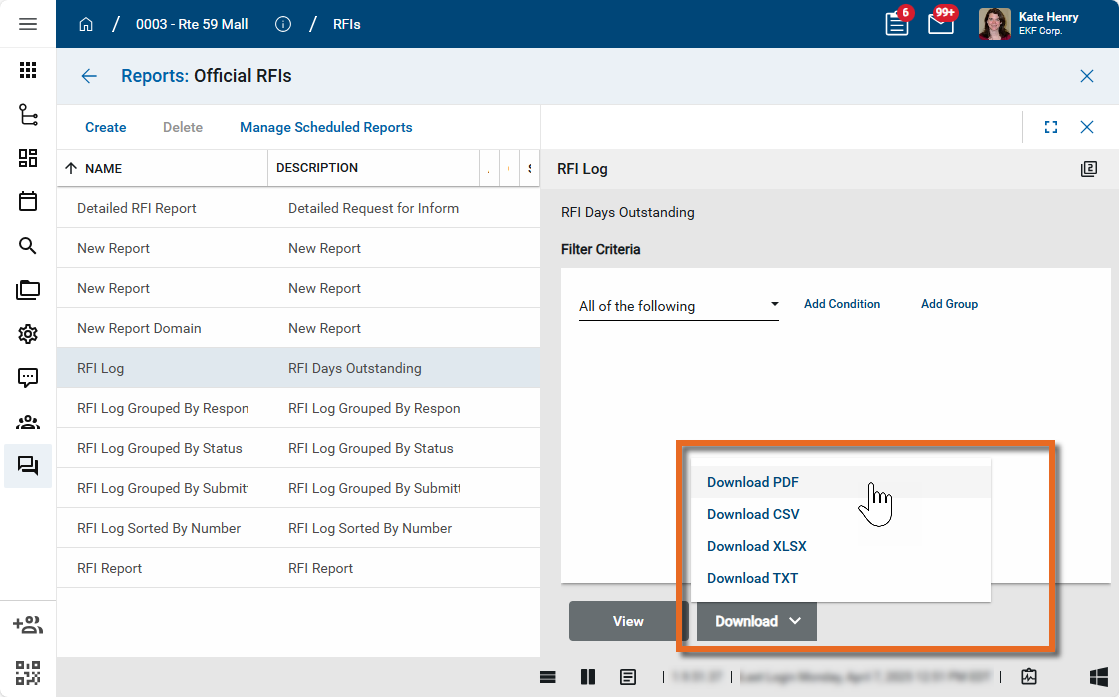
Select the report you want to run.
-
Apply any desired filters.
-
Select View or Download as appropriate. For more information, refer to Viewing Reports.
-
Click the Close icon
 when you are done.
To delete an Issue, complete the following steps:
-
Review the header to ensure that you are in the correct project or partition.
-
Navigate to the Issues app ( Apps > Cost Management > Issues).
-
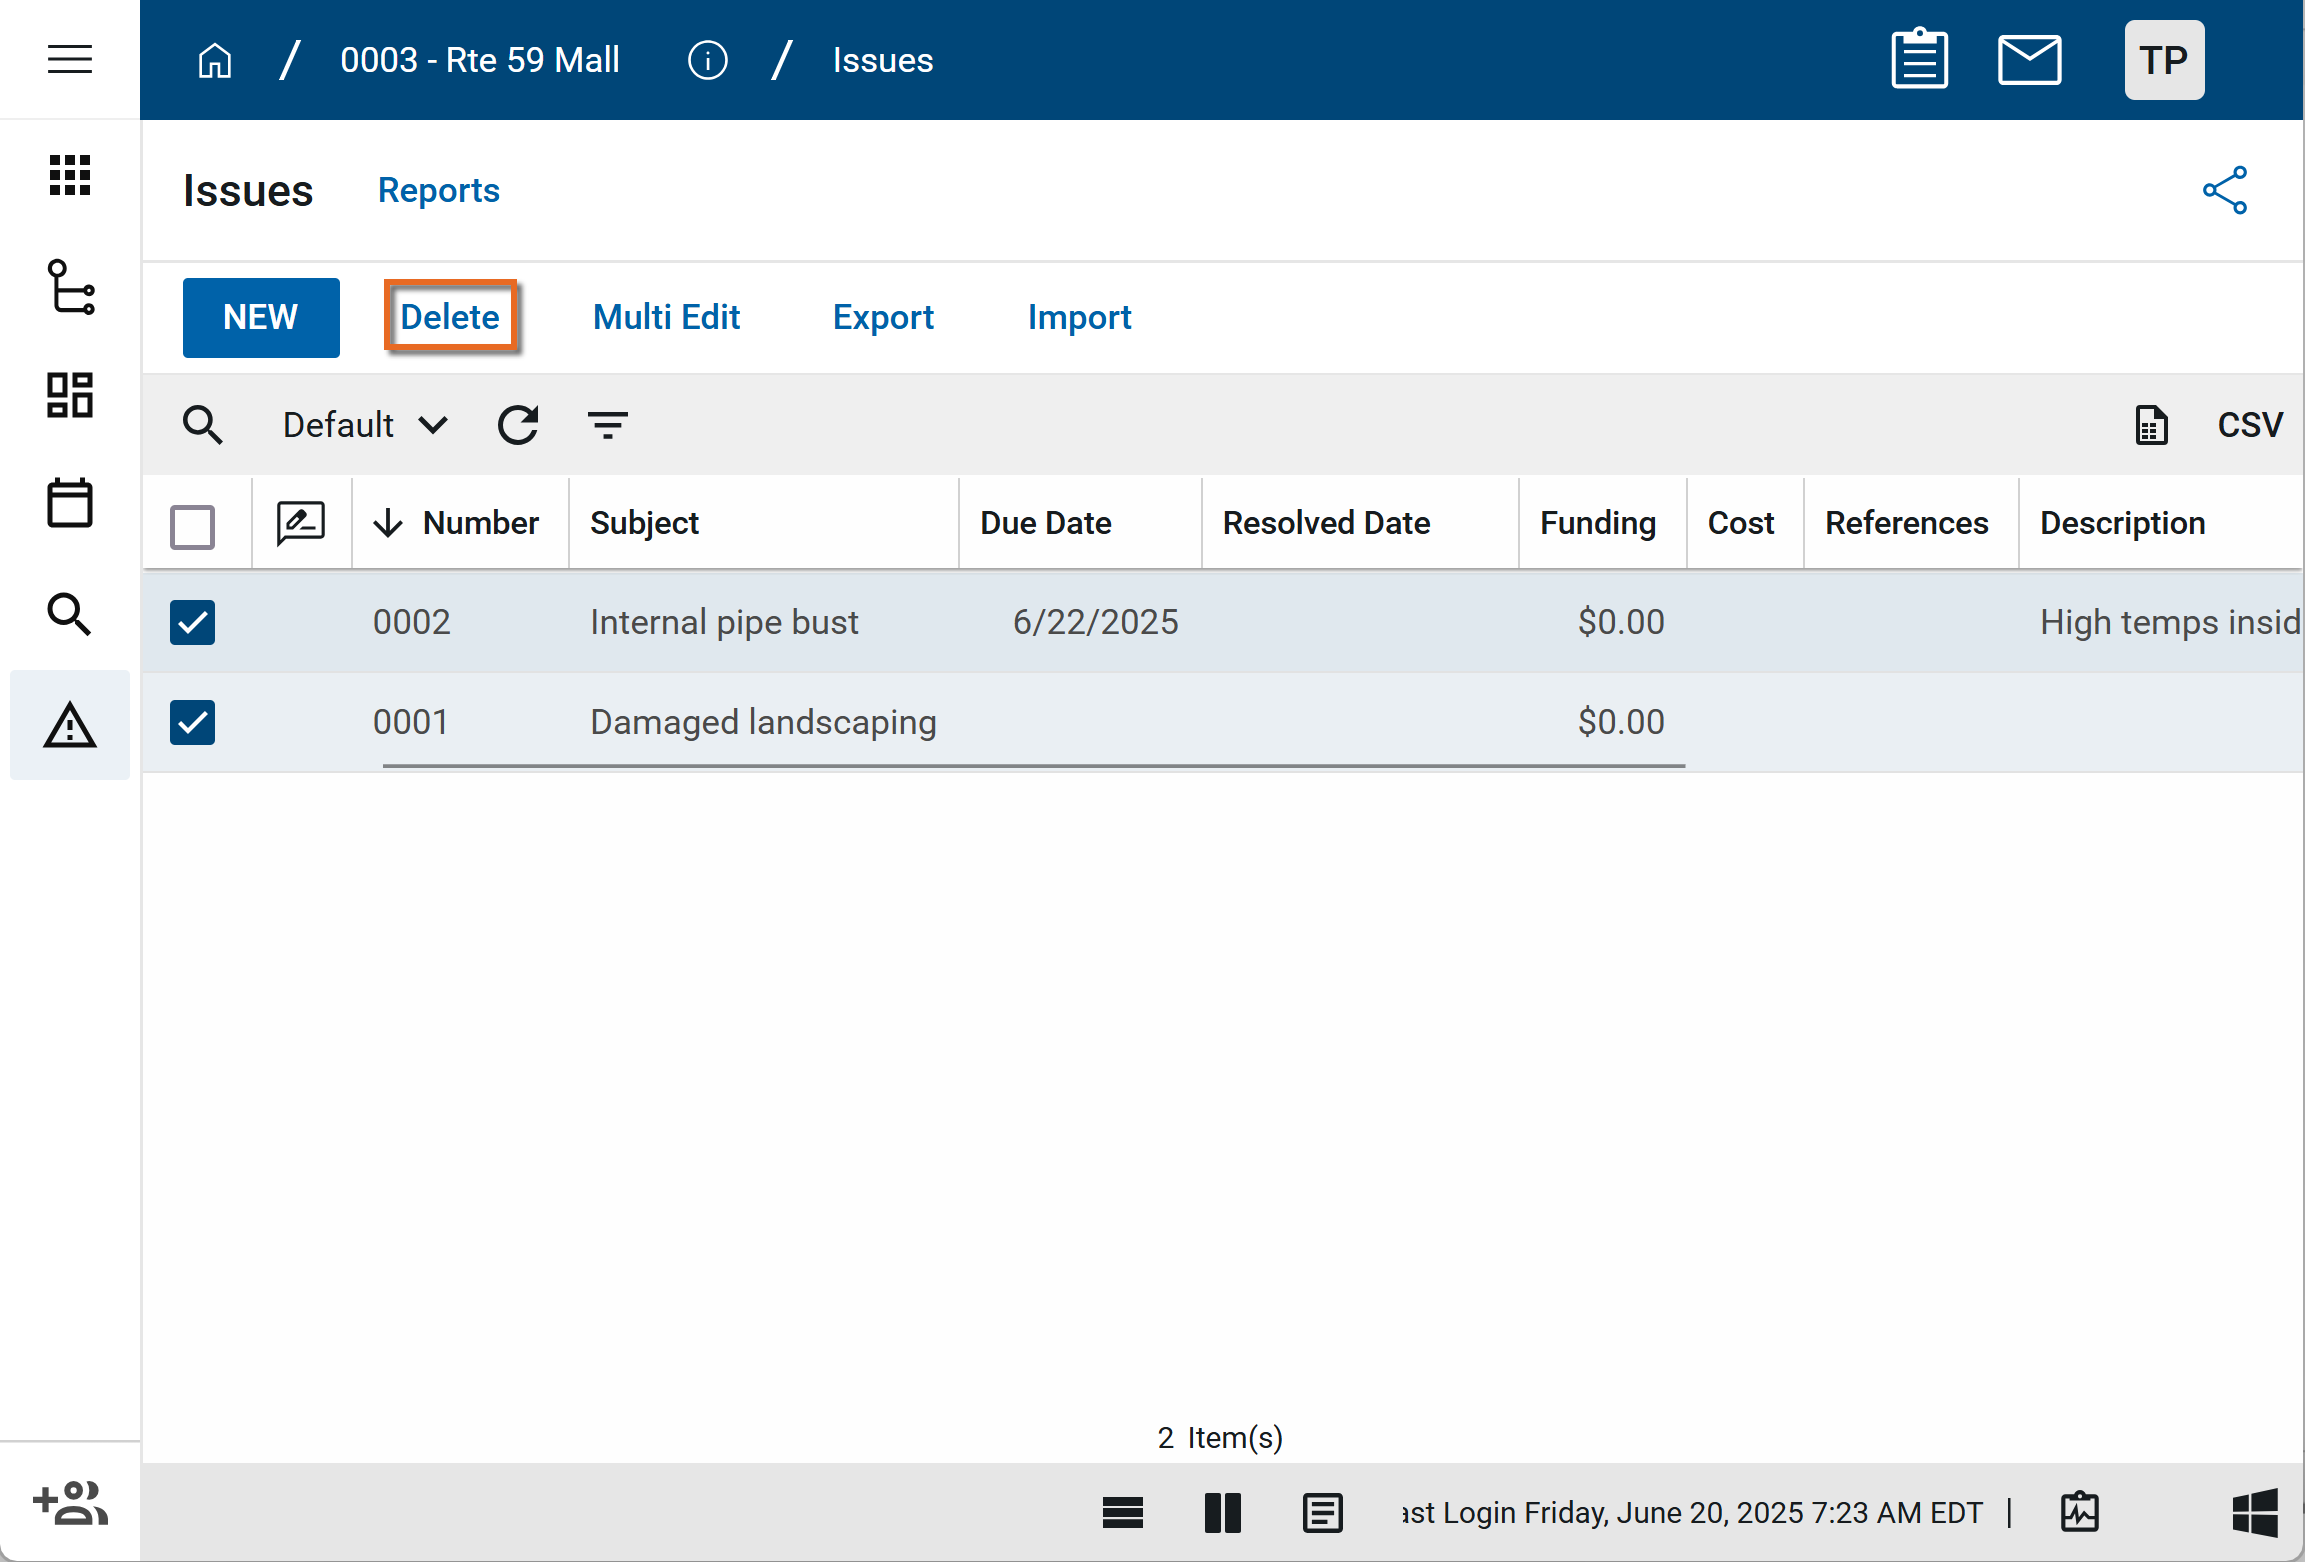
In the log view, select the check box next to the Issue (s) that you want to delete. Select Delete from the action bar.
-
Alternatively, right-click on the record in the log view and select Delete, or open it in the detail pane and select the Delete icon
 in the action bar.
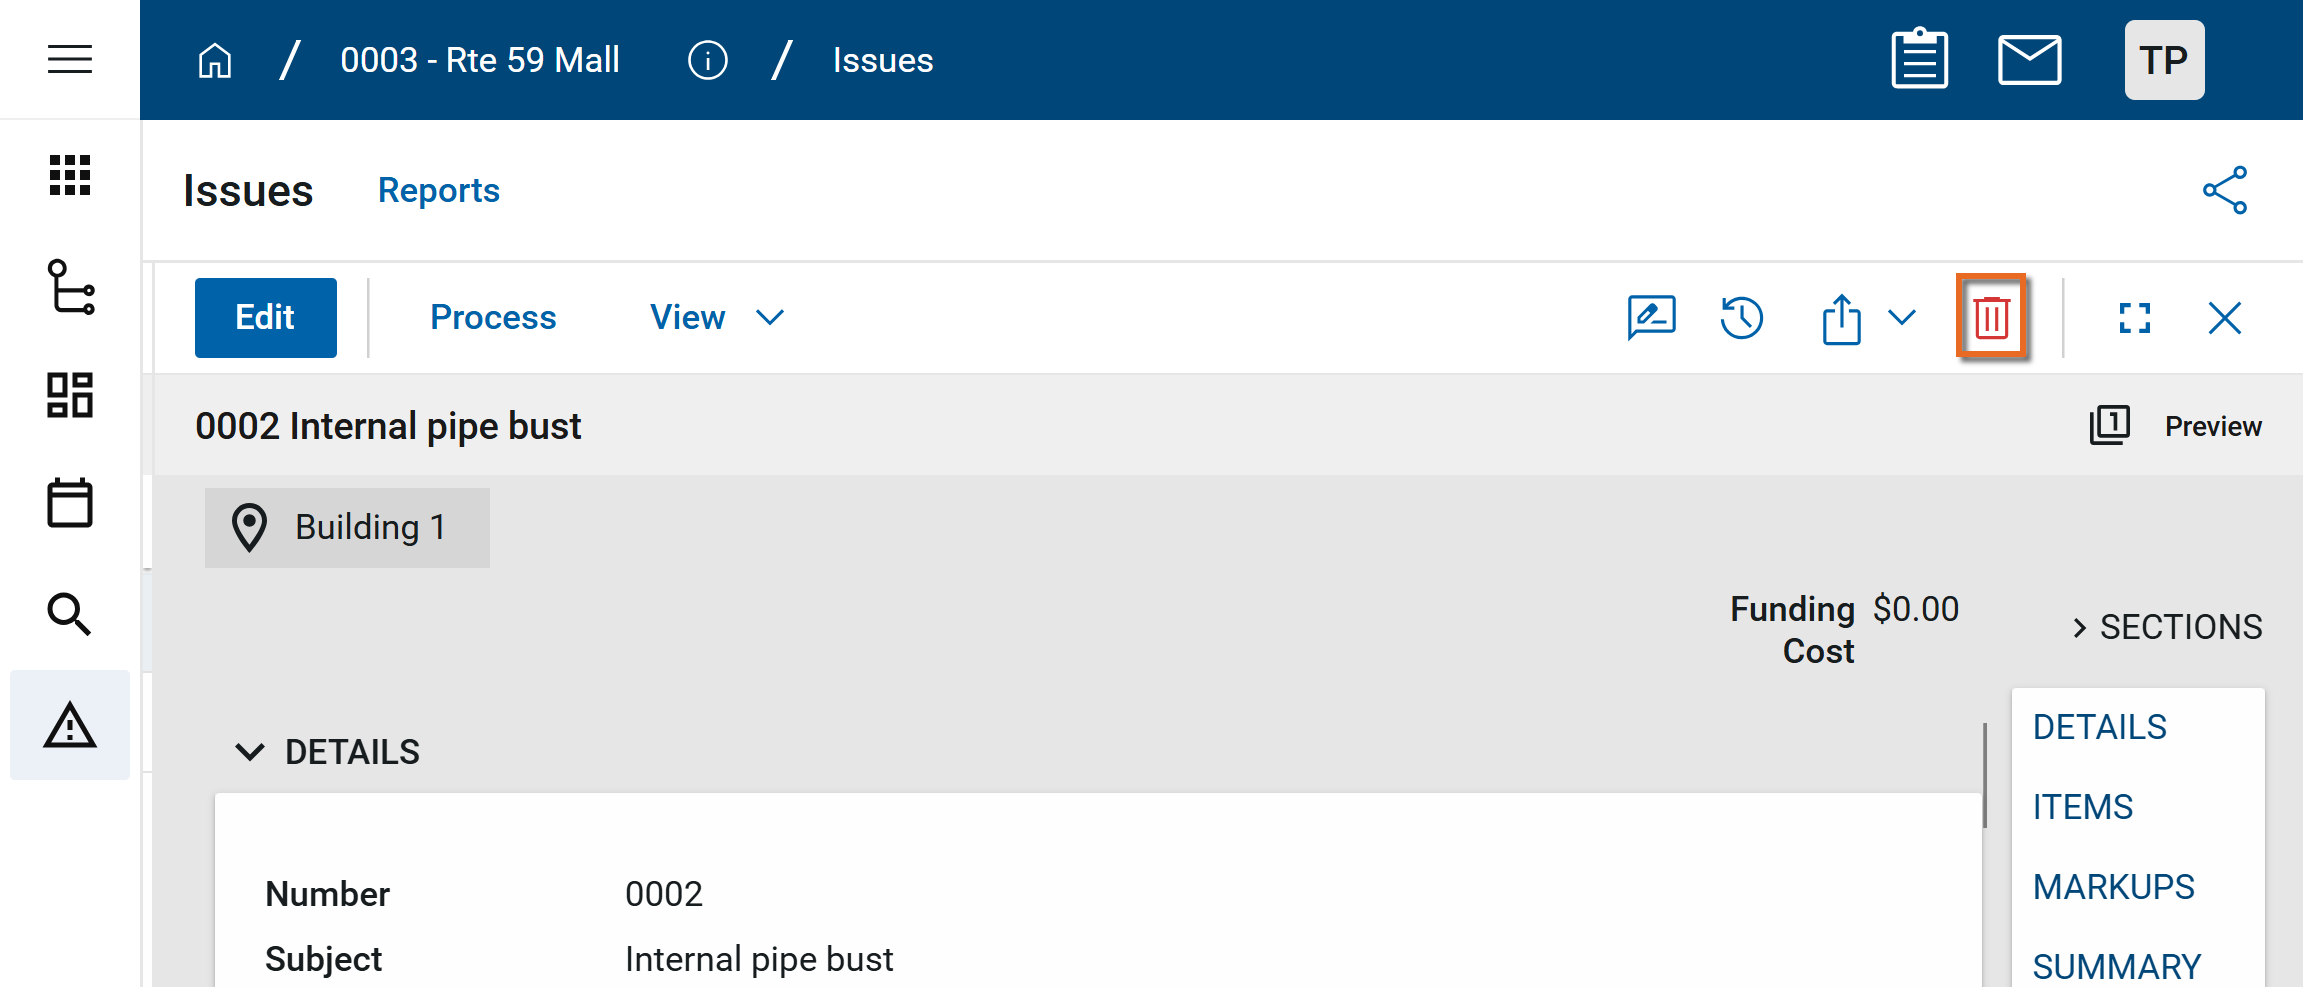
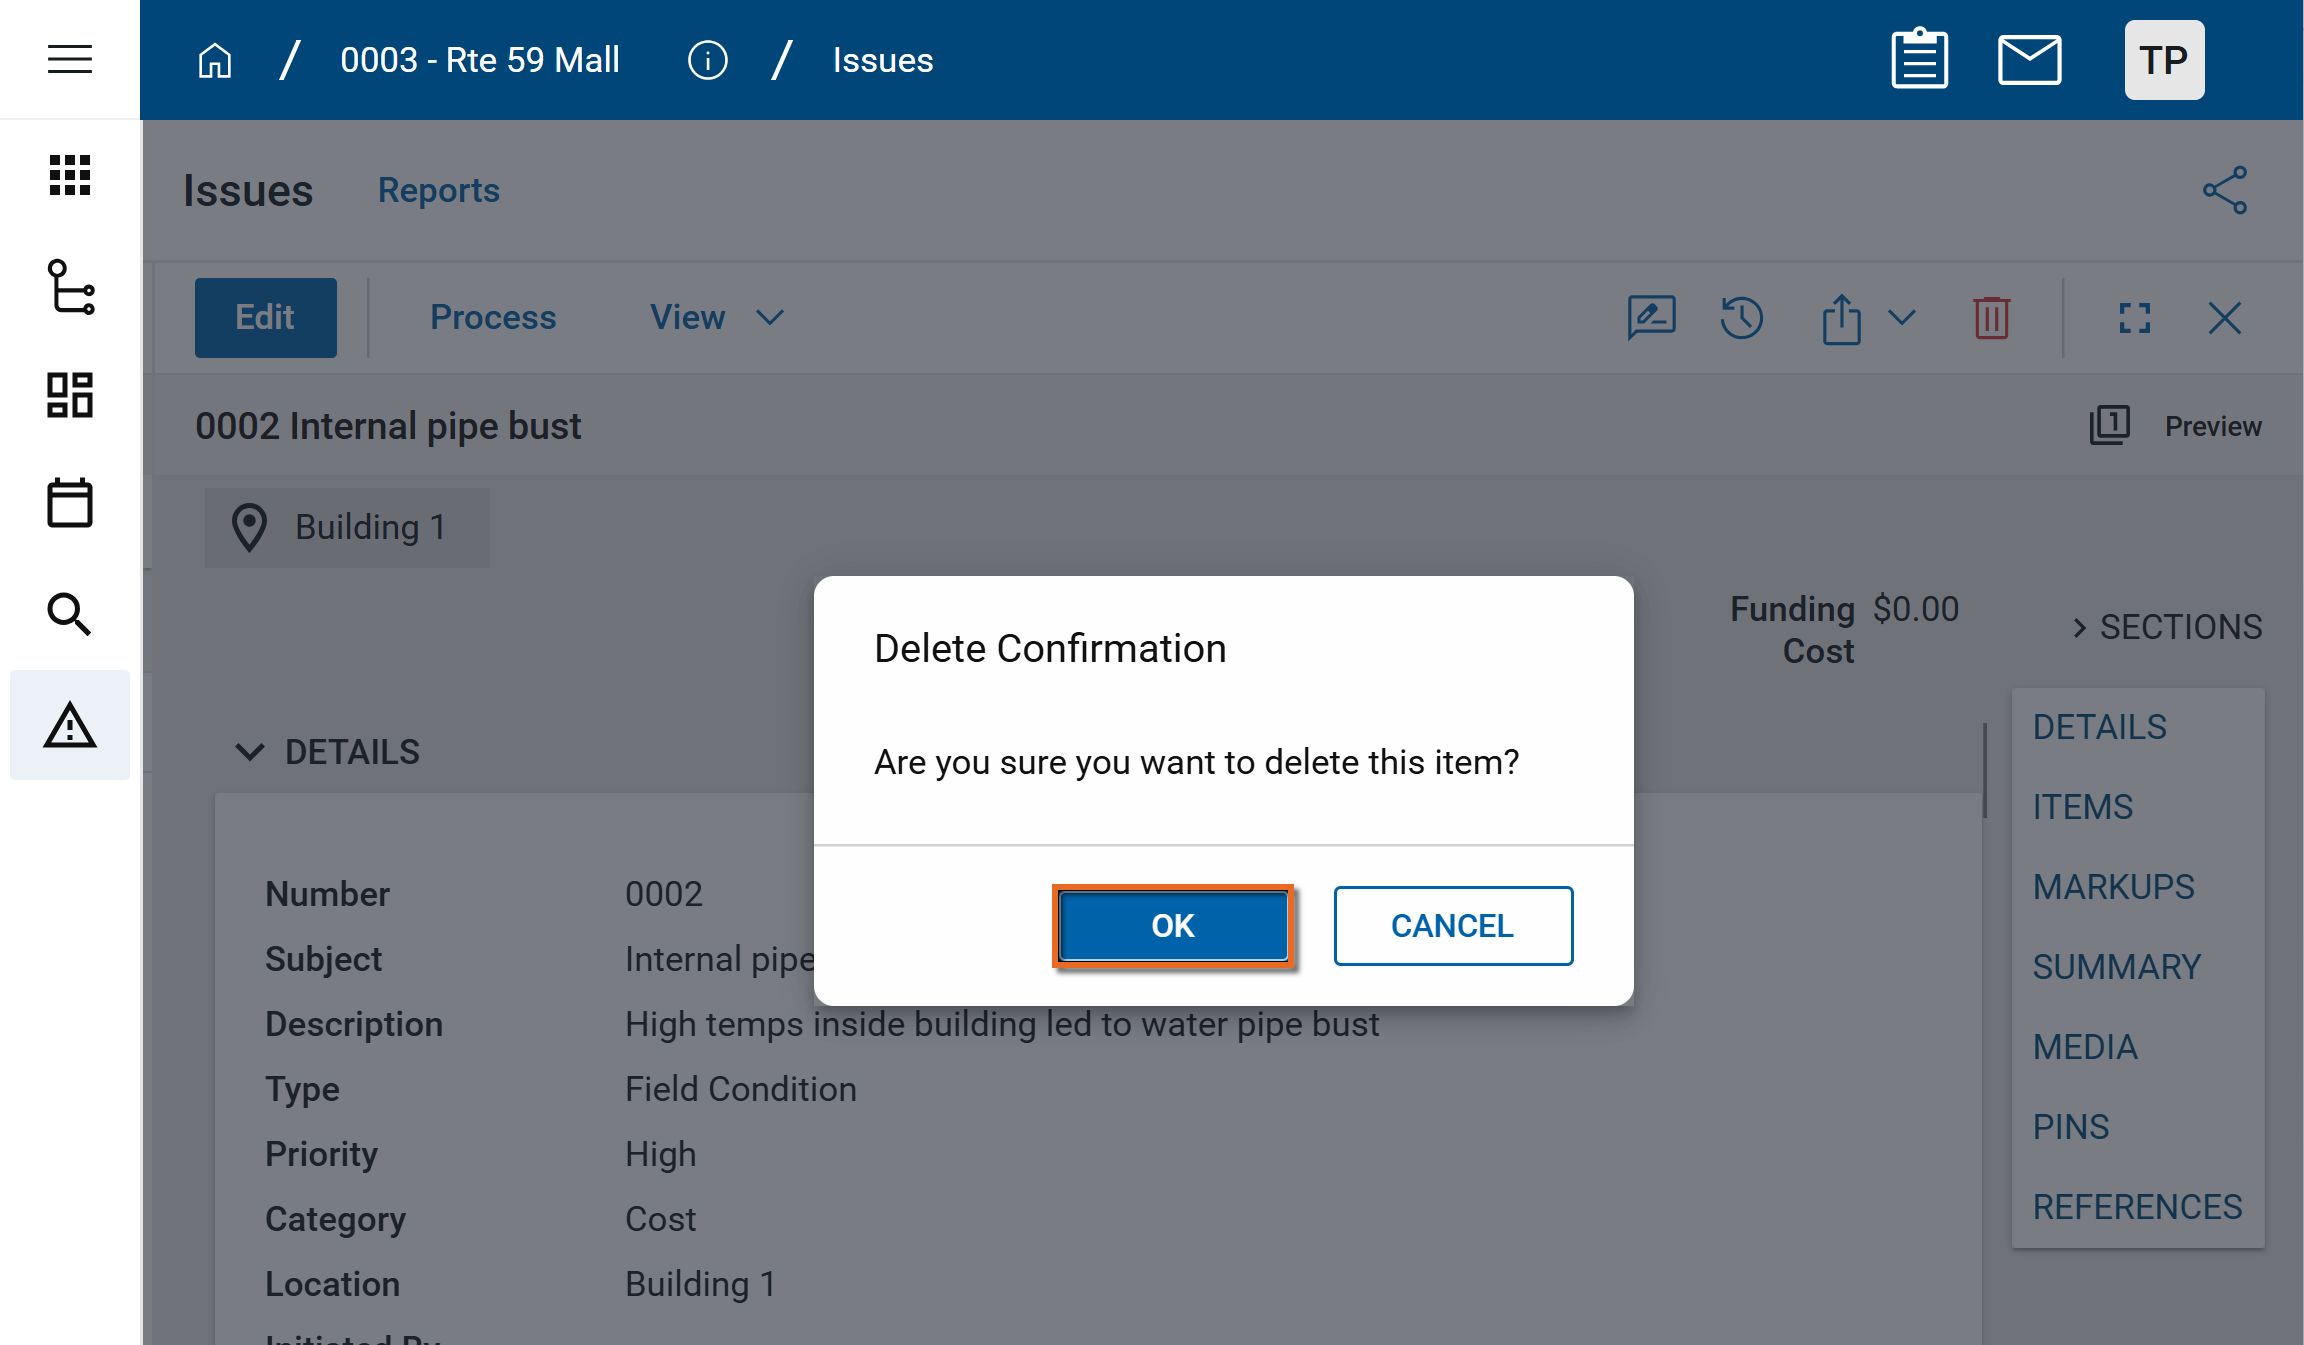
-
Click OK on the confirmation message. The record or records will be deleted.
Note If a record was deleted in error, it can be recovered from the Recycle Bin application by an administrator. Deleted records are available for restoration for a set number of days as configured in domain settings. For more information, refer to Using the Recycle Bin.
Your domain administrator or another user with the appropriate permissions can configure the app in the Configuration application.
Important When working in the Configuration app, it is important to review the header and ensure that you are working at the correct level in the hierarchy, either the root domain or at a partition or project level.
Settings that you establish at the root domain or lower levels will inherit down the hierarchy until they are overridden. For more information on the hierarchical structure of Kahua, refer to Understanding the hierarchical structure of Kahua.
The Configuration app can be accessed directly through the apps list (Apps > Administration > Configuration), or by right-clicking on an application in the launch bar and selecting Configure. When you select Configure for an app from the launch bar, the detail view of the configuration page for that application opens automatically.
For general information on configuring this app in Configuration, refer to Application configuration.