Adding Internal Users
Internal users are users at your own company who will be logging in to your Kahua domain. Other members of your project team will be external users. For more information about setting up external users, refer to Adding External Users.
Internal users typically have a license assigned to them to allow them to work in your domain. For more information on assigning licenses to users, refer to Managing user licenses.
Users must first be set up as contacts in your domain before they can be added as a user. The Add Person feature combines both tasks and allows you to create a contact and a user in one step, and the Add Multiple Users feature in the Users app allows you to add users in bulk.
For more information on the Users app, refer to Working in the Users application.
How to . . .
The Add Person feature can be used to add an external user or an internal user. It creates a contact in the Contacts app and a user in the Users app. To use Add Person to add a new internal user, complete the following steps:
-
Select Add Person
 from the bottom of the launch bar.
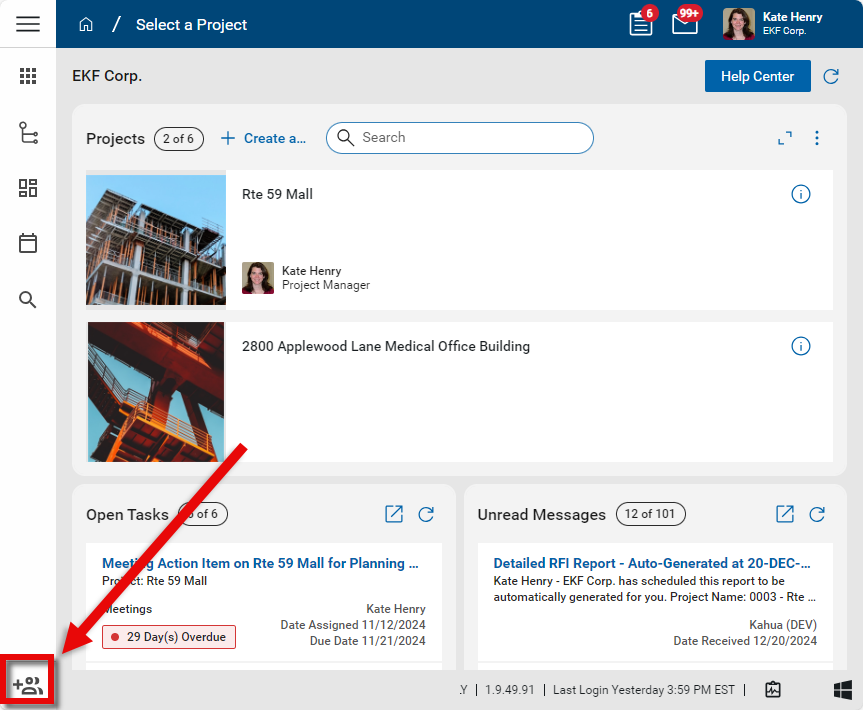
-
Enter the user's email address and click Next.
-
If the user is not already a contact in your domain's Contacts app, you will be required to enter their First Name, Last Name, and Company. Since this is an internal user, the company name will be your company name or an associated company from the Company Profiles app. Click Next when you are done.
-
A list of potential company matches from the Contacts app and the Kahua Community will appear. When you are adding an internal user, your company name should appear from the Contacts app. If the correct company record is not available, select Create Company.
-
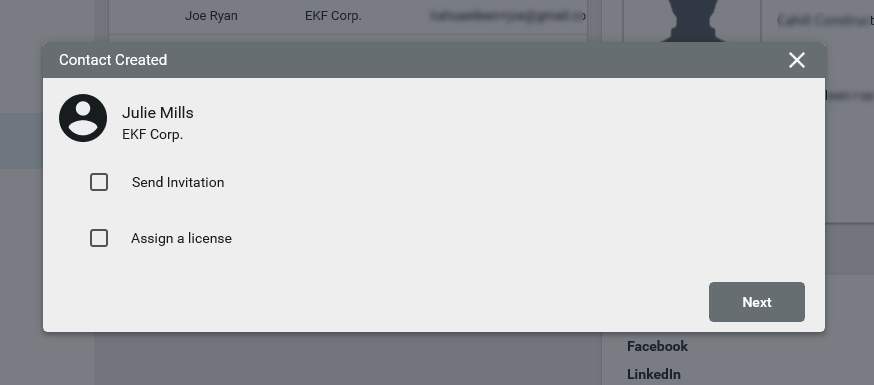
The Contact Created page will appear. You can select to Send Invitation and Assign a license directly from here. Note you cannot assign a license without sending an invitation. For more information on Kahua licenses, refer to Managing user licenses.
-
Click Next. The Next Steps page will appear. From here you can complete one of the following steps:
-
Add to Groups - Refer to Setting up groups.
-
Manage Licenses - Refer to Managing user licenses.
-
Share Apps - Refer to Understanding how Kahua sharing works.
-
Update Project Directory - Refer to Project Directory.
-
Update Contact - Refer to Using the People application.
-
-
If you do not need to complete one of the above steps, click Done.
Multiple internal users can be added at once through the Users application. They can be imported from Excel or entered manually on a grid. When a new user is added this way, a record is also created for them in the Contacts application.
To add multiple internal users, complete the following steps:
-
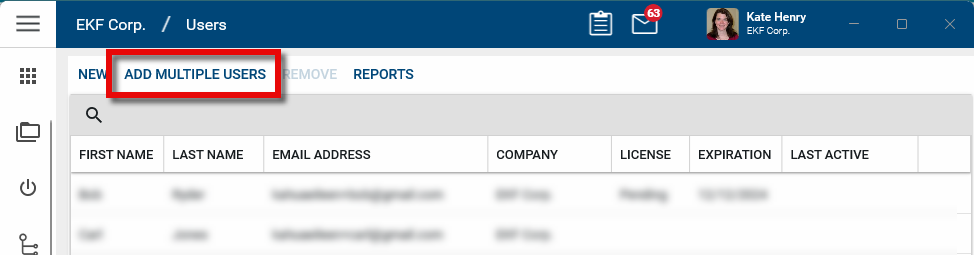
Navigate to the Users app (Apps > Administration > Users or User Management > Users).
-
Select Add Multiple Users from the action bar. A new page opens.
-
New users can be added manually, through an import, or a combination of both.

-
To enter user information manually, select Insert # items and enter the users' information. To copy a field value to other records, select the value on the record. Select Copy to All to copy the value to all other records, or select Copy to Selected to copy the value to selected records.
-
To import a list of users, select Import from Excel and complete the steps below. For general information on the import process, refer to Importing records.
-
Select Download Template to download the Excel template.
-
Enter the new user's First Name, Last Name and Email addresses into the Excel template.
-
Return to the Add Multiple Users grid and select Import from Excel > Upload to upload the completed import template. Click Ok to complete the import. The import may take several minutes, depending on how many records are in the import.
-
The Status field will show Conflict if information is missing or there is an existing user with the same email address. You must remove conflicting items to proceed. To remove a record from the list, select the check box and click Delete from the action bar.
-
-
Complete the rest of the grid:
Field Description Company Select the Company name. These are internal users, so the company name comes from the Company Profiles application. For more information, refer to Updating your company information in the Company Profiles app. First Name, Last Name, Email Enter the contact information for the new user. Licenses Select the appropriate licenses for the user. Internal users without a license can only receive tasks and messages and cannot create or view records in the system. For more information, refer to Managing user licenses. Destination Partition This will be the default partition the user will see when they open Kahua. If they are assigned to a specific project, you can select it here by clicking on Change. You must select the Destination Partition before you can assign a group to the user. Select Groups Select the group or groups the user should be assigned to. For more information on groups, refer to Setting up groups.
Note If using the Copy to All or Copy to Selected function, this field can only be copied if the Destination Partition of the record being copied from and the records being copied to are the same. If they are not the same, then the value will not be copied and a message will appear in the Status Message column.
-
To invite the users to your domain, select the check boxes and click Send Invitations in the action bar. Each user will be sent an invitation email and asked to verify their login. Once they have completed their verification they will be able to complete the registration process.
-
Click Done when you are finished.
New internal users can be added one at a time in the Users application. To create new users this way, they must first be created in the Contacts application and associated with your company. For more information on the Contacts application, refer to Understanding the Contacts app.
Once the user has been created as a contact in the Contacts application, complete the following steps to add them as an internal user:
-
Navigate to the Users app (Apps > Administration > Users or User Management > Users).
-
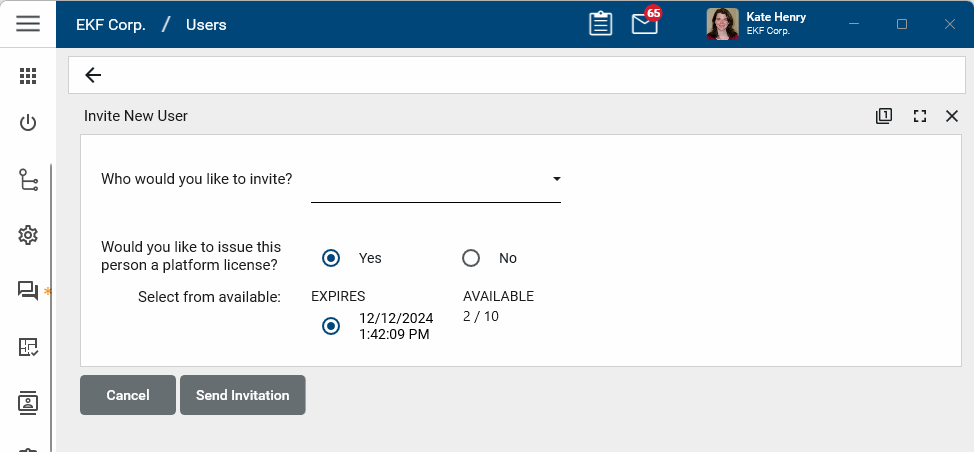
Select New from the action bar. The Invite New User panel opens.
-
Type in the user's name company name to filter the selection list and select the user.
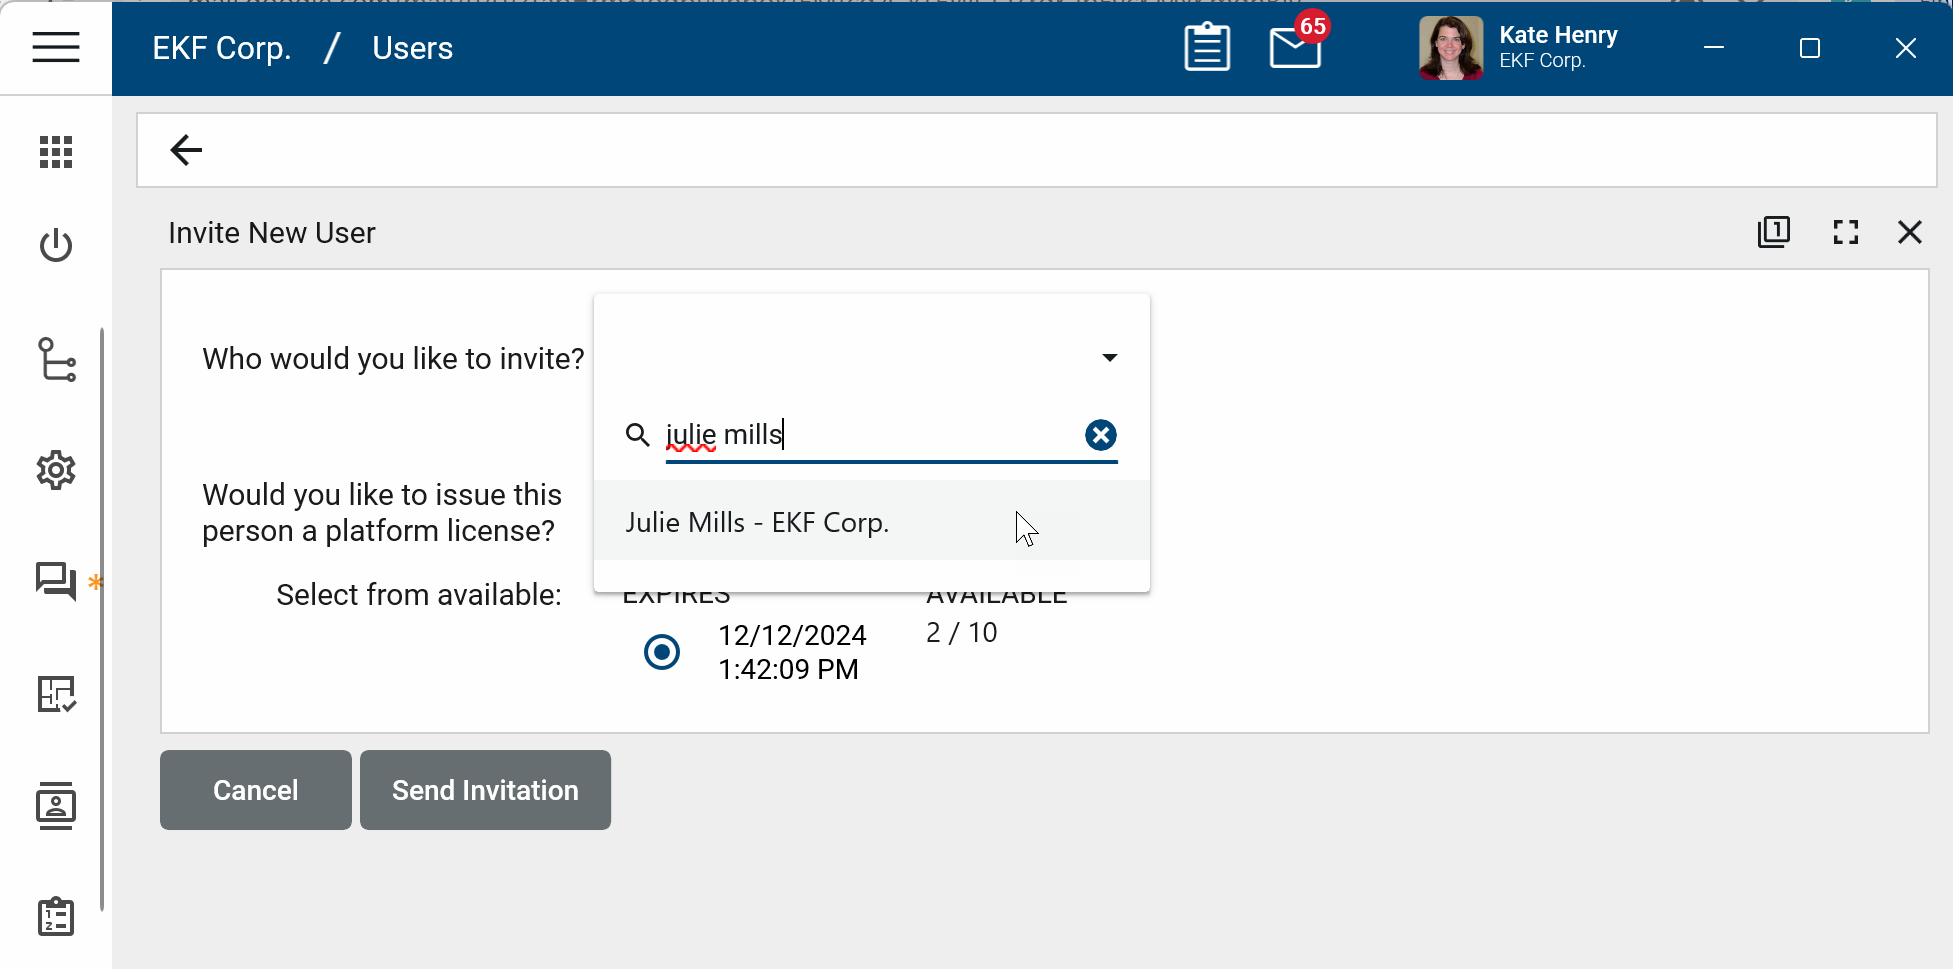
-
Select the license to assign to the user, if any.
-
Click Send Invitation. The user will be sent an invitation email and asked to verify their login. Once they have completed their verification they will be able to complete the registration process.
When an invited user does not respond to an invitation or the invitation has expired, it can be sent again.
Note Your domain administrator can define the invitation expiration period. Refer to Account Security Requirements.
To re-send an invitation, complete the following steps:
-
Navigate to the Users app (Apps > Administration > Users or User Management > Users).
-
Locate the user on the users list. Click on their name to open the detail panel.
-
Select Resend Invitation from the action bar and click OK on the confirmation message.
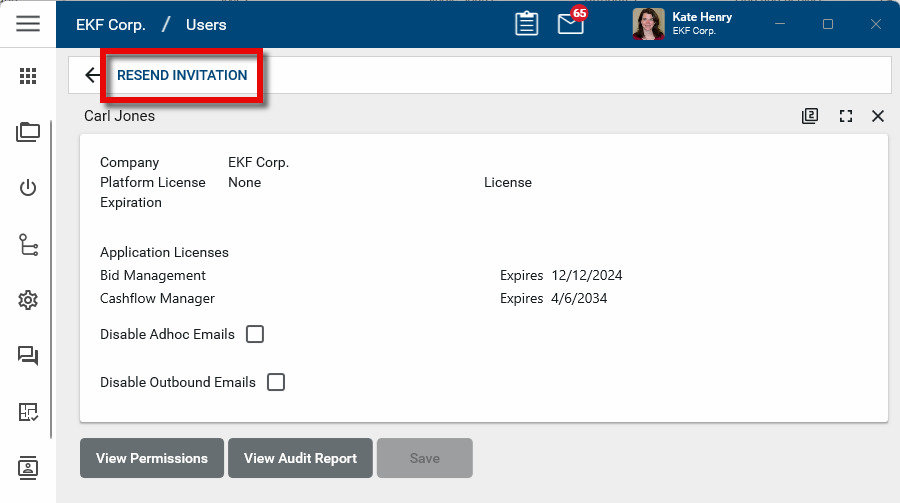
-
A new invitation will be sent to the user. They will be asked to verify their login. Once they have completed their verification they will be able to complete the registration process.
You may want to set up the internal user with an employee profile. The Employee Profile is a sub-application of the Contacts app. This application is important if you are going to utilize the Daily Reports app to track internal labor hours. To track a specific employee’s labor, they must have a profile created in the Employee Profile app. For more information, refer to Managing Employee Profiles.