Subcontractor RFIs (My RFIs)
Notice Kahua is a very flexible and customizable platform. In your domain, this application may have been modified to meet your company's needs. The online help uses default field labels for field names and describes standard workflows. Please check with your domain administrator for specific information about working in your organization's domain.
The RFI (Requests for Information) process is a formal way to ask questions of a general contractor, design team, or owner's representative in order to obtain additional information, clarification, or guidance related to construction documents or field conditions on a construction project or program.
The Kahua platform allows a subcontractor to create an RFI and submit it directly to the general contractor on a project. The general contractor can review the RFI and, as appropriate, respond directly to the question or move it forward in the process as an official RFI on the project.
In the subcontractor domain, these RFIs are created and submitted in the My RFIs app. The general contractor receives them in their RFI > Subcontractor's RFIs app, where they can be responded to or processed into an official RFI on the project.
Key elements of the Subcontractor RFI app and process are:
-
Subcontractors can create RFIs in their My RFIs app and submit them to the general contractor.
-
The first time an RFI is submitted to the general contractor, the general contractor will receive a task to create a connection between the two domains, and to select which project in their domain should receive the RFIs.
-
Once the connection is established, RFIs submitted by the subcontractor appear in the general contractor's project in the RFIs > Subcontractor's RFIs app.
-
The general contractor can respond directly to the RFI, return it to the subcontractor for more information, or move it forward in the process and convert it to an official project RFI.
How to . . .
To create a new RFI, complete the following steps:
-
Review the header to ensure that you are in the correct project or partition.
-
Navigate to the My RFIs application (Apps > Project Management > RFIs > My RFIs).
-
Click New in the action bar.
-
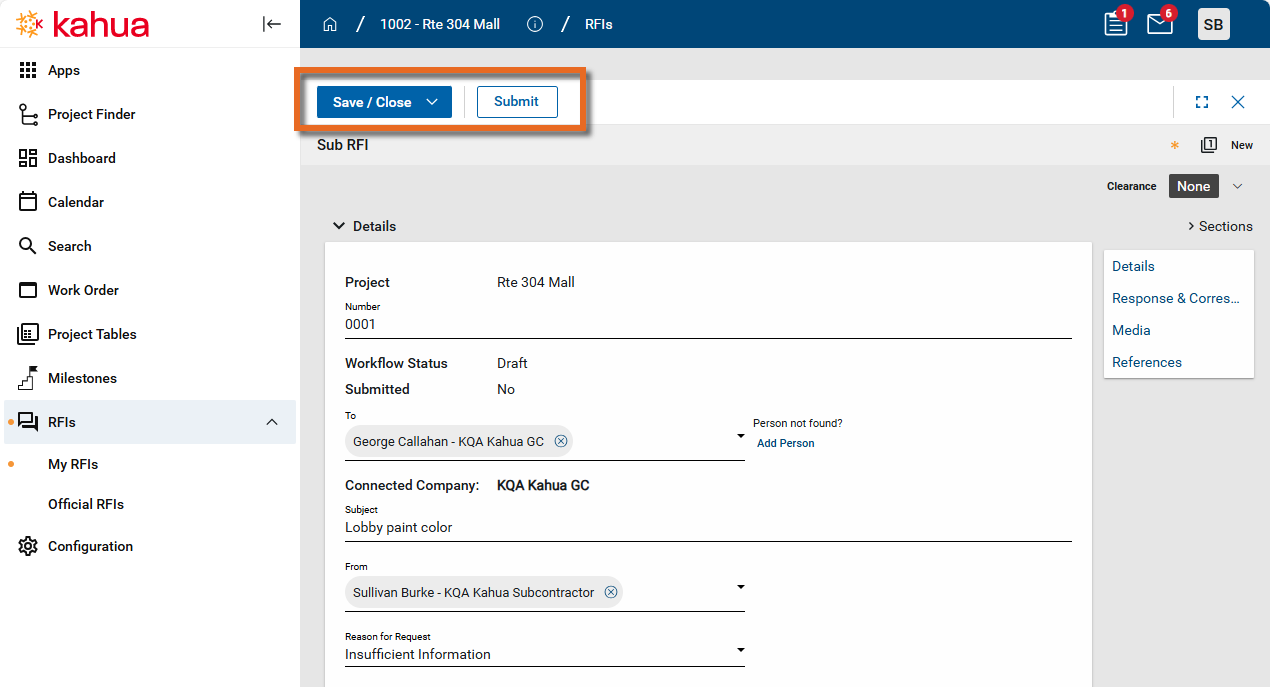
Complete the following fields as appropriate:
Note Depending on how this app is configured for your domain, there may be fields or sections listed here that do not appear for you, fields and sections that appear for you which are not listed here, or fields and sections which appear in a different order. If you have any questions, check with your domain administrator.
Field Description Details Number Allow Kahua to auto-number the record, or enter a different value.
Note The number format can be configured by your domain administrator. Refer to Number.
To Select the appropriate contact to send the RFI to.
If the person is not in the contact list, select Add Person, enter their email address, and click Search. The user account in the Kahua community with that email address appears. Click Ok to select the contact and add them to your contacts application.
For more information on working with the contacts app, refer to Understanding the Contacts app.
Subject Enter a subject for the RFI. From By default, your name appears here. If this should be another user, select the appropriate person. Reason for Request Select the underlying reason for the question, such as "Insufficient Information" or "Conflict".
Note This lookup list is managed in the Configuration app. Refer to Lookups.
Drawing Number If this relates to a specific drawing, enter the drawing number here. Work Suspended Select this option if the work is suspended until this question is resolved. Estimated Cost Effect Select the appropriate Estimated Cost Effect from the list.
Note This lookup list is managed in the Configuration app. Refer to Lookups.
Estimated Amount Enter the estimated cost amount. Estimated Time Effect Select the appropriate Estimated Time Effect from the list.
Note This lookup list is managed in the Configuration app. Refer to Lookups.
Estimated Number of Days Enter the estimated number of days of impact. Response Required By Enter the date the response is due to you. Reference No If applicable, enter a reference number. Information Requested Enter the detailed question. Recommendation If applicable, enter your recommendation or proposed solution. Notes Enter any additional notes Response & Correspondence Information about the response to the RFI appears here. Media Upload or select any relevant image files. You can use drag and drop to add an image file to this section. For more information on using this section, refer to Media section. References Upload or select any relevant files or documents. You can use drag and drop to add a file to this section. For more information on using this section, refer to References section.
-
To save your work, click Save in the action bar.
To submit the RFI to the contact in the To field, click Submit in the action bar.
After the RFI is submitted to the general contractor, you may need to recall the RFI or add additional information.
-
To recall the RFI, open the detail view and select Recall from the action bar.
-
To add information to the RFI, open the detail view and select Edit to make modifications. When complete, click Send Update to send the updated RFI to the general contractor.
As a general contractor, when a subcontractor submits their first RFI to you from their My RFIs app, you will receive a Project Connection Request as a task.
To accept this Project Connection Request task, complete the following steps:
-
Open the Tasks application. For more information on opening tasks, refer to Tasks App.
-
Select the "Project Connection Request" task to open it.
-
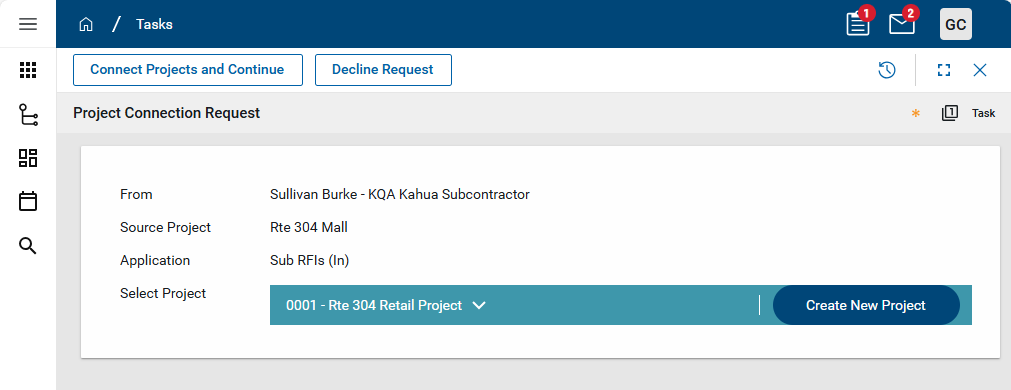
The following information appears on the Project Connection Request:
-
From - The name and company name of the contact making the connection request.
-
Source Project - The name of the project in the From company's domain.
-
Application - The app in your domain that the connection will be made to.
-
Select Project - The project you will be receiving the connection in to. By default, the name of the project you currently have open appears here. You can select a different project, or create a new project if you don't currently have the appropriate project set up in your domain.
Important It is important to review this field and select the correct project, or create a new one if needed.
-
-
In the Select Project section, click the expand icon
 to open a list of projects. To search the list, enter a search term in the search field.
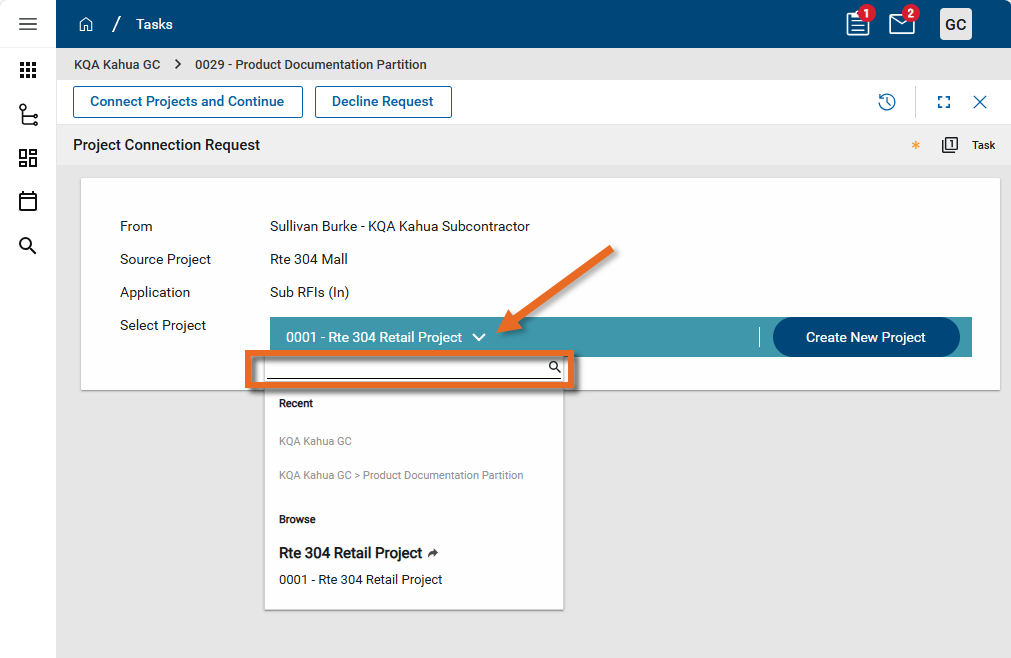
-
To create a new project, click Create New Project. The Number and Name field values use defaults. Modify as needed and click Save to save the new project.
-
When you are satisfied that the correct project in your domain has been selected, click Connect Projects and Continue. The projects are connected, and the initial RFI submitted by the subcontractor and any RFIs submitted in the future from this project will be available in the RFIs > Subcontractor's RFIs app.
When the project connection request is complete, the submitted RFI appears in the RFIs > Subcontractor's RFIs app in the general contractor's domain. From here it can be reviewed and acted upon.
To act on a submitted RFI, complete the following steps:
-
Review the header to ensure that you are in the correct project.
-
Navigate to the Subcontractor's RFIs application (Apps > Document Management > RFIs > Subcontractor's RFIs).
-
Select the appropriate RFI from the log view and open the detail view.
-
Review the Information Requested and Recommendation, if present. Review any attached files in the Media or References sections. For more information on using these sections, refer to Media section or References section.
-
If more information is needed from the subcontractor, complete the following steps:
-
Select Return for Clarification from the action bar.
-
The Provide a Reason dialog appears. Enter the reason for the return and select Continue.
-
The Workflow Status of the RFI changes to "Returned for Clarification" in the Subcontractor's RFIs sub-app.
-
In the My RFIs app in the subcontractor's domain, the Workflow Status changes to "Returned" and the Return Reason appears in the Response & Correspondence section.
-
- To respond directly to the RFI, complete the following steps:
Select Edit to open the RFI for editing.
Enter a response in the Response field.
If desired, optionally make a selection in the CSI Code field, add Notes, select additional contacts in the Notifications field, or add files to the References section.
Select Respond from the action bar.
The RFI and your response is returned to the subcontractor.
The Workflow Status of the RFI in both the Subcontractor's RFIs app and the My RFIs app is set to "Closed".
-
To convert the subcontractor RFI to an official RFI on the project and forward it to the architect or other appropriate party for a response, complete the following steps:
-
If desired, click Edit and optionally make a selection in the CSI Code field, add Notes, select additional contacts in the Notifications field, or add files to the References section. Click Save when you are done.
-
Select Process to Official from the action bar.
-
The Official RFIs app opens to a new RFI with the content from the original subcontractor RFI. Make edits as needed. For more information on completing an RFI, refer to RFIs (Request for Information).
-
The Workflow Status of the RFI changes to "Promoted to Official" in the Subcontractor's RFIs sub-app.
-
In the My RFIs app in the subcontractor's domain, the Workflow Status changes to "Awaiting Official Response".
-
Sometimes an RFI should additionally be tracked as a change order request. You can use the Process function to copy information from the RFI into a new record in the Change Order Request app.
To do so, complete the following steps:
-
Review the header to ensure that you are in the correct project or partition.
-
Navigate to the My RFIs application (Apps > Project Management > RFIs > My RFIs).
-
Right-click on the item and select Process, or open the detail view and select Process from the action bar.
-
In the Target Application field, select "Change Order Request". By default, reference files are included. Clear the check boxes for any files you do not want to include.
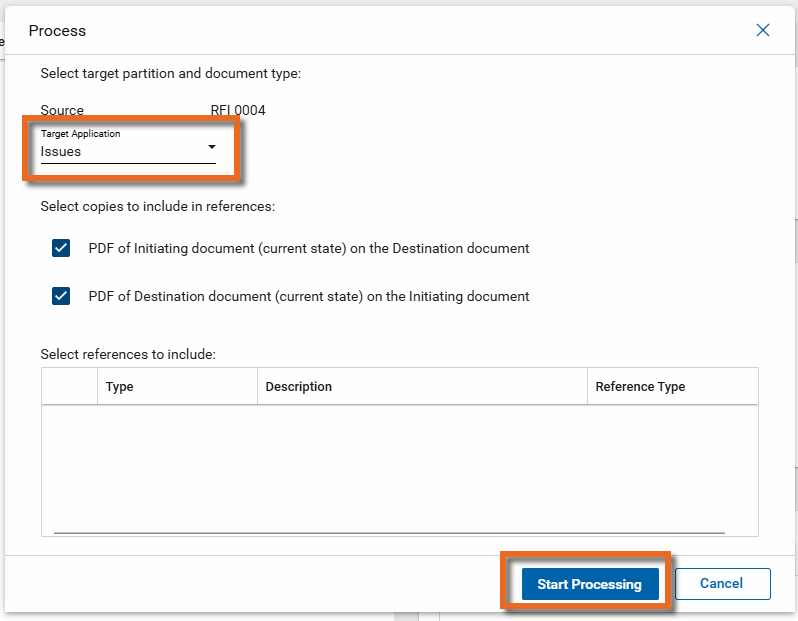
-
Click Start Processing.
-
The target application opens to a new record with information from the RFI. Complete any additional fields and click Save.
You can generate a report from a selected log view, or use one of the built-in reports available by default in each application. For more information on creating your own reports, including how to set up scheduled reports, refer to Creating ad hoc reports.
Note For information on modifying the logo that appears on reports in your project, refer to Managing report logos.
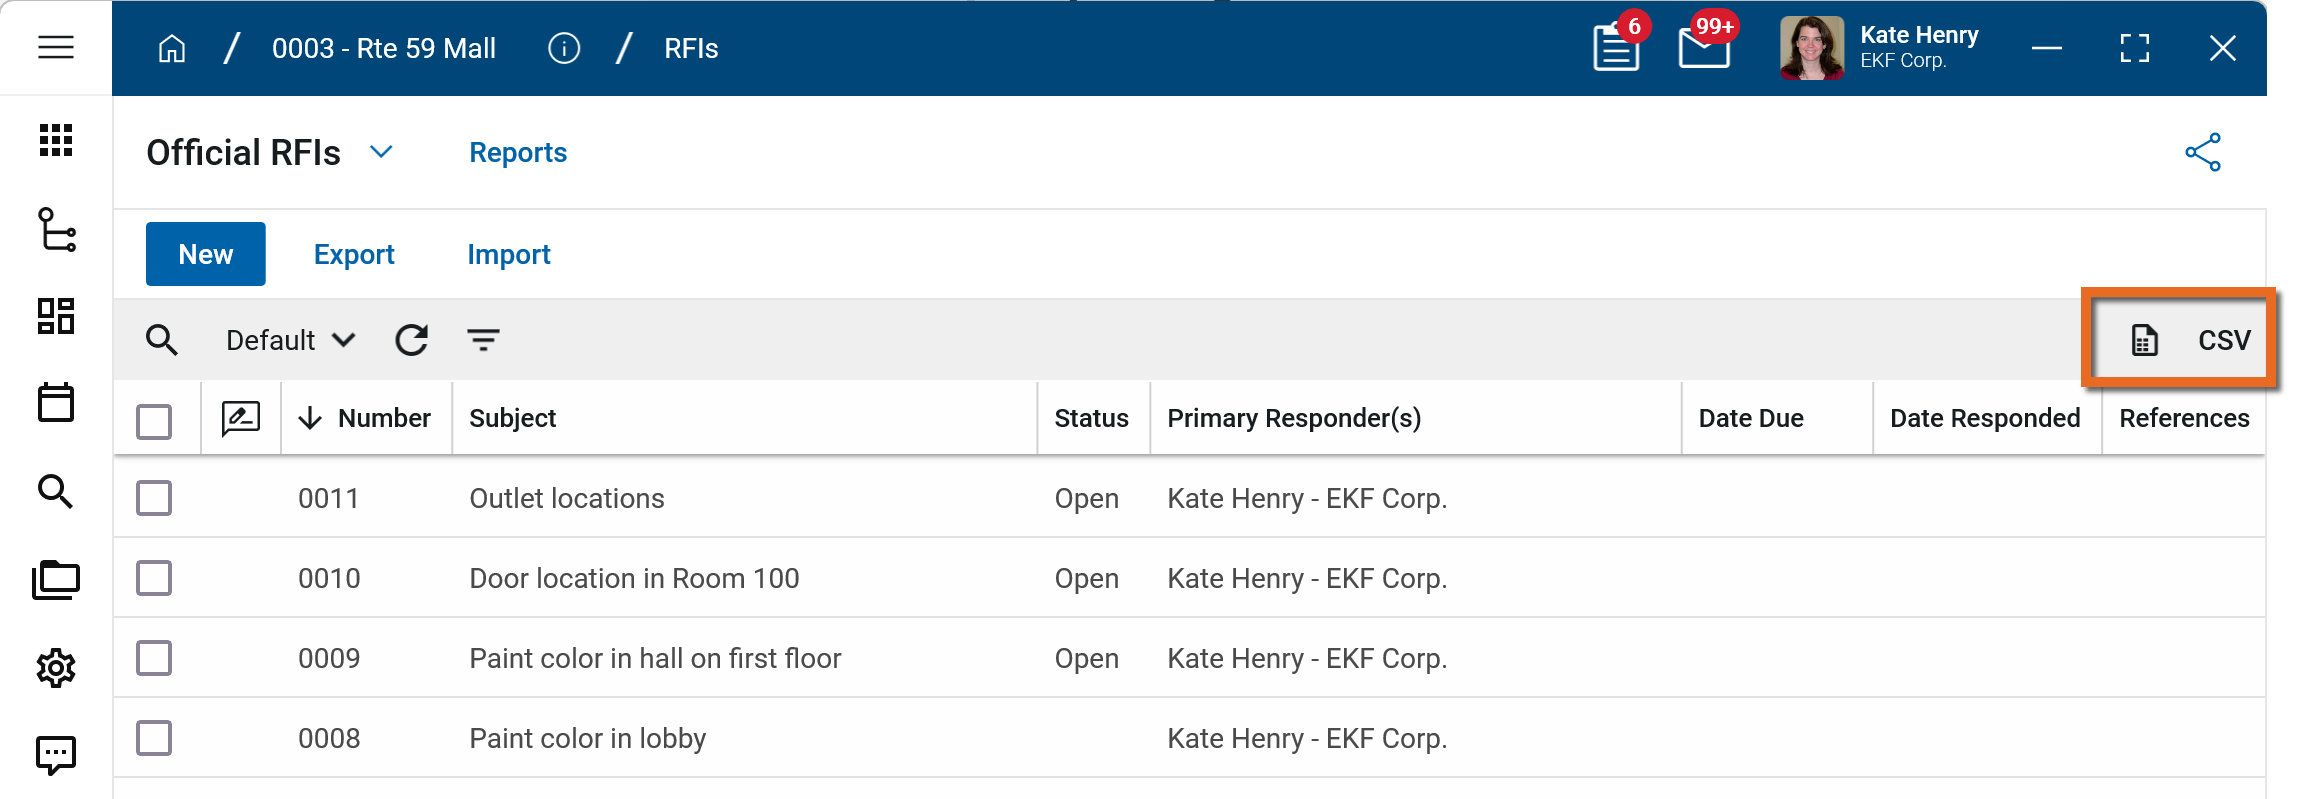
To generate a report from a log view with up to 10,000 records, select the report icon ![]() . If your log view contains more than 10,000 records, the report icon will be disabled and you can select to download the records to a CSV file instead. For more information, refer to Generate a report from a log view.
. If your log view contains more than 10,000 records, the report icon will be disabled and you can select to download the records to a CSV file instead. For more information, refer to Generate a report from a log view.
To generate an application report, complete the following steps:
-
Navigate to the application.
-
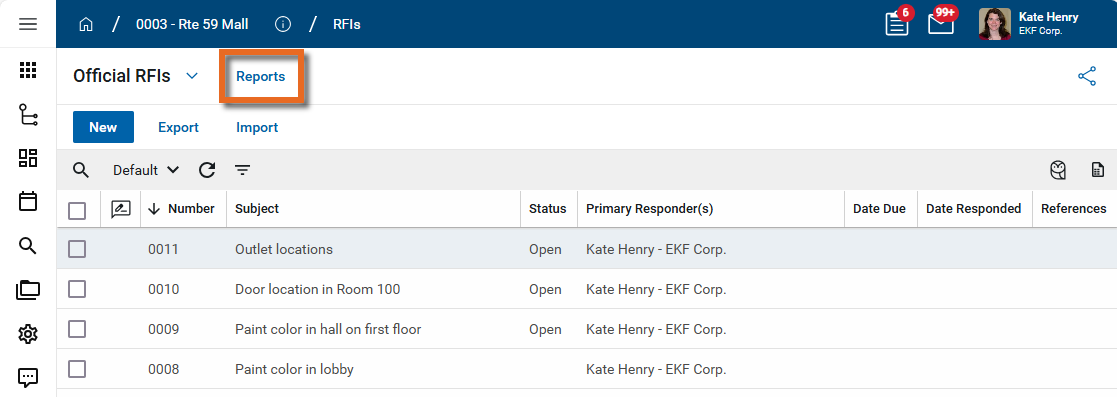
Select Reports in the application title bar.
-
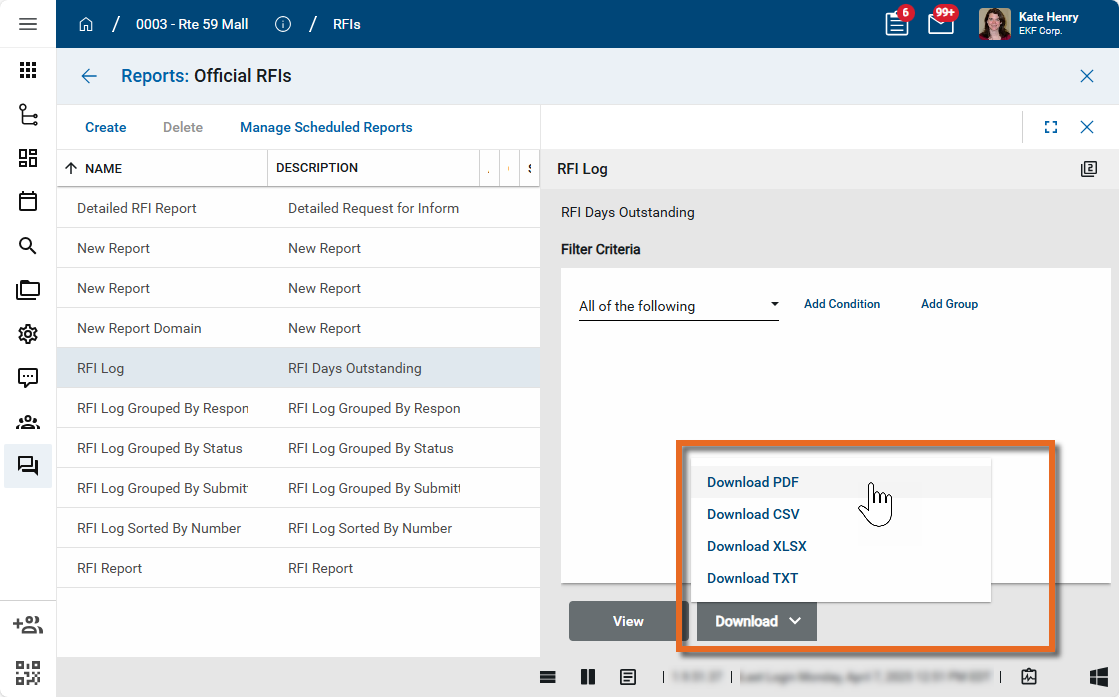
Select the report you want to run.
-
Apply any desired filters.
-
Select View or Download as appropriate. For more information, refer to Viewing Reports.
-
Click the Close icon
 when you are done.
Your domain administrator or another user with the appropriate permissions can configure the app in the Configuration application.
Important When working in the Configuration app, it is important to review the header and ensure that you are working at the correct level in the hierarchy, either the root domain or at a partition or project level.
Settings that you establish at the root domain or lower levels will inherit down the hierarchy until they are overridden. For more information on the hierarchical structure of Kahua, refer to Understanding the hierarchical structure of Kahua.
The Configuration app can be accessed directly through the apps list (Apps > Administration > Configuration), or by right-clicking on an application in the launch bar and selecting Configure. When you select Configure for an app from the launch bar, the detail view of the configuration page for that application opens automatically.
For general information about the Configuration app, including how to set up an approval workflow, refer to Configuration app.
For general information on configuring this app in Configuration, refer to Application configuration.