Drawings app
Notice Kahua is a very flexible and customizable platform. In your domain, this application may have been modified to meet your company's needs. The online help uses default field labels for field names and describes standard workflows. Please check with your domain administrator for specific information about working in your organization's domain.
The Drawings app is a place to upload and manage issued-for-construction drawings in Kahua. From this app, construction drawings can be easily accessed by the project team in both the office and in the field.
Important things to know about this application include the following:
-
If you have the appropriate permissions (moderator or above), you can upload drawing files to the Drawings app and publish them for other users to view.
-
Multi-page PDF drawing files are automatically split into individual sheets when they are uploaded.
-
When drawings are first uploaded, they are not yet published. You can add or extract information about each sheet, and publish them when you are done.
-
You can extract Drawing metadata such as the drawing Title, Number, Discipline or other information by using a title block template. For more information, refer to Title Block Extraction.
-
Drawings are clearly marked as "Current" or "Superseded", and you can easily select the Show Current Only option in the log view header.
-
The drawing Number field is used to track revisions and to determine whether a drawing has been previously published.
-
When drawing references such as sheet numbers are detected in a drawing and matching sheets exist in the project, those references can appear as hyperlinks.
-
Uploaded drawings are automatically synced for offline access in the mobile host and desktop host. The Drawings app does not have to be enabled for offline access. Refer to Kahua Offline.
-
Offline markup is supported on mobile after the drawing set has been synced and a mobile connection has been established at least once.
-
Drawing files can be downloaded to your device. Select one or more files and click Download from the action bar.
-
If your domain uses CUI, the app respects those permissions and users must have the appropriate access to open restricted documents.
-
The app is intended for construction-phase drawing management. The more detailed Design Review functionality remains available for earlier design-phase processes. Refer to Design Review.
How to . . .
 View and navigate drawings
To view and navigate drawings, complete the following steps:
-
Review the header to ensure that you are in the correct project or partition.
-
Navigate to the Drawings application (Apps > Document Management > Drawings).
-
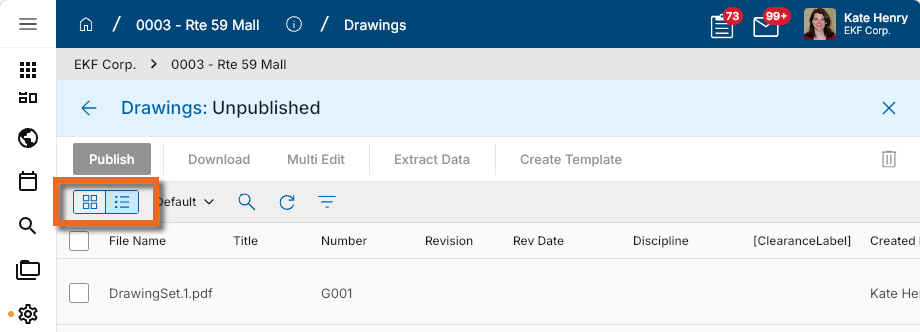
Use one of the following views as appropriate:
-
Thumbnail view - Shows drawing sheets as thumbnails.
-
List view - Shows drawing metadata in a list.
-
-
Use the search field to search by drawing title or sheet number. Use the quick filters to filter the list by values such as Discipline, Drawing Type, Location, or Packages.
-
Use the Show Current Only toggle to show only the current revision of each drawing. Clear the toggle to include superseded revisions in the list.
-
Click a drawing to open it.
-
When a drawing is open, use the arrow controls to move to the next or previous drawing in the current filtered list.
-
If drawing references in the file appear as hyperlinks, click a hyperlink to open the referenced drawing sheet. Use the recent-history navigation to return to the previously opened drawing.
Important The next and previous arrows follow the drawings currently shown in the filtered log. If you have applied a search or filter, navigation is limited to that result set.
Add and publish drawings
You can upload drawing files, extract or manually add metadata such as the drawing Number, Title, Discipline, etc, and when you are ready, publish the drawings to make them available to other users.
To add and publish drawings, complete the following steps:
-
Review the header to ensure that you are in the correct project or partition.
-
Navigate to the Drawings application (Apps > Document Management > Drawings).
-
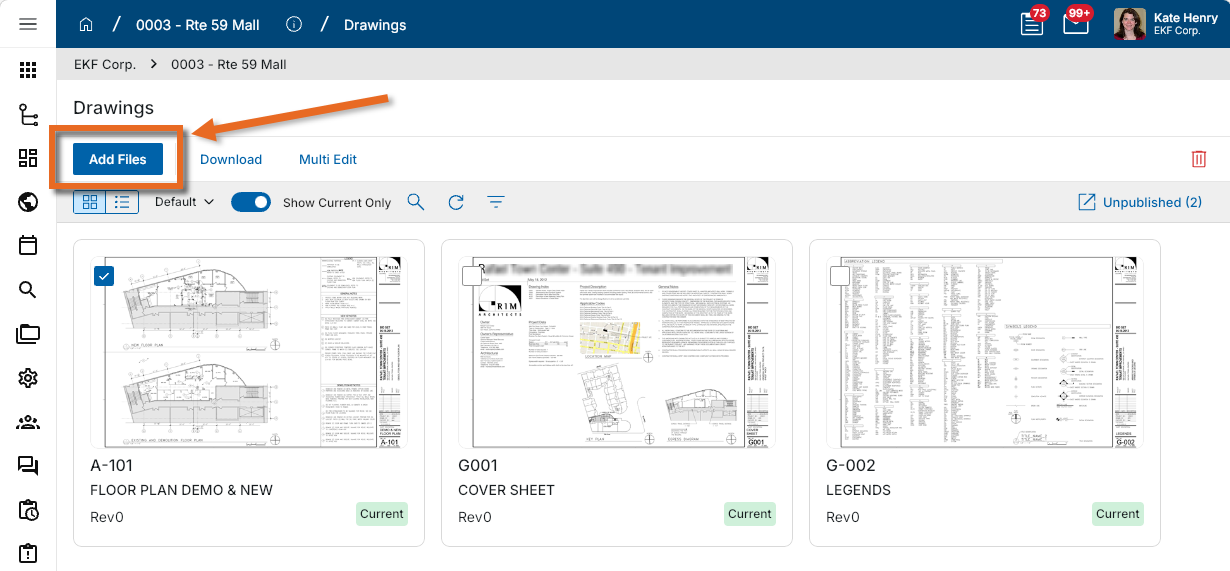
Select Add Files in the action bar. Select Upload File to upload files from your device, or select Add Kahua File to select previously uploaded files from the File Manager app.
-
Select one or more files to upload. You can upload individual sheet files or multi-page drawing sets. Uploaded multi-page drawing sets in PDF format are automatically split into individual drawing sheets.
-
The uploaded files appear on the Add Files dialog. Click Continue to complete the upload.
-
The newly added drawings appear on the Unpublished page. You can view them in a list or as tiles by making the appropriate view selection.
-
When drawings are initially uploaded, only the File Name and Created By fields are complete. You can update the remaining fields such as Number, Title, Discipline, etc, through one or more of the following actions:
-
Enter the data on each record individually - Click on each drawing and enter the appropriate values. Refer to Edit drawing metadata.
-
Use the Multi Edit function - Select multiple drawings and click MultiEdit in the action bar. Enter the appropriate values. Refer to Edit drawing metadata.
-
Extract the data from the drawings - You can use Title Block Extraction to automatically extract the data from the drawings. Refer to Extract data from uploaded drawing files using a template.
Note Data extraction can only be done before the drawings are published. Field values can be manually entered or modified either before or after the drawings are published.
-
-
When the drawings have been uploaded and the additional fields are updated and complete, you can publish the drawings.
-
Select the drawings you are ready to publish and click Publish in the action bar.
-
The Publish dialog appears. Enter the revision information as appropriate:
-
Revision Number is required. If Kahua finds an existing sheet with the same drawing number, you can use Apply to increment the revision. If the drawing number has not been published before, the initial revision is typically set to 0.
-
Revision Date can be applied to all selected drawings if appropriate.
-
-
Click Continue to publish the drawings.
-
The drawings now appear on the main view.
Note Publishing uses the drawing Number to determine whether a sheet has been seen before and whether a new revision should be created.
Note When working with a large number of sheets, Kahua may process them in batches. If items remain after publishing, repeat the publish process for the remaining unpublished drawings.
Extract data from uploaded drawing files using a template
Prior to publishing uploaded files, you can automatically extract metadata such as the drawing Number, Title, Discipline, etc, from the drawings.
To extract data using a title block template, you first need to create a template to follow, then you can apply that template to the appropriate drawings.
You can use templates previously created in the File Manager app, or create a new template in the Drawings app.
Create a new Title Block Template
To create a new template in the Drawings app, complete the following steps:
-
From your project in the Drawings app, select an unublished drawing to base your template on by clicking in the selection box.
-
Click Create Template in the action bar.
-
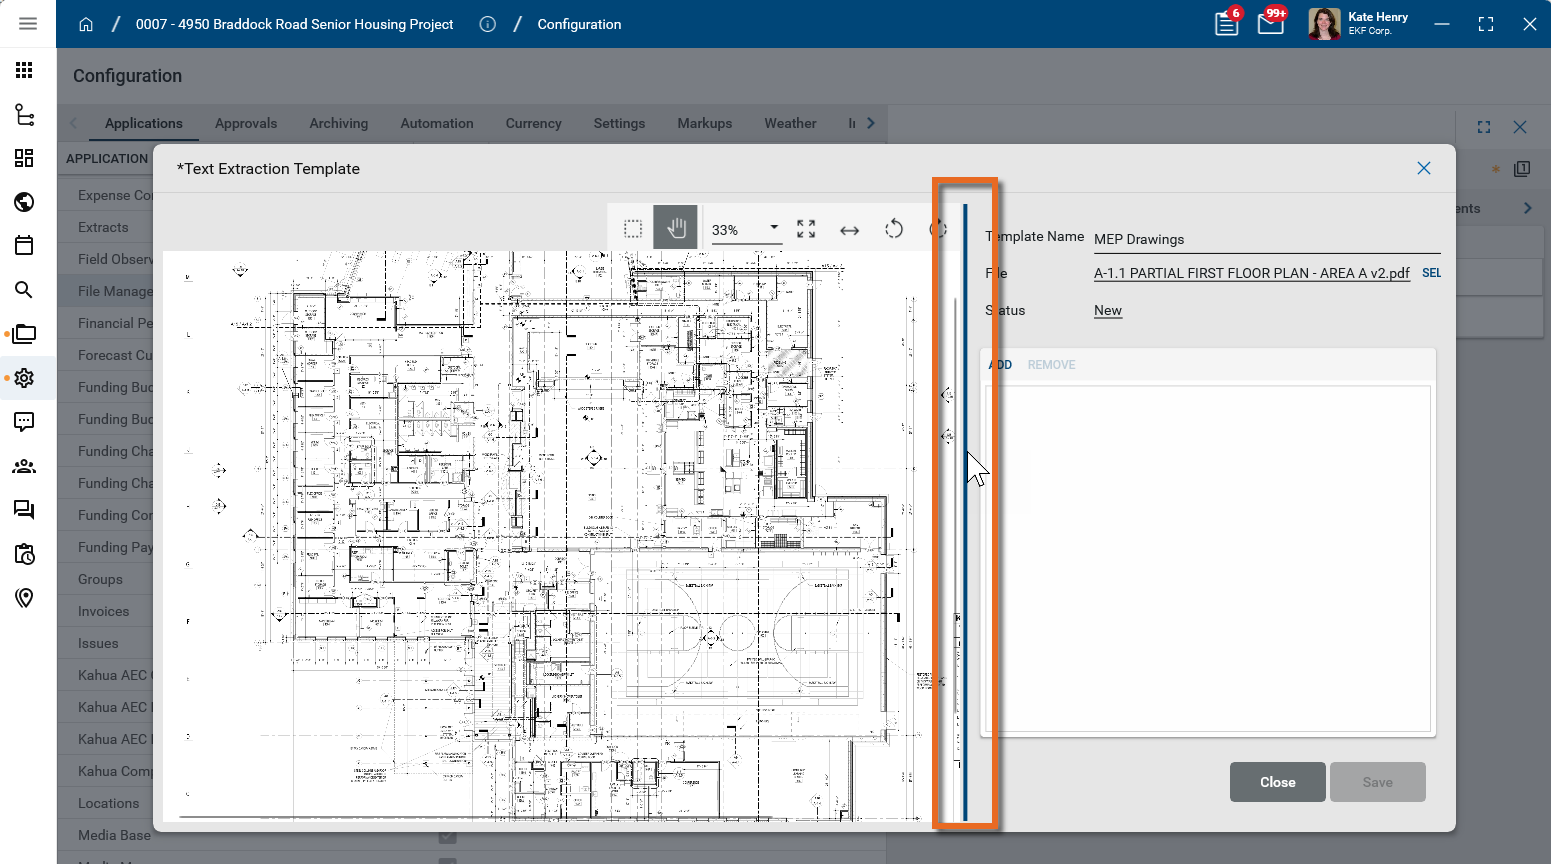
The Text Extraction Template page appears with the selected drawing. Enter a Template Name. For example, if you are creating a Title Block Template for the structural drawings, name the template "Structural Drawings".
-
Note that you can adjust the width of the drawing by hovering over the dividing line between the two areas.
-
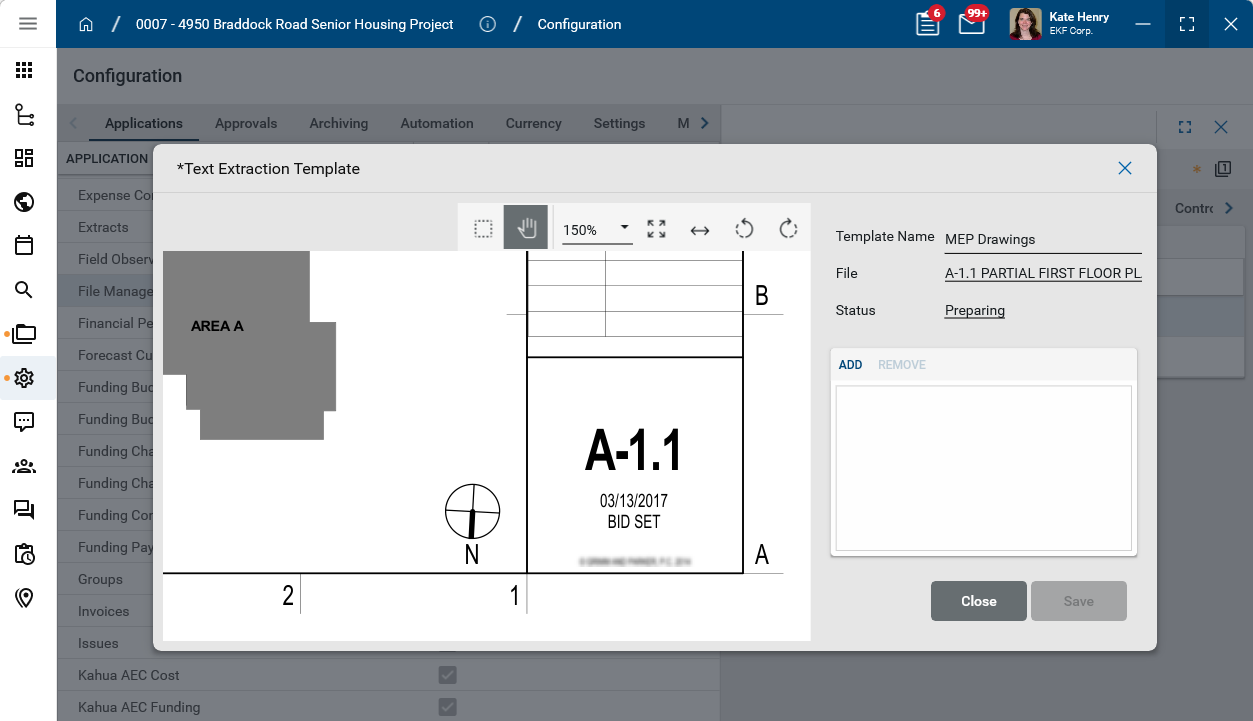
The following tools appear in the image toolbar. Use the Pan mode and Zoom selector to navigate to the title block at the appropriate level of detail.
Tool Description Select 
Click this icon to switch between selection mode and pan mode on the drawing.
In selection mode, clicking and dragging on the image will select a section of the image and any markups in that selected area.
Pan mode 
Click this icon to switch between pan mode and selection mode on the drawing.
In pan mode, clicking and dragging on the image will pan across the image.
Zoom 
Shows your current zoom level on the drawing.
Select a level from the drop-down list, manually enter a level and press Enter on your keyboard, use Ctrl + your mouse wheel, or press Ctrl plus the + or - key to zoom in and out from the current cursor location.
Fit Page 
Fits the file image to the display area.
Fit Width 
Fits the file image to width of the display area.
Rotate Counter Clockwise
 / Rotate Clockwise
Rotates the image counter-clockwise or clockwise.
-
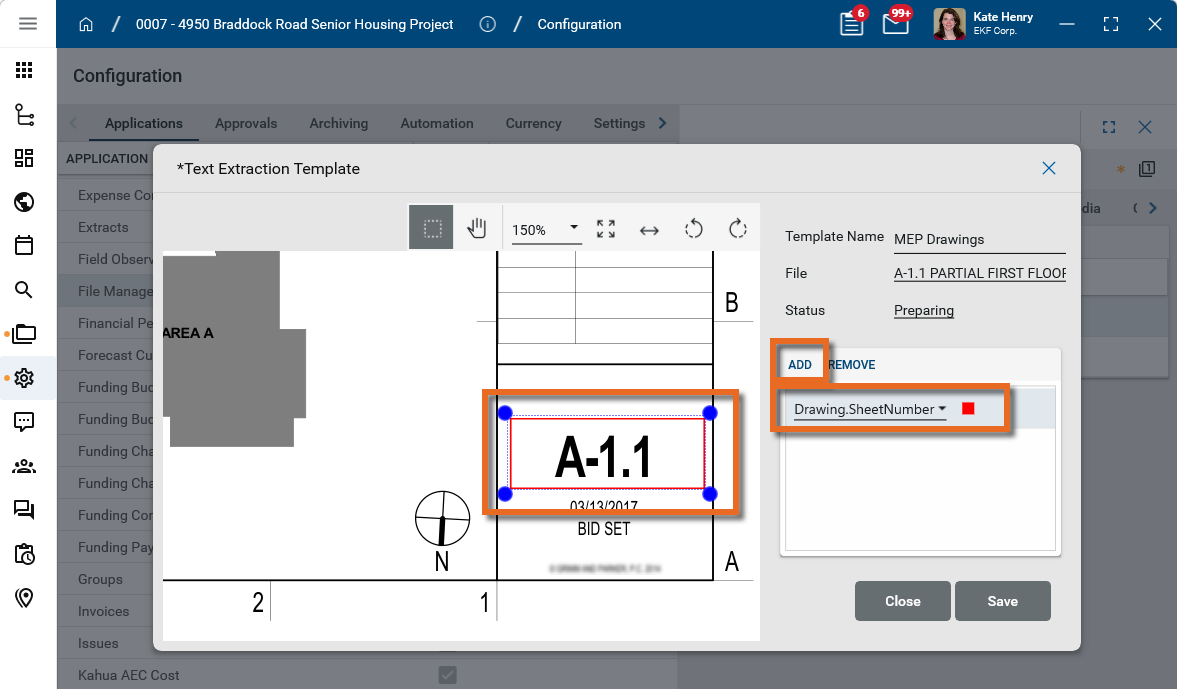
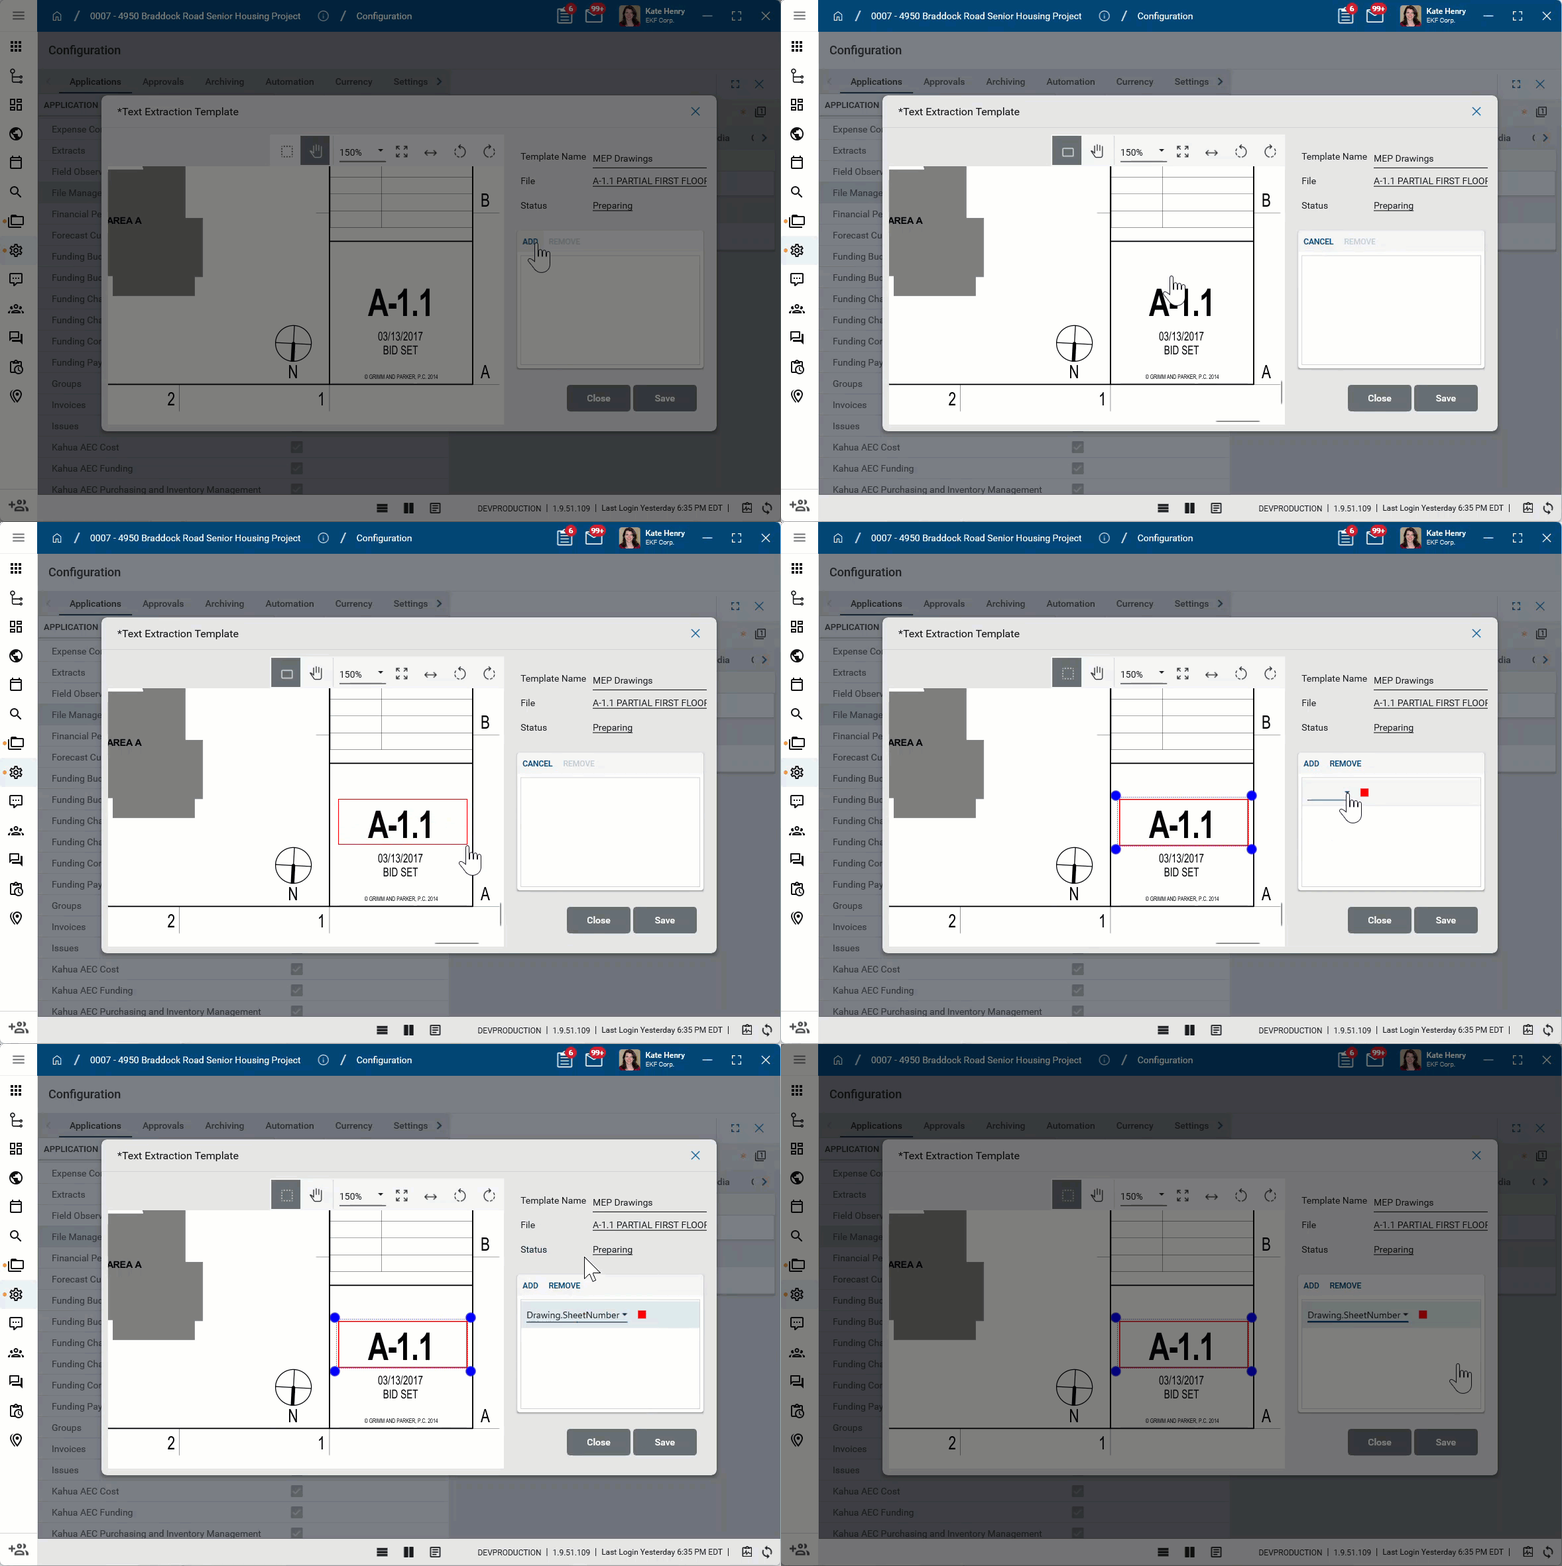
To map an area of the title block to an attribute, click Add, then use your mouse to draw a rectangle around the attribute in the title block. Then select the appropriate attribute to map the selected area to from the dropdown list.
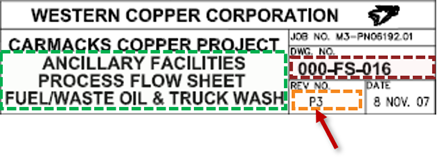
Note The recommended best practice is to make the mapped region as large as possible, without including other attribute areas. This will account for situations where data on one drawing fills more space than what’s on another drawing (esp. with variable length text, such as the Sheet Title). It also helps account for variations between drawing set, including minor margin changes or minor shifts in Title Block placement.
Important Extracting a revision number or date from a Revision table is not supported, as a table can include multiple values. To be mapped for extraction, these values must be defined in a single location in the Title Block.
-
Repeat the process to select additional attributes. Click Savewhen you are done.
Apply a Title Block Template to drawings
To apply the template to one or more drawings, complete the following steps:
-
Review the header to ensure that you are in the correct project or partition.
-
Navigate to the Drawings application (Apps > Document Management > Drawings).
-
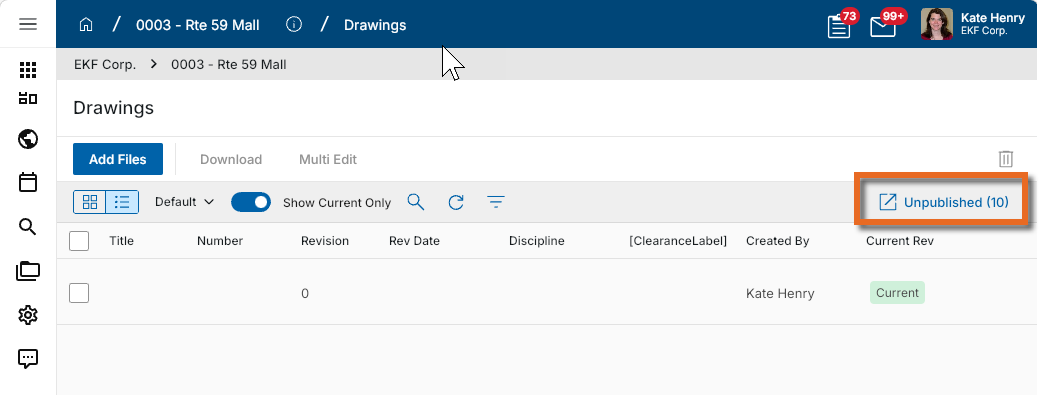
Select Unpublished in the action bar to open the list of unpublished drawings.
-
Select the drawings to extract data from and click Extract Data in the action bar.
-
In the Title Block Template field, select the appropriate template and click Continue.
-
The field values are extracted from the drawing and appear in the log view.
Note The extraction process may take several minutes to complete.
-
Review the extracted data. Update any values as needed before publishing. Refer to Edit drawing metadata.
Edit drawing metadata
When a drawing is open, the Details panel shows metadata for the drawing and the currently selected revision. Complete the following steps to review or update the metadata:
-
Review the header to ensure that you are in the correct project or partition.
-
Navigate to the Drawings application and open the appropriate drawing.
-
If the Details pane does not appear, click on the Open Panel icon
 to access it.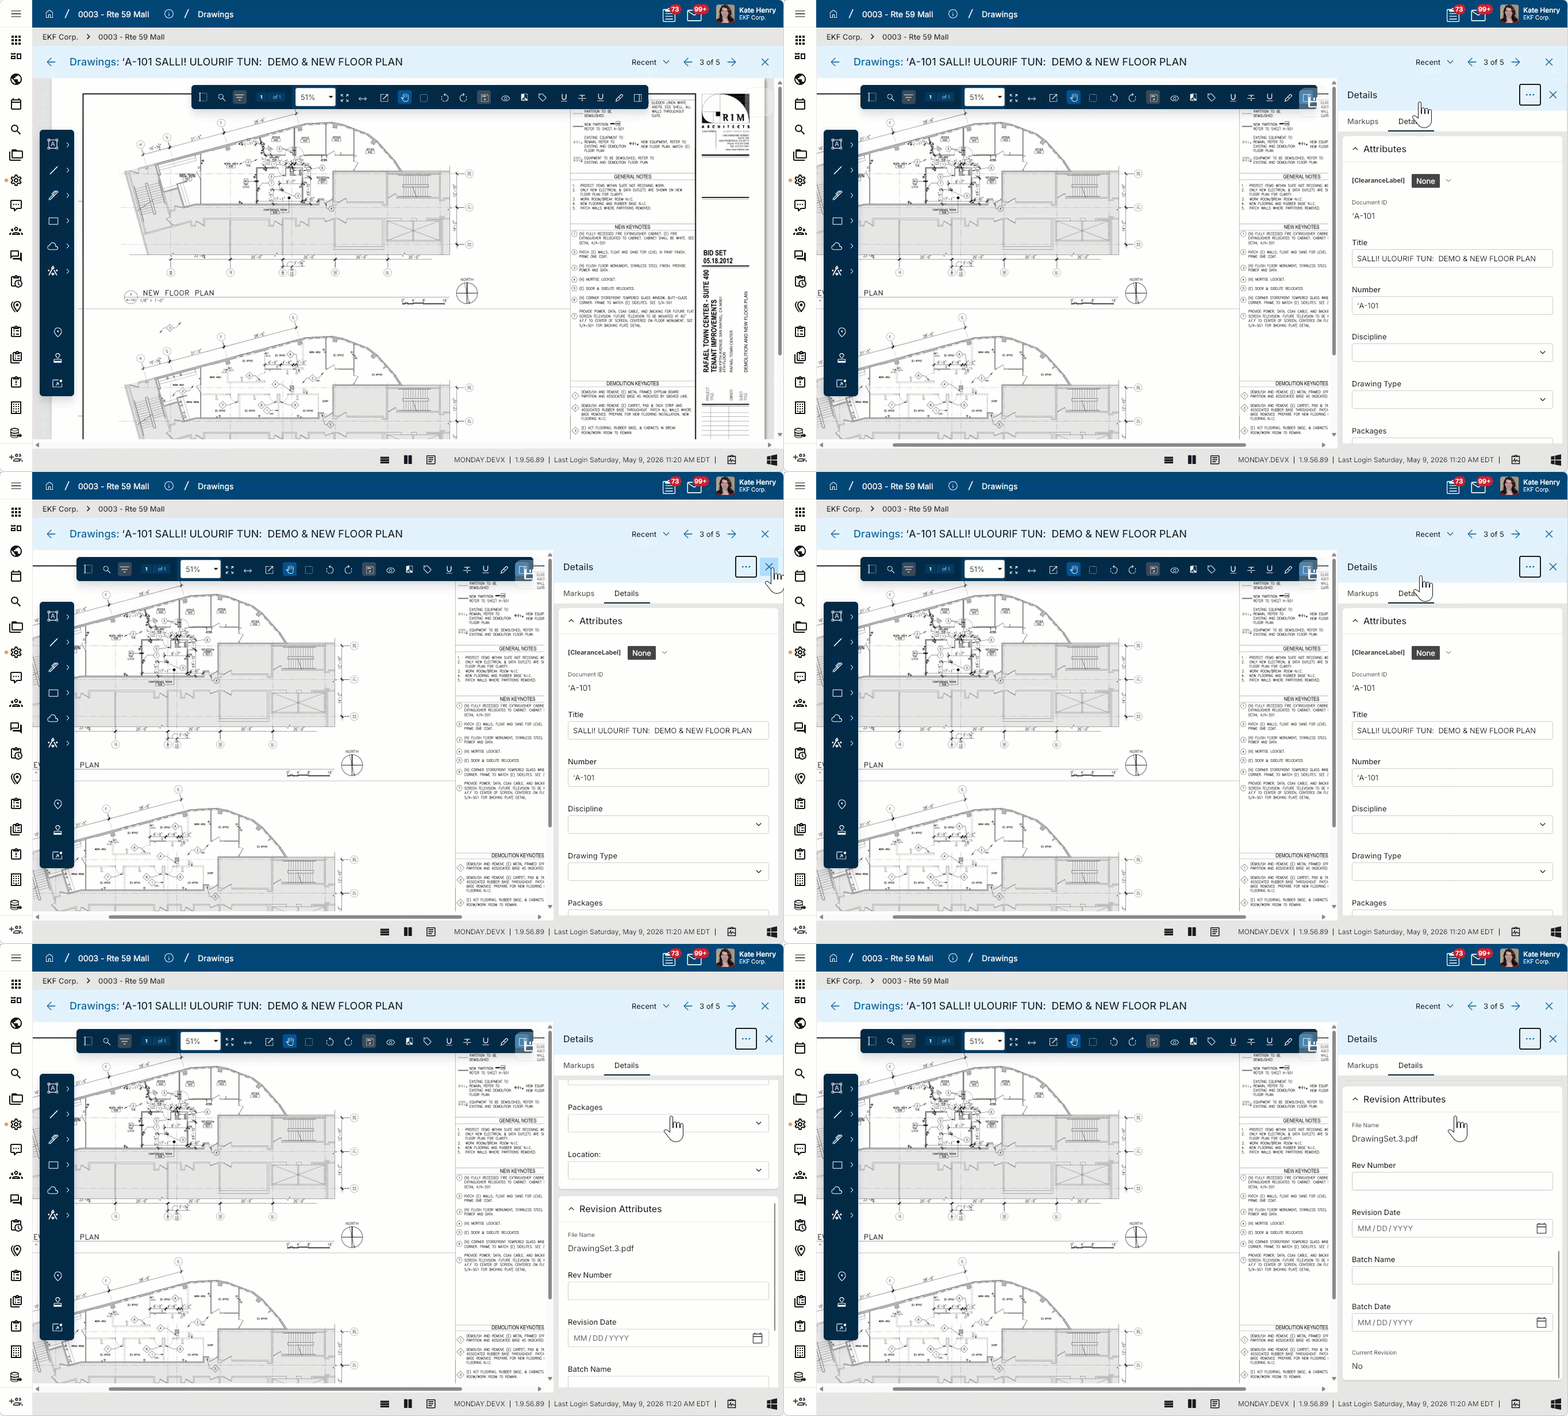
-
Review or update the following fields as appropriate:
Note Depending on how this app is configured for your domain, there may be fields or sections listed here that do not appear for you, fields and sections that appear for you which are not listed here, or fields and sections which appear in a different order. If you have any questions, check with your domain administrator.
Field Description Attributes Sensitivity / Clearance
If your domain uses CUI, the current sensitivity or clearance value appears here. The label can vary by domain configuration.
Document ID The system identifier for the drawing record appears here.
Title Enter or review the drawing title.
Number Enter or review the drawing number.
Important This value is used to track revisions and to determine whether a drawing has been previously published.
Discipline Select the appropriate discipline. This value can be assigned during metadata extraction based on configured discipline abbreviations.
Note This lookup list is managed in the Configuration app. Refer to Lookups.
Drawing Type Select the appropriate drawing type.
Note This lookup list is managed in the Configuration app. Refer to Lookups.
Packages Select the appropriate package value if your organization uses package tracking for drawings.
Note This lookup list is managed in the Configuration app. Refer to Lookups.
Location Select the appropriate location.
For more information on setting up location values, refer to Setting up locations.
Revision Attributes The values here can be entered during the publishing process.
File Name The uploaded file name appears here.
Rev Number The revision number for the current drawing revision appears here.
Revision Date Enter or review the date associated with this drawing revision.
Batch Name If batch publishing is used, the batch name appears here.
Batch Date If batch publishing is used, the batch date appears here.
Current Revision This value indicates whether the currently opened revision is the current revision of the drawing.
-
Click the Save icon
 in the lower-right corner to save your changes.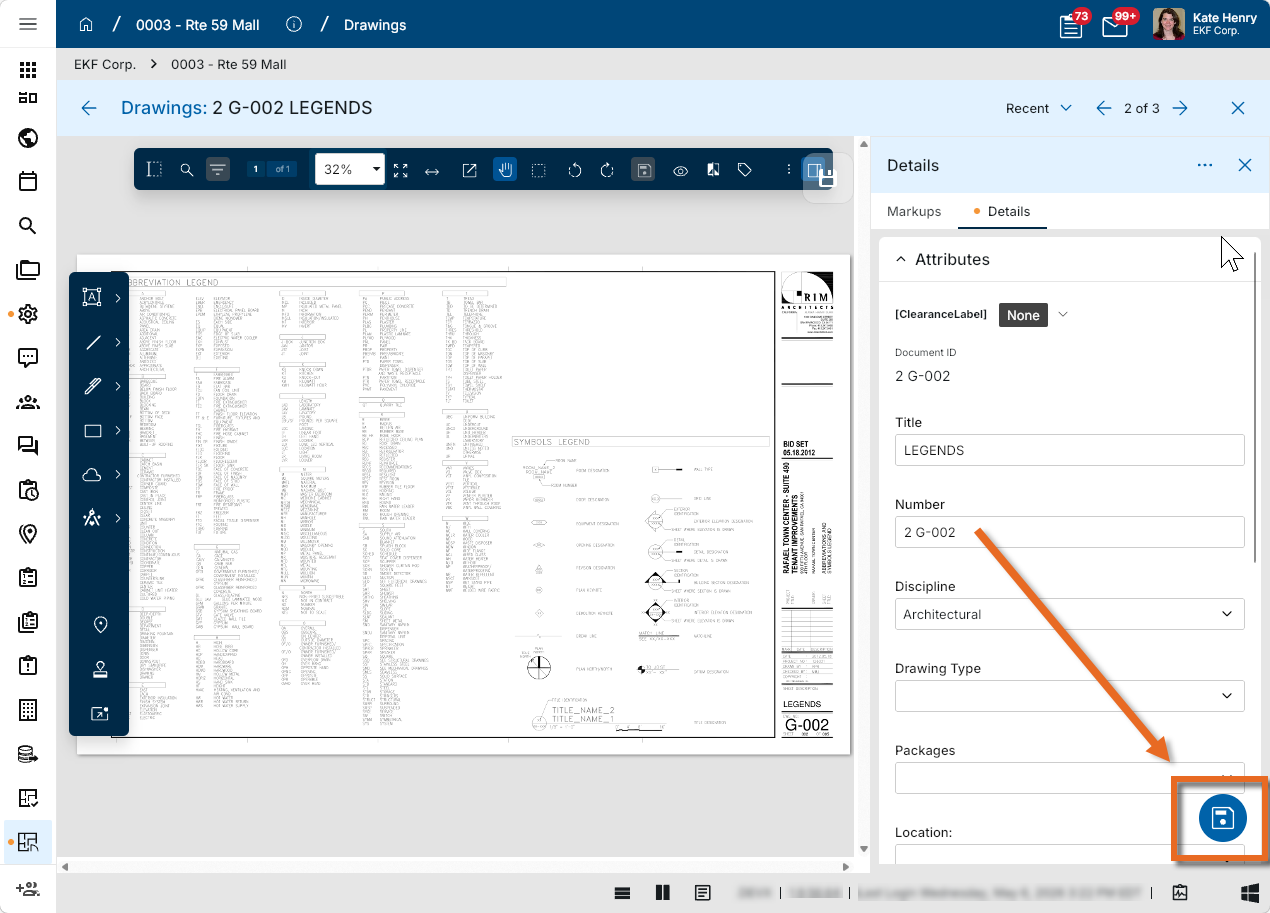
Mark up a drawing and add a pin
You can use the drawing viewer to add markups and, where appropriate, place pins on drawings.
To work with markups and pins, complete the following steps:
-
Review the header to ensure that you are in the correct project or partition.
-
Navigate to the Drawings application and open the appropriate drawing.
-
Use the markup tools to add annotations to the drawing. For more information on the available markup tools, refer to Using the Markup Tool.
-
Use the Markups panel to review existing markups on the drawing.
-
If appropriate for your workflow, place a pin on the drawing and link it to a supported record such as an RFI.
-
Save your changes.
Note Offline markup support is available after the drawing set has been synced to the mobile device and a mobile connection has been established at least once.
Note Pins in the Drawings app follow the same general pinning behavior used elsewhere in Kahua. For more information, refer to Pinning functionality in File Manager.
Generate a log report or other reports
You can generate a report from a selected log view, or use one of the built-in reports available by default in each application. For more information on creating your own reports, including how to set up scheduled reports, refer to Creating ad hoc reports.
Note For information on modifying the logo that appears on reports in your project, refer to Managing report logos.
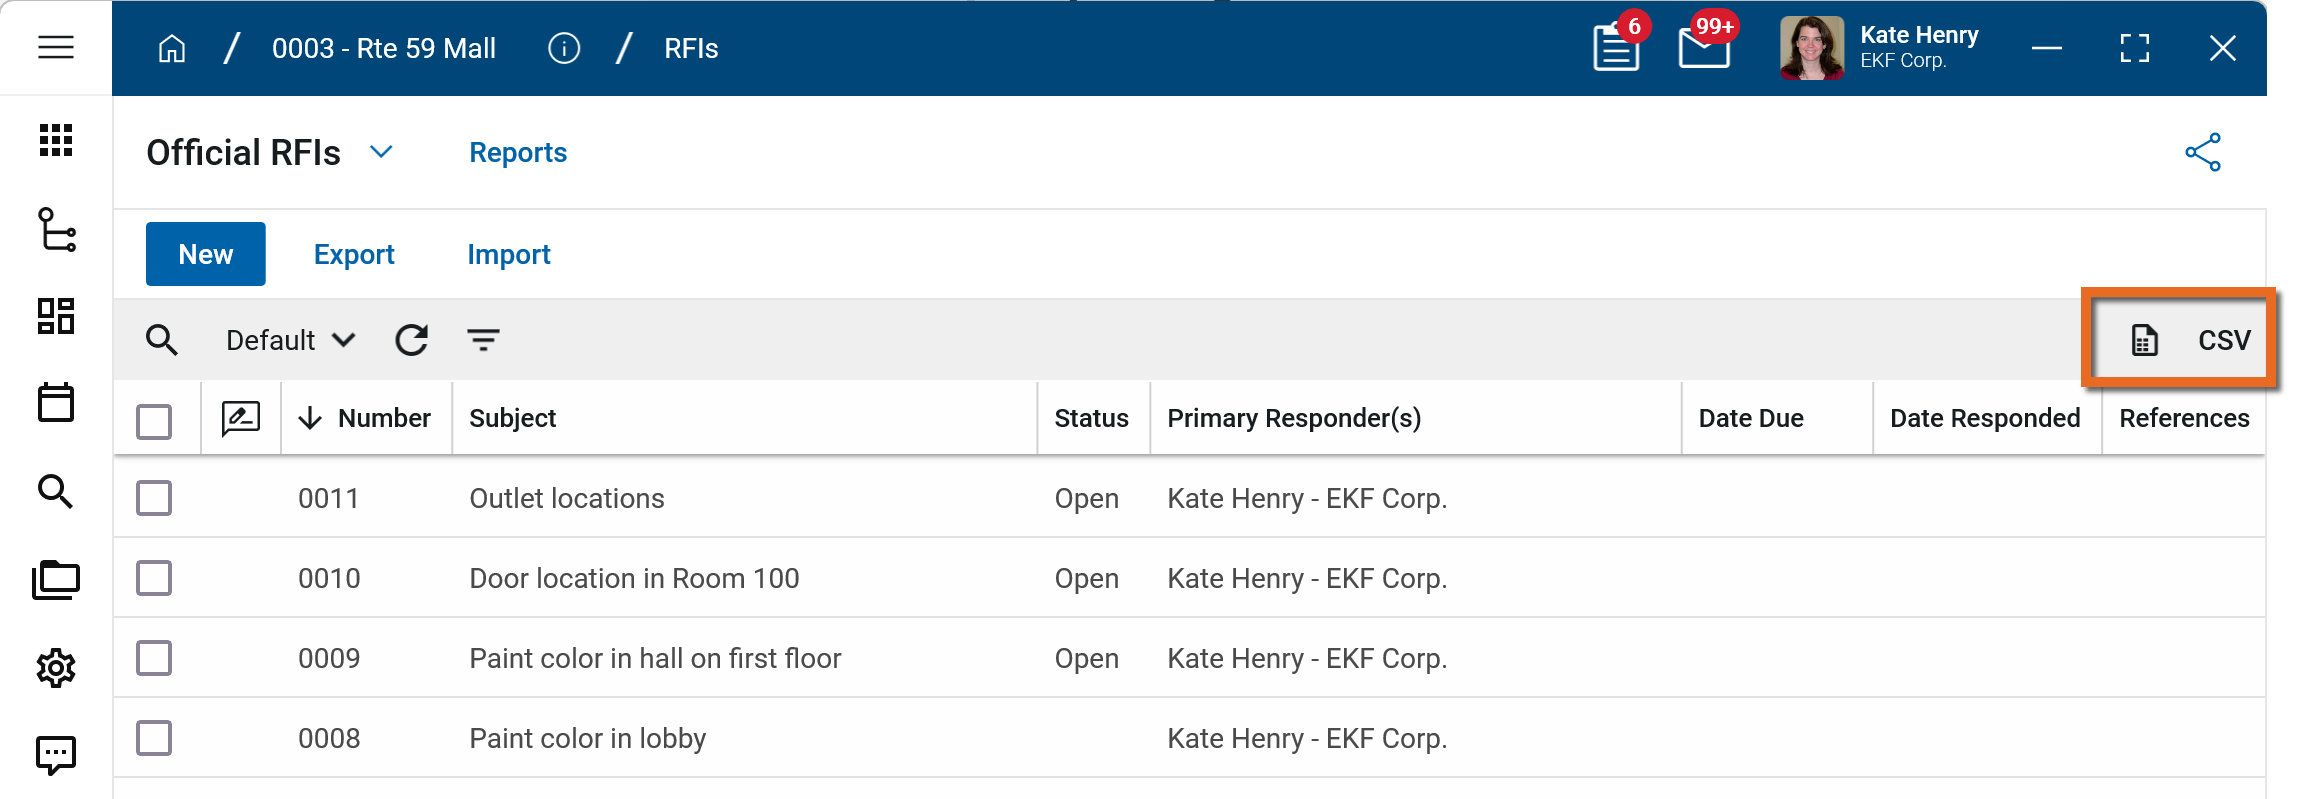
To generate a report from a log view with up to 10,000 records, click the More icon  and select Print. If your log view contains more than 10,000 records, the Print option will be disabled and you can select
  to download the records to a CSV file instead.
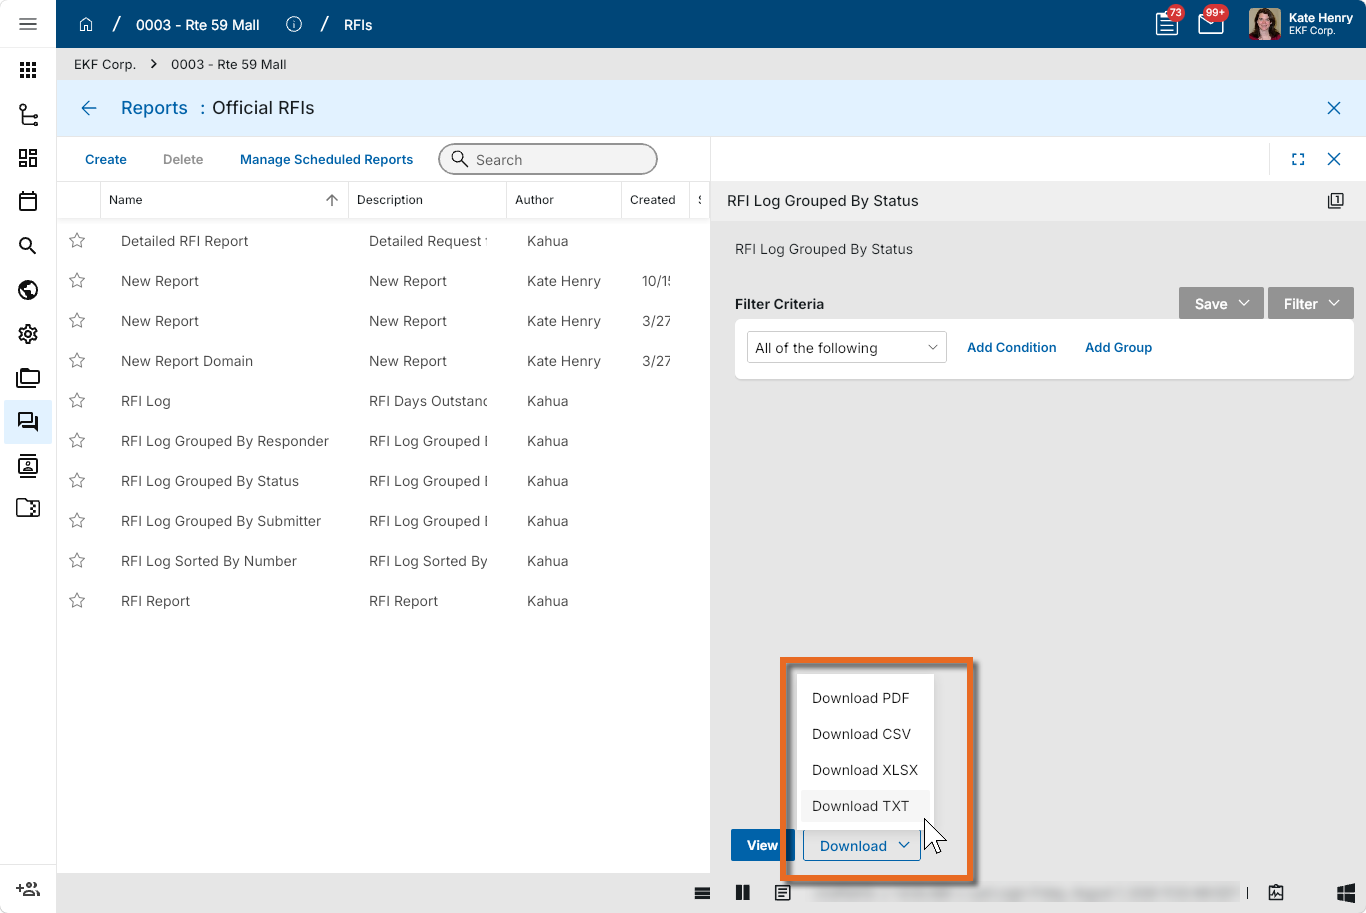
To generate an application report, complete the following steps:
-
Navigate to the application.
-
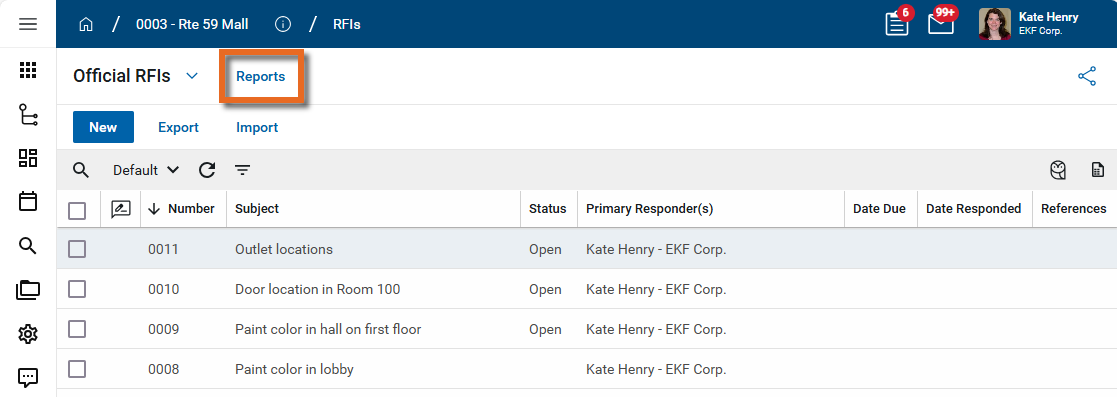
Select Reports in the application title bar.
-
Select the report you want to run.
-
Apply any desired filters.
-
Select View or Download as appropriate. For more information, refer to Viewing Reports.
-
Click the Close icon
 when you are done.
Perform standard actions on a single record (print, send, view history, delete, etc.)
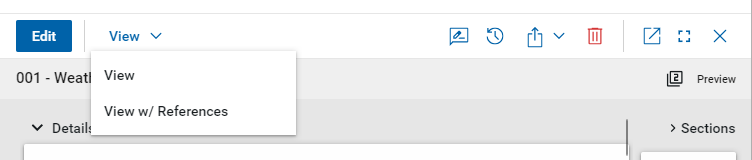
From the detail view of a record, there are several standard actions you can take. Depending on your permissions, some or all of the following options may be available to you:
-
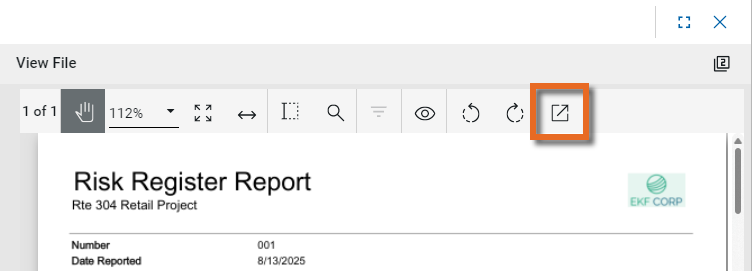
View and View w/References - Select View or View w/References to open a PDF view of the current record. The PDF file can be printed or shared from the viewer by clicking on the Open PDF icon
 .
.
Note Only references where the Include on Send value is set to "Yes" are included in the View w/References.
Additionally, if Include Markup on Send is set to "Yes", any markups on the file are included. -
Discussions
 - Select this icon to open the Discussions panel. If enabled in your domain, the discussions feature allows you to participate in public or private conversations associated with specific records. For more information, refer to Discussions.
 -
View History
 - Select this icon to open the History page for the record. The history page provides details regarding all activity (creation, edits, saves, etc.) performed on the record. Click view edit to drill down into more detail on a specific action. Click hide edit to close the action detail. Click the Close icon
  to close the history page.
 -
Send actions
 - Click this icon to select an appropriate Send action for the record. The following options may be available to you:
-
Copy Link and Copy Portable View Link - Select this option to copy a URL link for the record or record's portable view to your clipboard. This link can be sent outside of Kahua. Users with the appropriate permissions will be able to open Kahua directly to that record or portable view by using the link.
-
Copy QR Code and Copy Portable View QR Code - Select this option to generate a QR code for the currently open record or record's portable view. The QR code can be shared directly from your screen, or copied to your clipboard to be shared as appropriate. This QR code can be shared outside of Kahua. Users with the appropriate permissions will be able to open Kahua directly to that record or portable view by using the link.
-
Send - Select this option to open a new Kahua message with the open record included as an attachment. References with the Include on Send value set to "Yes" are also included. For more information, refer to Messages app.
-
-
Delete
 - Select this option to delete the open record. You must agree to the confirmation message before the record is deleted.
Alternatively, right-click on the record in the log view and select Delete, or select multiple records from the log view and select Delete.
Note If a record is deleted in error, your domain administrator may be able to recover it through the Recycle Bin app. For more information, refer to Using the Recycle Bin.
-
Open in a new window
 - Select this option to open the current record as read-only in a new window (desktop host) or browser tab (web host). This allows you to navigate to other records in the original Kahua instance while keeping the read-only window or tab open for reference. To re-open the record on the read-only window or tab in Kahua, select Open in the header.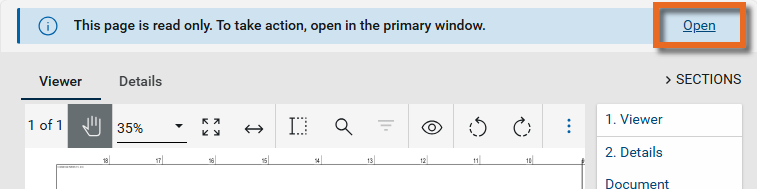
-
Maximize
 and Minimize
  - Select Maximize to open the record to a full screen view. From the full screen view, select Minimize
  to return to the original view.
 -
Close
- Select the close icon to close the currently open item.
Configure the app
Your domain administrator or another user with the appropriate permissions can configure the app in the Configuration application.
Important When working in the Configuration app, it is important to review the header and ensure that you are working at the correct level in the hierarchy, either the root domain or at a partition or project level.
Settings that you establish at the root domain or lower levels will inherit down the hierarchy until they are overridden. For more information on the hierarchical structure of Kahua, refer to Understanding the hierarchical structure of Kahua.
The Configuration app can be accessed directly through the apps list (Apps > Administration > Configuration)..
For general information on configuring this app in Configuration, refer to Application configuration.
The following items are specific to this application:
| Options | Description |
|---|---|
| Settings tab | |
| Default Title Block Extraction Method | Select a default Title Block Extraction Method. |
| Discipline Abbreviations | |
| Start Position of Discipline Abbreviation |
This selection is used during Title Block Extraction to determine the location of the Discipline Abbreviation in a drawing number so a discipline can be assigned to a drawing automatically. The number refers to the position of the discipline in the drawing number. Example For example, you would select 1 where drawings are numbered such as M101 for the first Mechanical drawing. On a project with drawings with a number pattern such as 01-M101, where the initial 01 prefix represents a project area and the Discipline is in the fourth position, you would select 4 as the Start Position of the Discipline Abbreviation. |
| Discipline Abbreviations |
By default, standard Disciplines and Discipline Codes are available.
Note For more information on working with grids, refer to Item grids. Note You may need to close and re-open the Configuration app if the discipline was newly added to the lookup list. |
Available application roles
Application roles determine which actions users can perform in the app. Roles are assigned to groups in the Groups app > Permissions tab. Members of the group then have the permissions associated with the roles assigned to the group.
The following roles are available for this application:
| Role | Details |
|---|---|
| Administrator |
Full administration, including add, configure, create lists, edit, import, export, share, view, send, process, remove, and edit view templates. |
| Contributor |
Can add, edit, open, view, send, and process records. |
| Moderator |
Can add, edit, import, export, remove, share, open, view, send, and process records. |
| Observer |
Can open, view, send, and process records. |
| Referencer |
View-only access to records. |
Note To manage these permissions, open the Groups app and assign the appropriate application role to the group. Only users with the appropriate permissions can manage application roles. For more information, refer to Managing Permissions.