Expense Contracts
Applicable Packages This article applies to the Kahua for K-12 Education, Kahua for Owners, Kahua for General Contractors, and Kahua for Subcontractors packages. If you are not sure if this is relevant to you, please contact your domain administrator.
Expense Contracts are contracts that track costs associated with a construction project. You can track associated items, such change orders and pay requests, in their own apps.
Key elements of the Expense Contracts app are as follows:
-
Contracts created in the Expense Contracts app will display in the Work Breakdown app. The column the contracts appear in will differ depending on its status. Refer to Work Breakdown Structure (WBS).
-
You can set up Master Service Agreements if that is appropriate for your project. For more information, refer to Master Service Agreements (MSA) .
How to . . .
To create a new contract, complete the following steps:
-
Review the header to ensure that you are in the correct project or partition.
-
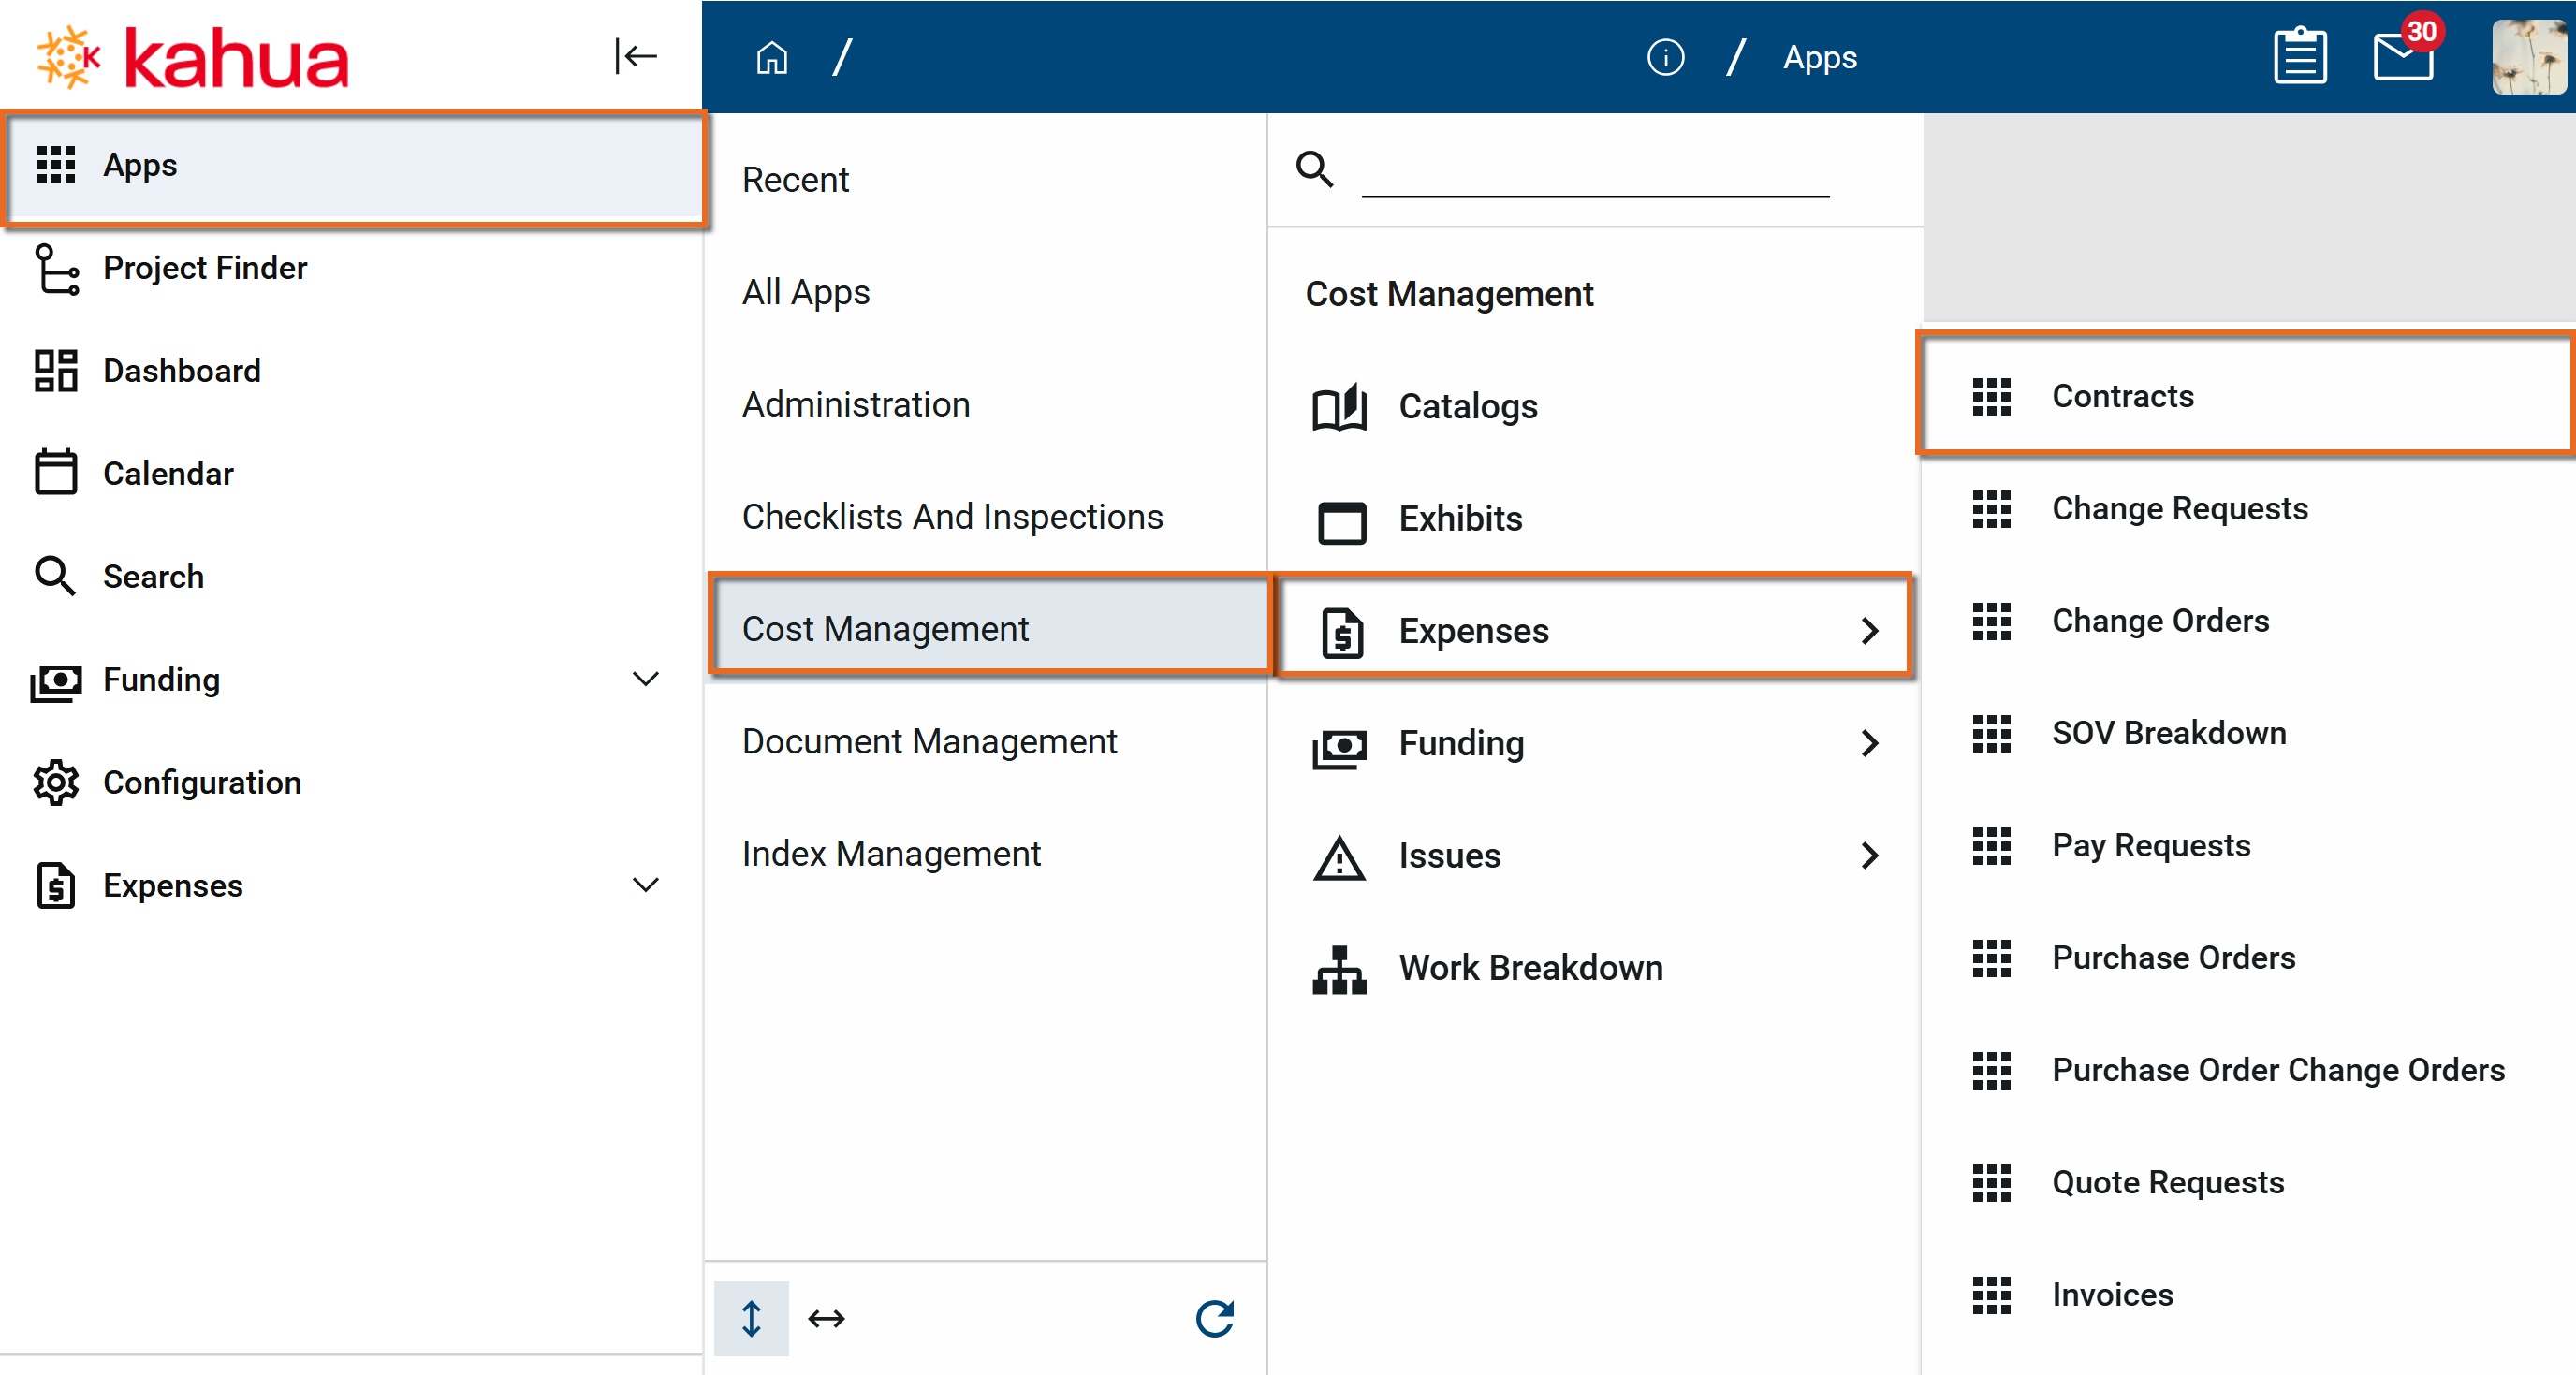
Navigate to the Expenses > Contracts app (Apps > Cost Management > Expenses > Contracts).
-
Click New in the action bar.
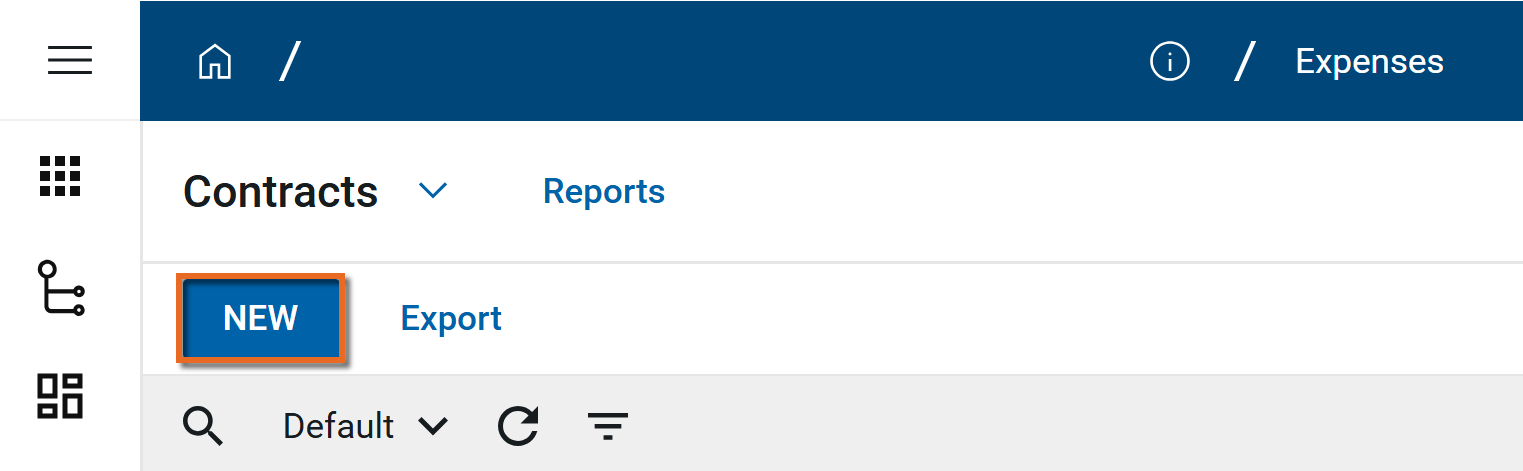
Note If Master Service Agreements (MSAs) are enabled, New with MSA will be available from the New menu. For more information on setting up contracts with an MSA, refer to Master Service Agreements (MSA) .
-
Complete the following fields as appropriate:
Note Depending on how this app is configured for your domain, there may be fields or sections listed here that do not appear for you, fields and sections that appear for you which are not listed here, or fields and sections which appear in a different order. If you have any questions, check with your domain administrator.
Field Description Details Number Allow Kahua to auto-number the record, or enter a different value.
Note The number format can be configured by your domain administrator. Refer to Number.
Date Select the appropriate contract date. Description Enter a brief description. Use SOV Breakdown Select this option to use the schedule of values (SOV) breakdown.
Note The SOV Breakdown app allows Kahua users to set up and approve contracts at a high level, then break the contract into smaller cost items through an SOV Breakdown record. SOV Breakdown inserts itself between the commitment documents (contracts and change orders) and the pay request process. This option must be selected before any pay requests are created for the contract. For more information, refer to Expense SOV Breakdown.
Associate Change Order Lines to Contract Lines
Select this option allow funds from a change order to be directly added to or subtracted from the line items on a contract.
Master Services Agreement If using, select the appropriate Master Services Agreement (MSA) to associate with this contract.
Note An administrator must enable MSAs in configuration for this field to appear. For more information on MSAs, refer to Master Service Agreements (MSA) .
Work Package If desired, select the appropriate work package. For more information, refer to Work Packages.
Type Select the contract type.
Note This lookup list is managed in the Configuration app. Refer to Lookups.
View Template If appropriate, select a portable view template other than the default here.
Note For more information on portable views, refer to Portable Views.
Parties From Contact / From Company / From Company Office
Select the appropriate contact from the company issuing the contract. The From Company and From Company Office fields will auto-populate once the From Contact has been selected. Modify as needed.
To Contact / To Company / To Company Office
Select the appropriate contact from the company the contract is being issued to. The To Company and To Company Office fields will auto-populate once the To Contact has been selected. Modify as needed.
To Contract Signer Select the contract signer. Managing Agent If using, select a third party person who you want to have access to view this contract.
This contact can be granted access through the sharing function. Refer to Sharing in Kahua.
Certifications If the To Company has certifications that should be tracked with the contract, select those here.
Note Certifications are managed on the company record in the Contacts > Companies app. Refer to Certifications.
Scope Not to Exceed Amount If appropriate, enter the contract's Not to Exceed value here.
Scope of Work Enter the scope of work. Addenda / General Provisions Enter this information as appropriate. Work Completed Retainage % / Stored Material Retainage % Enter work completed and stored material retainage percentages.
Note Retainage is the percent of each payment that is withheld until the end of the project or other agreed upon milestone.
Liquidated Damages? Select this option if Liquidated Damages are part of the contract.
Once selected, the following fields appear. Complete as appropriate:
-
Liquidated Damages Start Date
-
Liquidated Damages Per Day
-
Liquidated Damages Not to Exceed Amount
Number of Pages Enter the number of contract pages. Notes Enter any additional notes as desired. Dates & Workflow If using the available workflow options, date fields will auto-populate as the contract moves through the workflow. Remaining fields can be completed manually. Refer to Submitting into Workflow
Items Currency If using multi-currency, this field will appear and auto-populate with the currency set for the project. Modify as needed.
Note Currency for a project is managed on the Currency tab in the Configuration app. Refer to Currency.
Status Select the appropriate status of the contract items. Entry Type Select the appropriate value:
-
Unit Price
-
Total Value
-
Unit Price Calculated
-
Lump Sum
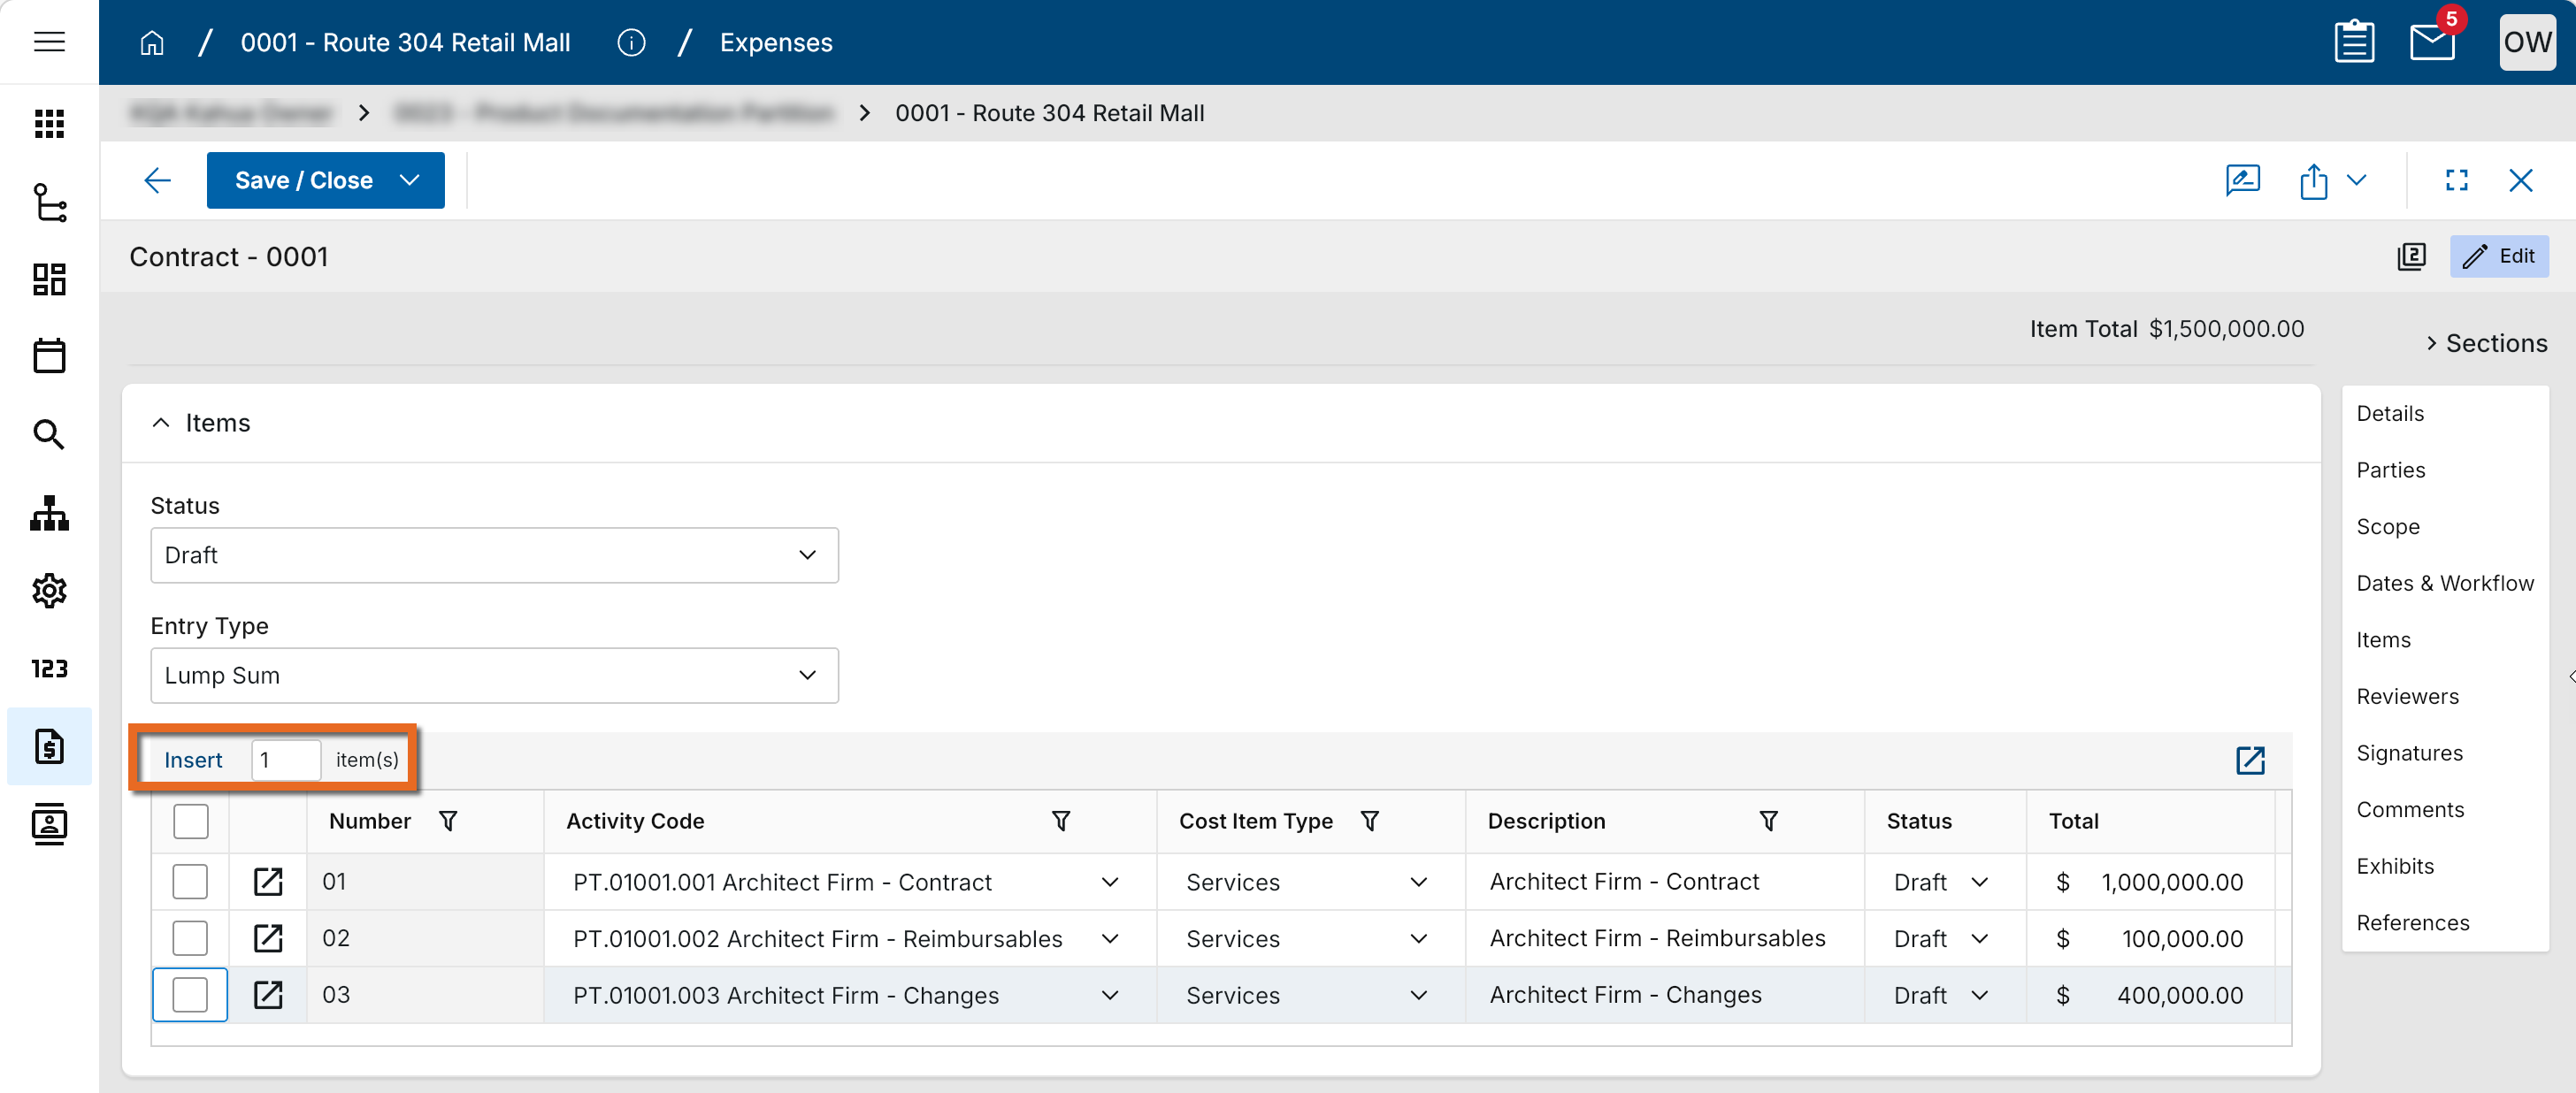
Click Insert to insert the selected number of lines on the grid. For more information on working with grids, refer to Item Grids.
Number This field auto-populates and is read only. Activity Code Select the appropriate activity code. Activity codes are set up and maintained in the Work Breakdown app. For more information, refer to Work Breakdown Structure (WBS).
Cost Item Type / Item Category
Select the appropriate values. Description Enter a description of the item.
Note If Default Description to Activity Code Description is selected in Configuration, the activity code description will be applied by default but can be edited.
Tax Rate This field auto-populates and is read only.
Note This field displays when the Separate Line Item Tax Type is selected.QTY / UOM / Unit Price If the Entry Type is set to "Unit Price" or "Unit Price Calculated", the QTY (Quantity), UOM (Unit of Measure), and Unit Price fields will appear. Enter values as appropriate.
Status The status of the line item appears here. Total The total amount for the line item is entered here. Currency If multi-currency has been configured, available currencies can be selected here.
Additional information and options are available in the Item Detail view. From the Items grid, click on the Details icon
 on a line item or the grid.
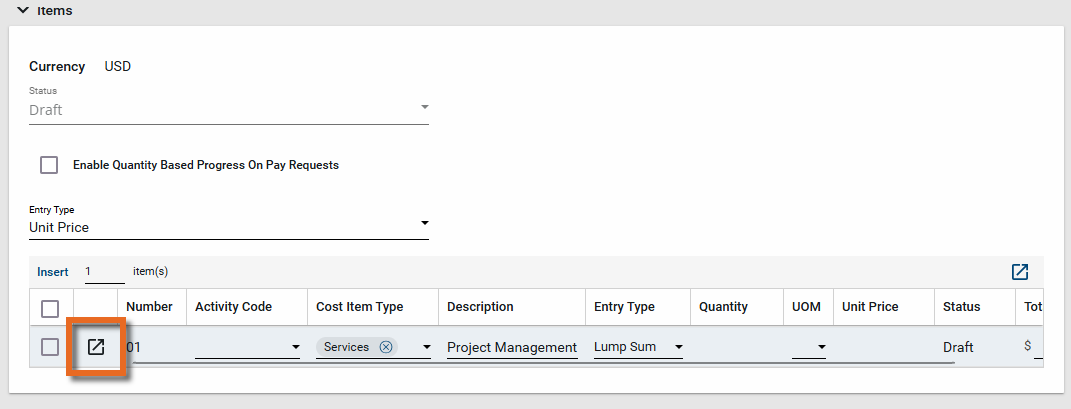
From the detail view, click on the View Details icon
 .
.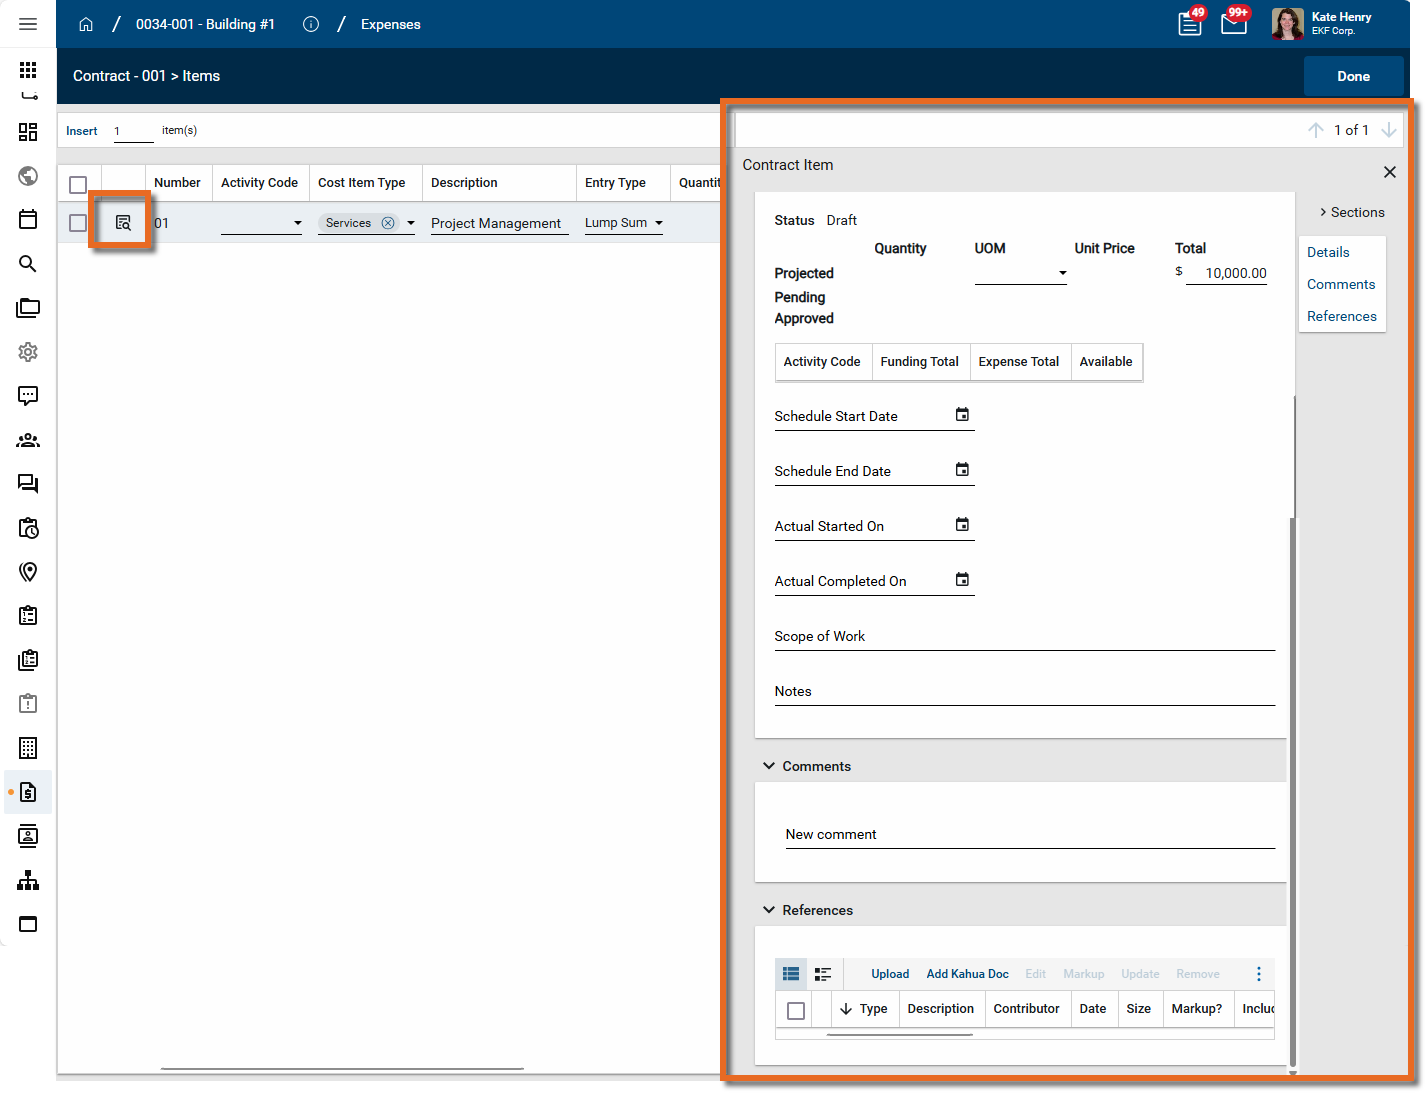
Suppress Auto Creating SOV Items Select this option to prevent automatic creation of SOV items. Refer to Expense SOV Breakdown. Schedule Start Date / Schedule End Date / Actual Started On / Actual Completed On
Enter date values as appropriate. Scope of Work / Notes / Comments
Enter as appropriate.
Note Comments are threaded. The author's name and date and time posted populates automatically when the record is saved.
References Upload any relevant files or documents. For more information on using this section, refer to References section.
Reviewers Reviewer information appears here.
Note To use the review workflow, the Use Review Workflow setting must be enabled on the Settings tab in configuration and the approval must be configured in Configuration > Approvals. Refer to Approval configuration.
Signatures Signature information appears here.
Note To use the signature workflow, the Use Signature Workflow setting must be enabled on the Settings tab in configuration and the approval must be configured in Configuration > Approvals. Refer to Approval configuration.
Comments New comment If desired, enter a comment.
Note Comments are threaded. The author name and the time and date it was posted will auto-populate once the contract has been saved.Exhibits Select Upload to upload exhibit documents from your computer, or Add to add exhibit documents from the Exhibits app. For more information, refer to Exhibits.
References Upload or select any relevant files or documents. You can use drag and drop to add a file to this section. For more information on using this section, refer to References section.
-
-
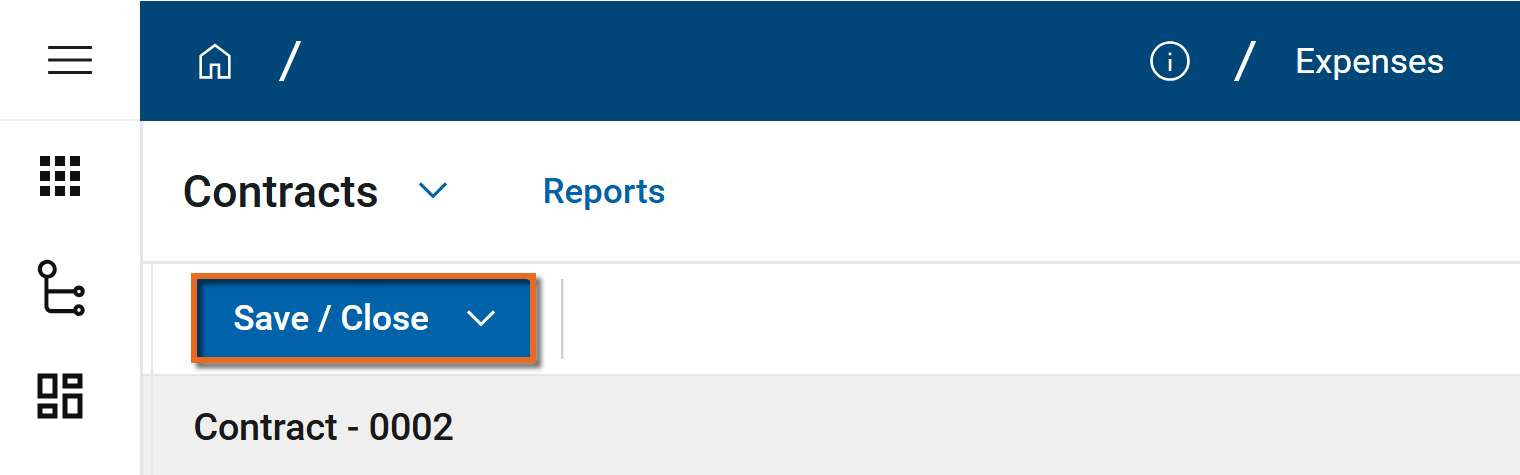
Click Save when you are done.
-
Once the contract is saved you can complete the following actions:
Note These are dependent on workflow and may not show up for you. For information on setting up workflows see Submitting into Workflow.-
Void
-
Submit for Review
-
Submit for Signature
-
Set to...
-
Projected
-
-
Pending
-
Approved
-
Approved & Lock
-
You can generate a report from a selected log view, or use one of the built-in reports available by default in each application. For more information on creating your own reports, including how to set up scheduled reports, refer to Creating ad hoc reports.
Note For information on modifying the logo that appears on reports in your project, refer to Managing report logos.
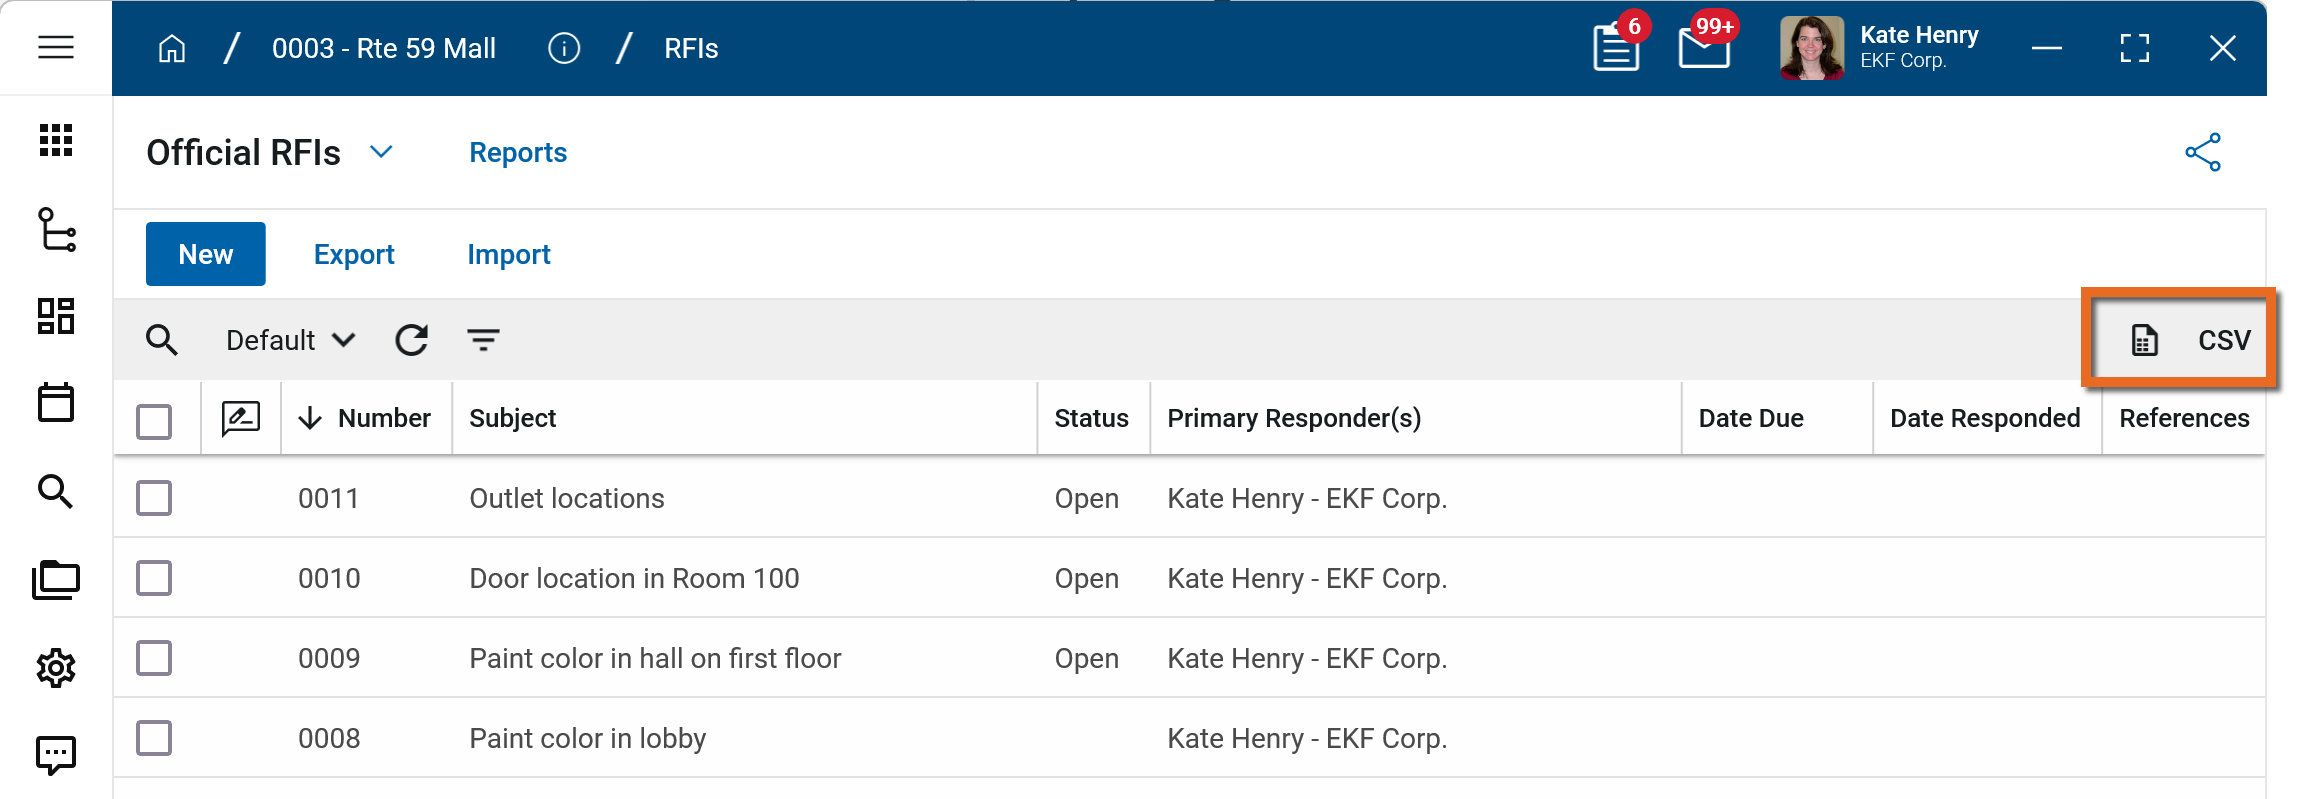
To generate a report from a log view with up to 10,000 records, select the report icon ![]() . If your log view contains more than 10,000 records, the report icon will be disabled and you can select to download the records to a CSV file instead. For more information, refer to Generate a report from a log view.
. If your log view contains more than 10,000 records, the report icon will be disabled and you can select to download the records to a CSV file instead. For more information, refer to Generate a report from a log view.
To generate an application report, complete the following steps:
-
Navigate to the application.
-
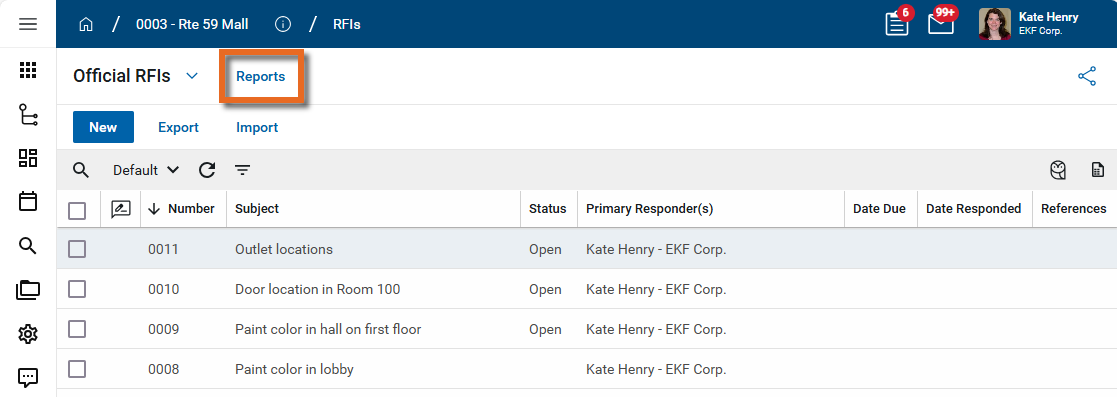
Select Reports in the application title bar.
-
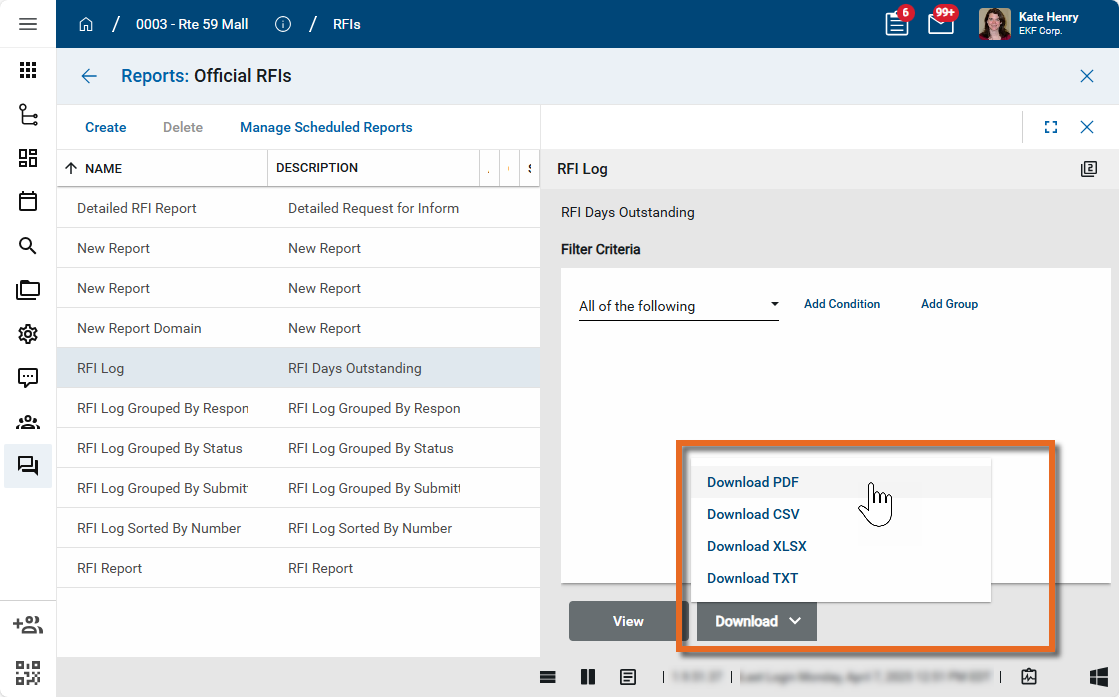
Select the report you want to run.
-
Apply any desired filters.
-
Select View or Download as appropriate. For more information, refer to Viewing Reports.
-
Click the Close icon
 when you are done.
Your project may be configured to require an approval document as part of the approval workflow for records in this app. An approval document is created in the References section of a record. To create an approval document, select Add Approval Doc, name the document and select the appropriate supporting files. These files are then combined into a single PDF that can become part of the approval workflow.
For more detailed information on creating an approval document, refer to Create an approval document.
Note For information on setting up approvals, refer to Approval configuration.
Your domain administrator or another user with the appropriate permissions can configure the app in the Configuration application.
Important When working in the Configuration app, it is important to review the header and ensure that you are working at the correct level in the hierarchy, either the root domain or at a partition or project level.
Settings that you establish at the root domain or lower levels will inherit down the hierarchy until they are overridden. For more information on the hierarchical structure of Kahua, refer to Understanding the hierarchical structure of Kahua.
The Configuration app can be accessed directly through the apps list (Apps > Administration > Configuration), or by right-clicking on an application in the launch bar and selecting Configure. When you select Configure for an app from the launch bar, the detail view of the configuration page for that application opens automatically.
For general information about the Configuration app, including how to set up an approval workflow, refer to Configuration app.
For general information on configuring this app in Configuration, refer to Application configuration.
The following items are specific to this application:
| Options | Description |
|---|---|
| Settings tab | |
| Use Review Workflow |
Select this option to make the Review workflow available. Note You must also configure the Review approval in Configuration > Approvals. Refer to Approval configuration. |
| Use Signature Workflow |
Select this option to make the Signature workflow available. Note You must also configure the Signature approval in Configuration > Approvals. Refer to Approval configuration. |
| Use Manual Status Override |
Select this option to allow users with the appropriate permissions to use workflow action buttons to increment status of a record (to Pending, Approved, etc.). This option is typically used when workflow is not enabled. |
| Use Manual Approve & Lock |
Select this option to have the Set to Approved and Lock option available to users with the appropriate permissions. When Set to Approved and Lock is selected, the status of both the document and its items are set to "Approved" and the document moves to the "Locked" step in the workflow. |
| Cost Status Read Only |
Select this option to have the cost status of the contract and line items appear as read-only. The fields cannot be manually edited. This requires the status field to be updated by only workflow or the selection of action items (e.g. Set to Pending, Set to Approved, etc.), depending on other cost configuration selections. |
| Default Description to Activity Code Description |
Select this option to have the activity code's description applied to the Description field of an item in a cost items grid. The activity code's description is applied as the default value, but it can be edited. |
| Use Master Service Agreements |
Select this option to enable fields related to Master Service Agreements (MSA) on contracts. For more information on using Master Service Agreements, refer to Master Service Agreements (MSA) . |
| Settings tab - Cost Unit Settings | |
| Default Entry Type | Select a default value. |
| Can View? | If selected, the Entry Type field is visible on the Items section. |
| Can Change? | If selected, the Entry Type field is editable. |
| Allow Item Entry Type Selection? | If selected, the Entry Type field appears in the grid for individual items. |
| Excluded Entry Types | Select entry types to remove them from the drop-down list. |
| Settings - Tax Settings | |
| Default Tax Entry Type | Select None or Separate Line Item. |
| Can View? | If selected, the Tax Type field is visible on the Items section. |
| Can Change? | If selected, the Tax Type field is editable. |
| Allow Manual Tax Entry? | |
| Set Taxable on New Items? | |
| Excluded Entry Types | Select tax entry types to remove them from the drop-down list. |